一、部署的环境准备
1.1 机器准备
一台虚拟机:
hostname:       myhost
ip地址:       192.168.3.241
1.2 系统环境
Last login: Mon Jun 25 10:21:35 2018 from 192.168.3.63
[root@myhost ~]# cat /etc/redhat-release
CentOS release 6.5 (Final)
[root@myhost ~]# ifconfig eth0
eth0      Link encap:Ethernet  HWaddr 00:0C:29:2D:1F:AC
          inet addr:192.168.3.241  Bcast:192.168.3.255  Mask:255.255.255.0
          inet6 addr: fe80::20c:29ff:fe2d:1fac/64 Scope:Link
          UP BROADCAST RUNNING MULTICAST  MTU:1500  Metric:1
          RX packets:2087 errors:0 dropped:0 overruns:0 frame:0
          TX packets:267 errors:0 dropped:0 overruns:0 carrier:0
          collisions:0 txqueuelen:1000
          RX bytes:220765 (215.5 KiB)  TX bytes:46058 (44.9 KiB)
[root@myhost ~]# /etc/init.d/iptables stop
iptables: Setting chains to policy ACCEPT: filter          [  OK  ]
iptables: Flushing firewall rules:                         [  OK  ]
iptables: Unloading modules:                               [  OK  ]
[root@myhost ~]# getenforce
Disabled
[root@myhost ~]#
[root@myhost ~]# ping www.baidu.com
PING www.a.shifen.com (180.97.33.107) 56(84) bytes of data.
64 bytes from 180.97.33.107: icmp_seq=1 ttl=54 time=43.0 ms
64 bytes from 180.97.33.107: icmp_seq=2 ttl=54 time=38.3 ms
64  ytes from 180.97.33.107: icmp_seq=3 ttl=54 time=37.1 ms
二、FastDFS安装及配置
2.1 安装开发环境
[root@myhost ~]#yum groupinstall "Development Tools" "Server platform Development" -y2.2 安装libfastcommon
2.2.1准备libfastcommon软件安装包
[root@myhost tools]# rz -y
rz waiting to receive.
Starting zmodem transfer.  Press Ctrl+C to cancel.
Transferring libfastcommon-master.zip...
  100%     467 KB     467 KB/sec    00:00:01       0 Errors
[root@myhost tools]# ll
total 187168
-rw-r--r-- 1 root root   9128610 May 18 16:11 apache-tomcat-8.0.27.tar.gz
-rw-r--r-- 1 root root 181238643 May 18 16:12 jdk-8u60-linux-x64.tar.gz
-rw-r--r-- 1 root root    478888 Jun 15  2017 libfastcommon-master.zip
drwxr-xr-x 9 1001 1001      4096 May 18 16:15 nginx-1.6.2
-rw-r--r-- 1 root root    804164 Apr 14 19:28 nginx-1.6.2.tar.gz
[root@myhost tools]#
2.2.2解压libfastcommon软件安装包
[root@myhost tools]# unzip libfastcommon-master.zip
[root@myhost tools]# ll
total 187172
-rw-r--r-- 1 root root   9128610 May 18 16:11 apache-tomcat-8.0.27.tar.gz
-rw-r--r-- 1 root root 181238643 May 18 16:12 jdk-8u60-linux-x64.tar.gz
drwxr-xr-x 5 root root      4096 Apr  5  2017 libfastcommon-master
-rw-r--r-- 1 root root    478888 Jun 15  2017 libfastcommon-master.zip
drwxr-xr-x 9 1001 1001      4096 May 18 16:15 nginx-1.6.2
-rw-r--r-- 1 root root    804164 Apr 14 19:28 nginx-1.6.2.tar.gz
[root@myhost tools]#
2.2.3编译安装libfastcommon
[root@myhost tools]# cd libfastcommon-master
[root@myhost libfastcommon-master]# ll
total 36
drwxr-xr-x 2 root root 4096 Apr  5  2017 doc
-rw-r--r-- 1 root root 8005 Apr  5  2017 HISTORY
-rw-r--r-- 1 root root  566 Apr  5  2017 INSTALL
-rw-r--r-- 1 root root 1606 Apr  5  2017 libfastcommon.spec
-rwxr-xr-x 1 root root 3099 Apr  5  2017 make.sh        #编译安装的脚本
drwxr-xr-x 2 root root 4096 Apr  5  2017 php-fastcommon
-rw-r--r-- 1 root root 2763 Apr  5  2017 README
drwxr-xr-x 3 root root 4096 Apr  5  2017 src
[root@myhost libfastcommon-master]#./make.sh
[root@myhost libfastcommon-master]#echo $?
[root@myhost libfastcommon-master]#./make.sh  install
[root@myhost libfastcommon-master]#echo $?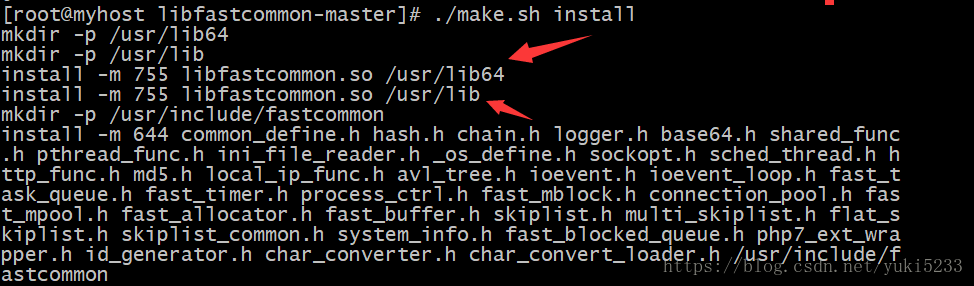
#至此libfastcommon就已经安装成功了,
#但注意一下上图中红色箭头标注的内容,libfastcommon.so 默认安装到了/usr/lib64/libfastcommon.so
#以及/usr/lib/libfastcommon.so中,但是FastDFS主程序设置的lib目录是/usr/local/lib,
#所以此处需要重新设置软链接。

ln -s /usr/lib64/libfastcommon.so       /usr/local/lib/libfastcommon.so
ln -s /usr/lib64/libfdfsclient.so       /usr/local/lib/libfdfsclient.so
2.3 安装fastdfs
2.3.1准备fastdfs软件安装包
[root@myhost tools]# rz -y
rz waiting to receive.
Starting zmodem transfer.  Press Ctrl+C to cancel.
Transferring fastdfs-v5.05.tar.gz...
  100%     328 KB     328 KB/sec    00:00:01       0 Errors

[root@myhost tools]# ll
total 187504
-rw-r--r-- 1 root root   9128610 May 18 16:11 apache-tomcat-8.0.27.tar.gz
-rw-r--r-- 1 root root    336001 Jun 20  2017 fastdfs-v5.05.tar.gz
-rw-r--r-- 1 root root 181238643 May 18 16:12 jdk-8u60-linux-x64.tar.gz
drwxr-xr-x 5 root root      4096 Jun 25 12:46 libfastcommon-master
-rw-r--r-- 1 root root    478888 Jun 15  2017 libfastcommon-master.zip
drwxr-xr-x 9 1001 1001      4096 May 18 16:15 nginx-1.6.2
-rw-r--r-- 1 root root    804164 Apr 14 19:28 nginx-1.6.2.tar.gz
2.3.2解压fastdfs软件安装包
[root@myhost tools]# tar xf fastdfs-v5.05.tar.gz
[root@myhost tools]# ll
total 187508
-rw-r--r--  1 root root   9128610 May 18 16:11 apache-tomcat-8.0.27.tar.gz
drwxrwxr-x 10 root root      4096 Nov 22  2014 fastdfs-5.05
-rw-r--r--  1 root root    336001 Jun 20  2017 fastdfs-v5.05.tar.gz
-rw-r--r--  1 root root 181238643 May 18 16:12 jdk-8u60-linux-x64.tar.gz
drwxr-xr-x  5 root root      4096 Jun 25 12:46 libfastcommon-master
-rw-r--r--  1 root root    478888 Jun 15  2017 libfastcommon-master.zip
drwxr-xr-x  9 1001 1001      4096 May 18 16:15 nginx-1.6.2
-rw-r--r--  1 root root    804164 Apr 14 19:28 nginx-1.6.2.tar.gz
2.3.3编译安装fastdfs
[root@myhost tools]# cd fastdfs-5.05/
[root@myhost fastdfs-5.05]# ll
total 132
drwxrwxr-x 3 root root  4096 Nov 22  2014 client
drwxrwxr-x 2 root root  4096 Nov 22  2014 common
drwxrwxr-x 2 root root  4096 Nov 22  2014 conf
-rw-rw-r-- 1 root root 35067 Nov 22  2014 COPYING-3_0.txt
-rw-rw-r-- 1 root root  2802 Nov 22  2014 fastdfs.spec
-rw-rw-r-- 1 root root 31386 Nov 22  2014 HISTORY
drwxrwxr-x 2 root root  4096 Nov 22  2014 init.d
-rw-rw-r-- 1 root root  7755 Nov 22  2014 INSTALL
-rwxrwxr-x 1 root root  5813 Nov 22  2014 make.sh
drwxrwxr-x 2 root root  4096 Nov 22  2014 php_client
-rw-rw-r-- 1 root root  2380 Nov 22  2014 README.md
-rwxrwxr-x 1 root root  1768 Nov 22  2014 restart.sh
-rwxrwxr-x 1 root root  1680 Nov 22  2014 stop.sh
drwxrwxr-x 4 root root  4096 Nov 22  2014 storage
drwxrwxr-x 2 root root  4096 Nov 22  2014 test
drwxrwxr-x 2 root root  4096 Nov 22  2014 tracker
[root@myhost fastdfs-5.05]#./make.sh
[root@myhost fastdfs-5.05]# echo $?
[root@myhost fastdfs-5.05]# ./make.sh install
2.3.4进入fastdfs的配置文件目录/etc/fdfs
[root@myhost fastdfs-5.05]# cd /etc/fdfs
[root@myhost fdfs]# ll
total 20
-rw-r--r-- 1 root root 1461 Jun 25 13:15 client.conf.sample
-rw-r--r-- 1 root root 7829 Jun 25 13:15 storage.conf.sample
-rw-r--r-- 1 root root 7102 Jun 25 13:15 tracker.conf.sample

#fastdfs安装成功后就会生成如上的3个.sample文件(示例配置文件),我们再分别拷贝出3个以备后面用正式配置的时候用。

[root@myhost fdfs]# cp ./client.conf.sample   ./client.conf
[root@myhost fdfs]# cp ./storage.conf.sample  ./storage.conf
[root@myhost fdfs]# cp ./tracker.conf.sample  ./tracker.conf
[root@myhost fdfs]# ll
total 40
-rw-r--r-- 1 root root 1461 Jun 25 13:23 client.conf
-rw-r--r-- 1 root root 1461 Jun 25 13:15 client.conf.sample
-rw-r--r-- 1 root root 7829 Jun 25 13:23 storage.conf
-rw-r--r-- 1 root root 7829 Jun 25 13:15 storage.conf.sample
-rw-r--r-- 1 root root 7102 Jun 25 13:23 tracker.conf
-rw-r--r-- 1 root root 7102 Jun 25 13:15 tracker.conf.sample
[root@myhost fdfs]#
#至此Fastdfs已经安装完毕,接下来的工作就是依次配置Tracker和Storage了。
2.4 Fastdfs关联Tracker配置
2.4.1 创建Tracker服务器文件存放路径
#在配置Tracker之前,首先需要创建Tracker服务器的文件路径,即用于存储Tracker的数据文件和日志文件等,
#这里我选择在/application/fastdfs目录下创建一个fastdfs_tracker目录用于存放Tracker服务器的相关文件。

[root@myhost ~]#  mkdir /application/fastdfs
[root@myhost ~]# cd /application/fastdfs
[root@myhost fastdfs]# pwd
/application/fastdfs
[root@myhost fastdfs]# mkdir fastdfs_tracker
[root@myhost fastdfs]# ll
total 4
drwxr-xr-x 2 root root 4096 Jun 25 13:30 fastdfs_tracker
[root@myhost fastdfs]#
2.4.2 编辑安装fastdfs软件时产生的tracker.conf配置文件
[root@myhost fastdfs_tracker]# egrep -v "^$|#" /etc/fdfs/tracker.conf
disabled=false  #启用配置文件(默认启用)
bind_addr=
port=22122      #设置tracker的端口号,通常采用22122这个默认端口
connect_timeout=30
network_timeout=60
base_path=/application/fastdfs/fastdfs_tracker  #设置tracker的数据文件和日志目录
max_connections=256
accept_threads=1
work_threads=4
store_lookup=2
store_group=group2
store_server=0
store_path=0
download_server=0
reserved_storage_space = 10%
log_level=info
run_by_group=
run_by_user=
allow_hosts=*
sync_log_buff_interval = 10
check_active_interval = 120
thread_stack_size = 64KB
storage_ip_changed_auto_adjust = true
storage_sync_file_max_delay = 86400
storage_sync_file_max_time = 300
use_trunk_file = false
slot_min_size = 256
slot_max_size = 16MB
trunk_file_size = 64MB
trunk_create_file_advance = false
trunk_create_file_time_base = 02:00
trunk_create_file_interval = 86400
trunk_create_file_space_threshold = 20G
trunk_init_check_occupying = false
trunk_init_reload_from_binlog = false
trunk_compress_binlog_min_interval = 0
use_storage_id = false
storage_ids_filename = storage_ids.conf
id_type_in_filename = ip
store_slave_file_use_link = false
rotate_error_log = false
error_log_rotate_time=00:00
rotate_error_log_size = 0
log_file_keep_days = 0
use_connection_pool = false
connection_pool_max_idle_time = 3600
http.server_port=8080       #设置tracker服务的http端口号,和tracker-nginx的端口相关:默认为8080
http.check_alive_interval=30
http.check_alive_type=tcp
http.check_alive_uri=/status.html
[root@myhost fastdfs_tracker]#
2.4.3为Tracker服务器脚本创建链接
#配置完成后就可以启动Tracker服务器了,但首先依然要为启动脚本创建软链接,
#因为fdfs_trackerd等命令在/usr/local/bin中并没有,而是在/usr/bin路径下。

ln -s /usr/bin/fdfs_trackerd        /usr/local/bin/fdfs_trackerd
ln -s /usr/bin/stop.sh          /usr/local/bin/stop.sh
ln -s /usr/bin/restart.sh           /usr/local/bin/restart.sh
2.4.4启动Tracker服务器
[root@myhost fastdfs]# cd /usr/local/bin/
[root@myhost bin]# ll
total 0
lrwxrwxrwx 1 root root 22 Jun 26 11:09 fdfs_storaged -> /usr/bin/fdfs_storaged
lrwxrwxrwx 1 root root 22 Jun 25 17:15 fdfs_trackerd -> /usr/bin/fdfs_trackerd
lrwxrwxrwx 1 root root 19 Jun 25 17:17 restart.sh -> /usr/bin/restart.sh
lrwxrwxrwx 1 root root 16 Jun 25 17:17 stop.sh -> /usr/bin/stop.sh
[root@myhost bin]#
[root@myhost bin]# service fdfs_trackerd start 或/usr/local/bin/fdfs_trackerd  /etc/fdfs/tracker.conf  start
Starting FastDFS tracker server:
[root@myhost bin]#

#如果启动命令执行成功,那么同时在刚才创建的tracker文件目录/application/fastdfs/fastdfs_tracker中
#就可以看到启动后新生成的data和logs目录,tracker服务的端口也应当被正常监听,
#最后再通过netstat命令查看一下端口监听情况:

[root@myhost fastdfs_tracker]# pwd
/application/fastdfs/fastdfs_tracker
[root@myhost fastdfs_tracker]# ll
total 8
drwxr-xr-x 2 root root 4096 Jun 25 17:25 data
drwxr-xr-x 2 root root 4096 Jun 25 17:22 logs
[root@myhost fastdfs_tracker]# netstat -lntup或 netstat-lntup|grep fdfs
Active Internet connections (only servers)
Proto Recv-Q Send-Q Local Address               Foreign Address             State       PID/Program name
tcp        0      0 0.0.0.0:22                  0.0.0.0:*                   LISTEN      3652/sshd
tcp        0      0 127.0.0.1:25                0.0.0.0:*                   LISTEN      1279/master
tcp        0      0 0.0.0.0:22122               0.0.0.0:*                   LISTEN      4925/fdfs_trackerd
tcp        0      0 :::22                       :::*                        LISTEN      3652/sshd
tcp        0      0 ::1:25                      :::*                        LISTEN      1279/master
[root@myhost fastdfs_tracker]#
2.5 Fastdfs关联Storage配置
2.5.1 创建Storage服务器文件存放路径
#同理,步骤基本与配置Tracker一致,首先是创建Storage服务器的文件目录,
#需要注意的是同Tracker相比多建了一个目录,因为Storage还需要一个文件存储路径,用于存放接收的文件。

[root@myhost ~]# cd /application/fastdfs/
[root@myhost fastdfs]# pwd
/application/fastdfs
[root@myhost fastdfs]# ll
total 4
drwxr-xr-x 4 root root 4096 Jun 25 17:22 fastdfs_tracker
[root@myhost fastdfs]# mkdir /application/fastdfs/fastdfs_storage
[root@myhost fastdfs]# mkdir /application/fastdfs/fastdfs_storage_data
[root@myhost fastdfs]# ll
total 12
drwxr-xr-x 2 root root 4096 Jun 26 10:51 fastdfs_storage
drwxr-xr-x 2 root root 4096 Jun 26 10:53 fastdfs_storage_data
drwxr-xr-x 4 root root 4096 Jun 25 17:22 fastdfs_tracker
[root@myhost fastdfs]#
2.5.2 编辑安装fastdfs软件时产生的storage.conf配置文件
[root@myhost fastdfs]# egrep -v "^$|#"  /etc/fdfs/storage.conf
disabled=false      #启用配置文件(默认启用)
group_name=group1       #组名,根据实际情况修改
bind_addr=
client_bind=true
port=23000              #设置storage的端口号,默认是23000,同一个组的storage端口号必须一致
connect_timeout=30
network_timeout=60
heart_beat_interval=30
stat_report_interval=60
base_path=/application/fastdfs/fastdfs_storage      #设置storage数据文件和日志目录
max_connections=256
buff_size = 256KB
accept_threads=1
work_threads=4
disk_rw_separated = true
disk_reader_threads = 1
disk_writer_threads = 1
sync_wait_msec=50
sync_interval=0
sync_start_time=00:00
sync_end_time=23:59
write_mark_file_freq=500
store_path_count=1                      #存储路径个数,需要和store_path个数匹配
store_path0=/application/fastdfs/fastdfs_storage_data           #文件实际存储路径
subdir_count_per_path=256
tracker_server=192.168.3.241:22122
#tracker 服务器的 IP地址和端口号,
#如果是单机搭建,IP不要写127.0.0.1,否则启动不成功(此处的ip是我的CentOS虚拟机ip,也不是映射的公网地址)
log_level=info
run_by_group=
run_by_user=
allow_hosts=*
file_distribute_path_mode=0
file_distribute_rotate_count=100
fsync_after_written_bytes=0
sync_log_buff_interval=10
sync_binlog_buff_interval=10
sync_stat_file_interval=300
thread_stack_size=512KB
upload_priority=10
if_alias_prefix=
check_file_duplicate=0
file_signature_method=hash
key_namespace=FastDFS
keep_alive=0
use_access_log = false
rotate_access_log = false
access_log_rotate_time=00:00
rotate_error_log = false
error_log_rotate_time=00:00
rotate_access_log_size = 0
rotate_error_log_size = 0
log_file_keep_days = 0
file_sync_skip_invalid_record=false
use_connection_pool = false
connection_pool_max_idle_time = 3600
http.domain_name=
http.server_port=8888       #设置storage的http 端口号,和stroage-nginx相关
[root@myhost fastdfs]#
2.5.3为Storage服务器脚本创建链接
#配置完成后就可以启动storage服务器了,但首先依然要为启动脚本创建软链接,
#因为fdfs_storaged等命令在/usr/local/bin中并没有,而是在/usr/bin路径下。

ln -s /usr/bin/fdfs_storaged        /usr/local/bin/fdfs_storaged
2.5.4 启动Storage服务器
[root@myhost fastdfs]# cd /usr/local/bin/
[root@myhost bin]# ll
total 0
lrwxrwxrwx 1 root root 22 Jun 26 11:09 fdfs_storaged -> /usr/bin/fdfs_storaged
lrwxrwxrwx 1 root root 22 Jun 25 17:15 fdfs_trackerd -> /usr/bin/fdfs_trackerd
lrwxrwxrwx 1 root root 19 Jun 25 17:17 restart.sh -> /usr/bin/restart.sh
lrwxrwxrwx 1 root root 16 Jun 25 17:17 stop.sh -> /usr/bin/stop.sh

#如果启动命令执行成功,那么同时在刚才创建的storage文件目录/application/fastdfs/fastdfs_tracker中
#就可以看到启动后新生成的data和logs目录,文件存储路径下会生成多级存储目录,
#storage服务的端口也应当被正常监听,最后再通过netstat命令查看一下端口监听情况。

[root@myhost bin]#service fdfs_storaged start 或/usr/local/bin/fdfs_storaged  /etc/fdfs/storage.conf start
[root@myhost bin]# cd /application/fastdfs/fastdfs_storage
[root@myhost fastdfs_storage]# ll
total 8
drwxr-xr-x 3 root root 4096 Jun 26 11:16 data
drwxr-xr-x 2 root root 4096 Jun 26 11:16 logs
[root@myhost fastdfs_storage]#
[root@myhost bin]#  netstat –lntup  或 netstat -lntup|grep fdfs
Active Internet connections (only servers)
Proto Recv-Q Send-Q Local Address               Foreign Address             State       PID/Program name
tcp        0      0 0.0.0.0:22                  0.0.0.0:*                   LISTEN      1212/sshd
tcp        0      0 0.0.0.0:23000               0.0.0.0:*                   LISTEN      1460/fdfs_storaged
tcp        0      0 127.0.0.1:25                0.0.0.0:*                   LISTEN      1288/master
tcp        0      0 0.0.0.0:22122               0.0.0.0:*                   LISTEN      1403/fdfs_trackerd
tcp        0      0 :::22                       :::*                        LISTEN      1212/sshd
tcp        0      0 ::1:25                      :::*                        LISTEN      1288/master
[root@myhost bin]#
#说明:storage服务下的data下有256个1级目录,每级目录下又有256个2级子目录,总共65536个文件,
#新写的文件会以hash的方式被路由到其中某个子目录下,然后将文件数据直接作为一个本地文件存储到该目录中。
#那么最后我们再看一下storage服务的端口监听情况。
2.6 检查Fastdfs的tracker与storage是否整合成功
#上面可以看到此时已经正常监听tracker的22122端口和storage的23000端口,至此storage服务器就已经配置完成,
#确定了storage服务器启动成功后,还有一项工作就是看看storage服务器是否已经登记到tracker服务器
#(也可以理解为tracker与storage是否整合成功),运行以下命令:

[root@myhost fastdfs_storage]# /usr/bin/fdfs_monitor /etc/fdfs/storage.conf
[2018-06-26 11:28:59] DEBUG - base_path=/application/fastdfs/fastdfs_storage, connect_timeout=30, network_timeout=60, tracker_server_count=1, anti_steal_token=0, anti_steal_secret_key length=0, use_connection_pool=0, g_connection_pool_max_idle_time=3600s, use_storage_id=0, storage server id count: 0

server_count=1, server_index=0

tracker server is 192.168.3.241:22122

group count: 1

Group 1:
group name = group1
disk total space = 6857 MB
disk free space = 3462 MB
trunk free space = 0 MB
storage server count = 1
active server count = 1
storage server port = 23000
storage HTTP port = 8888
store path count = 1
subdir count per path = 256
current write server index = 0
current trunk file id = 0

        Storage 1:
                id = 192.168.3.241
ip_addr = 192.168.3.241  ACTIVE
                http domain =
                version = 5.05
                join time = 2018-06-26 11:16:29
                up time = 2018-06-26 11:16:29
                total storage = 6857 MB
                free storage = 3462 MB
                upload priority = 10
                store_path_count = 1
                subdir_count_per_path = 256
                storage_port = 23000
                storage_http_port = 8888
                current_write_path = 0
                source storage id =
                if_trunk_server = 0
                connection.alloc_count = 256
                connection.current_count = 0
                connection.max_count = 0
                total_upload_count = 0
                success_upload_count = 0
                total_append_count = 0
                success_append_count = 0
                total_modify_count = 0
                success_modify_count = 0
                total_truncate_count = 0
                success_truncate_count = 0
                total_set_meta_count = 0
                success_set_meta_count = 0
                total_delete_count = 0
                success_delete_count = 0
                total_download_count = 0
                success_download_count = 0
                total_get_meta_count = 0
                success_get_meta_count = 0
                total_create_link_count = 0
                success_create_link_count = 0
                total_delete_link_count = 0
                success_delete_link_count = 0
                total_upload_bytes = 0
                success_upload_bytes = 0
                total_append_bytes = 0
                success_append_bytes = 0
                total_modify_bytes = 0
                success_modify_bytes = 0
                stotal_download_bytes = 0
                success_download_bytes = 0
                total_sync_in_bytes = 0
                success_sync_in_bytes = 0
                total_sync_out_bytes = 0
                success_sync_out_bytes = 0
                total_file_open_count = 0
                success_file_open_count = 0
                total_file_read_count = 0
                success_file_read_count = 0
                total_file_write_count = 0
                success_file_write_count = 0
                last_heart_beat_time = 2018-06-26 11:28:45
                last_source_update = 1970-01-01 08:00:00
                last_sync_update = 1970-01-01 08:00:00
                last_synced_timestamp = 1970-01-01 08:00:00
[root@myhost fastdfs_storage]#
#看到192.168.3.241 ACTIVE 字样即可说明storage服务器已经成功登记到了tracker服务器,
#同理别忘了添加开机启动,打开/etc/rc.d/rc.local并将如下配置追加到文件中:

service fdfs_trackerd start
service fdfs_storaged start

#至此我们就已经完成了fastdfs的全部配置,此时也就可以用客户端工具进行文件上传下载的测试了。
2.7 测试Fastdfs客户端工具进行文件上传下载
2.7.1编辑客户端client.conf配置文件
#测试时需要设置客户端的配置文件,编辑/etc/fdfs目录下的client.conf 文件

[root@myhost ~]# egrep -v '^$|#' /etc/fdfs/client.conf
connect_timeout=30
network_timeout=60
base_path=/application/fastdfs/fastdfs_tracker      #tracker服务器文件路径
tracker_server=192.168.3.241:22122                  tracker服务器IP地址和端口号
log_level=info
use_connection_pool = false
connection_pool_max_idle_time = 3600
load_fdfs_parameters_from_tracker=false
use_storage_id = false
storage_ids_filename = storage_ids.conf
http.tracker_server_port=80     # tracker 服务的 http 端口号,必须和tracker配置文件里的设置对应起来
[root@myhost ~]#
2.7.3准备需要上传的图片
# 配置完成后就可以模拟文件上传了,先给/root/pic目录下放一张图片(1.jpg)
[root@myhost pic]# pwd
/root/pic
[root@myhost pic]# rz -y
rz waiting to receive.
Starting zmodem transfer.  Press Ctrl+C to cancel.
Transferring 1.jpg...
  100%     116 KB     116 KB/sec    00:00:01       0 Errors
[root@myhost pic]# ll
total 120
-rw-r--r-- 1 root root 118852 Mar 25 11:39 1.jpg
[root@myhost pic]#
[root@myhost bin]# ll /usr/bin/fdfs*
-rwxr-xr-x 1 root root 274148 Jun 25 13:15 /usr/bin/fdfs_appender_test
-rwxr-xr-x 1 root root 271381 Jun 25 13:15 /usr/bin/fdfs_appender_test1
-rwxr-xr-x 1 root root 261589 Jun 25 13:15 /usr/bin/fdfs_append_file
-rwxr-xr-x 1 root root 260305 Jun 25 13:15 /usr/bin/fdfs_crc32
-rwxr-xr-x 1 root root 261664 Jun 25 13:15 /usr/bin/fdfs_delete_file
-rwxr-xr-x 1 root root 262511 Jun 25 13:15 /usr/bin/fdfs_download_file
-rwxr-xr-x 1 root root 262245 Jun 25 13:15 /usr/bin/fdfs_file_info
-rwxr-xr-x 1 root root 274893 Jun 25 13:15 /usr/bin/fdfs_monitor
-rwxr-xr-x 1 root root 912803 Jun 25 13:15 /usr/bin/fdfs_storaged
-rwxr-xr-x 1 root root 278084 Jun 25 13:15 /usr/bin/fdfs_test
-rwxr-xr-x 1 root root 277293 Jun 25 13:15 /usr/bin/fdfs_test1
-rwxr-xr-x 1 root root 390174 Jun 25 13:15 /usr/bin/fdfs_trackerd
-rwxr-xr-x 1 root root 262575 Jun 25 13:15 /usr/bin/fdfs_upload_appender
-rwxr-xr-x 1 root root 266177 Jun 25 13:15 /usr/bin/fdfs_upload_file
2.7.4通过执行客户端上传命令尝试上传图片
[root@myhost bin]# /usr/bin/fdfs_upload_file   /etc/fdfs/client.conf   /root/pic/1.jpg
group1/M00/00/00/wKgD8VsxwAiAAFkpAAHQROCkFv8114.jpg    #给我们返回了一个路径

#如果给我们返回了一个路径,就表示我们的文件已经上传成功了,当文件存储到某个子目录后,即认为该文件存储成功,
#接下来会为该文件生成一个文件名,文件名由group、存储目录、两级子目录、fileid、文件后缀名
#(由客户端指定,主要用于区分文件类型)拼接而成。
#同时在之前配置的storage服务器的实际文件存储路径中也可以根据返回的路径找到实际文件。

[root@myhost 00]# pwd
/application/fastdfs/fastdfs_storage_data/data/00/00
[root@myhost 00]# ll
total 120
-rw-r--r-- 1 root root 118852 Jun 26 12:24 wKgD8VsxwAiAAFkpAAHQROCkFv8114.jpg
[root@myhost 00]#
2.7.5查看上传的图片新的信息
[root@myhost 00]#
/usr/bin/fdfs_file_info  /etc/fdfs/client.conf  group1/M00/00/00/wKgD8VsxwAiAAFkpAAHQROCkFv8114.jpg
source storage id: 0
source ip address: 192.168.3.241
file create timestamp: 2018-06-26 12:24:40
file size: 118852
file crc32: 3768850175 (0xE0A416FF)
[root@myhost 00]#
2.7.6 下载图片
/usr/bin/fdfs_download_file /etc/fdfs/client.conf  group1/M00/00/00/wKgD8VsxwAiAAFkpAAHQROCkFv8114.jpg
#不需要跟保存路径,默认下载到当前目录
2.7.7 查看存储节点状态
[root@myhost 00]# /usr/bin/fdfs_monitor /etc/fdfs/client.conf
[2018-06-26 13:02:31] DEBUG - base_path=/application/fastdfs/fastdfs_tracker, connect_timeout=30, network_timeout=60, tracker_server_count=1, anti_steal_token=0, anti_steal_secret_key length=0, use_connection_pool=0, g_connection_pool_max_idle_time=3600s, use_storage_id=0, storage server id count: 0

server_count=1, server_index=0

tracker server is 192.168.3.241:22122

group count: 1

Group 1:
group name = group1
disk total space = 6857 MB
disk free space = 3439 MB
trunk free space = 0 MB
storage server count = 1
active server count = 1
storage server port = 23000
storage HTTP port = 8888
store path count = 1
subdir count per path = 256
current write server index = 0
current trunk file id = 0
三、配置nginx为storage server提供http访问接口
3.1 安装fastdfs-nginx-module
3.1.1准备fastdfs-nginx-module软件安装包
[root@myhost ~]# cd /root/tools/
[root@myhost tools]# git clone https://github.com/happyfish100/fastdfs-nginx-module.git
#这里我们上传之前已经下载好的软件
[root@myhost tools]# rz -y
rz waiting to receive.
Starting zmodem transfer.  Press Ctrl+C to cancel.
Transferring fastdfs-nginx-module_v1.16.tar.gz...
  100%      17 KB      17 KB/sec    00:00:01       0 Errors

[root@myhost tools]# ll
total 187536
-rw-r--r--  1 root root   9128610 May 18 16:11 apache-tomcat-8.0.27.tar.gz
drwxrwxr-x 10 root root      4096 Jun 25 13:15 fastdfs-5.05
drwxr-xr-x  4 root root      4096 Jun 26 13:07 fastdfs-nginx-module
-rw-r--r--  1 root root     17510 Jun 19  2017 fastdfs-nginx-module_v1.16.tar.gz
-rw-r--r--  1 root root    336001 Jun 20  2017 fastdfs-v5.05.tar.gz
-rw-r--r--  1 root root 181238643 May 18 16:12 jdk-8u60-linux-x64.tar.gz
drwxr-xr-x  5 root root      4096 Jun 25 12:46 libfastcommon-master
-rw-r--r--  1 root root    478888 Jun 15  2017 libfastcommon-master.zip
drwxr-xr-x  8 1001 1001      4096 May 31  2016 nginx-1.10.1
-rw-r--r--  1 root root    909077 Jun 20  2017 nginx-1.10.1.tar.gz
drwxr-xr-x  9 1001 1001      4096 May 18 16:15 nginx-1.6.2
-rw-r--r--  1 root root    804164 Apr 14 19:28 nginx-1.6.2.tar.gz
[root@myhost tools]#
3.1.2解压fastdfs-nginx-module软件安装包
[root@myhost tools]# tar xf fastdfs-nginx-module_v1.16.tar.gz
[root@myhost tools]# ll
total 188424
-rw-r--r--  1 root  root    9128610 May 18 16:11 apache-tomcat-8.0.27.tar.gz
drwxrwxr-x 10 root  root       4096 Jun 25 13:15 fastdfs-5.05
drwxrwxr-x  4 nginx nginx      4096 May  4  2014 fastdfs-nginx-module
-rw-r--r--  1 root  root      17510 Jun 19  2017 fastdfs-nginx-module_v1.16.tar.gz
-rw-r--r--  1 root  root     336001 Jun 20  2017 fastdfs-v5.05.tar.gz
-rw-r--r--  1 root  root  181238643 May 18 16:12 jdk-8u60-linux-x64.tar.gz
drwxr-xr-x  5 root  root       4096 Jun 25 12:46 libfastcommon-master
-rw-r--r--  1 root  root     478888 Jun 15  2017 libfastcommon-master.zip
drwxr-xr-x  9  1001  1001      4096 Jun 26 14:05 nginx-1.10.1
-rw-r--r--  1 root  root     909077 Jun 20  2017 nginx-1.10.1.tar.gz
drwxr-xr-x  9  1001  1001      4096 May 18 16:15 nginx-1.6.2
-rw-r--r--  1 root  root     804164 Apr 14 19:28 nginx-1.6.2.tar.gz
3.1.3拷贝解压的fastdfs-nginx-module安装包到指定
[root@myhost tools]# cp -a -r fastdfs-nginx-module  /application/fastdfs/
[root@myhost tools]# cd /application/fastdfs/
[root@myhost fastdfs]# ll
total 16
drwxrwxr-x 4 nginx nginx 4096 May  4  2014 fastdfs-nginx-module
drwxr-xr-x 4 root  root  4096 Jun 26 11:16 fastdfs_storage
drwxr-xr-x 3 root  root  4096 Jun 26 11:16 fastdfs_storage_data
drwxr-xr-x 4 root  root  4096 Jun 25 17:22 fastdfs_tracker
[root@myhost fastdfs]#  为storage服务安装nginx
3.2.1安装nginx的依赖库
在安装nginx之前需要先安装一些模块依赖的lib库
[root@myhost ~]#yum -y install pcre pcre-devel
[root@myhost ~]#yum -y install zlib zlib-devel
[root@myhost ~]#yum -y install openssl openssl-devel
3.2.2 准备nginx安装包
[root@myhost tools]#  rz -y
rz waiting to receive.
Starting zmodem transfer.  Press Ctrl+C to cancel.
Transferring nginx-1.10.1.tar.gz...
  100%     887 KB     887 KB/sec    00:00:01       0 Errors

[root@myhost tools]# ll
total 188424
-rw-r--r--  1 root root   9128610 May 18 16:11 apache-tomcat-8.0.27.tar.gz
drwxrwxr-x 10 root root      4096 Jun 25 13:15 fastdfs-5.05
-rw-r--r--  1 root root    336001 Jun 20  2017 fastdfs-v5.05.tar.gz
-rw-r--r--  1 root root 181238643 May 18 16:12 jdk-8u60-linux-x64.tar.gz
drwxr-xr-x  5 root root      4096 Jun 25 12:46 libfastcommon-master
-rw-r--r--  1 root root    478888 Jun 15  2017 libfastcommon-master.zip
-rw-r--r--  1 root root    909077 Jun 20  2017 nginx-1.10.1.tar.gz
drwxr-xr-x  9 1001 1001      4096 May 18 16:15 nginx-1.6.2
-rw-r--r--  1 root root    804164 Apr 14 19:28 nginx-1.6.2.tar.gz
[root@myhost tools]#
3.2.3 解压nginx安装包
[root@myhost tools]# ll
total 188428
-rw-r--r--  1 root root   9128610 May 18 16:11 apache-tomcat-8.0.27.tar.gz
drwxrwxr-x 10 root root      4096 Jun 25 13:15 fastdfs-5.05
drwxr-xr-x  4 root root      4096 Jun 26 13:07 fastdfs-nginx-module
-rw-r--r--  1 root root     17510 Jun 19  2017 fastdfs-nginx-module_v1.16.tar.gz
-rw-r--r--  1 root root    336001 Jun 20  2017 fastdfs-v5.05.tar.gz
-rw-r--r--  1 root root 181238643 May 18 16:12 jdk-8u60-linux-x64.tar.gz
drwxr-xr-x  5 root root      4096 Jun 25 12:46 libfastcommon-master
-rw-r--r--  1 root root    478888 Jun 15  2017 libfastcommon-master.zip
drwxr-xr-x  8 1001 1001      4096 May 31  2016 nginx-1.10.1
-rw-r--r--  1 root root    909077 Jun 20  2017 nginx-1.10.1.tar.gz
drwxr-xr-x  9 1001 1001      4096 May 18 16:15 nginx-1.6.2
-rw-r--r--  1 root root    804164 Apr 14 19:28 nginx-1.6.2.tar.gz
-rwxr-xr-x  1 root root      1535 Jun 25 17:06 sendSMS.py
[root@myhost tools]#
3.2.4 创建nginx用户并编译安装nginx
[root@myhost tools]#useradd nginx -s /sbin/nologin -M

#因为这台服务器我之前编译安装过nginx,所以换另外的路径进行编译安装。

[root@myhost tools]#
[root@myhost tools]# cd nginx-1.10.1
[root@myhost nginx-1.10.1]# pwd
/root/tools/nginx-1.10.1
[root@myhost nginx-1.10.1]#
./configure \
--user=nginx  \
--group=nginx  \
--prefix=/usr/local/nginx_storage\
--add-module=/application/fastdfs/fastdfs-nginx-module/src
[root@myhost nginx-1.10.1]# echo $?
0
[root@myhost nginx-1.10.1]#make


[root@myhost nginx-1.10.1]#vim /home/fastdfs/fastdfs-nginx-module/src/config
ngx_addon_name=ngx_http_fastdfs_module
HTTP_MODULES="$HTTP_MODULES ngx_http_fastdfs_module"
NGX_ADDON_SRCS="$NGX_ADDON_SRCS $ngx_addon_dir/ngx_http_fastdfs_module.c"
CORE_INCS="$CORE_INCS /usr/include/fastdfs /usr/include/fastcommon/"
CORE_LIBS="$CORE_LIBS -L/usr/local/lib -lfastcommon -lfdfsclient"
CFLAGS="$CFLAGS -D_FILE_OFFSET_BITS=64 -DFDFS_OUTPUT_CHUNK_SIZE='256*1024' -DFDFS_MOD_CONF_FILENAME='\"/etc/fdfs/mod_fastdfs.conf\"'"

#修改完毕之后然后再进行重新编译

[root@myhost nginx-1.10.1]#
./configure \
--user=nginx  \
--group=nginx  \
--prefix=/usr/local/nginx_storage  \
--add-module=/application/fastdfs/fastdfs-nginx-module/src
[root@myhost nginx-1.10.1]#make &&make  install
[root@myhost nginx-1.10.1]# echo $?
0
[root@myhost nginx-1.10.1]# cd /usr/local/
[root@myhost local]# ll
total 44
drwxr-xr-x. 2 root root 4096 Jun 26 11:09 bin
drwxr-xr-x. 2 root root 4096 Sep 23  2011 etc
drwxr-xr-x. 2 root root 4096 Sep 23  2011 games
drwxr-xr-x. 2 root root 4096 Sep 23  2011 include
drwxr-xr-x. 2 root root 4096 Jun 25 12:50 lib
drwxr-xr-x. 2 root root 4096 Sep 23  2011 lib64
drwxr-xr-x. 2 root root 4096 Sep 23  2011 libexec
drwxr-xr-x  6 root root 4096 Jun 26 14:40 nginx_storage //nginx安装路径
drwxr-xr-x. 2 root root 4096 Sep 23  2011 sbin
drwxr-xr-x. 5 root root 4096 Apr 14 14:51 share
drwxr-xr-x. 2 root root 4096 Sep 23  2011 src
[root@myhost local]#
3.2.5 编辑修改nginx配置文件
[root@myhost nginx_storage]# cd /usr/local/nginx_storage/
[root@myhost nginx_storage]# ll
total 16
drwxr-xr-x 2 root root 4096 Jun 26 14:40 conf
drwxr-xr-x 2 root root 4096 Jun 26 14:40 html
drwxr-xr-x 2 root root 4096 Jun 26 14:40 logs
drwxr-xr-x 2 root root 4096 Jun 26 14:40 sbin
[root@myhost nginx_storage]#
[root@myhost conf]# egrep -v '^$|#'  /usr/local/nginx_storage/conf/nginx.conf
worker_processes  1;
events {
    worker_connections  1024;
}
http {
    include       mime.types;
    default_type  application/octet-stream;
    sendfile        on;
    keepalive_timeout  65;
    server {
listen       8888;      #这里修改成storage服务的http.server_port=8888
        server_name  localhost;
location ~/group1/M00 {
root /application/fastdfs/fastdfs_storage_data; #文件实际存储路径
    ngx_fastdfs_module;   #模块名称
        }
        error_page   500 502 503 504  /50x.html;
        location = /50x.html {
            root   html;
        }
    }
}
3.2.6拷贝Fastdfs的配置文件
#将Fastdfs软件包里面的http.conf和mime.types拷贝到/etc/fdfs目录下。

[root@myhost tools]# cp -r /root/tools/fastdfs-5.05/conf/http.conf      /etc/fdfs/
[root@myhost tools]# cp -r /root/tools/fastdfs-5.05/conf/mime.types     /etc/fdfs/
3.2.7拷贝fastdfs-nginx-module的配置文件
[root@myhost ~]# cp -r /application/fastdfs/fastdfs-nginx-module/src/mod_fastdfs.conf  /etc/fdfs/
[root@myhost ~]#
[root@myhost ~]# ll /etc/fdfs/
total 80
-rw-r--r-- 1 root root  1509 Jun 26 11:41 client.conf
-rw-r--r-- 1 root root  1461 Jun 25 13:15 client.conf.sample
-rw-r--r-- 1 root root   858 Jun 26 15:14 http.conf
-rw-r--r-- 1 root root 31172 Jun 26 15:14 mime.types
-rw-r--r-- 1 root root  3679 Jun 26 15:17 mod_fastdfs.conf
-rw-r--r-- 1 root root  7931 Jun 26 11:05 storage.conf
-rw-r--r-- 1 root root  7829 Jun 25 13:15 storage.conf.sample
-rw-r--r-- 1 root root  7118 Jun 25 17:22 tracker.conf
-rw-r--r-- 1 root root  7102 Jun 25 13:15 tracker.conf.sample
[root@myhost ~]#
3.2.8 编辑拷贝的mod_fastdfs.conf配置文件
[root@myhost ~]# egrep -v '^$|#'  /etc/fdfs/mod_fastdfs.conf
#include http.conf    #这一行必须存在
connect_timeout=2
network_timeout=30
base_path=/application/fastdfs/fastdfs_storage      #设置storage数据文件和日志目录
load_fdfs_parameters_from_tracker=true
storage_sync_file_max_delay = 86400
use_storage_id = false
storage_ids_filename = storage_ids.conf
tracker_server=192.168.3.241:22122              #tracker服务器的IP地址以及端口号
storage_server_port=23000                   #storage服务器的端口号
group_name=group1
url_have_group_name = true                  #文件url 中是否有 group 名
store_path_count=1
store_path0=/application/fastdfs/fastdfs_storage_data           #文件实际存储路径
log_level=info
log_filename=
response_mode=proxy
if_alias_prefix=
flv_support = true
flv_extension = flv
group_count = 3     #设置组的个数,默认为0,事实上这次只使用了group1

[group1]
group_name=group1
storage_server_port=23000
store_path_count=1
store_path0=/application/fastdfs/fastdfs_storage_data

[group2]
group_name=group2
storage_server_port=23000
store_path_count=1
[root@myhost ~]#
接下来就需要在文件尾部追加这3个group setting:
[group1]
group_name=group1
storage_server_port=23000
store_path_count=1
store_path0=/application/fastdfs/fastdfs_storage_data

[group2]
group_name=group2
storage_server_port=23000
store_path_count=1
store_path0=/application/fastdfs/fastdfs_storage_data

[group3]
group_name=group3
storage_server_port=23000
store_path_count=1
store_path0=/application/fastdfs/fastdfs_storage_data
3.2.9 创建文件实际存储目录的软链接
#访问后面的目录就相当于访问前面的目录

ln  -s  /application/fastdfs/fastdfs_storage_data/data  /application/fastdfs/fastdfs_storage_data/data/M00
3.2.10 启动为storage服务安装nginx
[root@myhost ~]# /usr/local/nginx_storage/sbin/nginx -t        #检查语法
ngx_http_fastdfs_set pid=21835
nginx: the configuration file /usr/local/nginx_storage/conf/nginx.conf syntax is ok
nginx: configuration file /usr/local/nginx_storage/conf/nginx.conf test is successful
[root@myhost ~]#
[root@myhost ~]# /usr/local/nginx_storage/sbin/nginx       #执行启动脚本
ngx_http_fastdfs_set pid=21836
[root@myhost ~]#
[root@myhost ~]# lsof -i:8888
COMMAND   PID USER   FD   TYPE DEVICE SIZE/OFF NODE NAME
nginx   21837 root    6u  IPv4  99840      0t0  TCP *:ddi-tcp-1 (LISTEN)
[root@myhost ~]#
[root@myhost ~]# netstat -lntup
Active Internet connections (only servers)
Proto Recv-Q Send-Q Local Address               Foreign Address             State       PID/Program name
tcp        0      0 0.0.0.0:22                  0.0.0.0:*                   LISTEN      1212/sshd
tcp        0      0 0.0.0.0:8888                0.0.0.0:*                   LISTEN      21837/nginx
tcp        0      0 0.0.0.0:23000               0.0.0.0:*                   LISTEN      1460/fdfs_storaged
tcp        0      0 127.0.0.1:25                0.0.0.0:*                   LISTEN      1288/master
tcp        0      0 0.0.0.0:22122               0.0.0.0:*                   LISTEN      1403/fdfs_trackerd
tcp        0      0 :::22                       :::*                        LISTEN      1212/sshd
tcp        0      0 ::1:25                      :::*                        LISTEN      1288/master
[root@myhost ~]#
3.2.11测试storage的http服务:浏览器访问ip+http端口号
[root@myhost ~]# /etc/init.d/iptables  stop
iptables: Setting chains to policy ACCEPT: filter          [  OK  ]
iptables: Flushing firewall rules:                         [  OK  ]
iptables: Unloading modules:                               [  OK  ]
[root@myhost ~]#
http://192.168.3.241:8888/
3.3 为tracker服务安装nginx
3.3.1安装nginx的依赖库(单机不需要这一步)
#在安装nginx之前需要先安装一些模块依赖的lib库

[root@myhost ~]#yum -y install pcre pcre-devel
[root@myhost ~]#yum -y install zlib zlib-devel
[root@myhost ~]#yum -y install openssl openssl-devel
3.3.2 准备nginx安装包(单机不需要这一步)
[root@myhost tools]#  rz -y
rz waiting to receive.
Starting zmodem transfer.  Press Ctrl+C to cancel.
Transferring nginx-1.10.1.tar.gz...
  100%     887 KB     887 KB/sec    00:00:01       0 Errors

[root@myhost tools]# ll
total 188424
-rw-r--r--  1 root root   9128610 May 18 16:11 apache-tomcat-8.0.27.tar.gz
drwxrwxr-x 10 root root      4096 Jun 25 13:15 fastdfs-5.05
-rw-r--r--  1 root root    336001 Jun 20  2017 fastdfs-v5.05.tar.gz
-rw-r--r--  1 root root 181238643 May 18 16:12 jdk-8u60-linux-x64.tar.gz
drwxr-xr-x  5 root root      4096 Jun 25 12:46 libfastcommon-master
-rw-r--r--  1 root root    478888 Jun 15  2017 libfastcommon-master.zip
-rw-r--r--  1 root root    909077 Jun 20  2017 nginx-1.10.1.tar.gz
drwxr-xr-x  9 1001 1001      4096 May 18 16:15 nginx-1.6.2
-rw-r--r--  1 root root    804164 Apr 14 19:28 nginx-1.6.2.tar.gz
[root@myhost tools]#
3.3.3 重新解压一个nginx安装包
[root@myhost tools]# ll
total 188428
-rw-r--r--  1 root root   9128610 May 18 16:11 apache-tomcat-8.0.27.tar.gz
drwxrwxr-x 10 root root      4096 Jun 25 13:15 fastdfs-5.05
drwxr-xr-x  4 root root      4096 Jun 26 13:07 fastdfs-nginx-module
-rw-r--r--  1 root root     17510 Jun 19  2017 fastdfs-nginx-module_v1.16.tar.gz
-rw-r--r--  1 root root    336001 Jun 20  2017 fastdfs-v5.05.tar.gz
-rw-r--r--  1 root root 181238643 May 18 16:12 jdk-8u60-linux-x64.tar.gz
drwxr-xr-x  5 root root      4096 Jun 25 12:46 libfastcommon-master
-rw-r--r--  1 root root    478888 Jun 15  2017 libfastcommon-master.zip
drwxr-xr-x  8 1001 1001      4096 May 31  2016 nginx-1.10.1
-rw-r--r--  1 root root    909077 Jun 20  2017 nginx-1.10.1.tar.gz
drwxr-xr-x  9 1001 1001      4096 May 18 16:15 nginx-1.6.2
-rw-r--r--  1 root root    804164 Apr 14 19:28 nginx-1.6.2.tar.gz
-rwxr-xr-x  1 root root      1535 Jun 25 17:06 sendSMS.py
[root@myhost tools]#
3.3.4 编译安装nginx
#因为这台服务器我之前编译安装过nginx,所以换另外的路径进行编译安装。

[root@myhost tools]#
[root@myhost tools]# cd nginx-1.10.1
[root@myhost nginx-1.10.1]# pwd
/root/tools/nginx-1.10.1
[root@myhost nginx-1.10.1]#
./configure \
--user=nginx  \
--group=nginx  \
--prefix=/usr/local/nginx_tracker  \
--add-module=/application/fastdfs/fastdfs-nginx-module/src
[root@myhost ~]# cd /usr/local/
[root@myhost local]# ll
total 48
drwxr-xr-x.  2 root root 4096 Jun 26 11:09 bin
drwxr-xr-x.  2 root root 4096 Sep 23  2011 etc
drwxr-xr-x.  2 root root 4096 Sep 23  2011 games
drwxr-xr-x.  2 root root 4096 Sep 23  2011 include
drwxr-xr-x.  2 root root 4096 Jun 25 12:50 lib
drwxr-xr-x.  2 root root 4096 Sep 23  2011 lib64
drwxr-xr-x.  2 root root 4096 Sep 23  2011 libexec
drwxr-xr-x  11 root root 4096 Jun 26 15:47 nginx_storage
drwxr-xr-x   6 root root 4096 Jun 26 16:05 nginx_tracker
drwxr-xr-x.  2 root root 4096 Sep 23  2011 sbin
drwxr-xr-x.  5 root root 4096 Apr 14 14:51 share
drwxr-xr-x.  2 root root 4096 Sep 23  2011 src
[root@myhost local]#
3.3.5 编辑修改nginx配置文件
#tracker服务的nginx无需修改listen端口,即默认的80端口,并将upstream指向tracker的nginx地址。

[root@myhost conf]# egrep -v '#|^$'  /usr/local/nginx_tracker/conf/nginx.conf
worker_processes  1;
events {
    worker_connections  1024;
}
http {
    include       mime.types;
    default_type  application/octet-stream;
    sendfile        on;
keepalive_timeout  65;

upstream fdfs_group1 {
         server 192.168.3.241:8888;#负载均衡是访问的实际地址是storage http.server_port:8888
}

    server {
listen       8080;  #tracker服务的http端口号,访问这个端口的时候会自动去访问上面负载的实际地址。
        server_name  localhost;

location /group/M00{
            root   html;
            index  index.html index.htm;
    proxy_pass   http://fdfs_group1;
        }
        error_page   500 502 503 504  /50x.html;
        location = /50x.html {
            root   html;
        }
    }
}
3.3.6 启动为tracker服务安装nginx
[root@myhost ~]# /usr/local/nginx_tracker/sbin/nginx -t        #检查语法
ngx_http_fastdfs_set pid=21835
nginx: the configuration file /usr/local/nginx_tracker/conf/nginx.conf syntax is ok
nginx: configuration file /usr/local/nginx_tracker/conf/nginx.conf test is successful
[root@myhost ~]#
[root@myhost ~]# /usr/local/nginx_tracker/sbin/nginx       #执行启动脚本
ngx_http_fastdfs_set pid=21836
[root@myhost ~]#
[root@myhost ~]# lsof -i:8080
COMMAND   PID USER   FD   TYPE DEVICE SIZE/OFF NODE NAME
nginx   21838 root    6u  IPv4  99840      0t0  TCP *:ddi-tcp-1 (LISTEN)
[root@myhost ~]#
[root@myhost ~]# netstat -lntup
Active Internet connections (only servers)
Proto Recv-Q Send-Q Local Address               Foreign Address             State       PID/Program name
tcp        0      0 0.0.0.0:22                  0.0.0.0:*                   LISTEN      1212/sshd
tcp        0      0 0.0.0.0:8080               0.0.0.0:*                   LISTEN      21838/nginx
tcp        0      0 0.0.0.0:8888               0.0.0.0:*                   LISTEN      21837/nginx
tcp        0      0 0.0.0.0:23000               0.0.0.0:*                   LISTEN      1460/fdfs_storaged
tcp        0      0 127.0.0.1:25                0.0.0.0:*                   LISTEN      1288/master
tcp        0      0 0.0.0.0:22122               0.0.0.0:*                   LISTEN      1403/fdfs_trackerd
tcp        0      0 :::22                       :::*                        LISTEN      1212/sshd
tcp        0      0 ::1:25                      :::*                        LISTEN      1288/master
[root@myhost ~]#
3.3.7测试tracker的http服务:浏览器访问ip+http端口号
http://192.168.3.241:8080/group1/M00/00/00/wKgD8VsxwAiAAFkpAAHQROCkFv8114.jpg
http://192.168.3.241:8888/group1/M00/00/00/wKgD8VsxwAiAAFkpAAHQROCkFv8114.jpg