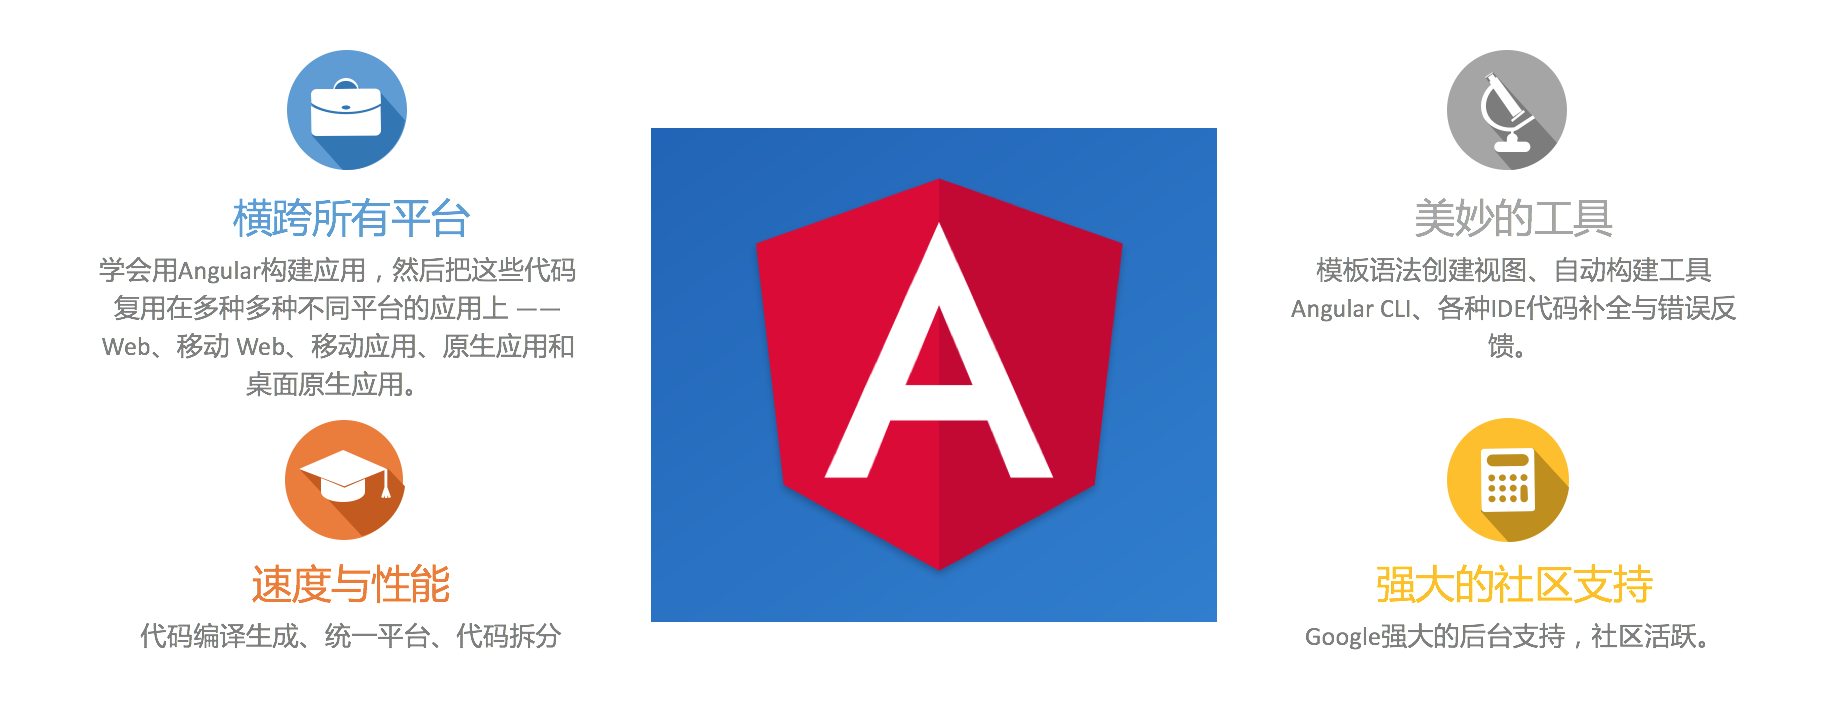
Angular 框架特性
Angular 核心思想
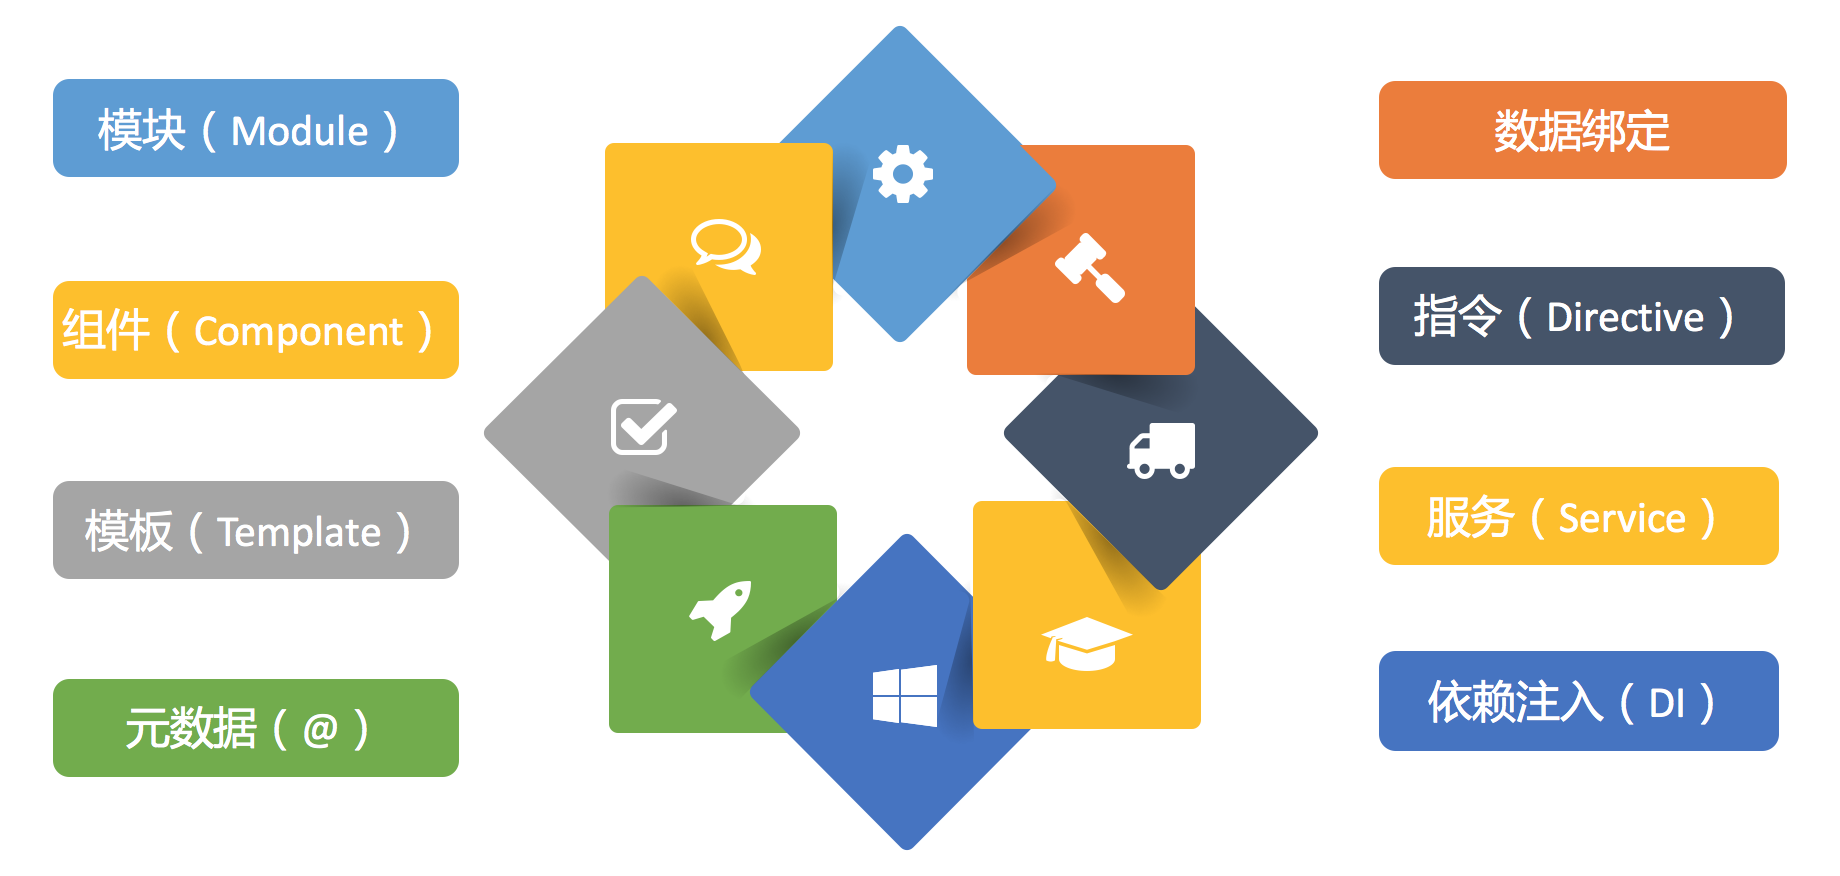
各个核心思想之间的关系

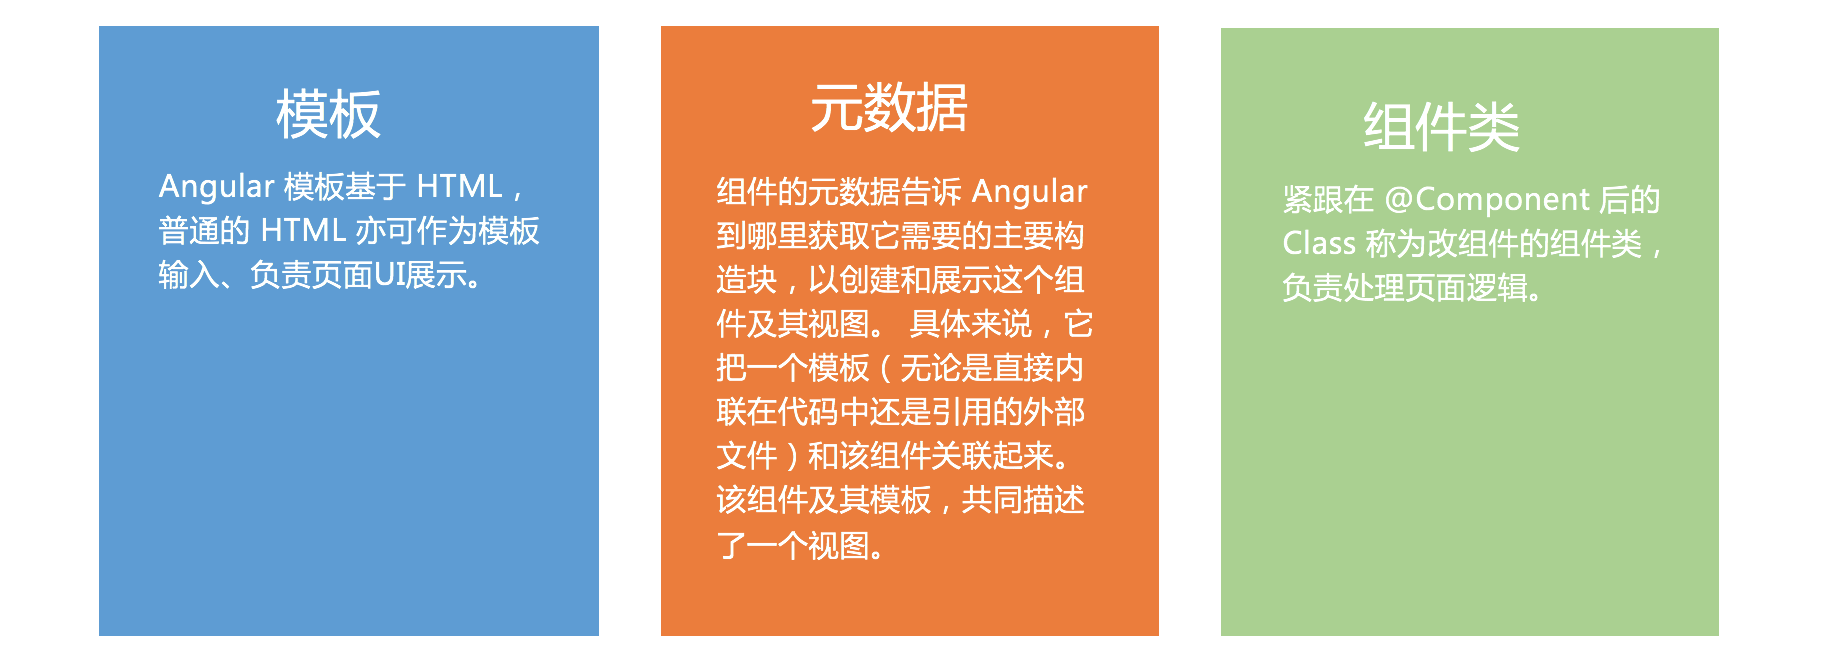
组件(Component)详解
组件(Component)三种常见交互方式
1、父组件通过属性绑定到子组件,子组件通过事件传递参数到父组件
//父组件html代码
<li *ngFor="let item of dataList;let i=index">
  <span>{{item.name}}</span>
  <app-child [names]="item" (foo)="bar($event)"></app-child>
</li>
//父组件ts代码
dataList=[
  {"id":0,"name":"张三"},
  {"id":1,"name":"李四"},
  {"id":2,"name":"王五"}
];
bar(event:any){
  console.log(event);
}
//子组件html代码
<input type="button" value="{{names.name}}" (click)="todo($event)" />
//子组件ts代码
export class ChildComponent implements OnInit{
  @Input() names:any = {}
  @Output() foo = new EventEmitter<string>()
  todo(event:any){
    this.foo.emit('hello');
  }
}
2、父组件通过@ViewChild获取子组件的引用
//父组件html代码
<p-tree #structureTree [value]="structureTreeNodes"></p-tree>
//父组件ts代码
export class StructureComponent implements OnInit{
  @ViewChild('structureTree') structureTree:Tree;
  this.structureTree.XXX();
}
3、利用服务的特性-单例性,作为数据交互的中介
import { Injectable } from '@angular/core';
@Injectable()
export class ChildToFatherService{
    list:string[] = [];
    constructor(){}
    append(str:any){
    this.list.push(str);
    }
}
//父组件的ts代码
import {Component,OnInit} from '@angular/core';
import { ChildToFatherService } form '../../service/child-to-father.service';
@Component({
    selector:'app-father',
    templateUrl:'./father.component.html',
    styleUrls:['./father.component.css'],
    providers:[ChildToFatherService]
})
export class FatherComponent implements OnInit{
    list:string[] = [];
    constructor(private service:ChildToFatherService){}
}

//子组件的ts代码
import { Component,OnInit } from '@angular/core';
import { ChildToFatherService } from '../service/child-to-father.service';
@Component({
    selector:'app-child',
    templementUrl:'./child.component.html',
    styleUrls:['./child.component.css']
})
export class ChildComponent implements OnInit{
    inputText:string = '';
    contructor(private service:ChildToFatherService){}
    ngOnit(){

    }
    add(){
    this.service.append(this.inputText);
    this.inputText = '';
    }
}
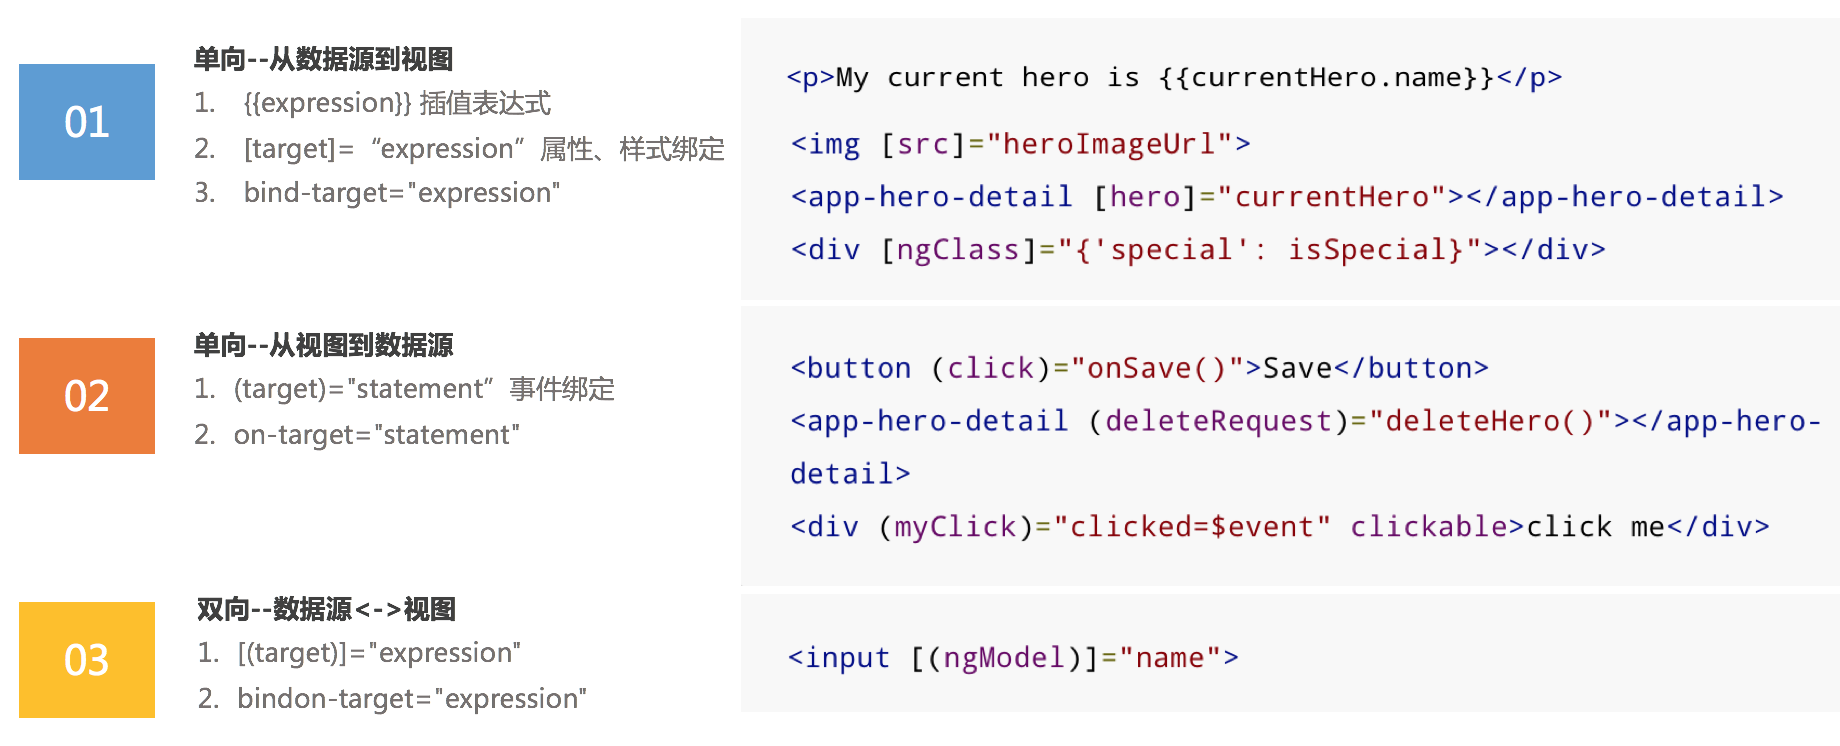
常见的数据绑定方式
模块(Module)详解
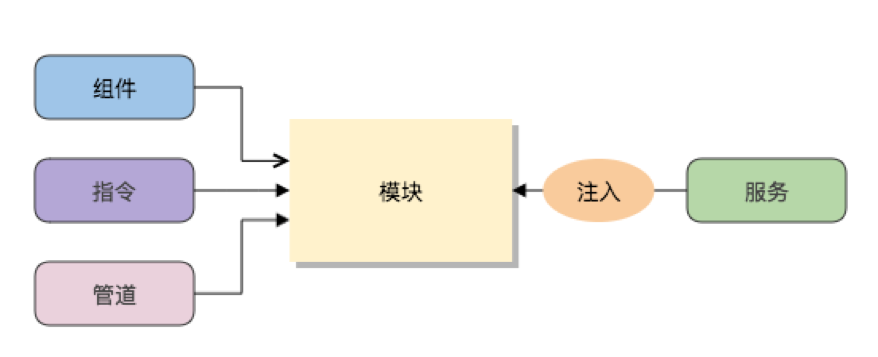
1、模块是组织应用和使用外部库扩展应用的最佳途径。
2、Angular 模块把组件、指令和管道打包成内聚的功能块,每个模块聚焦于一个特性区域、业务领域、工作流或通用工具。
3、模块可以把服务加到应用中。 这些服务可能是内部开发的,或者来自外部的(比如 Angular 的路由和 HTTP 服务)。
4、模块可以在应用启动时立即加载,也可以由路由器进行异步的惰性加载。
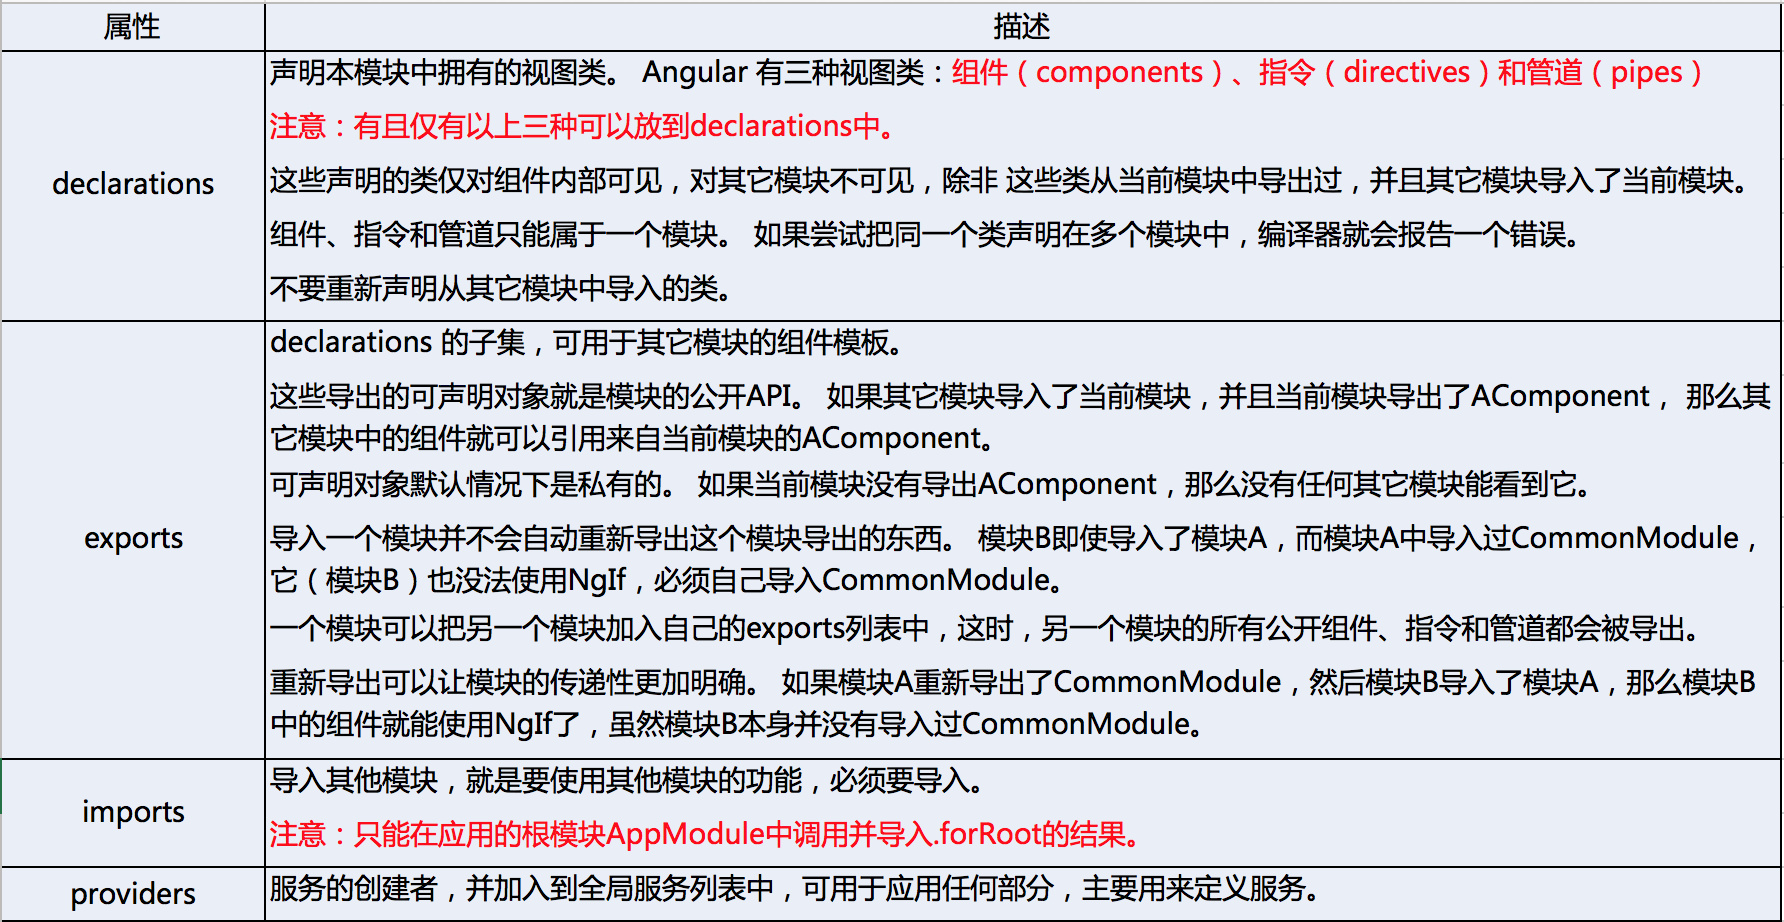
模块(Module)属性说明
路由(Route)详解

1、路由是 Angular 应用程序的核心,它加载与所请求路由相关联的组件,以及获取特定路由的相关数据。
2、通过控制不同的路由,获取不同的数据,从而渲染不同的页面。
路由(Route)代码示例
@NgModule({
    imports:[
      RouterModule.forRoot([
        {path:'',redirectTo:'home',pathMatch:'full'},
        {path:'login',component:LoginComponent},
        {path:'home',component:HomeComponent},
        {path:'business',loadChildren:'./business/business.module#BusinessModule'},
        {path:'**',component:PageNotFoundComponent}
      ])
    ],
    exports:[RouterModule]
})
@NgNodule({
    imports:[
      RouterModule.forChild([
        {
          path:'',component:BusinessComponent,
          children:[
          {path:'',redirectTo:'description',pathMatch:'full'},
          {path:'description',loadChildren:'./description/description.module#DescriptionModule'}
          ]
        }
      ])
    ],
    exports:[RouterModule]
})
路由(Route)使用说明
1、路由分为静态路由和异步(懒加载)路由,异步加载利弊需要平衡。
2、配置子路由可以实现仅更新页面部分区域的需求。
3、在AppRoutingModule中,我们使用了静态的RouterModule.forRoot方法来注册我们的路由和全应用级服务提供商。 在特性模块中,我们要改用forChild静态方法。
4、使用 path: ‘’来匹配空的路径,pathMatch = 'full' 导致 URL 中剩下的、未匹配的部分必须等于 ''。pathMatch 的另一个可能的值是 'prefix':当剩下的URL 以这个跳转路由中的 prefix 值开头时,就会匹配上这个跳转路由。
5、路由中的 ** 路径是一个通配符。当所请求的 URL 不匹配前面定义的路由表中的任何路径时,路由器就会选择此路由。
6、路由配置的顺序很重要。 路由器会接受第一个匹配上导航所要求的路径的那个路由。
7、<router-outlet>作为路由出口,在同一个组件模板中只能出现一次未用name标识的标签
<router-outlet></router-outlet><router-outlet name="view"></router-outlet>