本文主要介绍通过ajax提交表单后,@ResponseBody和@RequestBody的使用。
一、概念
@RequestBody
作用:
注解用于将Controller的方法参数,根据HTTP Request Header的content-Type的内容,通过适当的HttpMessageConverter转换为JAVA类
使用时机:
A)POST方式提时, 根据request header Content-Type的值来判断:
- application/x-www-form-urlencoded, 可选(即非必须,因为这种情况的数据@RequestParam, @ModelAttribute也可以处理,当然@RequestBody也能处理);
- multipart/form-data, 不能处理(即使用@RequestBody不能处理这种格式的数据);
- 其他格式, 必须(其他格式包括application/json, application/xml等。这些格式的数据,必须使用@RequestBody来处理);
B) PUT方式提交时, 根据request header Content-Type的值来判断:
- application/x-www-form-urlencoded, 必须;
- multipart/form-data, 不能处理;
- 其他格式, 必须;
@ResponseBody
作用:
该注解用于将Controller的方法返回的对象,通过适当的HttpMessageConverter转换为指定格式后,写入到Response对象的body数据区。
使用时机:
返回的数据不是html标签的页面,而是其他某种格式的数据时(如json、xml等)使用;
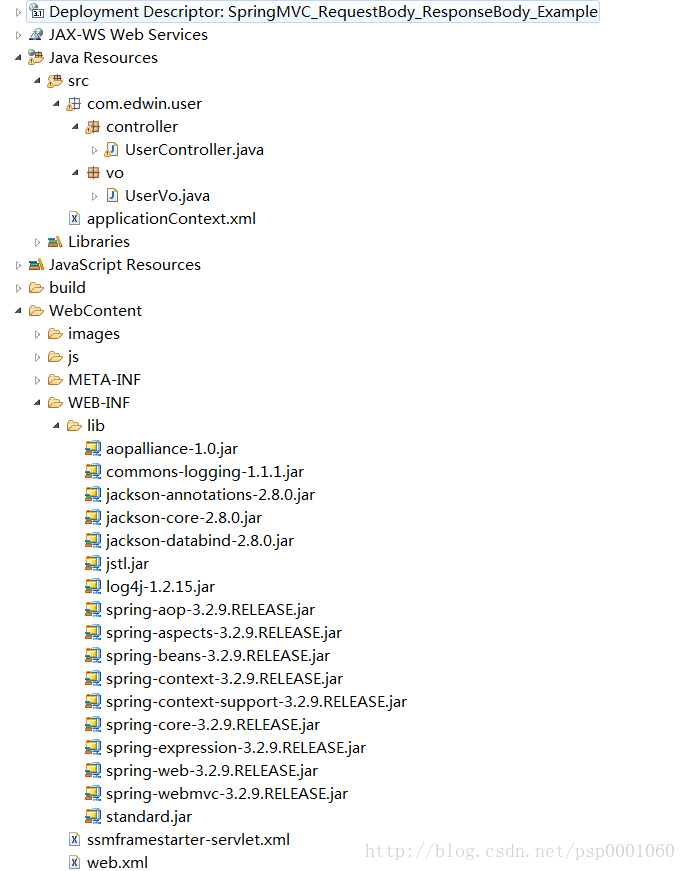
二、案例结构
三、关键代码
UserController:
-
package com.edwin.user.controller;
-
-
import java.util.ArrayList;
-
import java.util.Date;
-
import java.util.List;
-
-
import org.springframework.stereotype.Controller;
-
import org.springframework.web.bind.annotation.RequestBody;
-
import org.springframework.web.bind.annotation.RequestMapping;
-
import org.springframework.web.bind.annotation.RequestMethod;
-
import org.springframework.web.bind.annotation.ResponseBody;
-
-
import com.edwin.user.vo.UserVo;
-
-
@Controller
-
@RequestMapping(
"user")
-
public
class UserController {
-
-
private List<UserVo> userList =
new ArrayList<UserVo>();
-
-
public UserController() {
-
for (
int i =
1; i <=
5; i++) {
-
UserVo uv =
new UserVo();
-
uv.setUserID(i);
-
uv.setUserName(
"user"+i);
-
uv.setGender(i%
2);
-
uv.setPhone(
"1380013800"+i);
-
uv.setEmail(
"email@12"+i+
".com");
-
uv.setBirthday(
new Date(
90,
2,
23));
-
uv.setPassword(
"123456");
-
userList.add(uv);
-
}
-
}
-
-
@RequestMapping(
"getUsers.do")
-
@ResponseBody
-
public List<UserVo> getUsers(){
-
return userList;
-
}
-
-
/*
-
以POST提交方式,添加一个新用户
-
* @param vo
-
* @return
-
*/
-
@RequestMapping(value=
"addUser.do", method=RequestMethod.POST,consumes =
"application/json")
-
@ResponseBody
-
public int addUser(@RequestBody UserVo vo){
-
System.out.println(vo);
-
userList.add(vo);
-
return
1;
-
}
-
-
}
index.html
-
<!DOCTYPE html>
-
<html>
-
<head>
-
<meta charset="UTF-8">
-
<title>Insert title here
</title>
-
</head>
-
<body>
-
<a href="user/getUsers.do">查看所有用户
</a>
-
-
<a href="insert.html">添加用户
</a>
-
</body>
-
</html>
insert.html
-
<!DOCTYPE html>
-
<html>
-
<head>
-
<meta charset="UTF-8">
-
<title>Store
</title>
-
<script type="text/javascript" src="js/jquery-1.8.2.min.js">
</script>
-
<script type="text/javascript">
-
-
function addUser() {
-
var name = $(<span class="hljs-string">"#userName"</span>).val();</div></div></li><li><div class="hljs-ln-numbers"><div class="hljs-ln-line hljs-ln-n" data-line-number="11"></div></div><div class="hljs-ln-code"><div class="hljs-ln-line"> <span class="hljs-keyword">var</span> password = $(
"#password").val();
-
var email = $(<span class="hljs-string">"#email"</span>).val();</div></div></li><li><div class="hljs-ln-numbers"><div class="hljs-ln-line hljs-ln-n" data-line-number="13"></div></div><div class="hljs-ln-code"><div class="hljs-ln-line"> <span class="hljs-keyword">var</span> phone = $(
"#phone").val();
-
var gender = $(<span class="hljs-string">"#gender"</span>).val();</div></div></li><li><div class="hljs-ln-numbers"><div class="hljs-ln-line hljs-ln-n" data-line-number="15"></div></div><div class="hljs-ln-code"><div class="hljs-ln-line"> <span class="hljs-keyword">var</span> birthday = $(
"#birthday").val();
-
-
var sendInfo = {
-
userName: name,
-
password: password,
-
email: email,
-
phone: phone,
-
gender: gender,
-
birthday: birthday,
-
};
-
-
$.ajax({
-
type:
"POST",
-
url:
"user/addUser.do",
-
contentType :
'application/json',
//默认值: "application/x-www-form-urlencoded"。发送信息至服务器时内容编码类型。
-
dataType:
"json",
//预期服务器返回的数据类型
-
success:
function (msg) {
-
if (msg) {
-
alert(name +
" was added in list !");
-
}
else {
-
alert(
"Cannot add to list !");
-
}
-
},
error:
function(msg){
-
alert(
"failed");
-
},
-
-
data:
JSON.stringify(sendInfo)
-
});
-
}
-
</script>
-
</head>
-
<body>
-
Post 提交
-
<form action="" method="post">
-
userName:
<input type="text" id ="userName" value="david"/>
<br>
-
password:
<input type="text" id ="password" value="111111"/>
<br>
-
email:
<input type="text" id ="email" value="[email protected]"/>
<br>
-
phone:
<input type="text" id ="phone" value="13800138002"/>
<br>
-
gender:
<input type="text" id ="gender" value="1">
<br>
-
birthday:
<input type="text" id ="birthday" value="1990-06-30">
<br>
-
<input type="button" value="OK" onclick="addUser()"/>
-
</form>
-
</body>
-
</html>
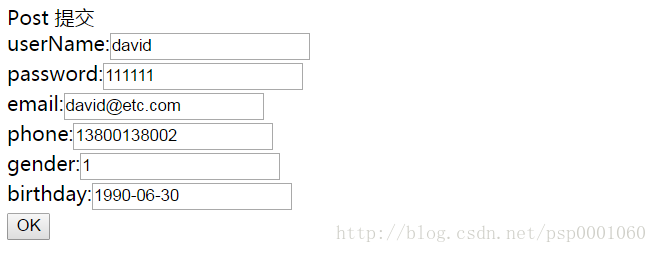
四、效果图

本文主要介绍通过ajax提交表单后,@ResponseBody和@RequestBody的使用。
一、概念
@RequestBody
作用:
注解用于将Controller的方法参数,根据HTTP Request Header的content-Type的内容,通过适当的HttpMessageConverter转换为JAVA类
使用时机:
A)POST方式提时, 根据request header Content-Type的值来判断:
- application/x-www-form-urlencoded, 可选(即非必须,因为这种情况的数据@RequestParam, @ModelAttribute也可以处理,当然@RequestBody也能处理);
- multipart/form-data, 不能处理(即使用@RequestBody不能处理这种格式的数据);
- 其他格式, 必须(其他格式包括application/json, application/xml等。这些格式的数据,必须使用@RequestBody来处理);
B) PUT方式提交时, 根据request header Content-Type的值来判断:
- application/x-www-form-urlencoded, 必须;
- multipart/form-data, 不能处理;
- 其他格式, 必须;
@ResponseBody
作用:
该注解用于将Controller的方法返回的对象,通过适当的HttpMessageConverter转换为指定格式后,写入到Response对象的body数据区。
使用时机:
返回的数据不是html标签的页面,而是其他某种格式的数据时(如json、xml等)使用;
二、案例结构
三、关键代码
UserController:
-
package com.edwin.user.controller;
-
-
import java.util.ArrayList;
-
import java.util.Date;
-
import java.util.List;
-
-
import org.springframework.stereotype.Controller;
-
import org.springframework.web.bind.annotation.RequestBody;
-
import org.springframework.web.bind.annotation.RequestMapping;
-
import org.springframework.web.bind.annotation.RequestMethod;
-
import org.springframework.web.bind.annotation.ResponseBody;
-
-
import com.edwin.user.vo.UserVo;
-
-
@Controller
-
@RequestMapping(
"user")
-
public
class UserController {
-
-
private List<UserVo> userList =
new ArrayList<UserVo>();
-
-
public UserController() {
-
for (
int i =
1; i <=
5; i++) {
-
UserVo uv =
new UserVo();
-
uv.setUserID(i);
-
uv.setUserName(
"user"+i);
-
uv.setGender(i%
2);
-
uv.setPhone(
"1380013800"+i);
-
uv.setEmail(
"email@12"+i+
".com");
-
uv.setBirthday(
new Date(
90,
2,
23));
-
uv.setPassword(
"123456");
-
userList.add(uv);
-
}
-
}
-
-
@RequestMapping(
"getUsers.do")
-
@ResponseBody
-
public List<UserVo> getUsers(){
-
return userList;
-
}
-
-
/*
-
以POST提交方式,添加一个新用户
-
* @param vo
-
* @return
-
*/
-
@RequestMapping(value=
"addUser.do", method=RequestMethod.POST,consumes =
"application/json")
-
@ResponseBody
-
public int addUser(@RequestBody UserVo vo){
-
System.out.println(vo);
-
userList.add(vo);
-
return
1;
-
}
-
-
}
index.html
-
<!DOCTYPE html>
-
<html>
-
<head>
-
<meta charset="UTF-8">
-
<title>Insert title here
</title>
-
</head>
-
<body>
-
<a href="user/getUsers.do">查看所有用户
</a>
-
-
<a href="insert.html">添加用户
</a>
-
</body>
-
</html>
insert.html
-
<!DOCTYPE html>
-
<html>
-
<head>
-
<meta charset="UTF-8">
-
<title>Store
</title>
-
<script type="text/javascript" src="js/jquery-1.8.2.min.js">
</script>
-
<script type="text/javascript">
-
-
function addUser() {
-
var name = $(<span class="hljs-string">"#userName"</span>).val();</div></div></li><li><div class="hljs-ln-numbers"><div class="hljs-ln-line hljs-ln-n" data-line-number="11"></div></div><div class="hljs-ln-code"><div class="hljs-ln-line"> <span class="hljs-keyword">var</span> password = $(
"#password").val();
-
var email = $(<span class="hljs-string">"#email"</span>).val();</div></div></li><li><div class="hljs-ln-numbers"><div class="hljs-ln-line hljs-ln-n" data-line-number="13"></div></div><div class="hljs-ln-code"><div class="hljs-ln-line"> <span class="hljs-keyword">var</span> phone = $(
"#phone").val();
-
var gender = $(<span class="hljs-string">"#gender"</span>).val();</div></div></li><li><div class="hljs-ln-numbers"><div class="hljs-ln-line hljs-ln-n" data-line-number="15"></div></div><div class="hljs-ln-code"><div class="hljs-ln-line"> <span class="hljs-keyword">var</span> birthday = $(
"#birthday").val();
-
-
var sendInfo = {
-
userName: name,
-
password: password,
-
email: email,
-
phone: phone,
-
gender: gender,
-
birthday: birthday,
-
};
-
-
$.ajax({
-
type:
"POST",
-
url:
"user/addUser.do",
-
contentType :
'application/json',
//默认值: "application/x-www-form-urlencoded"。发送信息至服务器时内容编码类型。
-
dataType:
"json",
//预期服务器返回的数据类型
-
success:
function (msg) {
-
if (msg) {
-
alert(name +
" was added in list !");
-
}
else {
-
alert(
"Cannot add to list !");
-
}
-
},
error:
function(msg){
-
alert(
"failed");
-
},
-
-
data:
JSON.stringify(sendInfo)
-
});
-
}
-
</script>
-
</head>
-
<body>
-
Post 提交
-
<form action="" method="post">
-
userName:
<input type="text" id ="userName" value="david"/>
<br>
-
password:
<input type="text" id ="password" value="111111"/>
<br>
-
email:
<input type="text" id ="email" value="[email protected]"/>
<br>
-
phone:
<input type="text" id ="phone" value="13800138002"/>
<br>
-
gender:
<input type="text" id ="gender" value="1">
<br>
-
birthday:
<input type="text" id ="birthday" value="1990-06-30">
<br>
-
<input type="button" value="OK" onclick="addUser()"/>
-
</form>
-
</body>
-
</html>
四、效果图