搭建fabric网络的详细步骤大都隐藏在官方的脚本中,本文详细了解下脚本的执行过程
1.生成各节点需要的公私钥证书
1.1编译生成cryptogen
cd ~/github.com/hyperledger/fabric
make cryptogen  //编译生成cryptogen
正常编译通过后会如下图所示并且在build/bin/目录下可以看到cryptogen

Tips:
我在执行这步操作的时候遇到了fatal error:ltdl.h:no such file or directory的错误。
安装libltdl-dev解决:sudo apt-get install libltdl-dev
1.2用cryptogen生成公私钥
cd examples/e2e_cli/
../../build/bin/cryptogen generate --config=./crypto-config.yaml    //根据crypto-confgi.yaml生成公私钥证书,生成的文件都存放在crypto-config文件夹中
tree crypto-config
2.生成创世区块和channel配置区块
2.1生成configtxgen
cd ~/github.com/hyperledger/fabric
make configtxgen //编译生成configtxgen
正常编译通过后会如下图所示并且在build/bin/目录下可以看到configtxgen

2.2生成创世区块
cd examples/e2e_cli/
../../build/bin/configtxgen -profile TwoOrgsOrdererGenesis -outputBlock ./channel-artifacts/genesis.block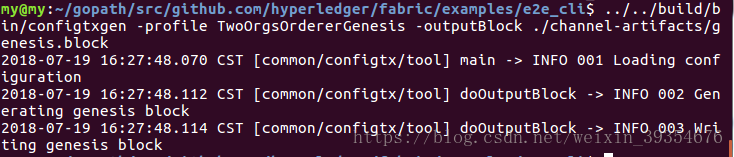
2.3生成channel区块
../../build/bin/configtxgen -profile TwoOrgsChannel -outputCreateChannelTx ./channel-artifacts/channel.tx -channelID mychannel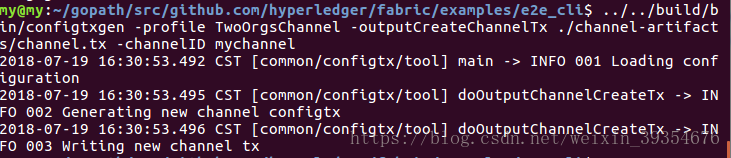
2.4更新锚节点
../../build/bin/configtxgen -profile TwoOrgsChannel -outputAnchorPeersUpdate ./channel-artifacts/Org1MSPanchors.tx -channelID mychannel -asOrg Org1MSP
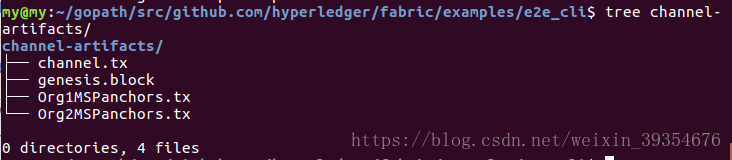
../../build/bin/configtxgen -profile TwoOrgsChannel -outputAnchorPeersUpdate ./channel-artifacts/Org2MSPanchors.tx -channelID mychannel -asOrg Org2MSP上述步骤执行完毕后在channel-artifacts目录下应该有4个文件
3.配置docker-compose
orderer配置参考base/docker-compose-base.yaml
orderer.example.com:
    container_name: orderer.example.com
    image: hyperledger/fabric-orderer
    environment:
      - ORDERER_GENERAL_LOGLEVEL=debug
      - ORDERER_GENERAL_LISTENADDRESS=0.0.0.0
      - ORDERER_GENERAL_GENESISMETHOD=file
      - ORDERER_GENERAL_GENESISFILE=/var/hyperledger/orderer/orderer.genesis.block
      - ORDERER_GENERAL_LOCALMSPID=OrdererMSP
      - ORDERER_GENERAL_LOCALMSPDIR=/var/hyperledger/orderer/msp
      # enabled TLS
      - ORDERER_GENERAL_TLS_ENABLED=true
      - ORDERER_GENERAL_TLS_PRIVATEKEY=/var/hyperledger/orderer/tls/server.key
      - ORDERER_GENERAL_TLS_CERTIFICATE=/var/hyperledger/orderer/tls/server.crt
      - ORDERER_GENERAL_TLS_ROOTCAS=[/var/hyperledger/orderer/tls/ca.crt]
      - ORDERER_KAFKA_RETRY_SHORTINTERVAL=1s
      - ORDERER_KAFKA_RETRY_SHORTTOTAL=30s
      - ORDERER_KAFKA_VERBOSE=true
    working_dir: /opt/gopath/src/github.com/hyperledger/fabric
    command: orderer
    volumes:
    - ../channel-artifacts/genesis.block:/var/hyperledger/orderer/orderer.genesis.block
    - ../crypto-config/ordererOrganizations/example.com/orderers/orderer.example.com/msp:/var/hyperledger/orderer/msp
    - ../crypto-config/ordererOrganizations/example.com/orderers/orderer.example.com/tls/:/var/hyperledger/orderer/tls
    ports:
      - 7050:7050
peer的配置参考base/docker-compose-base.yaml和peer-base.yaml
peer-base:
    image: hyperledger/fabric-peer
    environment:
      - CORE_VM_ENDPOINT=unix:///host/var/run/docker.sock
      # the following setting starts chaincode containers on the same
      # bridge network as the peers
      # https://docs.docker.com/compose/networking/
      - CORE_VM_DOCKER_HOSTCONFIG_NETWORKMODE=e2e_default
      #- CORE_LOGGING_LEVEL=ERROR
      - CORE_LOGGING_LEVEL=DEBUG
      - CORE_PEER_TLS_ENABLED=true
      - CORE_PEER_GOSSIP_USELEADERELECTION=true
      - CORE_PEER_GOSSIP_ORGLEADER=false
      - CORE_PEER_PROFILE_ENABLED=true
      - CORE_PEER_TLS_CERT_FILE=/etc/hyperledger/fabric/tls/server.crt
      - CORE_PEER_TLS_KEY_FILE=/etc/hyperledger/fabric/tls/server.key
      - CORE_PEER_TLS_ROOTCERT_FILE=/etc/hyperledger/fabric/tls/ca.crt
    working_dir: /opt/gopath/src/github.com/hyperledger/fabric/peer
    command: peer node start

peer0.org1.example.com:
    container_name: peer0.org1.example.com
    extends:
      file: peer-base.yaml
      service: peer-base
    environment:
      - CORE_PEER_ID=peer0.org1.example.com
      - CORE_PEER_ADDRESS=peer0.org1.example.com:7051
      - CORE_PEER_CHAINCODEADDRESS=peer0.org1.example.com:7052
      - CORE_PEER_CHAINCODELISTENADDRESS=0.0.0.0:7052
      - CORE_PEER_GOSSIP_EXTERNALENDPOINT=peer0.org1.example.com:7051
      - CORE_PEER_LOCALMSPID=Org1MSP
    volumes:
        - /var/run/:/host/var/run/
        - ../crypto-config/peerOrganizations/org1.example.com/peers/peer0.org1.example.com/msp:/etc/hyperledger/fabric/msp
        - ../crypto-config/peerOrganizations/org1.example.com/peers/peer0.org1.example.com/tls:/etc/hyperledger/fabric/tls
    ports:
      - 7051:7051
      - 7052:7052
      - 7053:7053
CLI的配置参考docker-compose-cli.yaml
cli:
    container_name: cli
    image: hyperledger/fabric-tools
    tty: true
    environment:
      - GOPATH=/opt/gopath
      - CORE_VM_ENDPOINT=unix:///host/var/run/docker.sock
      - CORE_LOGGING_LEVEL=DEBUG
      - CORE_PEER_ID=cli
      - CORE_PEER_ADDRESS=peer0.org1.example.com:7051
      - CORE_PEER_LOCALMSPID=Org1MSP
      - CORE_PEER_LOCALMSPTYPE=bccsp
      - CORE_PEER_TLS_ENABLED=true
      - CORE_PEER_TLS_CERT_FILE=/opt/gopath/src/github.com/hyperledger/fabric/peer/crypto/peerOrganizations/org1.example.com/peers/peer0.org1.example.com/tls/server.crt
      - CORE_PEER_TLS_KEY_FILE=/opt/gopath/src/github.com/hyperledger/fabric/peer/crypto/peerOrganizations/org1.example.com/peers/peer0.org1.example.com/tls/server.key
      - CORE_PEER_TLS_ROOTCERT_FILE=/opt/gopath/src/github.com/hyperledger/fabric/peer/crypto/peerOrganizations/org1.example.com/peers/peer0.org1.example.com/tls/ca.crt
      - CORE_PEER_MSPCONFIGPATH=/opt/gopath/src/github.com/hyperledger/fabric/peer/crypto/peerOrganizations/org1.example.com/users/Admin@org1.example.com/msp
    working_dir: /opt/gopath/src/github.com/hyperledger/fabric/peer
    command: /bin/bash -c './scripts/script.sh ${CHANNEL_NAME}; sleep $TIMEOUT'
    volumes:
        - /var/run/:/host/var/run/
        - ../chaincode/go/:/opt/gopath/src/github.com/hyperledger/fabric/examples/chaincode/go
        - ./crypto-config:/opt/gopath/src/github.com/hyperledger/fabric/peer/crypto/
        - ./scripts:/opt/gopath/src/github.com/hyperledger/fabric/peer/scripts/
        - ./channel-artifacts:/opt/gopath/src/github.com/hyperledger/fabric/peer/channel-artifacts
    depends_on:
      - orderer.example.com
      - peer0.org1.example.com
      - peer1.org1.example.com
      - peer0.org2.example.com
- peer1.org2.example.com需要注意的一点是,我们需要注释掉cli配置脚本中的command: /bin/bash -c './scripts/script.sh ${CHANNEL_NAME}; sleep $TIMEOUT'因为我们接下来会手动执行./scripts/script.sh中的内容。
4.初始化fabric网络环境
4.1启动docker容器
docker-compose -f docker-compose-cli.yaml up -d
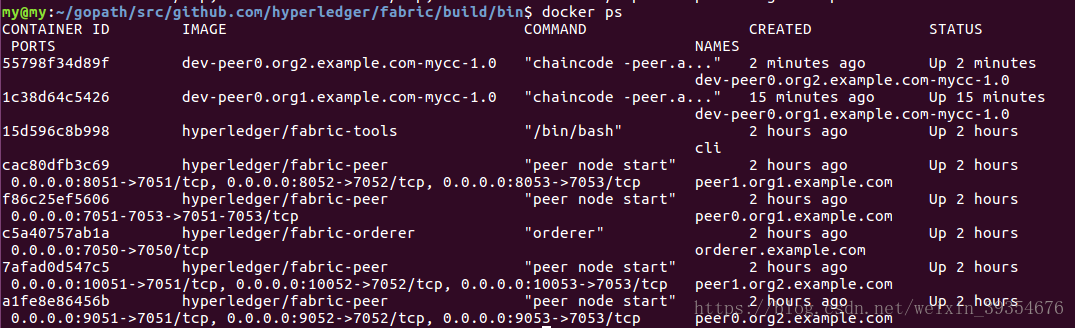
docker ps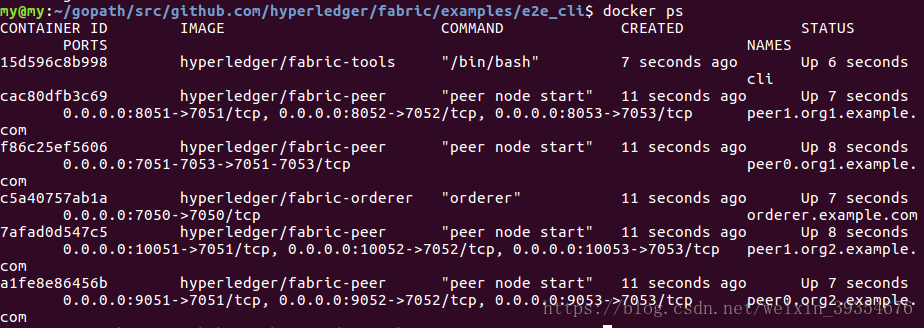
可以看到cli + orderer + 4 peer已经启动
4.2创建channel
channel本身是存在于orderer节点内部的
对于channel的理解,可以参考“我和你不在一个channel”~
也就是说,两个结点要想发生交易,它们必须加入同一个channel。
另外,block账本和channel也是一对一的关系,即一个channel一个账本。
docker exec -it cli bash    //创建channel需要先进入cli

ORDERER_CA=/opt/gopath/src/github.com/hyperledger/fabric/peer/crypto/ordererOrganizations/example.com/orderers/orderer.example.com/msp/tlscacerts/tlsca.example.com-cert.pem
peer channel create -o orderer.example.com:7050 -c mychannel -f ./channel-artifacts/channel.tx --tls true --cafile $ORDERER_CA
执行成功会在cli内部生成一个mychannel.block文件,后续peer节点加入channel需要用到这个文件
4.3peer加入channel
cli默认连接的是peer0.org1(docker-compose-cli.yaml中的默认配置),所以如果将peero.org1加入channel就非常简单
peer channel join -b mychannel.block其他几个peer要想加入channel就需要先修改cli的环境变量,然后再执行peer channel join
//peer1.org1 join
CORE_PEER_LOCALMSPID="Org1MSP"
CORE_PEER_TLS_ROOTCERT_FILE=/opt/gopath/src/github.com/hyperledger/fabric/peer/crypto/peerOrganizations/org1.example.com/peers/peer0.org1.example.com/tls/ca.crt
CORE_PEER_MSPCONFIGPATH=/opt/gopath/src/github.com/hyperledger/fabric/peer/crypto/peerOrganizations/org1.example.com/users/Admin@org1.example.com/msp
CORE_PEER_ADDRESS=peer1.org1.example.com:7051
peer channel join -b mychannel.block

//peer0.org2 join
CORE_PEER_LOCALMSPID="Org2MSP"
CORE_PEER_TLS_ROOTCERT_FILE=/opt/gopath/src/github.com/hyperledger/fabric/peer/crypto/peerOrganizations/org2.example.com/peers/peer0.org2.example.com/tls/ca.crt
CORE_PEER_MSPCONFIGPATH=/opt/gopath/src/github.com/hyperledger/fabric/peer/crypto/peerOrganizations/org2.example.com/users/Admin@org2.example.com/msp
CORE_PEER_ADDRESS=peer0.org2.example.com:7051
peer channel join -b mychannel.block

//peer1.org2 join
CORE_PEER_LOCALMSPID="Org2MSP"
CORE_PEER_TLS_ROOTCERT_FILE=/opt/gopath/src/github.com/hyperledger/fabric/peer/crypto/peerOrganizations/org2.example.com/peers/peer1.org2.example.com/tls/ca.crt
CORE_PEER_MSPCONFIGPATH=/opt/gopath/src/github.com/hyperledger/fabric/peer/crypto/peerOrganizations/org2.example.com/users/Admin@org2.example.com/msp
CORE_PEER_ADDRESS=peer1.org2.example.com:7051
peer channel join -b mychannel.block
4.4更新AnchorPeer节点
//更新Org1的anchor节点peer0.org1
CORE_PEER_LOCALMSPID="Org1MSP"
CORE_PEER_TLS_ROOTCERT_FILE=/opt/gopath/src/github.com/hyperledger/fabric/peer/crypto/peerOrganizations/org1.example.com/peers/peer0.org1.example.com/tls/ca.crt
CORE_PEER_MSPCONFIGPATH=/opt/gopath/src/github.com/hyperledger/fabric/peer/crypto/peerOrganizations/org1.example.com/users/Admin@org1.example.com/msp
CORE_PEER_ADDRESS=peer0.org1.example.com:7051
peer channel update -o orderer.example.com:7050 -c mychannel -f ./channel-artifacts/Org1MSPanchors.tx --tls true --cafile $ORDERER_CA

//更新Org2的anchor节点peer0.org2
CORE_PEER_LOCALMSPID="Org2MSP"
CORE_PEER_TLS_ROOTCERT_FILE=/opt/gopath/src/github.com/hyperledger/fabric/peer/crypto/peerOrganizations/org2.example.com/peers/peer0.org2.example.com/tls/ca.crt
CORE_PEER_MSPCONFIGPATH=/opt/gopath/src/github.com/hyperledger/fabric/peer/crypto/peerOrganizations/org2.example.com/users/Admin@org2.example.com/msp
CORE_PEER_ADDRESS=peer0.org2.example.com:7051
peer channel update -o orderer.example.com:7050 -c mychannel -f ./channel-artifacts/Org2MSPanchors.tx --tls true --cafile $ORDERER_CA
5.安装并运行chaincode
以chaincode_example02为例,这个chaincode实现了a,b两个账户转账的功能
5.1 install chaincode
安装过程指的是对指定代码进行编译打包并发送到指定peer节点
//在peer0.org1上安装chaincode
CORE_PEER_LOCALMSPID="Org1MSP"
CORE_PEER_TLS_ROOTCERT_FILE=/opt/gopath/src/github.com/hyperledger/fabric/peer/crypto/peerOrganizations/org1.example.com/peers/peer0.org1.example.com/tls/ca.crt
CORE_PEER_MSPCONFIGPATH=/opt/gopath/src/github.com/hyperledger/fabric/peer/crypto/peerOrganizations/org1.example.com/users/Admin@org1.example.com/msp
CORE_PEER_ADDRESS=peer0.org1.example.com:7051
peer chaincode install -n mycc -v 1.0 -p github.com/hyperledger/fabric/examples/chaincode/go/chaincode_example02
5.2 instantiate chaincode
在peer所在的基础上对chaincode进行包装,生成对应channel的docker容器
peer chaincode instantiate -o orderer.example.com:7050 --tls true --cafile $ORDERER_CA -C mychannel -n mycc -v 1.0 -c '{"Args":["init","a","100","b","200"]}' -P "OR ('Org1MSP.member','Org2MSP.member')"
执行docker ps可以看到多了一个dev-peer0.org1.example.com-mycc-1.0的image
5.3 invoke chaincode
peer chaincode query -C mychannel -n mycc -c '{"Args":["query","a"]}'   //查询账户a余额
peer chaincode invoke -o orderer.example.com:7050  --tls true --cafile $ORDERER_CA -C mychannel -n mycc -c '{"Args":["invoke","a","b","10"]}'      //转账:a->b 10
5.4 在另一个节点查询交易
//在peer0.org2上安装chaincode
CORE_PEER_LOCALMSPID="Org2MSP"
CORE_PEER_TLS_ROOTCERT_FILE=/opt/gopath/src/github.com/hyperledger/fabric/peer/crypto/peerOrganizations/org2.example.com/peers/peer0.org2.example.com/tls/ca.crt
CORE_PEER_MSPCONFIGPATH=/opt/gopath/src/github.com/hyperledger/fabric/peer/crypto/peerOrganizations/org2.example.com/users/Admin@org2.example.com/msp
CORE_PEER_ADDRESS=peer0.org2.example.com:7051
peer chaincode install -n mycc -v 1.0 -p github.com/hyperledger/fabric/examples/chaincode/go/chaincode_example02

peer chaincode query -C mychannel -n mycc -c '{"Args":["query","a"]}'   //查询a账户余额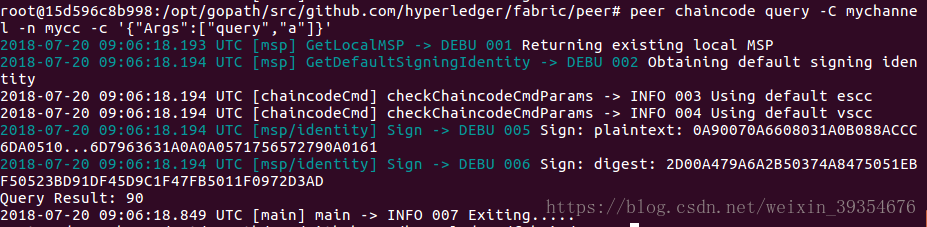
初始化时a账户余额为100,刚在peer0.org1上执行了a向b转账10的操作,我们发现,在peer0.org2上执行的查询结果也是更新后的,为90.
并且此时若再执行docker ps我们会发现也为peer0.org2创建了一个docker镜像