普通使用:
在没有用测试框架之前,我们要用一个main方法来跑代码,而有了像junit这样的测试框架后,就可以不用次次写个main方法了。
直接上代码,注释里有说明:
package com.stuPayment;

import static org.junit.Assert.assertEquals;

import org.junit.After;
import org.junit.AfterClass;
import org.junit.Before;
import org.junit.BeforeClass;
import org.junit.Ignore;
import org.junit.Test;

/**
 * 简单地演示了junit的基本用法
 * @author 85060
 *
 */
public class MyTest {
    private static NumberTest numberTest = null;

    public void get3(NumberTest num) {
        num.a = num.a*num.a*num.a;
    }

    public void get2(NumberTest num) {
        num.a = num.a*num.a;
    }

    @Ignore //这个注释下的方法是会被忽略暂时不会运行的
    public void ignoreMethod() {
        System.out.println("i am ingnored");
    }

    @Before //这个注释是在每个测试方法之前都会跑的,也就是每个@Test的方法跑之前
    public void sayBefore() {
        System.out.println("hello i am the before");
    }

    @After    //这个注释是在每个测试方法之后都会跑的,也就是每个@Test的方法跑之后
    public void sayAfter() {
        System.out.println("hello i am the after");
    }

    @BeforeClass    //这个注释是在整个测试开始前会跑的
    public static void befC() {
        System.out.println("hello i am the before class");
        numberTest = new NumberTest(3);
    }

    @AfterClass    //这个注释是在整个测试结束后会跑的
    public static void aftC() {
        System.out.println("hello i am the after class and the a is "+numberTest.a+" now");

    }

    @Test
    public void test1() {
        System.out.println("i am the test1");
        get2(numberTest);
        assertEquals(9, numberTest.a);
    }

    @Test
    public void test2() {
        System.out.println("i am the test2");
        /*if(numberTest.a == 3) {

        } else if(numberTest.a == 9)*/
        get3(numberTest);
        assertEquals(729, numberTest.a);

    }

}

class NumberTest {
    int a;

    public NumberTest(int a) {
        this.a = a;
    }

}
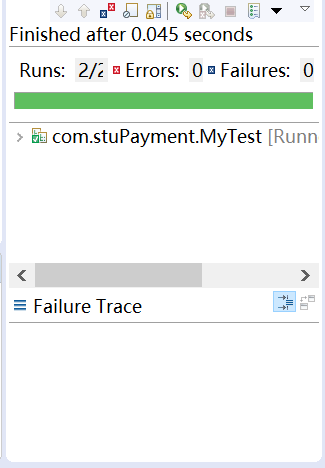
运行的方法就直接run as Junit Test,运行结果:

在Springboot中使用junit:
这里只是提供一个简单的测试例子,可以用来单独测试service或者是你的dao接口。
关于@Runwiht:
@RunWith
在JUnit中有很多个Runner,他们负责调用你的测试代码,每一个Runner都有各自的特殊功能,你要根据需要选择不同的Runner来运行你的测试代码。
如果我们只是简单的做普通Java测试,不涉及Spring Web项目,你可以省略@RunWith注解,这样系统会自动使用默认Runner来运行你的代码。
也是直接上代码,注释里面有说明:
package com.stuPayment;

import static org.junit.Assert.assertArrayEquals;

import java.util.HashMap;
import java.util.List;
import java.util.Map;

import org.junit.Test;
import org.junit.runner.RunWith;
import org.springframework.beans.factory.annotation.Autowired;
import org.springframework.boot.test.context.SpringBootTest;
import org.springframework.test.context.junit4.SpringRunner;

import com.stuPayment.dao.LoginMapper;
import com.stuPayment.entiy.User;

/**
 * 演示了springboot环境下的junit测试
 * @author 85060
 *
 */
@RunWith(SpringRunner.class)    // SpringJUnit支持,由此引入Spring-Test框架支持!
@SpringBootTest             //提供spring环境
public class MyTest2 {

    @Autowired
    private LoginMapper loginMapper;

    @Test
    public void testVoid() {
        Map<String, Object> user = new HashMap<>();
        user.put("userAccount", "123");
        user.put("userPassword", "123");
        List<User> userList = loginMapper.getThisUser(user);

        assertArrayEquals(
                new Object[]{
                        userList.isEmpty()
                }, new Object[]{
                        false
                }
        );
    }
}
junit的参数化测试:
其实就是,当有一个方法,要用多组参数来验证其正确性,这个时候你就可以考虑用这个@RunWith(Parameterized.class)注解
上代码,代码里面有注解解释:
package com.stuPayment;

import static org.junit.Assert.assertTrue;

import java.util.Arrays;
import java.util.Collection;

import org.junit.Test;
import org.junit.runner.RunWith;
import org.junit.runners.Parameterized;
import org.junit.runners.Parameterized.Parameters;

/**
 * 演示一下参数测试
 * @author 85060
 *
 */
@RunWith(Parameterized.class)   //一定要用这个注解
public class MyTest3 {
    private String name;
    private boolean result;

    /**
     * 在参数测试中只能有一个构造方法,因为参数测试是需要一个构造方法参与的
     * 这个构造方法的参数和等一下@Parameters注解的方法中的Object数组中值的顺序对应
     * @param name
     * @param result
     */
    public MyTest3(String name, boolean result) {
        this.name = name;
        this.result = result;
    }

    /**
     * 必须提供@Parameters方法,方法签名必须是public static Collection,不能有参数,
     * 并且collection元素必须是相同长度的数组。
     * 同事数组的长度必须与唯一的公共构造函数的参数数量相匹配。
     */
    @Parameters
    public static Collection<?> data() {
        return Arrays.asList(new Object[][]{
            {"jflksadjflkasdlkfj",false},
            {"mikjsdkalfjlksdjfmifjaslkdjf",true},
            {"mimimimisdfsadfsd",true}
        });//意思其实就是拿这些数据去用MyTest3(String name, boolean result)一直new
    }

    @Test    //真正测试也就是跑的那个方法,用@parameters方法返回的那些参数每组都用MyTest3(String name, bolean result)
             //然后再跑下面这个方法。
    public void test() {
        assertTrue(name.contains("mi") == result);//看看每个用上面那些数据new的实例是否符合要求
    }

}
测试结果的效果:
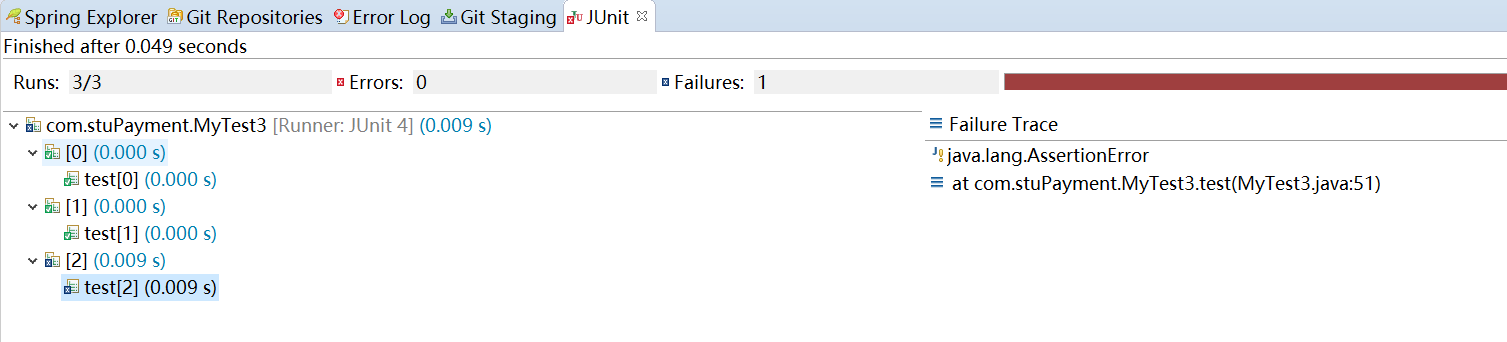
可以看到,如果有错的话会有蓝色的叉叉,然后点击这个错误,在failure trace那可以看到简单的错误说明。