1准备
1.安装vncserver (参考http://www.cnblogs.com/woyuchengying/p/4727241.html)
2.本地电脑安装Xmanager ,并启动Xmanager - Passive(被动服务)
3.进入Root, 设置 export DISPLAY=:0.0 执行xhost + 正常返回:access control disabled,clients can connect from any host;切回oracle用户,执行:export DISPLAY=192.168.1.2:0.0
2开始
1. linux.x64_11gR2_database_1of2.zip , linux.x64_11gR2_database_2of2.zip 软件安装包
2. 安装Oracle的依赖: 使用下面命令
yum install -y compat-libstdc++-33 elfutils-libelf elfutils-libelf-devel gcc gcc-c++ glibc glibc-common glibc-devel glibc-headers libaio libaio-devel libgcc libstdc++ libstdc++-devel libXp make sysstat unixODBC unixODBC-devel compat-libcap1 compat-libstdc++-33 elfutils-libelf-devel ksh
3.设置主机名
编辑/etc/sysconfig/network中的HOSTNAME

4.编辑/etc/hosts 文件
添加(ip 主机名):
192.168.56.126 oracle11g

3设置内核参数
1:编辑/etc/sysctl.conf
添加:
fs.suid_dumpable = 1
fs.aio-max-nr = 1048576
fs.file-max = 6815744
#kernel.shmall = 2097152
#kernel.shmmax = 536870912
kernel.shmmni = 4096
# semaphores: semmsl, semmns, semopm, semmni
kernel.sem = 250 32000 100 128
net.ipv4.ip_local_port_range = 9000 65500
net.core.rmem_default=262144
net.core.rmem_max=4194304
net.core.wmem_default=262144
net.core.wmem_max=1048586
编辑完之后需要执行命令:/sbin/sysctl -p
2:编辑/etc/security/limits.conf
添加:
oracle soft nproc 16384
oracle hard nproc 16384
oracle soft nofile 4096
oracle hard nofile 65536
oracle soft stack 10240
3:编辑/etc/pam.d/login
添加
session required pam_limits.so
4:编辑/etc/security/limits.d/90-nproc.conf
将
* soft nproc 1024
设置成
* - nproc 16384
5:编辑/etc/selinux/config
将SELINUX设置为permissive:SELINUX=permissive
或者禁用SELINUX
setenforce 0
sed -i 's/SELINUX=enforcing/SELINUX=disabled/' /etc/selinux/config
getenforce


4.创建oracle用户
groupadd -g 1000 oinstall
groupadd -g 1100 dba
useradd -m -g oinstall -G dba -u 1200 oracle
[root@oracle11g ~]# id oracle
uid=1200(oracle) gid=1000(oinstall) groups=1000(oinstall),1100(dba)
设置密码
[root@oracle11g ~]# passwd oracle
5.创建安装目录
[root@oracle11g ~]# mkdir -p /u01/app/oracle/product/11.2.0/db_1
[root@oracle11g ~]# chown -R oracle:oinstall /u01 权限赋予
6.关闭防火墙
[root@oracle11g oracle]# chkconfig --level 2345 ip6tables off 设置Linux级别中防火墙关闭
[root@oracle11g oracle]# chkconfig --level 2345 iptables off
[root@oracle11g oracle]# service ip6tables stop 设置当前Linux级别中防火墙关闭
[root@oracle11g oracle]# service iptables stop 查看
[root@oracle11g oracle]# chkconfig --list | grep ip
ip6tables 0:off 1:off 2:off 3:off 4:off 5:off 6:off
iptables 0:off 1:off 2:off 3:off 4:off 5:off 6:off
7.安装oracle 11.2.0.4 软件
[root@oracle11g oracle]# ll 上传后查看权限
total 2489640
-rw-r--r--. 1 root root 1395582860 Oct 29 08:31 p13390677_112040_Linux-x86-64_1of7.zip
-rw-r--r--. 1 root root 1151304589 Oct 29 08:31 p13390677_112040_Linux-x86-64_2of7.zip
[root@oracle11g oracle]# chown -R oracle:oinstall /zxx_software/oracle/ 设置权限
[root@oracle11g oracle]# pwd
/zxx_software/oracle
[root@oracle11g oracle]# ll
total 2489640
-rw-r--r--. 1 oracle oinstall 1395582860 Oct 29 08:31 p13390677_112040_Linux-x86-64_1of7.zip
-rw-r--r--. 1 oracle oinstall 1151304589 Oct 29 08:31 p13390677_112040_Linux-x86-64_2of7.zip
[root@oracle11g oracle]# su - oracle 切换到oracle 用户解压
[oracle@oracle11g ~]$ cd /zxx_software/oracle/
[oracle@oracle11g oracle]$ unzip p13390677_112040_Linux-x86-64_1of7.zip
[oracle@oracle11g oracle]$ unzip p13390677_112040_Linux-x86-64_2of7.zip
[oracle@oracle11g oracle]$ ll 解压之后
total 2489644
drwxr-xr-x. 7 oracle oinstall 4096 Aug 27 2013 database
-rw-r--r--. 1 oracle oinstall 1395582860 Oct 29 08:31 p13390677_112040_Linux-x86-64_1of7.zip
-rw-r--r--. 1 oracle oinstall 1151304589 Oct 29 08:31 p13390677_112040_Linux-x86-64_2of7.zip
[oracle@oracle11g database]$ ./runInstaller 安装
保证客户端启动Xmanager - Passive
备注:比如你的oracle服务器ip是192.168.0.1,访问的客户端的ip是192.168.1.2,当你用192.168.1.2连接上数据库后,希望在192.168.1.2上显示图像界面,这是就需要export DISPLAY=192.168.1.2:0.0
再执行oracle安装文件./runInstaller,会提示弹窗授权:
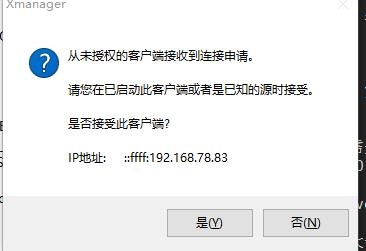 点击是后,会正常弹窗。
8.可视化安装 可参考 https://jingyan.baidu.com/article/63f236280db0770208ab3d32.html 安装
9.编辑oracle环境
[oracle@node1 ~]$ vi .bash_profile
export ORACLE_SID=test
export ORACLE_HOME=/u01/app/oracle/product/11.2.0/db_1
export PATH=$ORACLE_HOME/bin:$PATH
export LD_LIBRARY_PATH=$ORACLE_HOME/lib:/lib:/usr/lib
if [ $USER = "oracle" ]; then
if [ $SHELL = "/bin/ksh" ]; then
ulimit -p 16384
ulimit -n 65536
else
ulimit -u 16384 -n 65536
fi
fi
[oracle@oracle11g ~]$ source .bash_profile 使环境生效
[oracle@oracle11g ~]$ echo $ORACLE_HOME 测试是否生效
/u01/app/oracle/product/11.2.0/db_1

10.dbca 建库
参考https://jingyan.baidu.com/article/5d368d1eed4cac3f61c05765.html
11.netca 创建监听
参考https://jingyan.baidu.com/article/63f236280db0770208ab3d32.html
yum install -y compat-libstdc++-33 elfutils-libelf elfutils-libelf-devel gcc gcc-c++ glibc glibc-common glibc-devel glibc-headers libaio libaio-devel libgcc libstdc++ libstdc++-devel libXp make sysstat unixODBC unixODBC-devel compat-libcap1 compat-libstdc++-33 elfutils-libelf-devel ksh