首先看springboot启动类,这个类一定的放在一级目录下(意思就是他所在的目录与其他包所在的目录平级,详细可见下面的目录图)
@SpringBootApplication
@MapperScan("com.example.demo.dao")
public class DemoApplication {

   public static void main(String[] args) {
      SpringApplication.run(DemoApplication.class, args);
   }
}
@SpringBootApplication是该类的必备注解,我就不解释了,MapperScan注解对应的是Mapper.xml对应的接口层,如下
import com.example.demo.entity.Users;
import org.apache.ibatis.annotations.Mapper;
import org.springframework.stereotype.Repository;

@Mapper
@Repository
public interface UsersDao {
    public Users login(String username, String password);
}我这里用的参数,其实也可以用对象的
@Mapper则是对应mybatis的mapper.xml
<?xml version="1.0" encoding="UTF-8"?>
<!DOCTYPE mapper
PUBLIC "-//mybatis.org//DTD Mapper 3.0//EN"
"http://mybatis.org/dtd/mybatis-3-mapper.dtd">
<mapper namespace="com.example.demo.dao.UsersDao">

   <select id="login" resultType="com.example.demo.entity.Users">
      select * from users where username=#{param1} and password=#{param2}
   </select>

</mapper>
这是我的mapper文件,而实体类是Users 类(项目结构图最后会奉上)
public class Users {
    private Integer id;
    private String username;
    private String password;
    private Integer age;
}后面的get set tostring 方法自动补全,我就不贴上去了,这里对应的是数据库的字段
然后是我的service层
@Service
public class UsersService {
    @Autowired
    private UsersDao usersDao;

    public Users dologin(Users users) {
        users=this.usersDao.login(users.getUsername(), users.getPassword());
        return users;
    }
}这里吧DAO层依赖注入进来
再后是Controller层
@Controller
public class InitController {

    @Autowired
    private UsersService userservice;

    @RequestMapping("/tologin.action")
    public String index() {
        return "login";
    }

    @RequestMapping(value = "login.action")
    public ModelAndView login(Users users, HttpServletRequest request, HttpSession session) {
        ModelAndView mav = new ModelAndView();
        String username = request.getParameter("username");
        String password = request.getParameter("password");
        users.setUsername(username);
        users.setPassword(password);
        users = this.userservice.dologin(users);
        if (users != null) {
            session.setAttribute("users", users);
            mav.setViewName("detail");
            return mav;
        } else {
            session.setAttribute("errormsg", "账号或密码错误!请重新输入");
        }
        mav.setViewName("login");
        return mav;
    }
}输入localhost:8080/tologin.action就可以访问到登录页,login.action则是对登录的操作
好了一连串的逻辑代码好像走完了,但是有些配置好像还没奉上
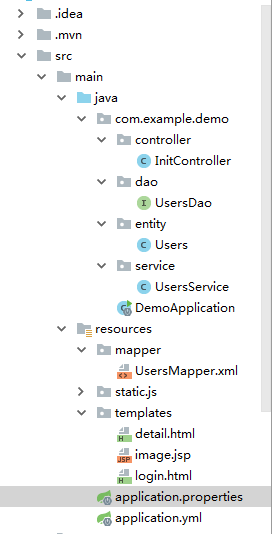
大家可以从这看到我的项目的目录结构;从这里可以看到Application启动类是直接放在com.example.demo下的
然后还有几点要注意
1.mapper文件要放在resources文件下,别问我为啥,因为这是IDEA,好像是java那边不支持解析xml
2.springboot也不是很提倡JSP,所以我写的是html页面但是里面也有个很重要的点,那就是
thymeleaf,他的写法和平常的是不同的 如下
<!doctype html>
<html xmlns:th="http://www.thymeleaf.org">
<head>
<meta charset="UTF-8">
<meta http-equiv="X-UA-Compatible" content="IE=edge,chrome=1">
<meta name="viewport" content="width=device-width, initial-scale=1.0">
<title>登录</title>
<!--<script type="text/javascript" src="resouces/static/js/time.js"></script>-->
<script th:src="@{/js/time.js}"></script>
</head>
<body>
<div id="regLogin" class="wrap" >
<div class="dialog">
<div class="box">
<h4><center>用户登录</center></h4>
<form id="login.action" name="login.action" action="login.action" method="post">
<div class="infos" style="text-align:center;">
<table class="field"style="text-align:center;" >
<tr>
<td colspan="2" style="text-align:center; color:red"></td>
</tr>
<tr style="text-align:center ;margin-left:300px;">
<td class="field" style="color:black;"><center>用 户 名:</center></td>
<td>
<input type="text" name="username" value="" id="username" class="text" required="true"/>
</td>
</tr>
<tr>
<td class="field">密 码:</td>
<td>
<input type="password" name="password" id="password" class="text" required="true"/>
</td>
</tr>
</table>
<div class="buttons">
<input type="submit" id="User_login_action_0" value="立即登录"/>
</div>
</div>
</form>
<div id="result"><p th:text="${session.errormsg}">[]</p></div>
</div>
</div>
</div>
<h1>租房系统</h1>
</body>
</html>
这里有几个地方要注意:1.第二行
<html xmlns:th="http://www.thymeleaf.org">这是引用thymeleaf的方式
2.因为的用的request.getParamenter方法取参数的方式,所以你们得登录名和密码的name属性一定要和controller里的相同(最好和数据库字段也相同)
3.第三点就是thymeleaf怎么从session,request中取值
<p th:text="${session.errormsg}">[]</p>就是这样的
4.还有就是静态资源的引入
<script th:src="@{/js/time.js}"></script>
然后就是detail页面了
<!DOCTYPE html PUBLIC "-//W3C//DTD HTML 4.01 Transitional//EN" "http://www.w3.org/TR/html4/loose.dtd">
<html xmlns:th="http://www.thymeleaf.org">
<head>
<meta http-equiv="Content-Type" content="text/html; charset=UTF-8">
<title>Insert title here</title>
</head>
<body>

      <p th:text="${session.users.id}">[]</p>
      <p th:text="${session.users.username}"></p>
      <p th:text="${session.users.password}"></p>
      <p th:text="${session.users.age}"></p>

</body>
</html>
所有代码差不多来齐了,还有几个配置文件,我是配置了application.properties 和
application.yml两个混合
application.properties:
spring.thymeleaf.prefix=classpath:/templates/
spring.thymeleaf.suffix=.html
这两个配置的意思是返回的视图在这个目录下,然后是以.html结尾的
application.yml
server:
  port: 8080 //对应端口号

spring:
  profiles:
    active: prod //spring默认配置
  datasource:
    driver-class-name: com.mysql.jdbc.Driver
    url: jdbc:mysql://127.0.0.1:3306/springboot
    username: root
    password: a    //数据库的驱动和账号密码
mybatis:
  mapper-locations: classpath:mapper/*.xml   //mybatis的mapper文件所在路径
  type-aliases-package: com.example.demo.entity   //实体类路径
所有的配置和代码全来齐了,然后就准备运行了
找到demoapplication 右击运行
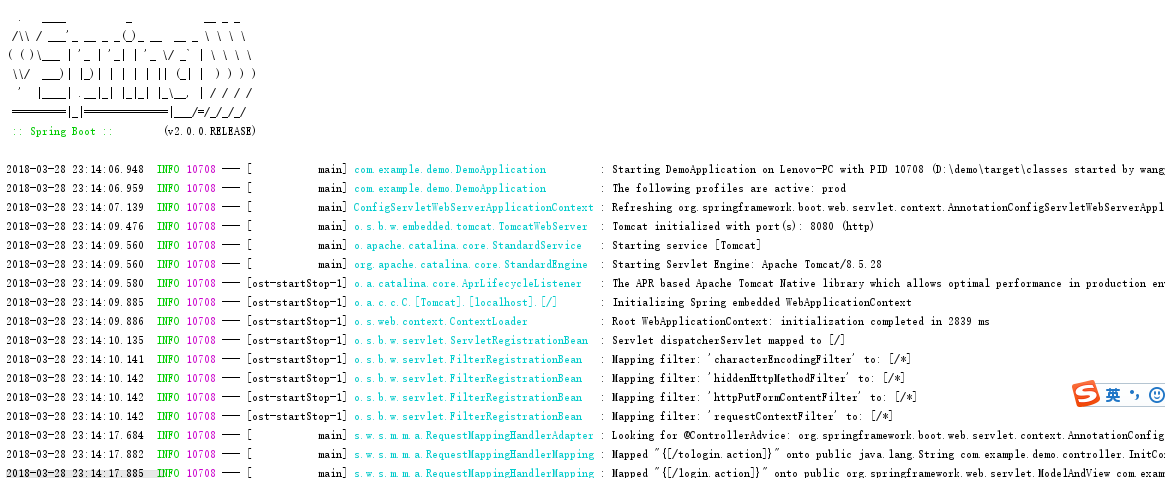
如果这个图标出现了,那么恭喜你,已经成功了第一步,然后就访问http://localhost:8080/tologin.action
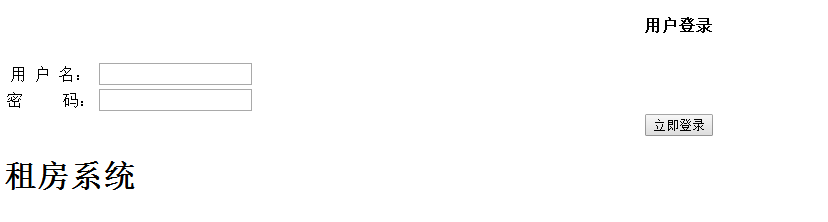
如果出现下面这个登录界面,那么恭喜你,你的返回视图也是没问题的
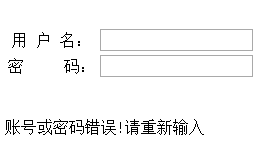
最后一步啦,输入账号密码咯,我的是 账号 wp 密码 a 如果账号密码错误它会打印出错误信息显示在页面,如图
如果你登录成功,则返回的是detail页面,如下,如果不成功则检查后台代码是否正确

好了,到此已经全部结束了,希望对大家有所帮助