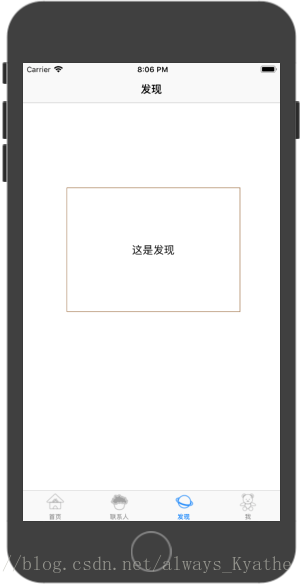
接上一篇,完善,给它在第二界面加个标签栏。界面如下。
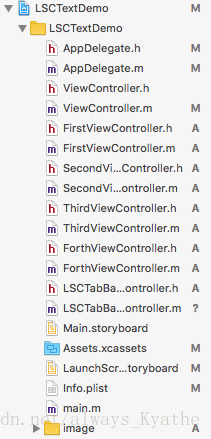
一共共有四个页面可供切换,所以 需要再创建五个程序,其中包括四个页面程序和一个TabBar控制程序,分别是FirstViewController、SecondViewController、ThirdViewController、ForthViewController、LSCTabBarViewController。程序组成如下。
UITabBarController标签栏,是一个容器,在其中添加四个UINavigationController容器,每个UINavigationController容器下面又有一个UIViewController容器包含一个界面。
首先,需要在ViewController.m中重写上篇里面的jumpToNext { } 方法, 【需要多加注意】
- (void)jumpToNext {
    AppDelegate *myAppDelegate = (AppDelegate *)[UIApplication sharedApplication].delegate;
    [myAppDelegate changeToTabBarController];  //调用跳转方法
}
这里的跳转方法在AppDelegate.m中进行声明,声明如下。 【需要多加注意】
- (void)changeToTabBarController { //自定义的方法,跳转到LSCTabBarViewController。注意要在AppDelegate.h文件中声明该方法 LSCTabBarViewController *tabBarC = [[LSCTabBarViewController alloc] init]; //初始化tabBarC self.window.rootViewController = tabBarC; //通过rootViewController设置第一个界面是navtab所以上诉代码的含义就是,点击按键之后,调用jumpToNext { } 方法,然后清屏方法,而后跳转至LSCTabBarViewController.m,即生成标签栏。
至于FirstViewController.m、SecondViewController.m、ThirdViewController.m、ForthViewController.m这四个页面程序,则是控制每个页面的显示,最后在LSCTabBarViewController.m中通过 [ self addChildViewController:] 将四个页面加入该标签容器中。
SecondViewController.m 代码如下,同样只用修改-(void)viewDidLoad 方法。其他三个页面程序类似。
- (void)viewDidLoad {
    [super viewDidLoad];
    self.view.backgroundColor = [UIColor whiteColor];
    self.title=@"联系人";

    UILabel *friendsLabel=[[UILabel alloc]init];
    friendsLabel.frame=CGRectMake(70, 200, 280, 200);
    friendsLabel.layer.borderColor=[UIColor brownColor].CGColor;
    friendsLabel.layer.borderWidth=1;
    friendsLabel.text=@"这是联系人";
    friendsLabel.textAlignment=NSTextAlignmentCenter;

    [self.view addSubview:friendsLabel];

}#import "LSCTabBarViewController.h"
#import "AppDelegate.h"
#import "FirstViewController.h"
#import "SecondViewController.h"
#import "ThirdViewController.h"
#import "ForthViewController.h"
@interface LSCTabBarViewController ()
@end
@implementation LSCTabBarViewController
- (void)viewDidLoad {
[super viewDidLoad];
self.view.backgroundColor=[UIColor whiteColor];
FirstViewController *homePage=[[FirstViewController alloc]init];
homePage.tabBarItem.title=@"首页";
//设置标签栏对应的部分的标题
homePage.tabBarItem.image=[UIImage imageNamed: @"1.png"];
//设置标签栏对应的部分的图片
UINavigationController *firstNav = [[UINavigationController alloc] initWithRootViewController:homePage]; //导航栏,这是需要多加注意的地方
[self addChildViewController:firstNav]; //将该页面加入到TabBar容器中
SecondViewController *friends=[[SecondViewController alloc]init];
friends.tabBarItem.title=@"联系人";
friends.tabBarItem.image=[UIImage imageNamed:@"2.png"];
UINavigationController *friendsNav=[[UINavigationController alloc]initWithRootViewController:friends];
[self addChildViewController:friendsNav];
ThirdViewController *find=[[ThirdViewController alloc]init];
find.tabBarItem.title=@"发现";
find.tabBarItem.image=[UIImage imageNamed:@"3.png"];
UINavigationController *findNav=[[UINavigationController alloc]initWithRootViewController:find];
[self addChildViewController:findNav];
ForthViewController *i=[[ForthViewController alloc]init];
i.tabBarItem.title=@"我";
i.tabBarItem.image=[UIImage imageNamed:@"4.png"];
UINavigationController *iNav=[[UINavigationController alloc]initWithRootViewController:i];
[self addChildViewController:iNav];
}
- (void)didReceiveMemoryWarning {
[super didReceiveMemoryWarning];
// Dispose of any resources that can be recreated.
}
/*
#pragma mark - Navigation
// In a storyboard-based application, you will often want to do a little preparation before navigation
- (void)prepareForSegue:(UIStoryboardSegue *)segue sender:(id)sender {
// Get the new view controller using [segue destinationViewController].
// Pass the selected object to the new view controller.
}
*/
@end