1.创建Android项目:

2.添加Runtime SDK依赖
ESRI提供了两种SDK方式,一种是本地方式,但此种方式较为麻烦,另一种是联网方式,我采用的是联网方式。
在Project的Build.gradle中添加:
allprojects {
  repositories {
    google()
    jcenter()
    // 添加Esri公共Bintray Maven repository
    maven {
        url 'https://esri.bintray.com/arcgis'
    }
  }
}
在Module的Build.gradle中添加:
dependencies {
    [其他implementation]
    //添加Runtime依赖
    implementation 'com.esri.arcgisruntime:arcgis-android:100.3.0'
    implementation fileTree(dir: 'libs', include: ['*.jar'])
}
注:若出现“Manifest merger failed : uses-sdk:minSdkVersion 15 cannot be smaller than version 19 declared in library [com.esri.arcgisruntime:arcgis-android:100.3.0]”等类似的错误,则需要修改AndroidSDK版本,方法:
在Module的Build.gradle中修改:
minSdkVersion 193.设置界面布局:
在layout中的布局XML中添加MapView控件:
<!-- MapView控件 -->
    <com.esri.arcgisruntime.mapping.view.MapView
        android:id="@+id/mapView"
        android:layout_width="match_parent"
        android:layout_height="match_parent">
    </com.esri.arcgisruntime.mapping.view.MapView>
4.编写代码:
在上步布局相应的Activty的onCreate方法中:
//在Layout中获取到MapView控件,记得在外层创建mMapView对象
mMapView = (MapView) findViewById(R.id.mapView);
//创建一个地图对象
ArcGISMap map = new ArcGISMap();
//创建并添加地图服务
String strMapUrl="http://map.geoq.cn/ArcGIS/rest/services/ChinaOnlineCommunity/MapServer";
ArcGISTiledLayer arcGISTiledLayer = new ArcGISTiledLayer(strMapUrl);
//创建底图、并设置底图图层
Basemap basemap = new Basemap();
basemap.getBaseLayers().add(arcGISTiledLayer);
//设置地图底图
map.setBasemap(basemap);
//设置map地图对象在MapView控件中显示
mMapView.setMap(map);
5.添加权限及OpenGL ES支持:
在AndroidManifest.xml中添加:
<!--联网权限 -->
<uses-permission android:name="android.permission.INTERNET" />
<!--OpenGL ES支持 -->
<uses-feature
android:glEsVersion="0x00020000"
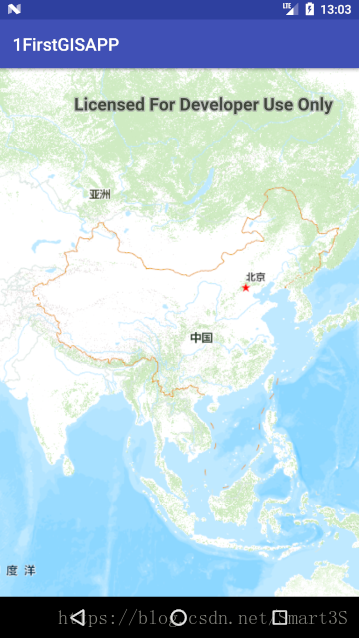
android:required="true" />6.运行APP:可以进行简单的2D地图的浏览与缩放
7.补充:
关于MapView的地图事件:
        //地图事件方法
        mMapView.setOnTouchListener(new MapView.OnTouchListener() {
            @Override
            public boolean onMultiPointerTap(MotionEvent motionEvent) {
                return false;
            }

            @Override
            public boolean onDoubleTouchDrag(MotionEvent motionEvent) {
                return false;
            }

            @Override
            public boolean onUp(MotionEvent motionEvent) {
                return false;
            }

            @Override
            public boolean onRotate(MotionEvent motionEvent, double v) {
                return false;
            }

            @Override
            public boolean onSingleTapConfirmed(MotionEvent motionEvent) {
                return false;
            }

            @Override
            public boolean onDoubleTap(MotionEvent motionEvent) {
                return false;
            }

            @Override
            public boolean onDoubleTapEvent(MotionEvent motionEvent) {
                return false;
            }

            @Override
            public boolean onDown(MotionEvent motionEvent) {
                return false;
            }

            @Override
            public void onShowPress(MotionEvent motionEvent) {

            }

            @Override
            public boolean onSingleTapUp(MotionEvent motionEvent) {
                return false;
            }

            @Override
            public boolean onScroll(MotionEvent motionEvent, MotionEvent motionEvent1, float v, float v1) {
                return false;
            }

            @Override
            public void onLongPress(MotionEvent motionEvent) {

            }

            @Override
            public boolean onFling(MotionEvent motionEvent, MotionEvent motionEvent1, float v, float v1) {
                return false;
            }

            @Override
            public boolean onScale(ScaleGestureDetector scaleGestureDetector) {
                return false;
            }

            @Override
            public boolean onScaleBegin(ScaleGestureDetector scaleGestureDetector) {
                return false;
            }

            @Override
            public void onScaleEnd(ScaleGestureDetector scaleGestureDetector) {

            }

            @Override
            public boolean onTouch(View view, MotionEvent motionEvent) {
                return false;
            }
        });
(2)记得在Activity终止、暂停、关闭时对MapView也采用相应操作:
    @Override
    protected void onPause() {
        super.onPause();
        mMapView.pause();
    }
    @Override
    protected void onResume() {
        super.onResume();
        mMapView.resume();
    }
    @Override
    protected void onDestroy() {
        super.onDestroy();
        mMapView.dispose();
    }