Swagger Edit介绍
Swagger是专门用来管理接口一个工具。在开发过程中,接口一直是纷争的聚焦点,能有效管理接口(保存好记录、及时更新、方便查看、接口测试)。会让整个项目开发效率提升很大。
而其中Swagger Edit是用来编辑接口文档的小程序,简单易用。在官网上分为在线编辑和下载代码线下编辑,两种编辑方式。Swagger是通过YAML来定义你的接口规范。可以通过接口文档帮你生成不同框架的服务端和客户端,方便你mock和契约测试。最后导出JSON格式的API规范,通过Swagger UI对外发布。下图就是Swagger Edit界面:
安装
1.下载并且安装node.js
2. npm install -g http-server
3. 下载项目https://github.com/swagger-api/swagger-editor 并且解压。
4. 进入swagger-editor文件夹。运行http-server命令。
5. 进入http://127.0.0.1 就可以看到swagger页面了。
界面介绍
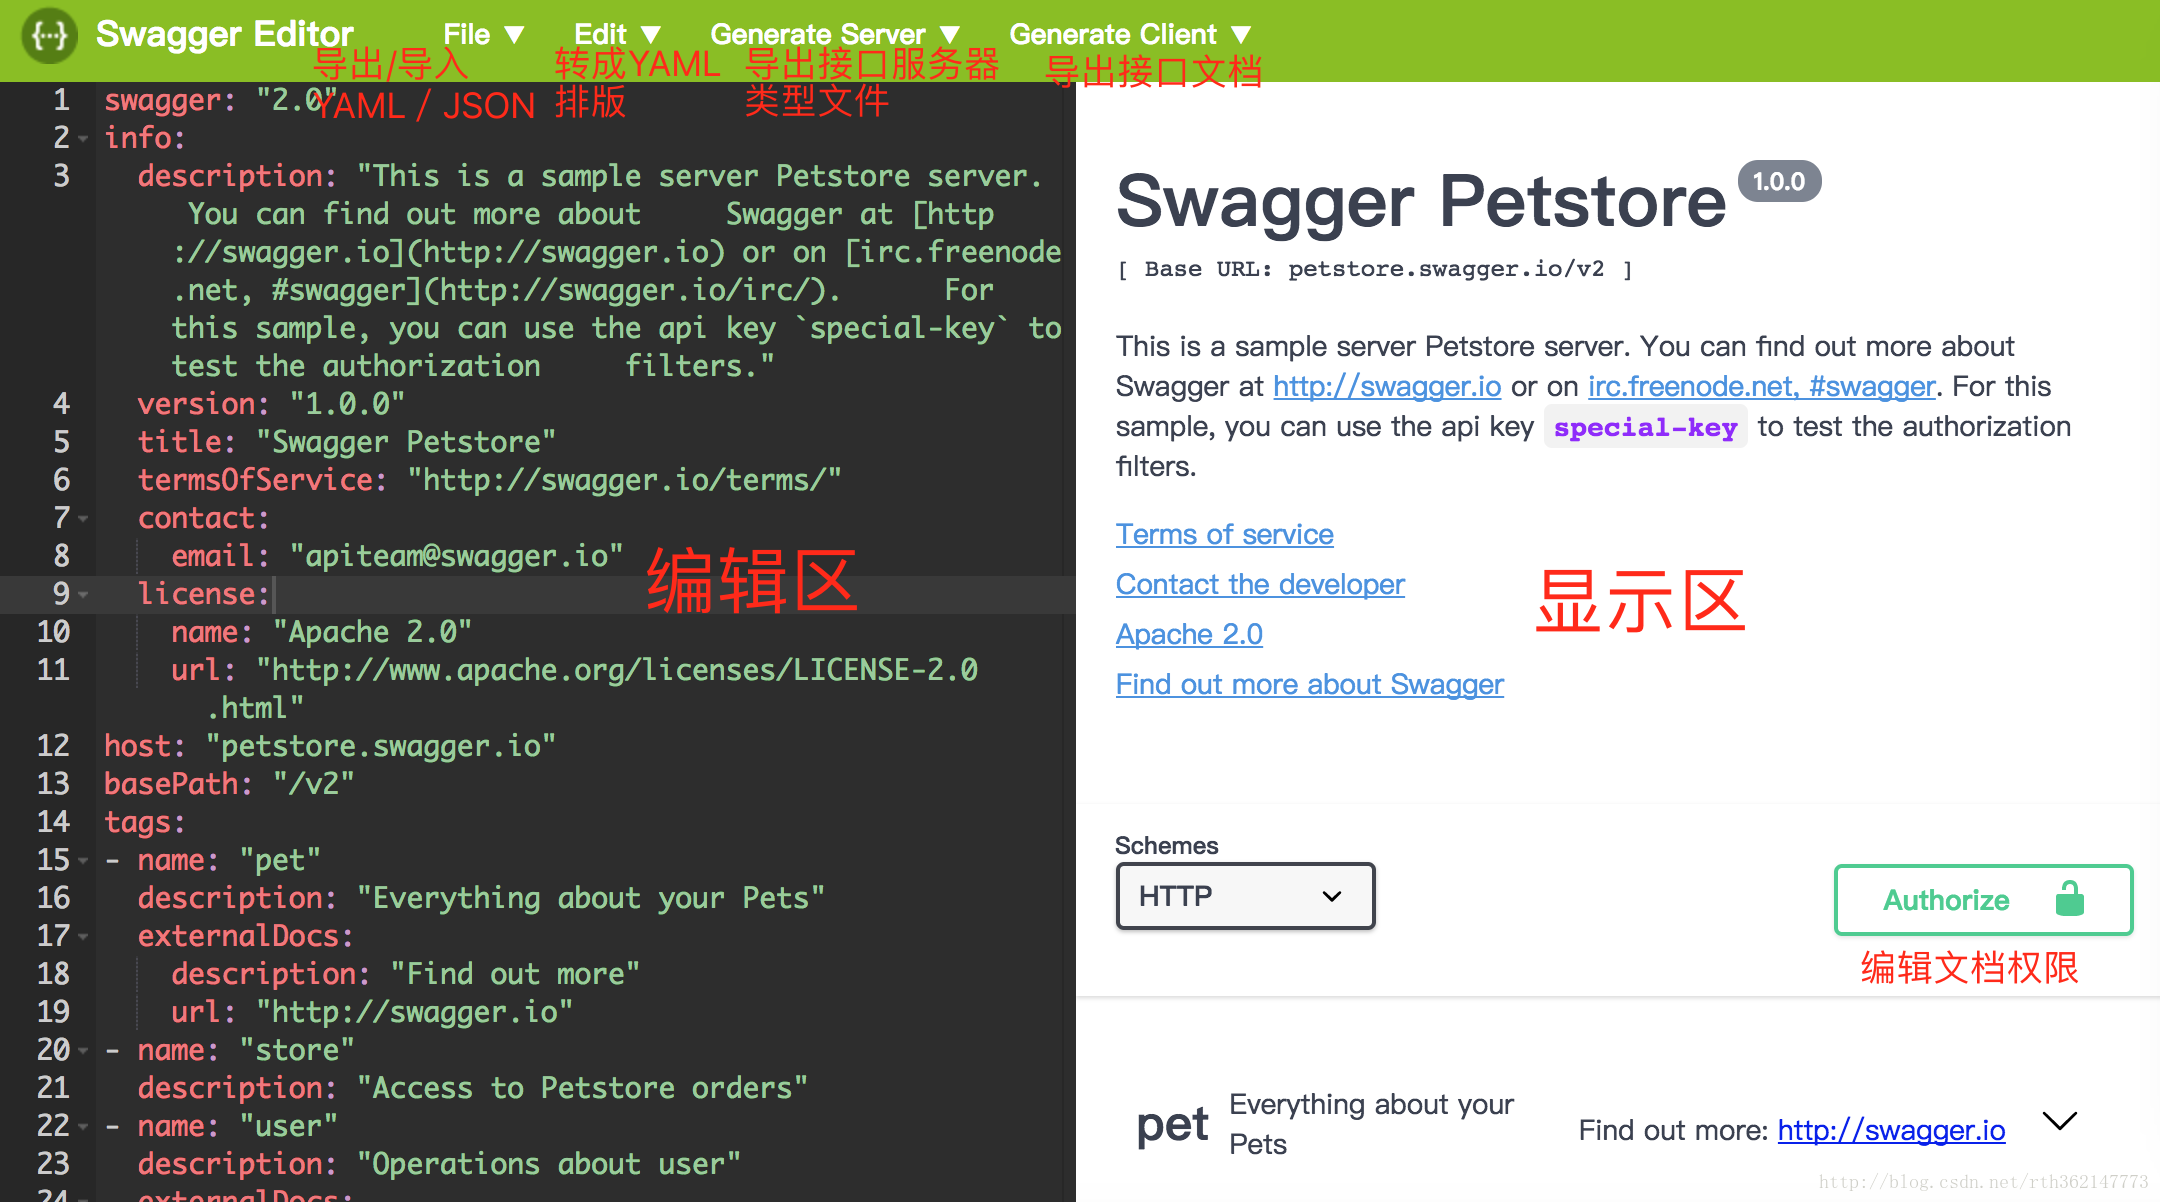
swagger edit界面分为导航栏和工作区。导航栏是对接口文档的处理用,下面会介绍到。
工作区就是我们花时间最多的地方。分为左右区域,左边是编辑区,右边是显示区。左边编辑区使用的YAML语法来编写,只要一修改右边显示区立刻有变化,使用很便捷。进入swagger edit会默认填入一个demo文档,通常我们只需要修改demo文档,就能制作我们想要的接口文档。如下图:
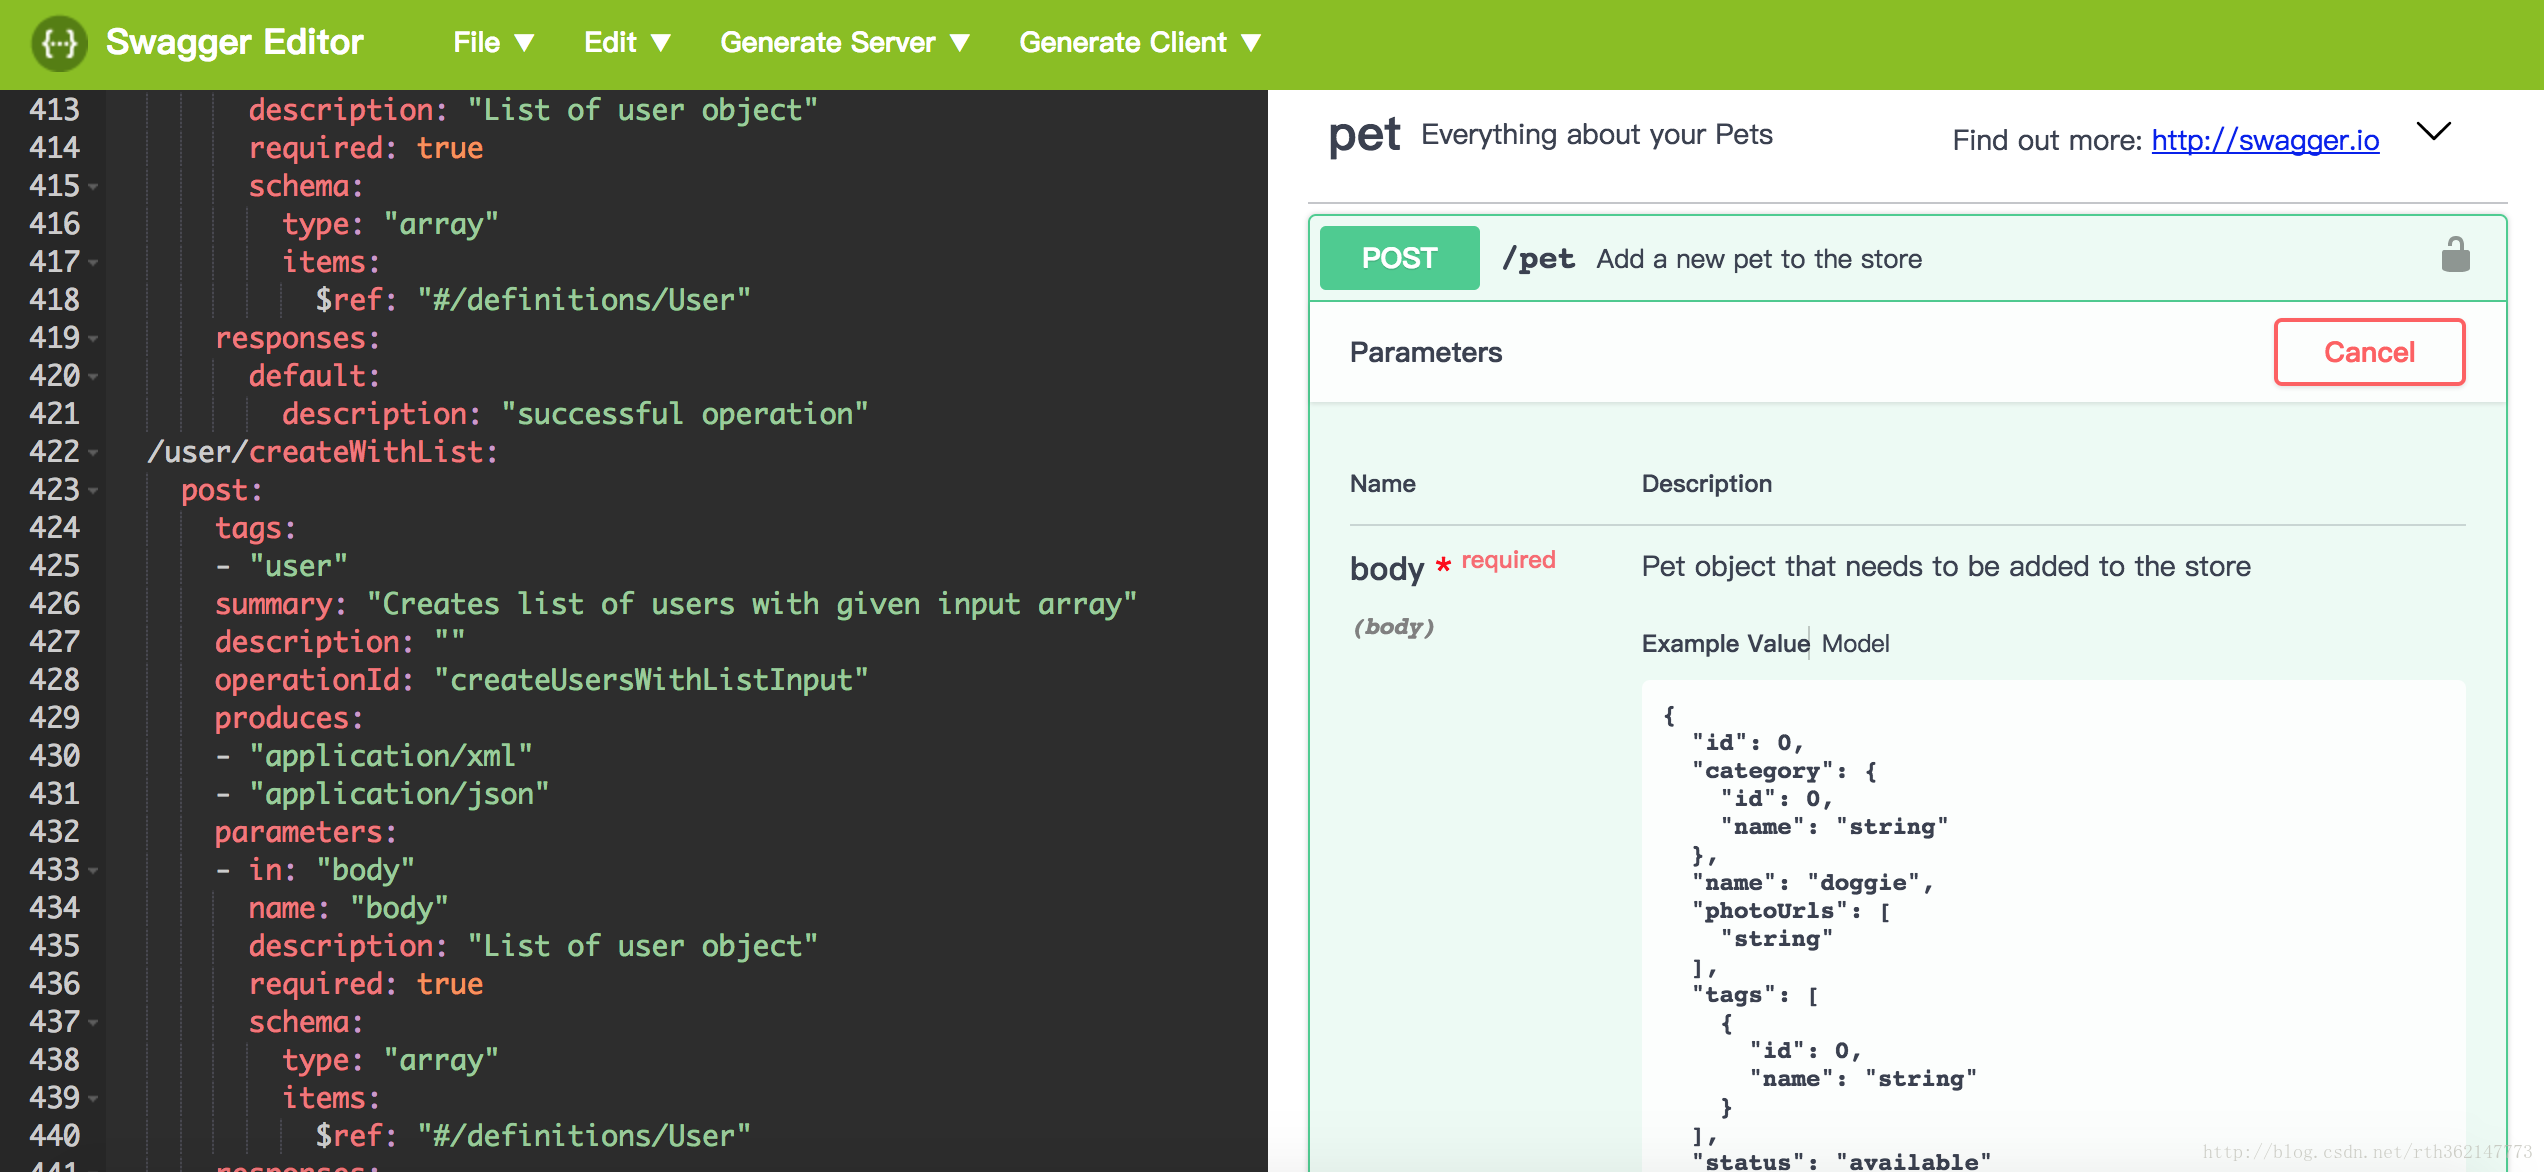
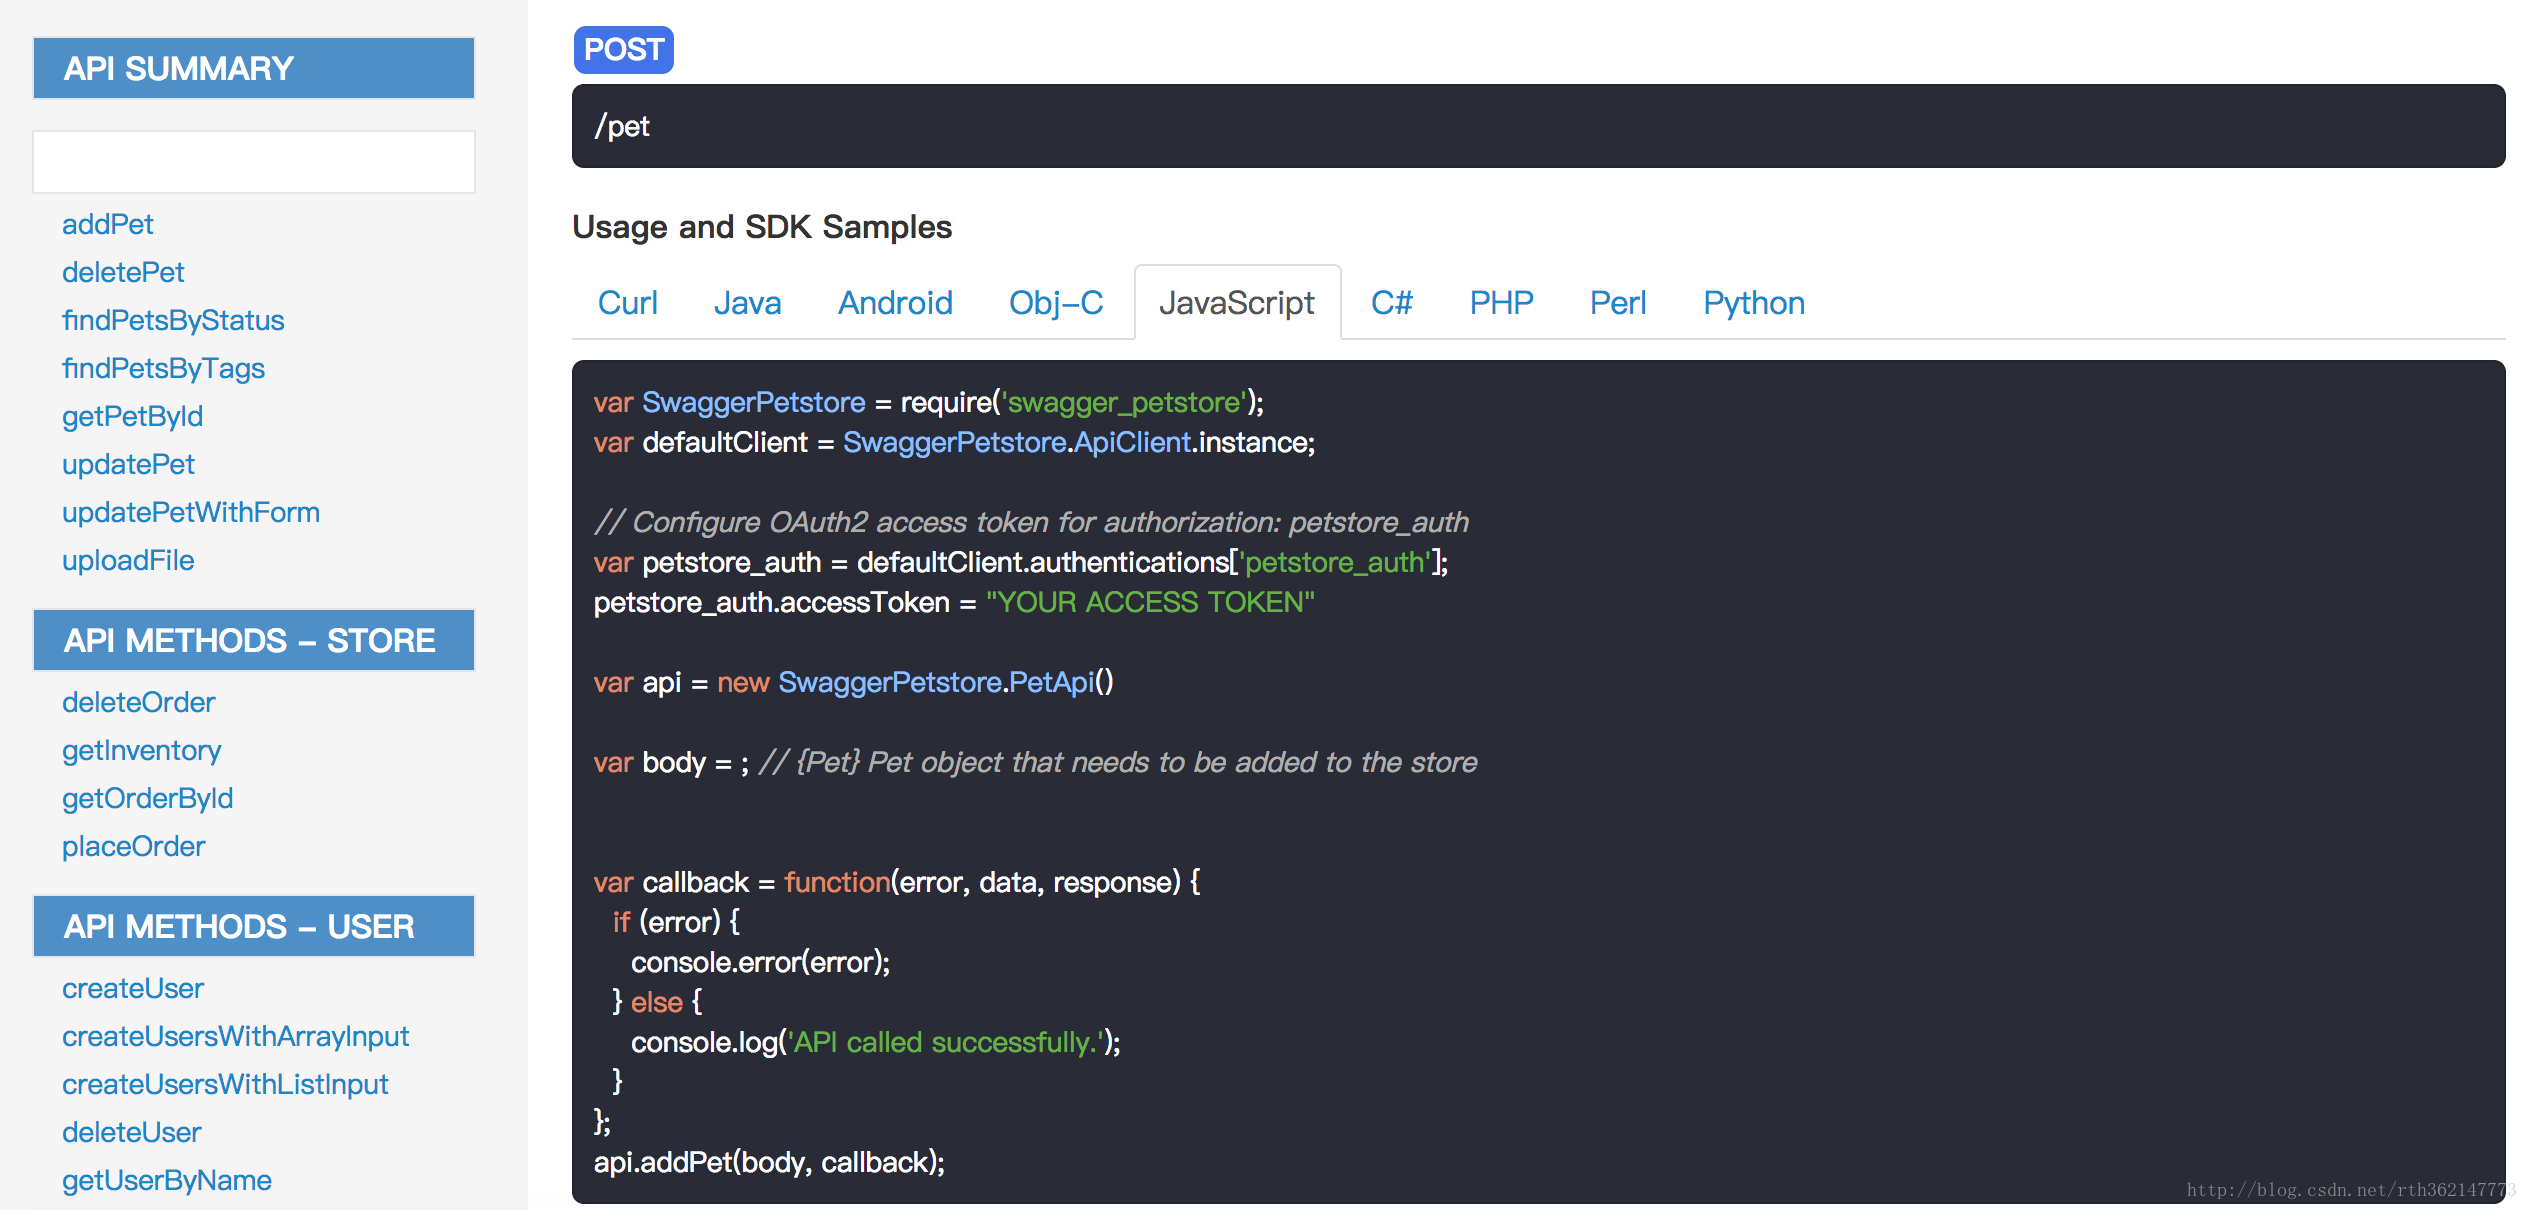
编写完文档点击展示区的excute,进行测试接口。如下图

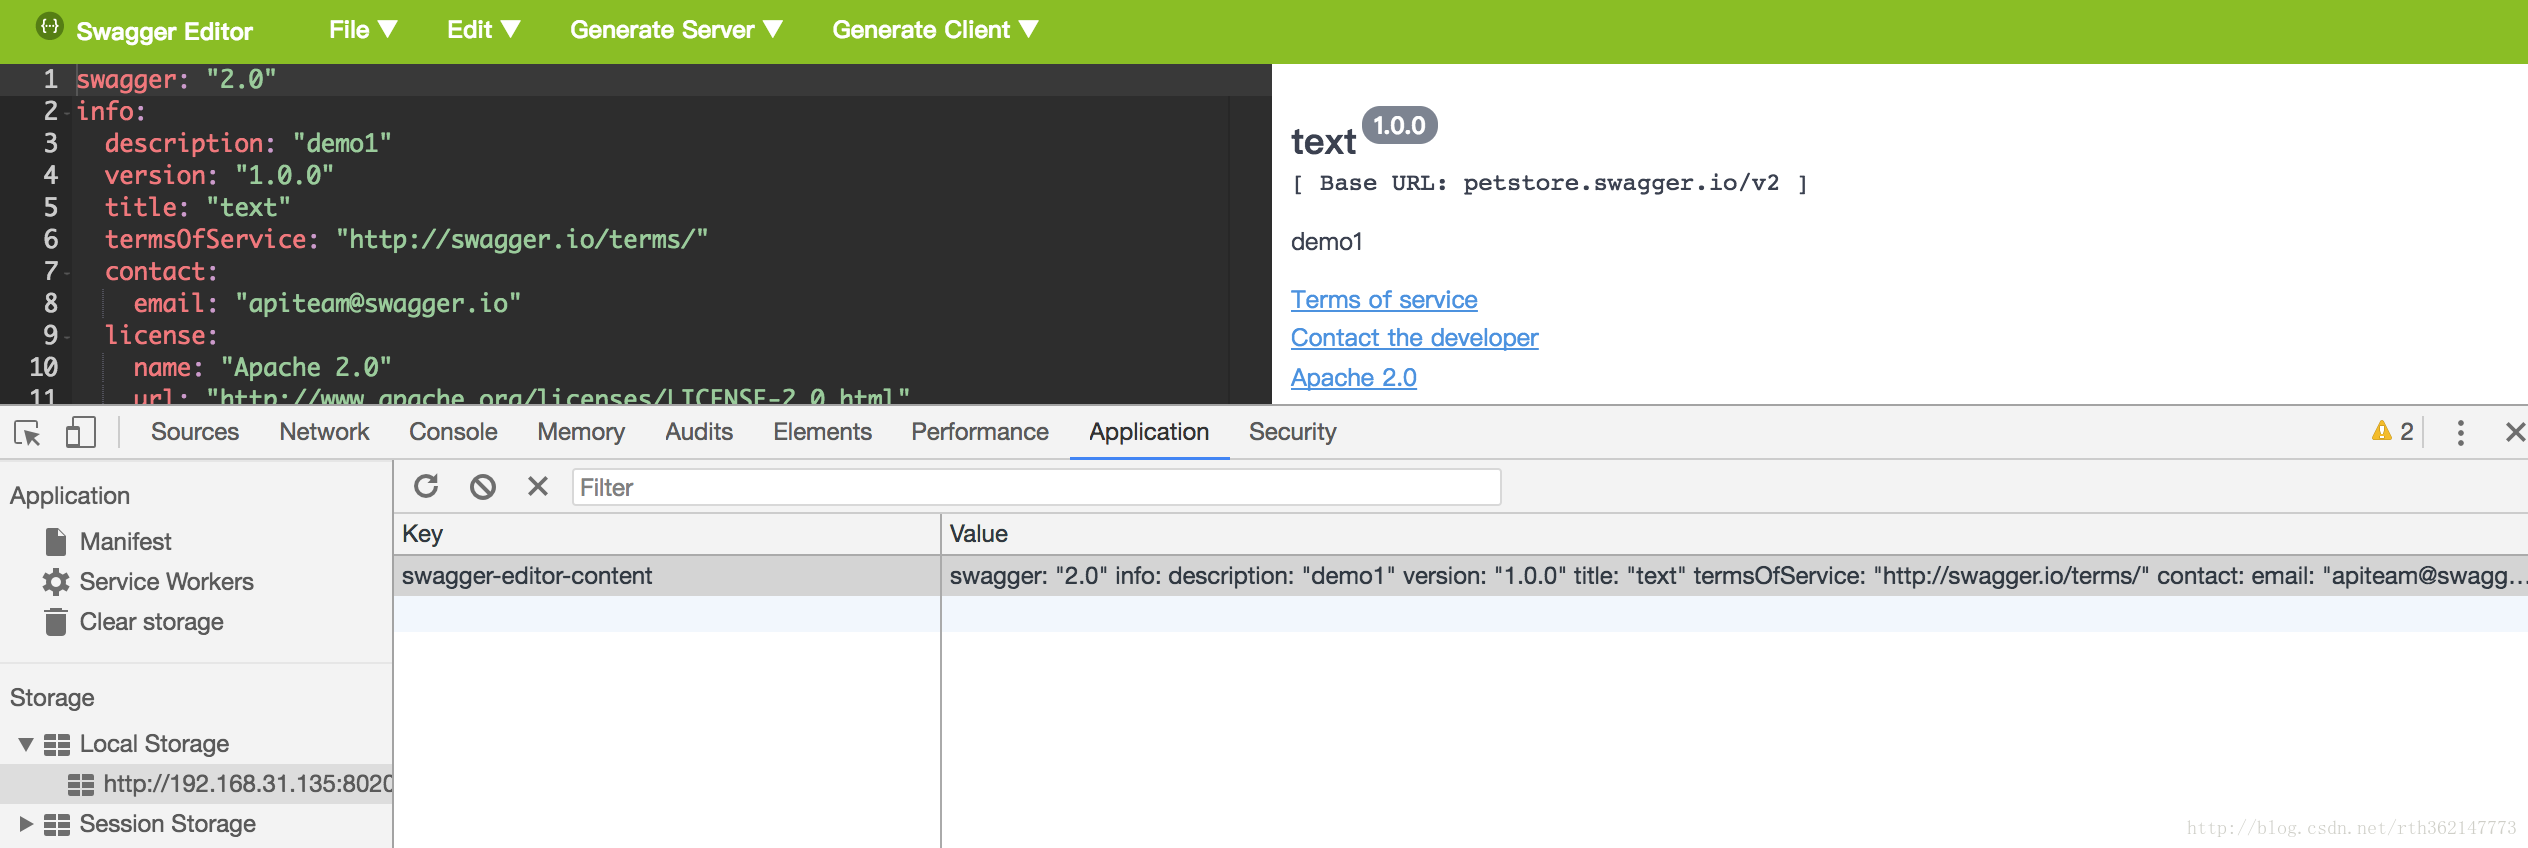
ps:Swagger Edit修改会后会立即把数据保存到浏览器Local Storage里面,所以不用担心关闭浏览器就会把数据丢失。只要不清缓存,不重装浏览器,这数据会一直存在。
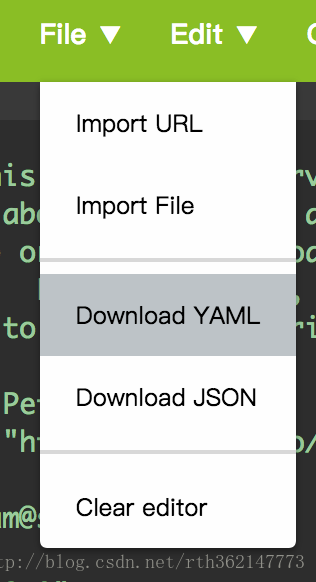
File
这个用来导出/引入接口文件在swagger edit里面进行编辑,也可以输出YAML/JSON格式。这个如果你是非在线版,编辑一半想下次在编辑,建议先导出备份,避免数据丢失。
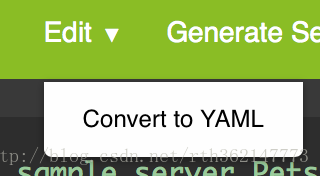
convert to YAML
把编辑区转换成YAML格式。
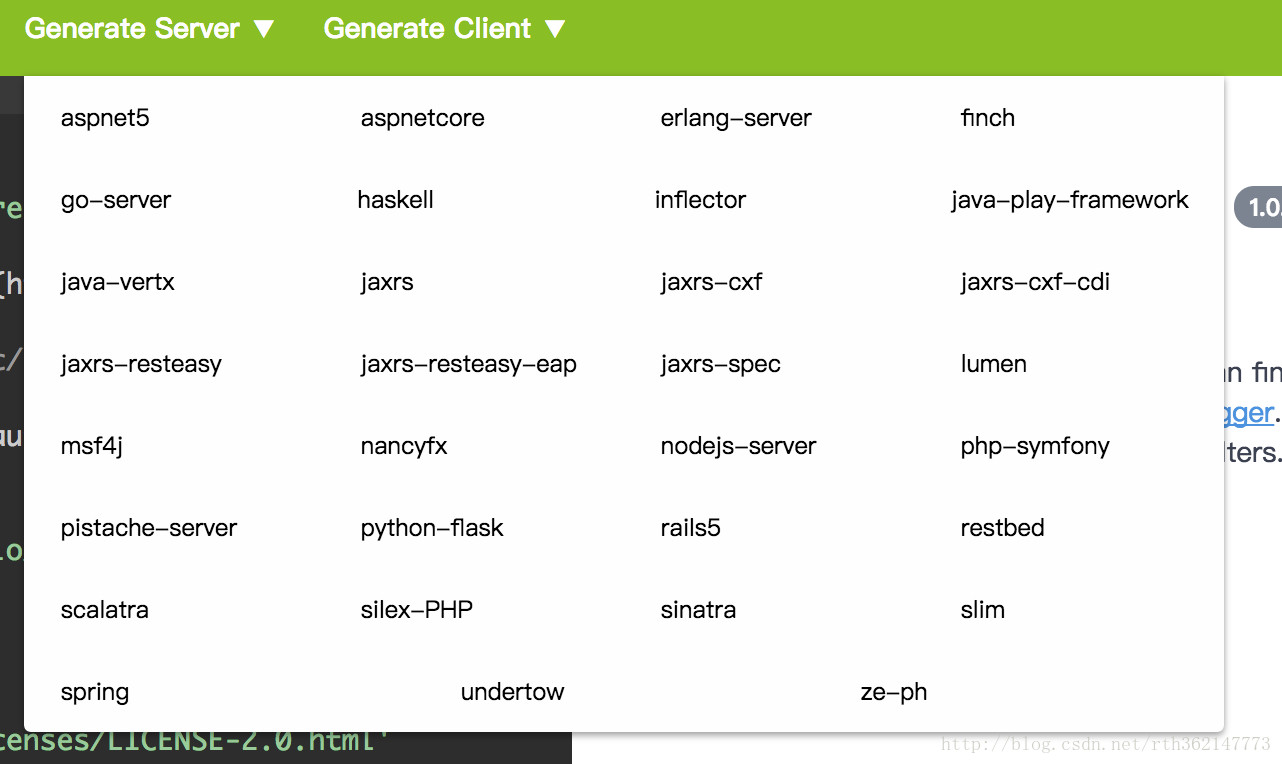
Generate Server
把接口文档生成服务器文件,导出一个压缩包,接口文档生成java、js等服务器文件。很实用工具,让你写少很多代码。
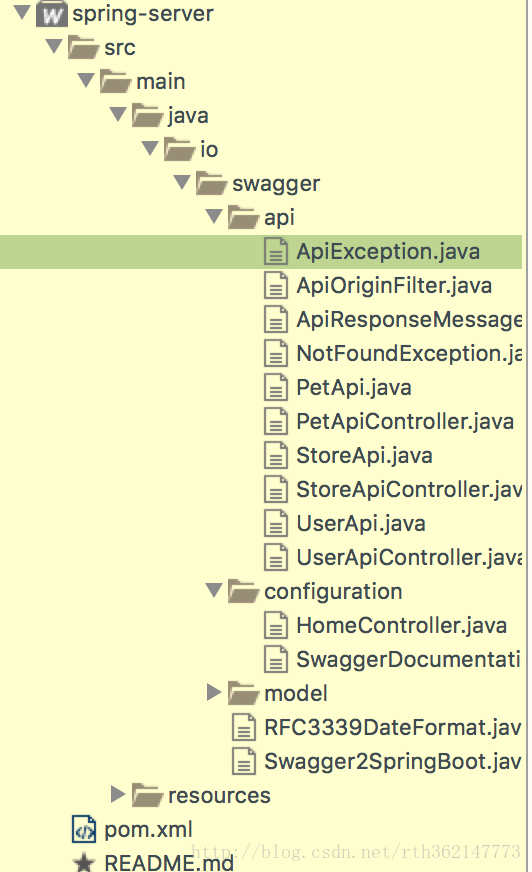
导出spring-boot
导出nodeJS

Generate Client
生成查看接口文档。编写好下一步就是展示。这里可以选择导出什么格式的接口文档。
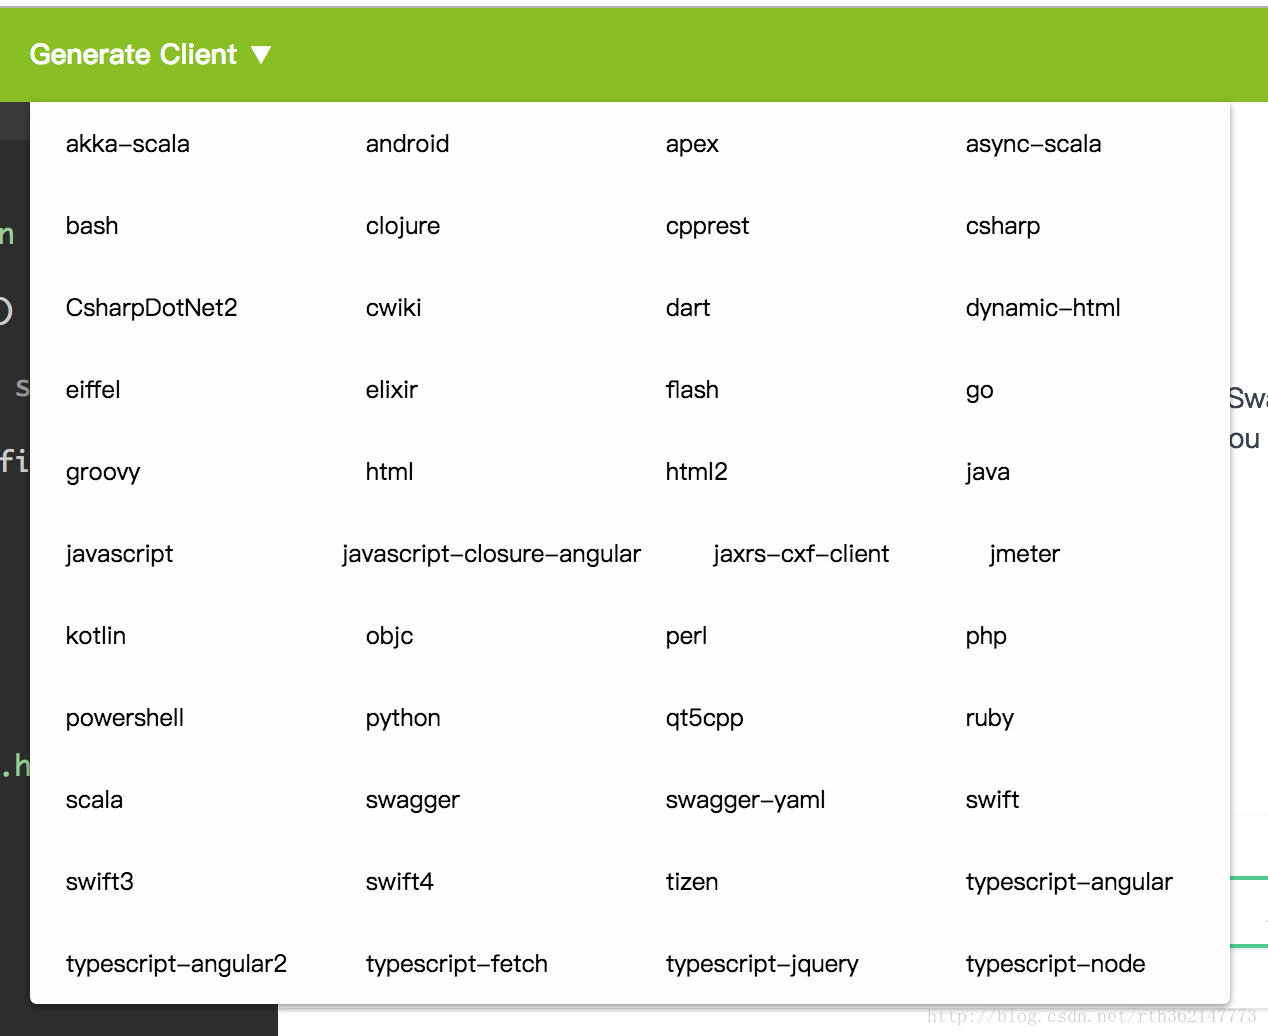
导出html
文档编写语法
文档是YAML语法来编辑,这里不解说。这里提供各字段的中文解释,大家应该看的懂。对语法不懂,请查看YAML语法 阮一峰
swagger: '2.0'                      # swagger的版本
info:
  title: 文档标题
  description:  描述
version: "v1.0" # 版本号 termsOfService: "" # 文档支持截止日期 contact: # 联系人的信息 name: "" # 联系人姓名 url: "" # 联系人URL email: "" # 联系人邮箱 license: # 授权信息 name: "" # 授权名称,例如Apache 2.0 url: "" # 授权URL host: api.haofly.net # 域名,可以包含端口,如果不提供host,那么默认为提供yaml文件的host basePath: / # 前缀,比如/v1 schemes: # 传输协议 - http - https securityDefinitions: # 安全设置 api_key: type: apiKey name: Authorization # 实际的变量名比如,Authorization in: header # 认证变量放在哪里,query或者header OauthSecurity: # oauth2的话有些参数必须写全 type: oauth2 flow: accessCode # 可选值为implicit/password/application/accessCode authorizationUrl: 'https://oauth.simple.api/authorization' tokenUrl: 'https://oauth.simple.api/token' scopes: admin: Admin scope user: User scope media: Media scope auth: type: oauth2 description: "" # 描述 authorizationUrl: http://haofly.net/api/oauth/ name: Authorization # 实际的变量名比如,Authorization tokenUrl: flow: implicit # oauth2认证的几种形式,implicit/password/application/accessCode scopes: write:post: 修改文件 read:post: 读取文章 security: # 全局的安全设置的一个选择吧 auth: - write:pets - read:pets consumes: # 接收的MIME types列表 - application/json # 接收响应的Content-Type - application/vnd.github.v3+json produces: # 请求的MIME types列表 - application/vnd.knight.v1+json # 请求头的Accept值 - text/plain; charset=utf-8 tags: # 相当于一个分类 - name: post description: 关于post的接口 externalDocs: description: find more info here url: https://haofly.net paths: # 定义接口的url的详细信息 /projects/{projectName}: # 接口后缀,可以定义参数 get: tags: # 所属分类的列表 - post summary: 接口描述 # 简介 description: # 详细介绍 externalDocs: # 这里也可以加这个 description: url: operationId: "" # 操作的唯一ID consumes: [string] # 可接收的mime type列表 produces: [string] # 可发送的mime type列表 schemes: [string] # 可接收的协议列表 deprecated: false # 该接口是否已经弃用 security: # OAuth2认证用 - auth: - write:post - read: read parameters: # 接口的参数 - name: projectName # 参数名 in: path # 该参数应该在哪个地方,例如path、body、query等,但是需要注意的是如果in body,只能用schema来指向一个定义好的object,而不能直接在这里定义 type: string # 参数类型 allowEmptyValue: boolean # 是否允许为空值 description: 项目名 # 参数描述 required: true # 是否必须 default: * # 设置默认值 maximum: number # number的最大值 exclusiveMaximum: boolean # 是否排除最大的那个值 minimum: number # number的最小值 exclusiveMinimum: boolean maxLength: integer # int的最大值 minLength: integer enum: [*] # 枚举值 items: # type为数组的时候可以定义其项目的类型 - $ref: "#/parameters/uuidParam" # 这样可以直接用定义好的 responses: # 设置响应 200: # 通过http状态来描述响应 description: Success # 该响应的描述 schema: # 定义返回数据的结构 $ref: '#/definitions/ProjectDataResponse' # 直接关联至某个model /another: # 另一个接口 responses: 200: description: schema: type: object properitis: data: $ref: '#/definitions/User' # 关联 definitions: # Model/Response的定义,这里的定义不强制要求返回数据必须和这个一致,但是在swagger-ui上,会展示这里面的字段。 Product: # 定义一个model type: object # model类型 properties: # 字段列表 product_id: # 字段名 type: integer # 字段类型 description: # 字段描述 product_name: type: string description: ProjectDataResponse: type: object properties: data: $ref: '#/definitions/ProjectResponse' # model之间的关联,表示在data字段里面包含的是一个ProjectResponse对象 parameters: # 可以供很多接口使用的params limitParam: name: limit in: query description: max records to return required: true type: integer format: int32 responses: # 可以供很多接口使用的responses NotFound: description: Entity not found.- 1
- 2
- 3
- 4
- 5
- 6
- 7
- 8
- 9
- 10
- 11
- 12
- 13
- 14
- 15
- 16
- 17
- 18
- 19
- 20
- 21
- 22
- 23
- 24
- 25
- 26
- 27
- 28
- 29
- 30
- 31
- 32
- 33
- 34
- 35
- 36
- 37
- 38
- 39
- 40
- 41
- 42
- 43
- 44
- 45
- 46
- 47
- 48
- 49
- 50
- 51
- 52
- 53
- 54
- 55
- 56
- 57
- 58
- 59
- 60
- 61
- 62
- 63
- 64
- 65
- 66
- 67
- 68
- 69
- 70
- 71
- 72
- 73
- 74
- 75
- 76
- 77
- 78
- 79
- 80
- 81
- 82
- 83
- 84
- 85
- 86
- 87
- 88
- 89
- 90
- 91
- 92
- 93
- 94
- 95
- 96
- 97
- 98
- 99
- 100
- 101
- 102
- 103
- 104
- 105
- 106
- 107
- 108
- 109
- 110
- 111
- 112
- 113
- 114
- 115
- 116
- 117
- 118
- 119
- 120
- 121
- 122
- 123
- 124
- 125
- 126
- 127
- 128
- 129
- 130
- 131
- 132
- 133
- 134
- 135
- 136
- 137
- 138
- 139
- 140
- 141
- 142
参考
Swagger官网:http://swagger.io/
Swagger Github:https://github.com/swagger-api
Swagger Editor在线demo:http://editor.swagger.io/#/
Swagger UI在线demo:http://petstore.swagger.io/