一、Redis简介
Redis是一个开源的使用ANSI C语言编写、支持网络、可基于内存亦可持久化的日志型、Key-Value数据库,并提供多种语言的API。从2010年3月15日起,Redis的开发工作由VMware主持。从2013年5月开始,Redis的开发由Pivotal赞助。
Redis是一个key-value存储系统。和Memcached类似,它支持存储的value类型相对更多,包括string(字符串)、list(链表、set(集合)、zset(sorted set –有序集合)和hash(哈希类型)。这些数据类型都支持push/pop、add/remove及取交集并集和差集及更丰富的操作,而且这些操作都是原子性的。在此基础上,redis支持各种不同方式的排序。与memcached一样,为了保证效率,数据都是缓存在内存中。区别的是redis会周期性的把更新的数据写入磁盘或者把修改操作写入追加的记录文件,并且在此基础上实现了master-slave(主从)同步。
Redis支持主从同步。数据可以从主服务器向任意数量的从服务器上同步,从服务器可以是关联其他从服务器的主服务器。这使得Redis可执行单层树复制。存盘可以有意无意的对数据进行写操作。由于完全实现了发布/订阅机制,使得从数据库在任何地方同步树时,可订阅一个频道并接收主服务器完整的消息发布记录。同步对读取操作的可扩展性和数据冗余很有帮助。
二、Redis五种数据类型
- string 字符类型
- hash 散列类型
- list 列表类型
- set 集合类型
- zset(sorted set) 有序集合类型
三、Redis单机版安装
下载Redis
官网:https://redis.io/ redis-4.0.10.tar.gz
安装步骤
安装gcc编译环境
yum install gcc-c++把redis的源码上传到linux服务器
解压缩
tar -zxvf redis-4.0.10.tar.gz编译安装
make
make install PREFIX=/usr/local/redis
启动Redis
两种启动方式:前端启动、后台启动。
前端启动:./redis-server
后台启动:
复制redis.conf到redis的安装目录
cp redis-4.0.10/redis.conf -c /usr/local/redis/bin/修改redis.conf,修改daemonize yes
./redis-server redis.conf

查看启动结果:
ps aux|grep redis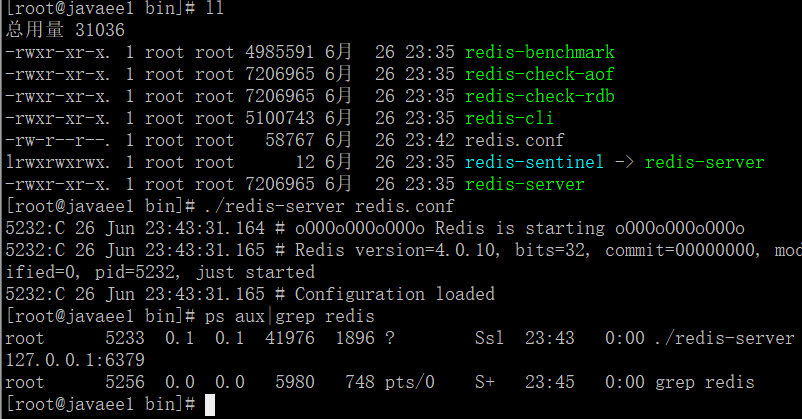
关闭Redis
./redis-cli -a password -h 192.168.1.20 -p 6379 shutdown
ps aux|grep redis
四、客户端连接Redis
redis-cli
命令格式:redis-cli -p 端口 -h IP地址 <-c>连接集群时使用此参数
默认端口:6379
默认IP:localhost(127.0.0.1)

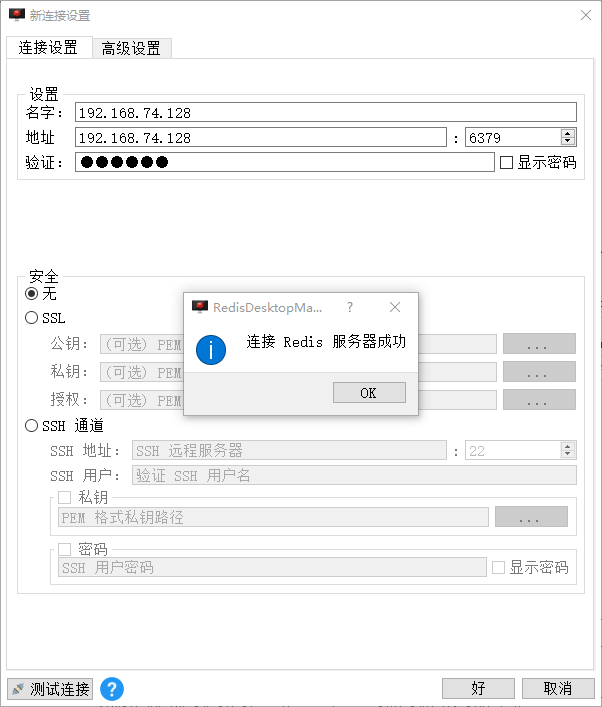
RedisDesktopManager
下载安装:https://redisdesktop.com/download
设置防火墙:
/sbin/iptables -I INPUT -p tcp --dport 6379 -j ACCEPT
/etc/rc.d/init.d/iptables save修改redis.conf配置文件:注释掉本地链接限制和设置密码取消redis的默认保护模式


重启redis服务,客户端连接测试:
五、搭建Redis集群
redis-cluster架构图
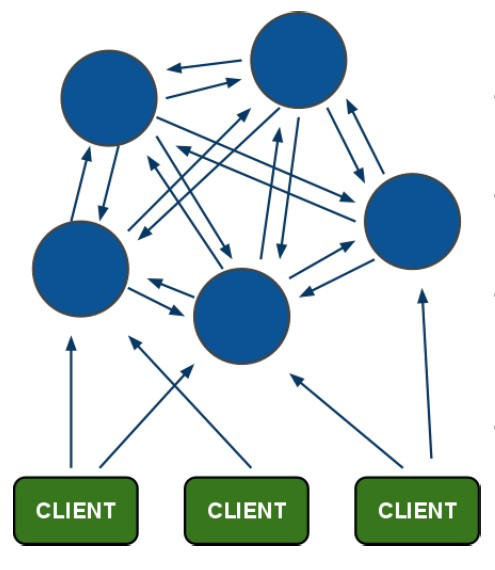
架构细节
- 所有的redis节点彼此互联(PING-PONG机制),内部使用二进制协议优化传输速度和带宽.。
- 节点的fail是通过集群中超过半数的节点检测失效时才生效。
- 客户端与redis节点直连,不需要中间proxy层。客户端不需要连接集群所有节点,连接集群中任何一个可用节点即可。
- redis-cluster把所有的物理节点映射到[0-16383]slot上,cluster 负责维护node<->slot<->value。Redis 集群中内置了 16384 个哈希槽,当需要在 Redis 集群中放置一个 key-value 时,redis 先对 key 使用 crc16 算法算出一个结果,然后把结果对 16384 求余数,这样每个 key 都会对应一个编号在 0-16383 之间的哈希槽,redis 会根据节点数量大致均等的将哈希槽映射到不同的节点。
搭建步骤
伪分布式集群配置:集群中应该至少有3个节点,每个节点有1个备份节点,需要6台服务器(6个Redis实例)。
复制6份编译安装好的单机版Redis实例,分别为redis01-06;
删除每个实例的dump.rdb文件,修改配置文件redis.conf的端口号7001-7006以及开放集群配置;
拷贝Redis源码包src下用于搭建集群的ruby脚本:redis-trib.rb;
cp /root/redis-4.0.10/src/redis-trib.rb -c ./安装ruby环境;
# 下载Ruby源码包

wget --no-check-certificate https://cache.ruby-lang.org/pub/ruby/2.3/ruby-2.3.0.tar.gz

# 解压安装

tar -zxvf ruby-2.3.0.tar.gz
./configure
make
make install

# 查看Ruby版本

ruby -v


# 安装redis-trib.rb运行依赖的ruby的包

gem install redis
启动所有Redis实例;
cd redis01/bin/
./redis-server redis.conf
cd ../../
cd redis02/bin/
./redis-server redis.conf
cd ../../
cd redis03/bin/
./redis-server redis.conf
cd ../../
cd redis04/bin/
./redis-server redis.conf
cd ../../
cd redis05/bin/
./redis-server redis.conf
cd ../../
cd redis06/bin/
./redis-server redis.conf
cd ../../
使用redis-trib.rb脚本创建Redis集群(防火墙开启7001-7006)。
service iptables stop  # 临时关闭防火墙

./redis-trib.rb create --replicas 1 192.168.74.128:7001 192.168.74.128:7002 192.168.74.128:7003 192.168.74.128:7004 192.168.74.128:7005  192.168.74.128:7006
如果出现Sorry, can’t connect to node,需要修改redis-trib.rb脚本,添加连接密码。
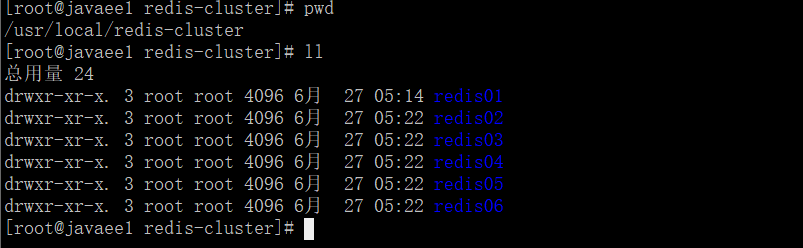


搭建结果

五、Jedis客户端
单机版测试
需要添加jedis依赖的jar包。
/**
  * 单机版测试
  */
@Test
public void testJedis() {
    // 创建一个Jedis对象
    Jedis jedis = new Jedis("192.168.74.128", 6379);
    // 设置连接密码
    jedis.auth("123456");
    jedis.set("single", "hello single redis");
    String str = jedis.get("single");
    System.out.println(str);

    jedis.close();
}
结果:

生产环境一般使用连接池的方式对Redis连接进行管理,所有Jedis对象先放在池子中每一次需要的时候连接Redis,只需要在池子中借,用完了再归还给池子。
| 优点 | 缺点 | |
|---|---|---|
| 直连 | 简单方便,适用于少量长期连接的场景 | 1. 存在每次新建/关闭TCP连接开销 2. 资源无法控制,极端情况下会出现连接泄露 3. Jedis对象线程不安全 |
| 连接池 | 1. 无需每次连接都生成Jedis对象,降低开销 2、使用连接池的形式保护和控制资源的使用 |
相对于直连,使用相对麻烦,尤其在资源管理上需要很多参数来保证,一旦规划不合理也会出现问题。 |
使用连接池:
/**
  * 使用连接池
  */
@Test
public void testJedisPool() {
    // 创建一个连接池对象 (系统中应该是单例的)
    JedisPool jedisPool = new JedisPool("192.168.74.128", 6379);
    Jedis jedis = jedisPool.getResource();
    jedis.auth("123456");
    String str = jedis.get("single");
    System.out.println(str);
    // jedis必须关闭
    jedis.close();

    // 系统关闭时关闭连接池
    jedisPool.close();
}
集群版测试
redis集群在jedis2.9.0版后添加了JedisCluster配置集群密码的功能,所以添加Jedis的jar包最好是2.9版本以上。
/**
  * 连接redis集群
  */
@Test
public void testJedisCluster() throws IOException {
    // 创建节点集合
    Set<HostAndPort> nodes = new HashSet<>();
    nodes.add(new HostAndPort("192.168.74.128", 7001));
    nodes.add(new HostAndPort("192.168.74.128", 7002));
    nodes.add(new HostAndPort("192.168.74.128", 7003));
    nodes.add(new HostAndPort("192.168.74.128", 7004));
    nodes.add(new HostAndPort("192.168.74.128", 7005));
    nodes.add(new HostAndPort("192.168.74.128", 7006));

    // 创建一个JedisCluster对象,在系统中是单例的。
    JedisCluster jedisCluster = new JedisCluster(nodes, 2000, 2000, 5,
                                                 "123456", new GenericObjectPoolConfig());
    jedisCluster.set("cluster", "hello cluster redis");
    String str = jedisCluster.get("cluster");
    System.out.println(str);

    // 系统关闭时关闭jedisCluster
    jedisCluster.close();
}
结果:

六、Spring配置Redis
Spring使用单机版和集群版Redis方式不一致,我们可以使用面向接口编程的思想实现两者的无缝切换:定义一个Redis操作接口,分别实现单机版和集群版的实现类。当使用单机版redis时,配置单机版的实现类,当使用集群版本的时候,配置集群版的实现类。
接口类
public interface JedisClient {
    String set(String key, String value);
    String get(String key);
    Long hset(String key, String item, String value);
    String hget(String key, String item);
    Long incr(String key);
    Long decr(String key);
    Long expire(String key, int second);
    Long ttl(String key);
}
单机版实现类
import guo.ping.taotao.rest.component.JedisClient;
import org.springframework.beans.factory.annotation.Autowired;
import redis.clients.jedis.Jedis;
import redis.clients.jedis.JedisPool;

/**
 * redis客户端单机版实现类
 */
public class JedisClientSingle implements JedisClient {

    @Autowired
    private JedisPool jedisPool;

    @Value("${REDIS_PASSWORD}")
    private String REDIS_PASSWORD;

    private Jedis getJedisResource(JedisPool jedisPool) {
        Jedis jedis = jedisPool.getResource();
        jedis.auth(REDIS_PASSWORD);
        return jedis;
    }

    @Override
    public String set(String key, String value) {
        Jedis jedis = getJedisResource(jedisPool);
        String result = jedis.set(key, value);
        jedis.close();
        return result;
    }

    @Override
    public String get(String key) {
        Jedis jedis = getJedisResource(jedisPool);
        String result = jedis.get(key);
        jedis.close();
        return result;
    }

    @Override
    public Long hset(String key, String item, String value) {
        Jedis jedis = getJedisResource(jedisPool);
        Long result = jedis.hset(key, item, value);
        jedis.close();
        return result;
    }

    @Override
    public String hget(String key, String item) {
        Jedis jedis = getJedisResource(jedisPool);
        String result = jedis.hget(key, item);
        jedis.close();
        return result;
    }

    @Override
    public Long incr(String key) {
        Jedis jedis = getJedisResource(jedisPool);
        Long result = jedis.incr(key);
        jedis.close();
        return result;
    }

    @Override
    public Long decr(String key) {
        Jedis jedis = getJedisResource(jedisPool);
        Long result = jedis.decr(key);
        jedis.close();
        return result;
    }

    @Override
    public Long expire(String key, int second) {
        Jedis jedis = getJedisResource(jedisPool);
        Long result = jedis.expire(key, second);
        jedis.close();
        return result;
    }

    @Override
    public Long ttl(String key) {
        Jedis jedis = getJedisResource(jedisPool);
        Long result = jedis.ttl(key);
        jedis.close();
        return result;
    }
}
集群版实现类
import guo.ping.taotao.rest.component.JedisClient;
import org.springframework.beans.factory.annotation.Autowired;
import redis.clients.jedis.JedisCluster;

/**
 * redis客户端集群版实现类
 */
public class JedisClientCluster implements JedisClient {

    @Autowired
    private JedisCluster jedisCluster;

    @Override
    public String set(String key, String value) {
        return jedisCluster.set(key, value);
    }

    @Override
    public String get(String key) {
        return jedisCluster.get(key);
    }

    @Override
    public Long hset(String key, String item, String value) {
        return jedisCluster.hset(key, item, value);
    }

    @Override
    public String hget(String key, String item) {
        return jedisCluster.hget(key, item);
    }

    @Override
    public Long incr(String key) {
        return jedisCluster.incr(key);
    }

    @Override
    public Long decr(String key) {
        return jedisCluster.decr(key);
    }

    @Override
    public Long expire(String key, int second) {
        return jedisCluster.expire(key, second);
    }

    @Override
    public Long ttl(String key) {
        return jedisCluster.ttl(key);
    }
}
Spirng配置Redis
redis的相关属性设置:
# redis_password
REDIS_PASSWORD=123456
# redis_connection_timeout
REDIS_CONNECTION_TIMEOUT=2000
# redis_so_timeout
REDIS_SO_TIMEOUT=2000
# redis_attempts
REDIS_ATTEMPTS=5
# redis_nodes
REDIS_HOST1=192.168.74.128
REDIS_HOST2=192.168.74.128
REDIS_HOST3=192.168.74.128
REDIS_HOST4=192.168.74.128
REDIS_HOST5=192.168.74.128
REDIS_HOST6=192.168.74.128
REDIS_PORT1=7001
REDIS_PORT2=7002
REDIS_PORT3=7003
REDIS_PORT4=7004
REDIS_PORT5=7005
REDIS_PORT6=7006
单机版配置:
<!--配置单击版Redis-->
<bean id="jedisPool" class="redis.clients.jedis.JedisPool">
    <constructor-arg name="host" value="192.168.74.128" />
    <constructor-arg name="port" value="6379" />
</bean>
<bean id="jedisClientSingle" class="guo.ping.taotao.rest.component.impl.JedisClientSingle" />
<!-- end -->
集群版配置(含密码):
<!--配置集群版Redis-->
<!--redisPool配置 -->
<bean id="jedisPoolConfig" class="redis.clients.jedis.JedisPoolConfig">
<!--最大连接数 -->
<property name="maxTotal" value="30"/>
<!--最大空闲连接数 -->
<property name="maxIdle" value="10"/>
<!--每次释放连接的最大数目 -->
<property name="numTestsPerEvictionRun" value="1024"/>
<!--释放连接的扫描间隔(单位:毫秒) -->
<property name="timeBetweenEvictionRunsMillis" value="30000"/>
<!--连接最小空闲时间(单位:毫秒) -->
<property name="minEvictableIdleTimeMillis" value="100000"/>
<!--连接空闲多久后释放,当空闲时间大于该值并且空闲连接大于最大空闲连接时直接释放连接 -->
<property name="softMinEvictableIdleTimeMillis" value="10000"/>
<!--获取连接时最大等待毫秒数,如果该值小于0,则阻塞不确定的时长,默认值-1 -->
<property name="maxWaitMillis" value="1500"/>
<!--在获取连接时检查连接有效性,默认为false -->
<property name="testOnBorrow" value="false"/>
<!--在连接空闲时检查连接有效性,默认为false -->
<property name="testWhileIdle" value="true"/>
<!--连接耗尽是否阻塞,false代表抛异常,true代表阻塞直到超时,默认为true -->
<property name="blockWhenExhausted" value="false"/>
</bean>
<bean id="jedisCluster" class="redis.clients.jedis.JedisCluster">
<constructor-arg>
<set>
<bean class="redis.clients.jedis.HostAndPort">
<constructor-arg name="host" value="${REDIS_HOST1}"/>
<constructor-arg name="port" value="${REDIS_PORT1}"/>
</bean>
<bean class="redis.clients.jedis.HostAndPort">
<constructor-arg name="host" value="${REDIS_HOST2}"/>
<constructor-arg name="port" value="${REDIS_PORT2}"/>
</bean>
<bean class="redis.clients.jedis.HostAndPort">
<constructor-arg name="host" value="${REDIS_HOST3}"/>
<constructor-arg name="port" value="${REDIS_PORT3}"/>
</bean>
<bean class="redis.clients.jedis.HostAndPort">
<constructor-arg name="host" value="${REDIS_HOST4}"/>
<constructor-arg name="port" value="${REDIS_PORT4}"/>
</bean>
<bean class="redis.clients.jedis.HostAndPort">
<constructor-arg name="host" value="${REDIS_HOST5}"/>
<constructor-arg name="port" value="${REDIS_PORT5}"/>
</bean>
<bean class="redis.clients.jedis.HostAndPort">
<constructor-arg name="host" value="${REDIS_HOST6}"/>
<constructor-arg name="port" value="${REDIS_PORT6}"/>
</bean>
</set>
</constructor-arg>
<!--设置连接超时时间 -->
<constructor-arg name="connectionTimeout" value="${REDIS_CONNECTION_TIMEOUT}"/>
<!--设置网络通信超时时间 -->
<constructor-arg name="soTimeout" value="${REDIS_SO_TIMEOUT}"/>
<!--设置集群访问密码 -->
<constructor-arg name="password" value="${REDIS_PASSWORD}"/>
<!--设置最大重试次数 -->
<constructor-arg name="maxAttempts" value="${REDIS_ATTEMPTS}"/>
<!--设置jedisPool配置 -->
<constructor-arg name="poolConfig" ref="jedisPoolConfig"/>
</bean>
<bean id="jedisClientCluster" class="guo.ping.taotao.rest.component.impl.JedisClientCluster"/>
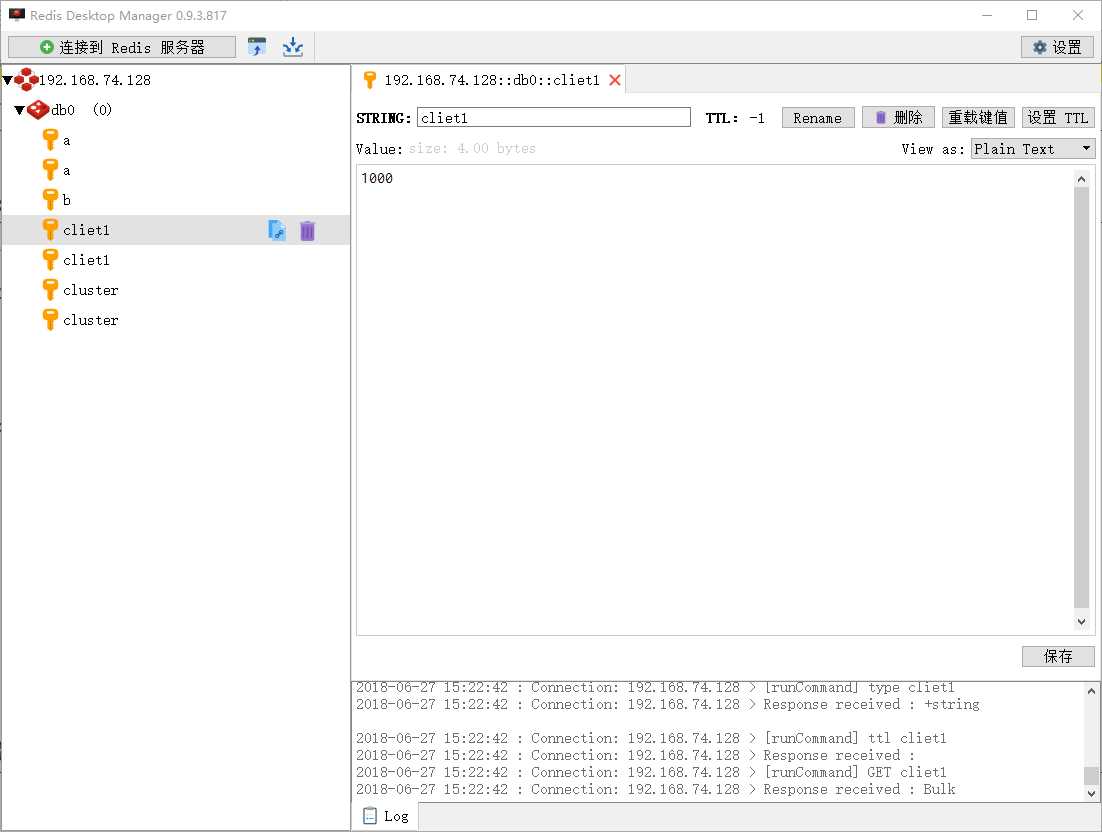
<!-- end -->测试
/**
  * 测试spring配置
  * @throws Exception
  */
@Test
public void testJedisClientSpring() throws Exception {
    //创建一个spring容器
    ApplicationContext applicationContext = new ClassPathXmlApplicationContext("classpath:spring/applicationContext-*.xml");
    //从容器中获得JedisClient对象
    JedisClient jedisClient = applicationContext.getBean(JedisClient.class);
    //jedisClient操作redis
    jedisClient.set("cliet1", "1000");
    String string = jedisClient.get("cliet1");
    System.out.println(string);
}
七、实际项目之添加缓存
平时我们使用的关系型数据库数据全部存储在我们部署数据库的机器的硬盘中,通常通过数据驱动来链接数据库进行增删改查。服务器的读写效率是网站运行速度的重要条件,服务器处理数据的速度与网站速度息息相关,而数据查询、数据处理等和数据库处理速度有关。
其实,sql语句优化可以提高处理效率。但是如果网站的访问量非常大的时候,我们的数据库压力就变大了。数据库的连接池、处理数据的能力就会面临很大的挑战。此时就要使用高并发处理、负载均衡和分布式数据库。但是这些会花费很大的人力、资金。
缓存就是在内存中对存储的数据备份,当数据没有发生本质变化的时候,我们避免数据的查询操作直接连接数据库,而是去内存中读取数据,这样就大大降低了数据库的读写次数,而且从内存中读数据的速度要比从数据库查询要快很多。
案例
Service层通过Dao方法查询数据库获得数据:
@Service
public class ContentServiceImpl implements ContentService {

    @Autowired
    private TbContentMapper tbContentMapper;

    @Override
    public List<TbContent> getContentList(Long cid) {
        return tbContentMapper.getContentListByCategoryId(cid);
    }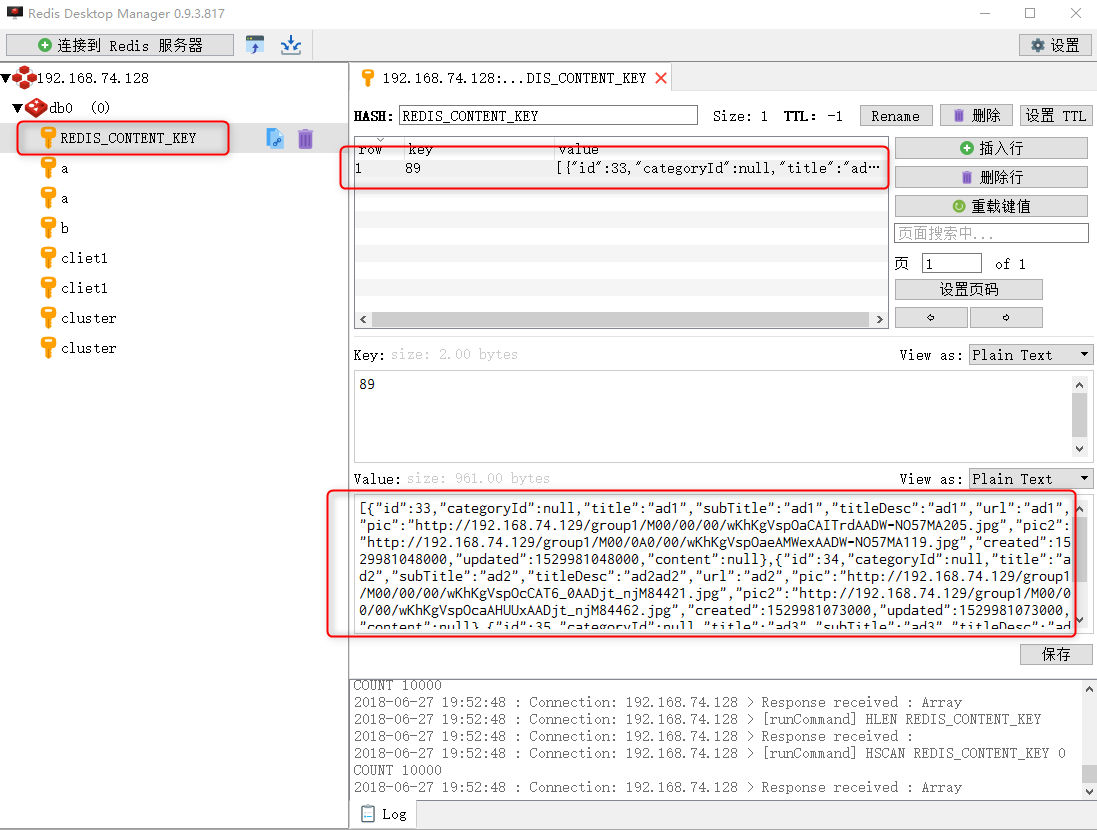
}添加缓存:需要先查询redis是否已经缓存数据,若有则直接返回数据,没有则需要访问数据库获取数据并写入Redis中。注意添加缓存时不要影响正常的业务逻辑。
@Service
public class ContentServiceImpl implements ContentService {

    @Autowired
    private TbContentMapper tbContentMapper;
    @Autowired
    private JedisClient jedisClient;
    @Value("${REDIS_CONTENT_KEY}")
    private String REDIS_CONTENT_KEY;

    @Override
    public List<TbContent> getContentList(Long cid) {
        // 添加缓存
        // 查询数据库之前先查询缓存,如果有直接返回
        try {
            //从redis中取缓存数据
            String json = jedisClient.hget(REDIS_CONTENT_KEY, cid + "");
            if (!StringUtils.isBlank(json)) {
                return JsonUtils.jsonToList(json, TbContent.class);
            }
        } catch (Exception e) {
            e.printStackTrace();
        }

        List<TbContent> tbContentList = tbContentMapper.getContentListByCategoryId(cid);

        // 返回结果之前,向缓存中添加数据
        try {
            jedisClient.hset(REDIS_CONTENT_KEY, cid+"", JsonUtils.objectToJson(tbContentList));
        } catch (Exception e) {
            e.printStackTrace();
        }

        return tbContentList;
    }
}
结果
缓存同步
当后台(CMS内容管理系统)修改内容信息后,只需要把redis中缓存的数据删除即可(后台系统不直接操作redis数据库)。我们可以在发布一个服务,当CMS对数据库数据信息修改后,调用服务删除redis缓存即可。
发布Restful服务:
@ResponseBody
@RequestMapping("/sync/{cid}")
public TaotaoResult syncContent(@PathVariable Long cid) {
    try {
        return contentService.syncContent(cid);
    } catch (Exception e) {
        return TaotaoResult.build(500, ExceptionUtil.getStackTrace(e));
    }
}
CMS系统增删改数据时,需要调用http://localhost:8081/rest/content/sync/cid对应的服务来同步缓存:
@Controller
@RequestMapping("/content")
public class ContentController {

    @Autowired
    private ContentService contentService;
    private String REDIS_SYNC_BASE_URL = "http://localhost:8081/rest";
    private String REDIS_CONTENT_SYNC_URL = "content/sync/";

    // CMS系统新增内容
    @ResponseBody
    @RequestMapping("/save")
    public TaotaoResult insertContent(TbContent tbContent) {
        TaotaoResult result = contentService.insertContent(tbContent);
        // 调用服务
        HttpClientUtil.doGet(REDIS_SYNC_BASE_URL + REDIS_CONTENT_SYNC_URL + tbContent.getCategoryId());
        return result;
    }
}