问题:跑openpose代码的时候,出现问题
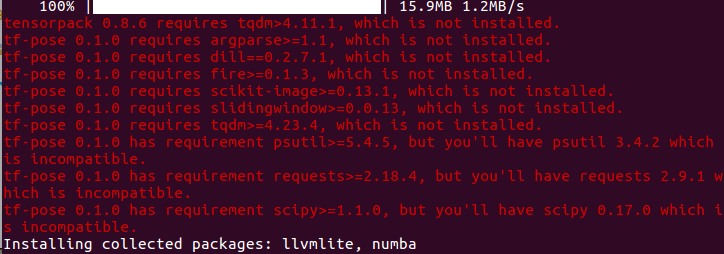
tensorpack 0.8.6 requires tqdm>4.11.1, which is not installed.
tf-pose 0.1.0 requires argparse>=1.1, which is not installed.
tf-pose 0.1.0 requires dill==0.2.7.1, which is not installed.
tf-pose 0.1.0 requires fire>=0.1.3, which is not installed.
tf-pose 0.1.0 requires scikit-image>=0.13.1, which is not installed.
tf-pose 0.1.0 requires slidingwindow>=0.0.13, which is not installed.
tf-pose 0.1.0 requires tqdm>=4.23.4, which is not installed.
tf-pose 0.1.0 has requirement psutil>=5.4.5, but you'll have psutil 3.4.2 which is incompatible.
tf-pose 0.1.0 has requirement requests>=2.18.4, but you'll have requests 2.9.1 which is incompatible.
tf-pose 0.1.0 has requirement scipy>=1.1.0, but you'll have scipy 0.17.0 which is incompatible.
解决方案:
1、删除不需要源文件和相关依赖
sudo pip uninstall tf-pose
针对不同的代码所需要的依赖环境不同配置虚拟环境
2、python配置虚拟环境
https://www.jb51.net/article/114933.htm
安装 virtualenv
pip install virtualenv
使用方法
cd my_project_folder
virtualenv venv
|
1
2
3
4
5
6
7
8
9
10
11
12
13
14
15
16
17
18
19
|
.
├── bin
│ ├── activate
│ ├── activate.csh
│ ├── activate.fish
│ ├── activate_this.py
│ ├── easy_install
│ ├── easy_install-3.5
│ ├── pip
│ ├── pip3
│ ├── pip3.5
│ ├── python -> python3
│ ├── python3
│ ├── python3.5 -> python3
│ └── wheel
├── include
│ └── python3.5m -> /Library/Frameworks/Python.framework/Versions/3.5/include/python3.5m
└── lib
└── python3.5
|
此外在创建env的时候可以选择指定的Python解释器,例如下面是基于Python3创建的虚拟环境
virtualenv -p /usr/local/bin/python3 venv
默认情况下,虚拟环境会依赖系统环境中的site packages,就是说系统中已经安装好的第三方package也会安装在虚拟环境中,如果不想依赖这些package,那么可以加上参数 --no-site-packages建立虚拟环境
virtualenv --no-site-packages [虚拟环境名称]
激活虚拟环境
cd env
source ./bin/activate
激活成功后,在命令行会显示虚拟环境的名称,类似((env)Your-Computer:your_project UserName$)
退出虚拟环境
deactivate
如果想删除虚拟环境,那么直接运行rm -rf venv/命令即可。
在虚拟环境安装Python packages
Virtualenv 附带有pip安装工具,因此需要安装的packages可以直接运行:
pip install [套件名称]
如果没有启动虚拟环境,系统环境也安装了pip工具,那么packages将被安装在系统环境中,为了避免发生此事,可以在~/.bashrc文件中加上:
export PIP_REQUIRE_VIRTUALENV=true
如果在没开启虚拟环境时运行pip,就会提示错误:
Could not find an activated virtualenv (required).
3、Virtualenvwrapper
Virtaulenvwrapper是virtualenv的扩展包,用于更方便管理虚拟环境,它可以做:
1. 将所有虚拟环境整合在一个目录下
2. 管理(新增,删除,复制)虚拟环境
3. 切换虚拟环境
4. ...
安装Virtualenvwrapper
安装Virtualenvwrapper前需要virtualenv已近安装
pip install virtualenvwrapper
此时还不能使用virtualenvwrapper,默认virtualenvwrapper安装在/usr/local/bin下面,实际上你需要运行virtualenvwrapper.sh文件才行,先别急,打开这个文件看看,里面有安装步骤,我们照着操作把环境设置好。
1、创建目录用来存放虚拟环境
mkdir $HOME/Envs
2、编辑~/.zshrc或~/.bashrc(根据你使用shell类型决定)
export WORKON_HOME=$HOME/Envs source /usr/local/bin/virtualenvwrapper.sh
3、运行:
source ~/.zshrc
此时virtualenvwrapper就可以使用了。virtualenvwrapper的基本使用方式:
1、列出虚拟环境列表
workon 或者 lsvirtualenv
新建虚拟环境
mkvirtualenv [虚拟环境名称]
2、启动/切换虚拟环境
workon [虚拟环境名称]
3、删除虚拟环境
rmvirtualenv [虚拟环境名称]
4、离开虚拟环境,和virutalenv一样的命令
deactivate