最近再看Spring Boot 就想做一个文件上传的url。 如图:
文件目录如下:
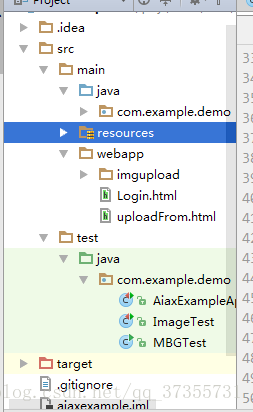
在这里 为什么不把文件上传到resources里,因为上传到这里 必须重新启项目,才能生效,所以 新建了webapp,像web应用一样,上传到这里。完美解决这个问题。
对啦,在这里提下springboot的跳转html文件的方式,我采用的是Thymeleaf,
点我,参考Thymeleaf
好了,不多说了,贴代码。
1)我才用maven建立的项目,所以先到导包pom.xml
 <!-- 添加thymeleaf -->
        <dependency>
         <groupId>org.springframework.boot</groupId>
         <artifactId>spring-boot-starter-thymeleaf</artifactId>
        </dependency>
2)UserController.java, 用于跳转uploadFrom.html.一定要注意不要加 @ResponseBody
@Controller
public class UserController extends BaseAppController{
    @Autowired
    public UserMapper userMapper;
    @RequestMapping("/user")
    public String user(){
        return "uploadFrom";
    }
}
3)此时跳转到 uploadFrom.html。注意的是,记得加:
<html xmlns:th="http://www.thymeleaf.org"><!DOCTYPE html>
<html xmlns:th="http://www.thymeleaf.org">
<head>
<meta charset="UTF-8"/>
<script type="text/javascript" src="http://tyit.qiniudn.com/ucp/js/jquery.min.js"></script>
<title>文件上传</title>
<script type="text/javascript">
function ksubmit(){
alert("你好");
document.getElementById("form1").submit();
document.getElementById("form1").submit();
}
</script>
</head>
<body>
<h2>文件上传</h2>
<form name="form1" id="form1" method="post" action="upload" enctype="multipart/form-data">
<table>
<tr>
<td>文件描述</td>
<td>
<input type="text" name="description" style="width:160px" datatype="Require" msg="请输入文件"/>
</td>
</tr>
<tr>
<td>请选择文件</td>
<td><input type="file" name="file"/></td>
</tr>
<tr>
<td><button onclick="ksubmit()">提交</button></td>
</tr>
</table>
</form>
</body>
</html>4)此时选择图片上传到FileUploadController.java
@Controller
public class FileUploadController {
@RequestMapping(value = "/upload",method = RequestMethod.POST)
@ResponseBody
public String upload(HttpServletRequest request,
@RequestParam("description") String description,
@RequestParam("file")MultipartFile file) throws IOException {
String saveDirectory = "./src/main/resources/images";
if (!file.isEmpty()){
String contentType = file.getContentType();
String fileName = file.getOriginalFilename();
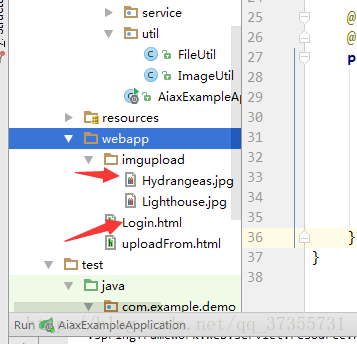
String filePath = request.getSession().getServletContext().getRealPath("imgupload/");
try {
FileUtil.uploadFile(file.getBytes(), filePath, fileName);
} catch (Exception e) {
// TODO: handle exception
}
File(path+File.separator+ filename));
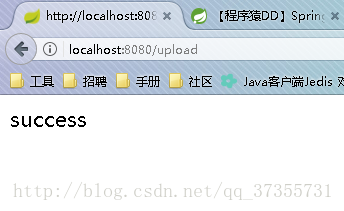
return "success";
}else{
return "error";
}
}
}5)这里用到了一个工具类FileUtil
public class FileUtil {
    public static void uploadFile(byte[] file, String filePath, String fileName) throws Exception {
        File targetFile = new File(filePath);
        if(!targetFile.exists()){
            targetFile.mkdirs();
        }
        FileOutputStream out = new FileOutputStream(filePath+fileName);
        out.write(file);
        out.flush();
        out.close();
    }
}
6)好啦,大功告成,开始测试:
启动项目 在浏览器输入:
http://localhost:8080/user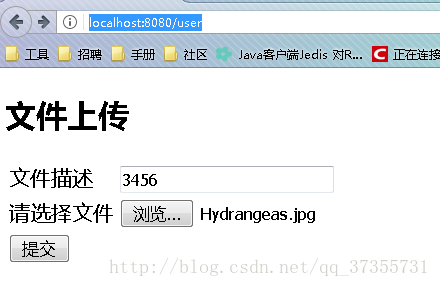
7)如果文件大于2M,则在application.yml中配置
spring.http.multipart.maxFileSize=100Mb
spring.http.multipart.maxRequestSize=100Mb
我也是小白,刚开始接触,如果有什么问题,可以留言我,谢谢。