前言
因为最近云小哥哥换了一份工作,新公司比较忙,所以一直没有更新新的博客。云小哥哥新的公司是做区块链的,最近在学习区块链相关的东西(也算是乘坐上了区块链这艘大船)。本博客是记录我搭建ethereum的debug环境的步骤。
系统环境及工具
- 操作系统:mac 10.13.4
- ide:go-land
- 版本控制:git
- go-lang:go version go1.10.3 darwin/amd64
通过 brew 就可以安装上述提到的所有工具,其他操作系统请自行安装上述工具。
搭建ethereum的debug环境
1.查看go的环境,找到 GOPATH
command:
go env
output:
GOARCH="amd64"
GOBIN=""
GOCACHE="/Users/qingyun.yu/Library/Caches/go-build"
GOEXE=""
GOHOSTARCH="amd64"
GOHOSTOS="darwin"
GOOS="darwin"
GOPATH="/Users/qingyun.yu/go"
GORACE=""
GOROOT="/usr/local/Cellar/go/1.10.3/libexec"
GOTMPDIR=""
GOTOOLDIR="/usr/local/Cellar/go/1.10.3/libexec/pkg/tool/darwin_amd64"
GCCGO="gccgo"
CC="clang"
CXX="clang++"
CGO_ENABLED="1"
CGO_CFLAGS="-g -O2"
CGO_CPPFLAGS=""
CGO_CXXFLAGS="-g -O2"
CGO_FFLAGS="-g -O2"
CGO_LDFLAGS="-g -O2"
PKG_CONFIG="pkg-config"
GOGCCFLAGS="-fPIC -m64 -pthread -fno-caret-diagnostics -Qunused-arguments -fmessage-length=0 -fdebug-prefix-map=/var/folders/cg/xnlvmg894zs64pmk0cvzxxg1jzppgf/T/go-build103516383=/tmp/go-build -gno-record-gcc-switches -fno-common"
通过上面的输出,我们就可以找到 GOPATH 的配置为 /Users/qingyun.yu/go
2.进入 /Users/qingyun.yu/go文件夹
command:

cd /Users/qingyun.yu/go
3.在文件夹上创建以下目录
eth/
    src/
        github.com/
            ethereum/
        golang.org/
    bin/
    pkg/
command:
mkdir eth eth/bin eth/src eth/pkg eth/src/github.com eth/src/golang.org eth/src/github.com/ethereum
4.进入 eth/src/github.com/ethereum 文件夹
cd eth/src/github.com/ethereum
5.通过git下载ethereum,地址是 https://github.com/ethereum/go-ethereum.git
command:
git clone https://github.com/ethereum/go-ethereum.git
output:
thereum/go-ethereum.git
Cloning into 'go-ethereum'...
remote: Counting objects: 71480, done.
remote: Total 71480 (delta 0), reused 0 (delta 0), pack-reused 71480
Receiving objects: 100% (71480/71480), 97.76 MiB | 1.81 MiB/s, done.
Resolving deltas: 100% (47359/47359), done.
出现以上输出表示下载成功了。
6.打开ide go-land
键盘按住:command+空格
搜索go-land,打开
7.载入eth文件夹
点击 Open Project ,找到 /Users/qingyun.yu/go/eth 文件夹,点击确定即可
8.创建 genesis.json 文件(初始化需要的一些参数)
genesis.json:
{
  "config": {
    "chainId": 666,
    "homesteadBlock": 0,
    "eip155Block": 0,
    "eip158Block": 0
  },
  "coinbase" : "0x0000000000000000000000000000000000000000",
  "difficulty" : "0x40000",
  "extraData" : "",
  "gasLimit" : "0xffffffff",
  "nonce" : "0x0000000000000042",
  "mixhash" : "0x0000000000000000000000000000000000000000000000000000000000000000",
  "parentHash" : "0x0000000000000000000000000000000000000000000000000000000000000000",
  "timestamp" : "0x00",
  "alloc": { }
}
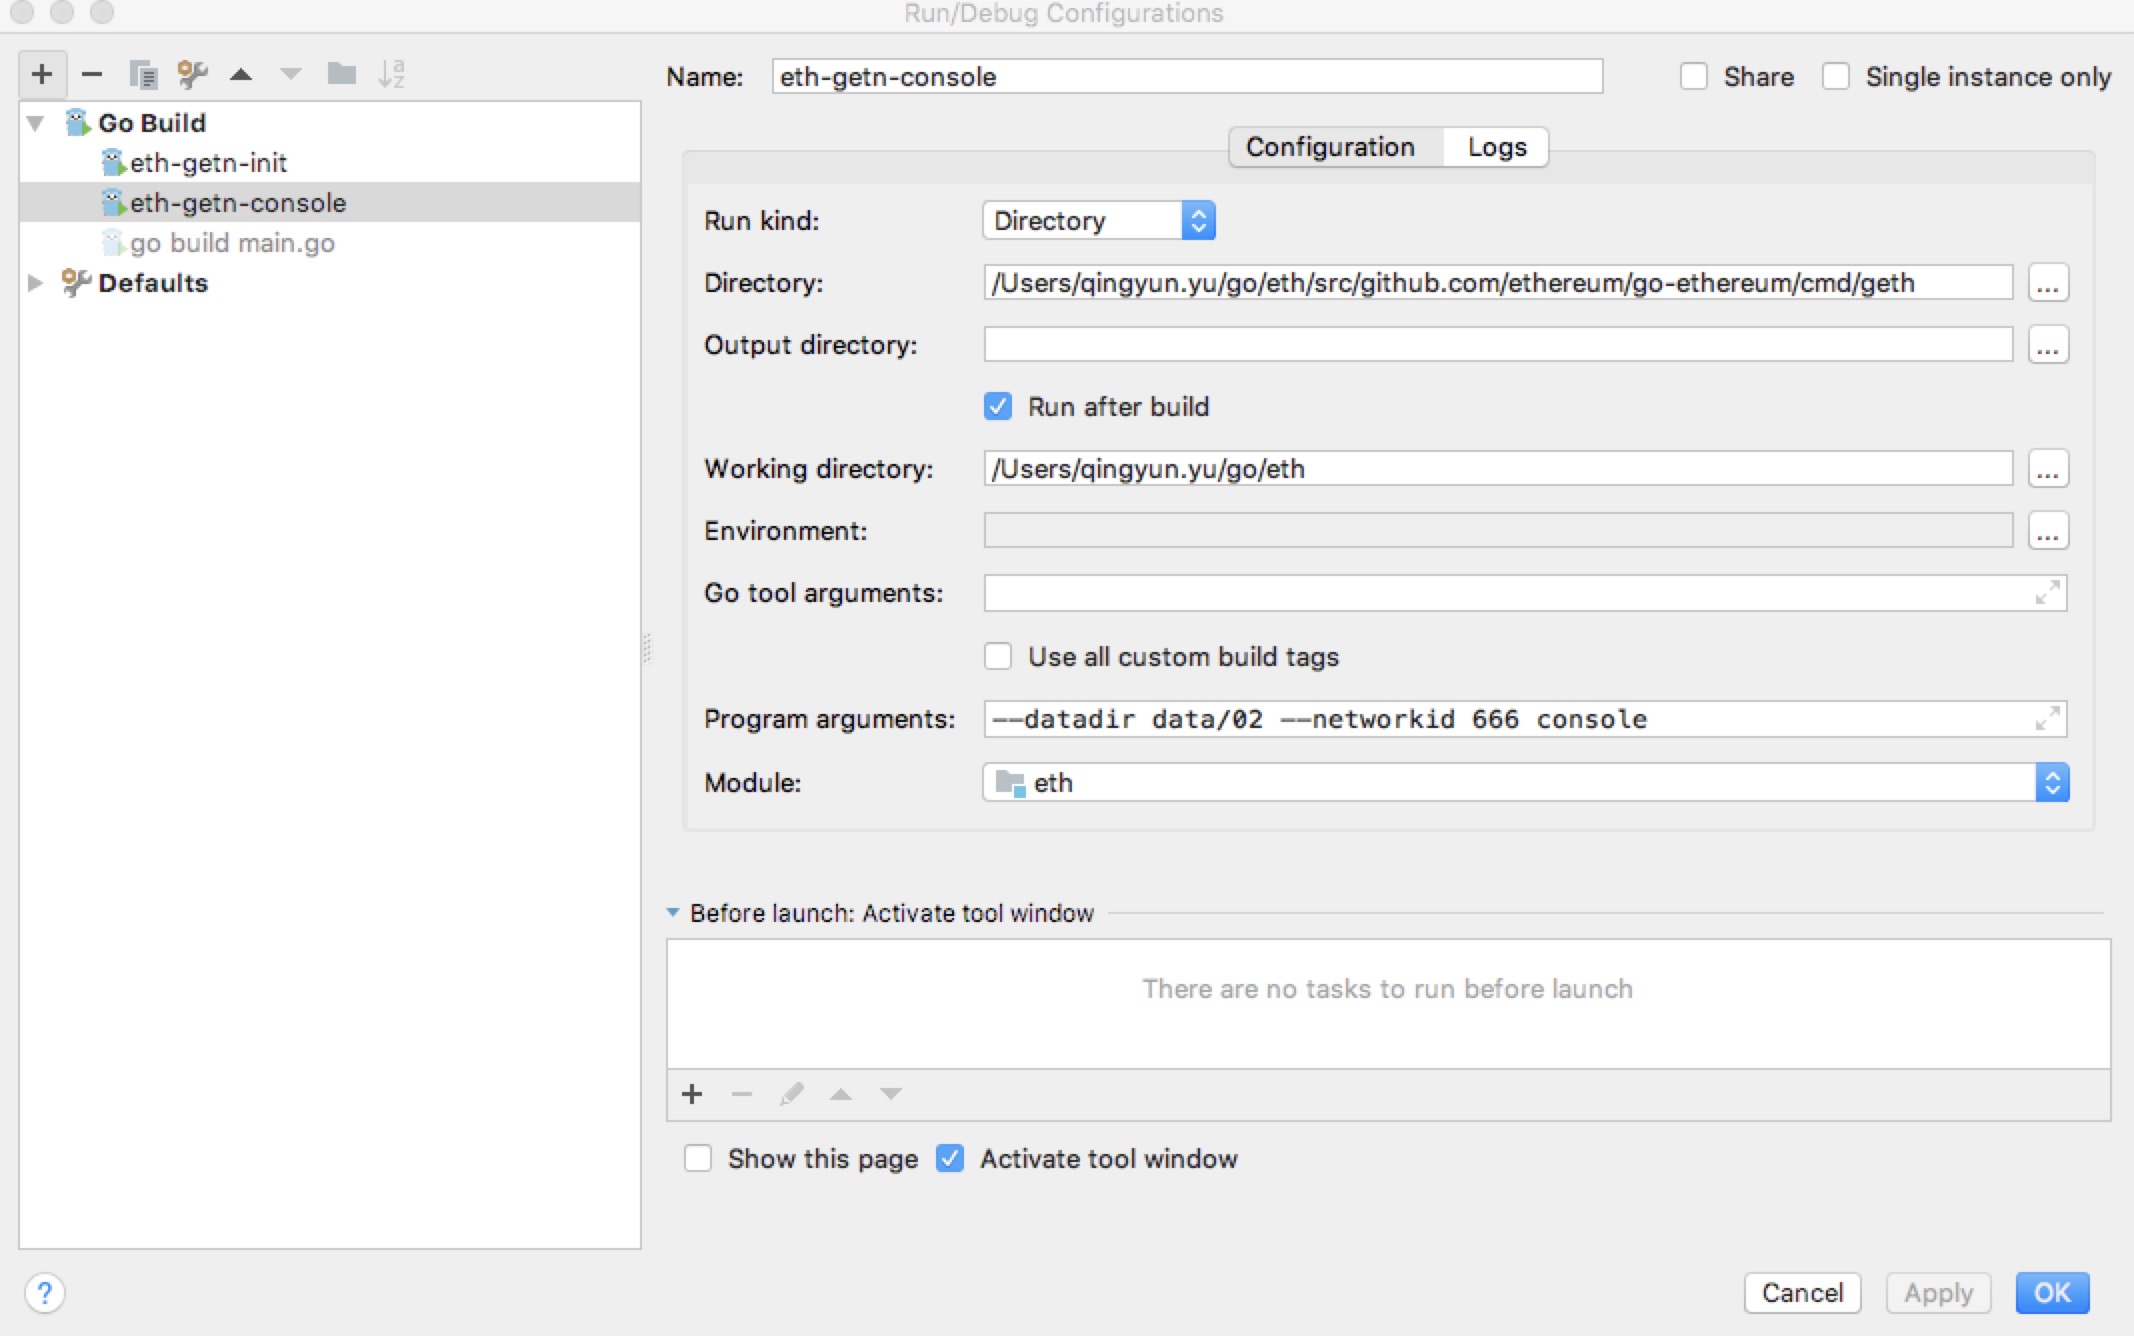
9.进入 Edit Configurations

点击 Edit Configurations ,出现以下界面
10.创建两个 Go Build

点击+号,然后点击 Go Build ,出现下面的界面

配置下面的参数:
第一个go build(初始化一些信息):
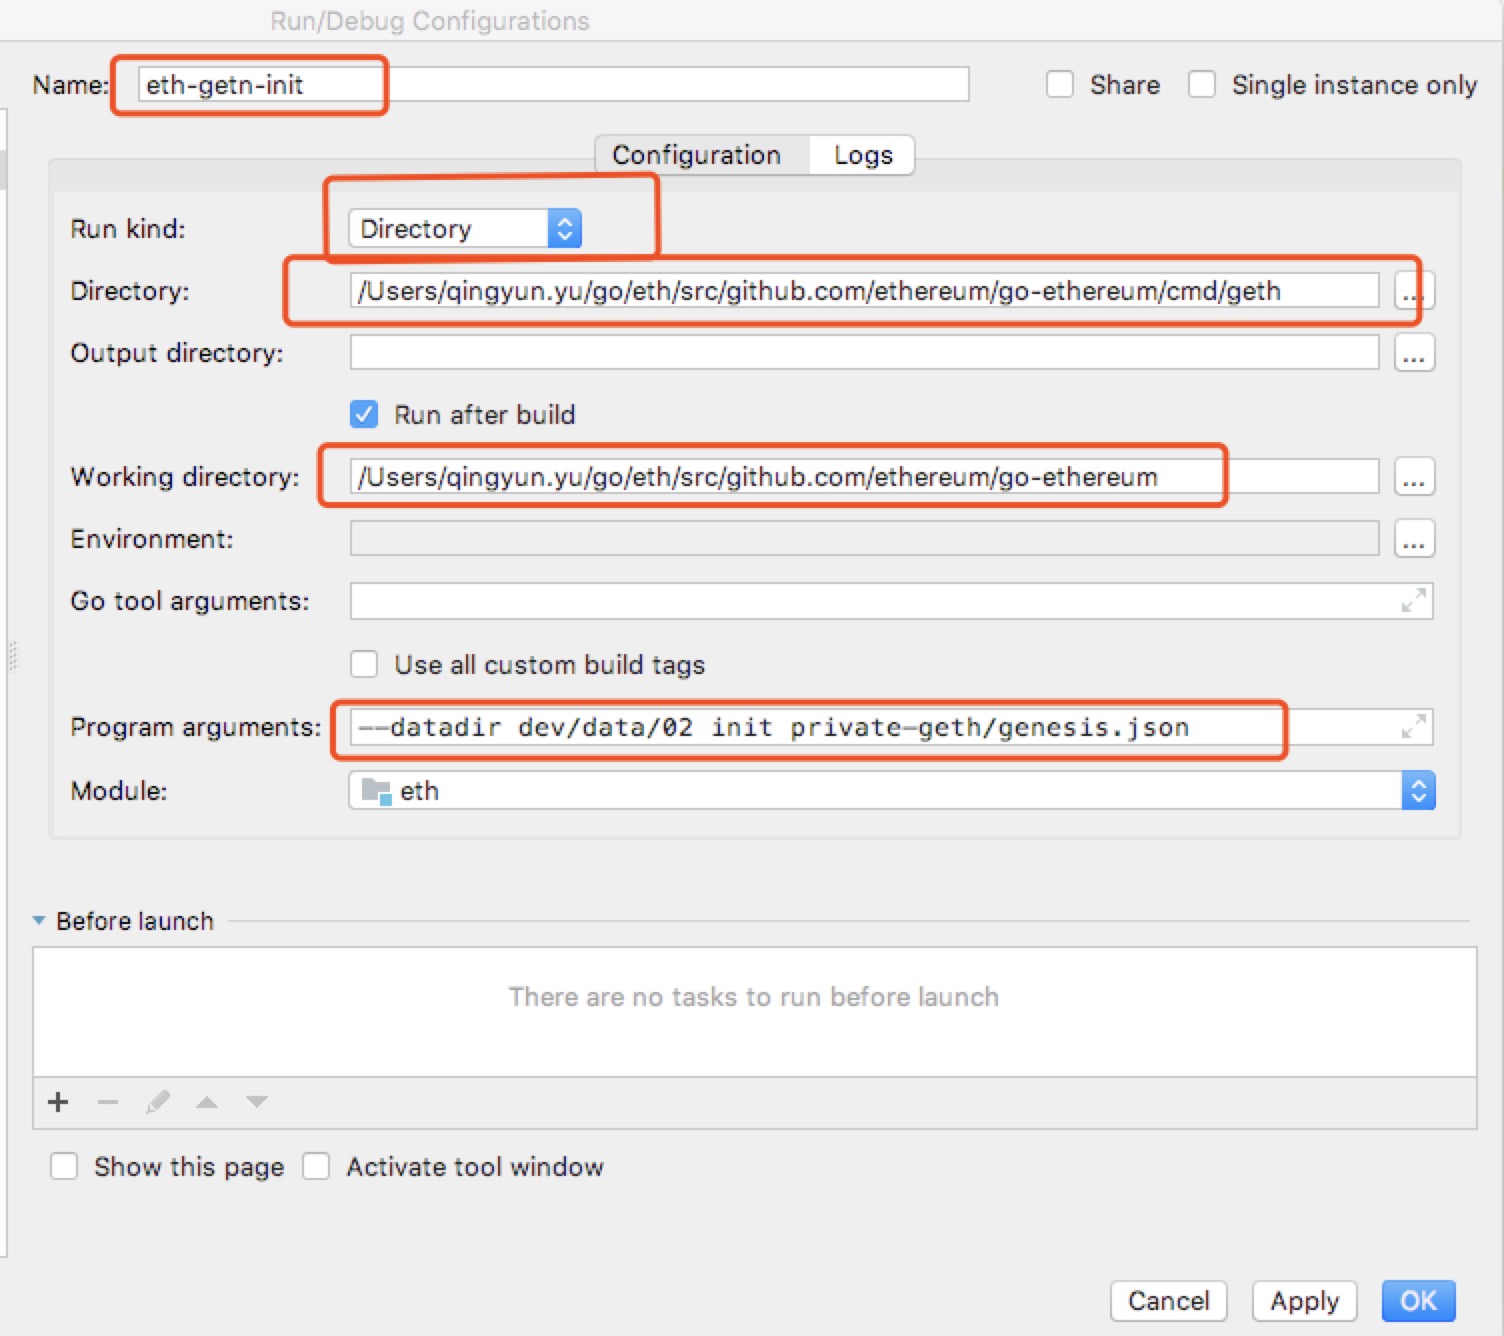
其中 dev/data/02 是存储数据的地方, private-geth/genesis.json 是初始化配置文件的地址,
第二个go build(运行以太坊客户端,并且打开控制台):

其中 666 为你要加入链的编号,以太坊默认的链是1号, console 表示进入控制台。
小结
通过以上的配置,你就可以使用ide进行debug调试了。