1.创建项目
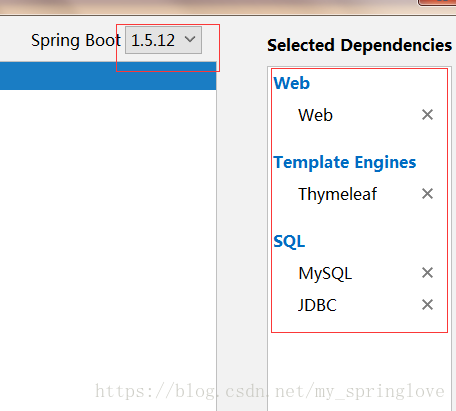
2.pom.xml中编写坐标文件
<dependencies> <!-- https://mvnrepository.com/artifact/com.alibaba/druid --> <dependency> <groupId>com.alibaba</groupId> <artifactId>druid</artifactId> <version>1.1.9</version> </dependency> <dependency> <groupId>org.springframework.boot</groupId> <artifactId>spring-boot-starter-jdbc</artifactId> </dependency> <dependency> <groupId>mysql</groupId> <artifactId>mysql-connector-java</artifactId> <scope>runtime</scope> </dependency> <dependency> <groupId>org.springframework.boot</groupId> <artifactId>spring-boot-starter-thymeleaf</artifactId> </dependency> <dependency> <groupId>org.springframework.boot</groupId> <artifactId>spring-boot-starter-web</artifactId> </dependency> <dependency> <groupId>org.mybatis.spring.boot</groupId> <artifactId>mybatis-spring-boot-starter</artifactId> <version>1.3.2</version> </dependency> <dependency> <groupId>org.springframework.boot</groupId> <artifactId>spring-boot-starter-test</artifactId> <scope>test</scope> </dependency> </dependencies> <build> <plugins> <plugin> <groupId>org.springframework.boot</groupId> <artifactId>spring-boot-maven-plugin</artifactId> </plugin> </plugins> </build> </project> |
3.创建application.yml文件
spring:
  datasource:
    username: root
    password: 12345
    url: jdbc:mysql://localhost:3306/db0226
    driver-class-name: com.mysql.jdbc.Driver
#   数据源其他配置
    initialSize: 5
    minIdle: 5
    maxActive: 20
    maxWait: 60000
    timeBetweenEvictionRunsMillis: 60000
    minEvictableIdleTimeMillis: 300000
    validationQuery: SELECT 1 FROM DUAL
    testWhileIdle: true
    testOnBorrow: false
    testOnReturn: false
poolPreparedStatements: true |
4.cn.vp.config.DataSourcesConfig
@Configuration
public class DataSourcesConfig {

    @Bean
    @ConfigurationProperties(prefix = "spring.datasource")
    public DataSource getDataSources() {

        return new DruidDataSource();
    }
} |
public class User { private Integer id; private String username; private String password; @Override public String toString() { return "user{" + "id=" + id + ", username='" + username + '\'' + ", password='" + password + '\'' + '}'; } public User() { } public User(Integer id, String username, String password) { this.id = id; this.username = username; this.password = password; } public Integer getId() { return id; } public void setId(Integer id) { this.id = id; } public String getUsername() { return username; } public void setUsername(String username) { this.username = username; } public String getPassword() { return password; } public void setPassword(String password) { this.password = password; } } |
6.编写Dao层curd
@Mapper public interface UserDao { @Insert("INSERT INTO `hehe` (`username`, `password`) VALUES (#{username}, #{password})") public int addUser(User user); @Delete("DELETE FROM `hehe` where id=#{id}") public int deleteById(Integer id); @Update("UPDATE `hehe` SET `username`='#{username}', `password`=#{password} WHERE (`id`=#{id})") public int updateUser(User user); @Select("SELECT * from `hehe` where id=#{id}") public User queryById(@Param("id") Integer id); } |
@MapperScan(value = "cn.vp.dao") @SpringBootApplication public class JdbccurdApplication { public static void main(String[] args) { SpringApplication.run(JdbccurdApplication.class, args); } } |
8.在test中测试curd方法的运行
@RunWith(SpringRunner.class)
@SpringBootTest
public class UserDaoTest {
    @Autowired
    private UserDao userDao;

    @Test
    public void addUser() throws Exception {
        User user=new User();
        user.setUsername("吴艳丽");
        user.setPassword("2131");
        userDao.addUser(user);
    }
} |
扫描二维码关注公众号,回复:
1901415 查看本文章
