1.oracle安装
1.1 安装包
oracle-linux-64-11g官方安装包
下载链接: https://pan.baidu.com/s/12NpwmcEl_eOuRzQQTwAXUQ
密码: 5q2f
两个zip包下载后解压到同一个文件夹下(unzip /share/linux.x64_11gR2_database_*.zip -d /share/)
1.2 系统资源参数配置
1.2.1 sysctl.conf
vi /etc/sysctl.conf
将下面这一段加入文档最后:
fs.aio-max-nr = 1048576
fs.file-max = 6815744
kernel.shmall = 2097152
kernel.shmmax = 536870912
kernel.shmmni = 4096
kernel.sem = 250 32000 100 128
net.ipv4.ip_local_port_range = 9000 65500
net.core.rmem_default = 262144
net.core.rmem_max = 4194304
net.core.wmem_default = 262144
net.core.wmem_max = 1048576
net.ipv4.tcp_wmem = 262144 262144 262144
net.ipv4.tcp_rmem = 4194304 4194304 4194304
注意注释掉
# Disable netfilter on bridges.
#net.bridge.bridge-nf-call-ip6tables
#net.bridge.bridge-nf-call-arptables = 0
1.2.2 limits.conf
vi /etc/security/limits.conf
将下面这一段加入文档最后:
oracle soft nproc 2047
oracle hard nproc 16384
oracle soft nofile 1024
oracle hard nofile 65536
oracle hard stack 10240
(重新加载这些参数,一定要重启系统,否则不起作用)
1.2.3
安装依赖包
yum install gcc make binutils gcc-c++ compat-libstdc++-33elfutils-libelf-devel elfutils-libelf-devel-static ksh libaio libaio-develnumactl-devel sysstat unixODBC unixODBC-devel pcre-devel –y
1.3安装
这里的安装方法均是通过配置文件安装。database文件夹是安装包解压缩后的文件夹
1.3.1 安装数据库软件
创建所需文件夹
mkdir -p /opt/oracle/app
mkdir -p /opt/oracle/oraInventory
建用户和组
groupadd oinstall
groupadd dba
useradd oracle
usermod -G oinstall,dba oracle
passwd oracle
给用户权限
chown -R oracle:oinstall /opt/oracle
chown -R oracle:dba /opt/oracle
给安装文件读写执行权限,我直接给全部权限了,省的纠结…
chmod 777 /opt/oracle
chmod 777 /share/database
配置oracle环境变量
在oracle用户下
vi .bash_profile,在后边加上以下这段:
export PATH= ORACLE_HOME/bin:$HOME/bin
export ORACLE_HOME=$ORACLE_BASE/product/11.2.0/db_1
export ORACLE_BASE=/opt/oracle/app
export ORACLE_SID=orcl
export PATH= ORACLE_HOME/bin:$HOME/bin
编辑后执行命令source .bash_profile
编辑数据库响应文件/database/response/db_install.rsp
oracle.install.responseFileVersion=/oracle/install/rspfmt_dbinstall_response_schema_v11_2_0
oracle.install.option=INSTALL_DB_SWONLY
ORACLE_HOSTNAME=iZbp1id7ajv83gqftpax5jZ UNIX_GROUP_NAME=oinstall
INVENTORY_LOCATION=/opt/oracle/oraInventory
SELECTED_LANGUAGES=en,zh_CN
ORACLE_HOME=/opt/oracle/app/product/11.2.0/db_1
ORACLE_BASE=/opt/oracle/app
oracle.install.db.InstallEdition=EE
oracle.install.db.isCustomInstall=false
oracle.install.db.customComponents=oracle.server:11.2.0.1.0,oracle.sysman.ccr:10.2.7.0.0,oracle.xdk:11.2.0.1.0,oracle.rdbms.oci:11.2.0.1.0,oracle.network:11.2.0.1.0,oracle.network.listener:11.2.0.1.0,oracle.rdbms:11.2.0.1.0,oracle.options:11.2.0.1.0,oracle.rdbms.partitioning:11.2.0.1.0,oracle.oraolap:11.2.0.1.0,oracle.rdbms.dm:11.2.0.1.0,oracle.rdbms.dv:11.2.0.1.0,orcle.rdbms.lbac:11.2.0.1.0,oracle.rdbms.rat:11.2.0.1.0
oracle.install.db.DBA_GROUP=dba
oracle.install.db.OPER_GROUP=oinstall
oracle.install.db.CLUSTER_NODES=
oracle.install.db.config.starterdb.type=GENERAL_PURPOSE
oracle.install.db.config.starterdb.globalDBName=orcl
oracle.install.db.config.starterdb.SID=orcl
oracle.install.db.config.starterdb.characterSet=AL32UTF8
oracle.install.db.config.starterdb.memoryOption=true
oracle.install.db.config.starterdb.memoryLimit=81920
oracle.install.db.config.starterdb.installExampleSchemas=false
oracle.install.db.config.starterdb.enableSecuritySettings=true
oracle.install.db.config.starterdb.password.ALL=oracle
oracle.install.db.config.starterdb.password.SYS=
oracle.install.db.config.starterdb.password.SYSTEM=
oracle.install.db.config.starterdb.password.SYSMAN=
oracle.install.db.config.starterdb.password.DBSNMP=oracle.install.db.config.starterdb.control=DB_CONTROL
oracle.install.db.config.starterdb.gridcontrol.gridControlServiceURL=
oracle.install.db.config.starterdb.dbcontrol.enableEmailNotification=false
oracle.install.db.config.starterdb.dbcontrol.emailAddress=
oracle.install.db.config.starterdb.dbcontrol.SMTPServer=oracle.install.db.config.starterdb.automatedBackup.enable=false
oracle.install.db.config.starterdb.automatedBackup.osuid=
oracle.install.db.config.starterdb.automatedBackup.ospwd=
oracle.install.db.config.starterdb.storageType=
oracle.install.db.config.starterdb.fileSystemStorage.dataLocation=
oracle.install.db.config.starterdb.fileSystemStorage.recoveryLocation=
oracle.install.db.config.asm.diskGroup=
oracle.install.db.config.asm.ASMSNMPPassword=
MYORACLESUPPORT_USERNAME= MYORACLESUPPORT_PASSWORD=
SECURITY_UPDATES_VIA_MYORACLESUPPORT=DECLINE_SECURITY_UPDATES=true
PROXY_HOST= PROXY_PORT= PROXY_USER= PROXY_PWD=
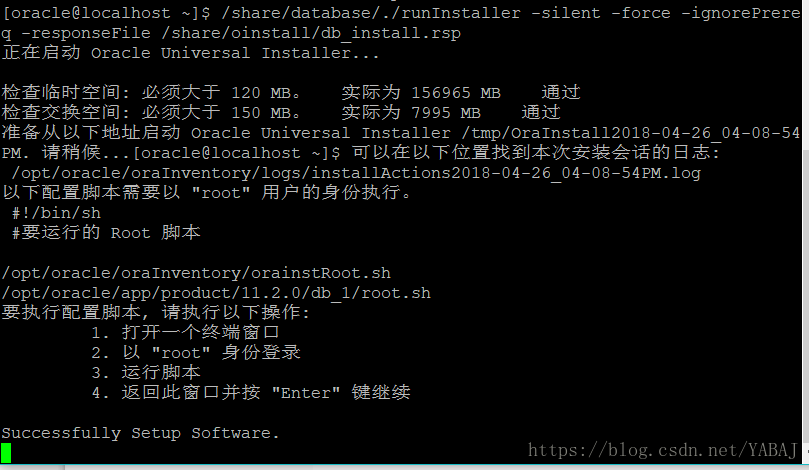
执行静默安装数据库命令(oracle用户下):
/share/database/./runInstaller -silent -force -ignorePrereq -responseFile /share/database/response/db_install.rsp
然后就稍等吧….
然后按照安装结束后描述的命令执行,运行orainsRoot.sh和root.sh
1.3.2 建数据库实例
下面建数据库实例(oracle用户下):
dbca -silent -createDatabase -templateName General_Purpose.dbc -gdbName orcl -sid orcl -sysPassword oracle -systemPassword oracle -diskGroupName datadg -nationalCharacterSet "AL16UTF16" -characterSet "AL32UTF8" -sampleSchema false -asmSysPassword oracle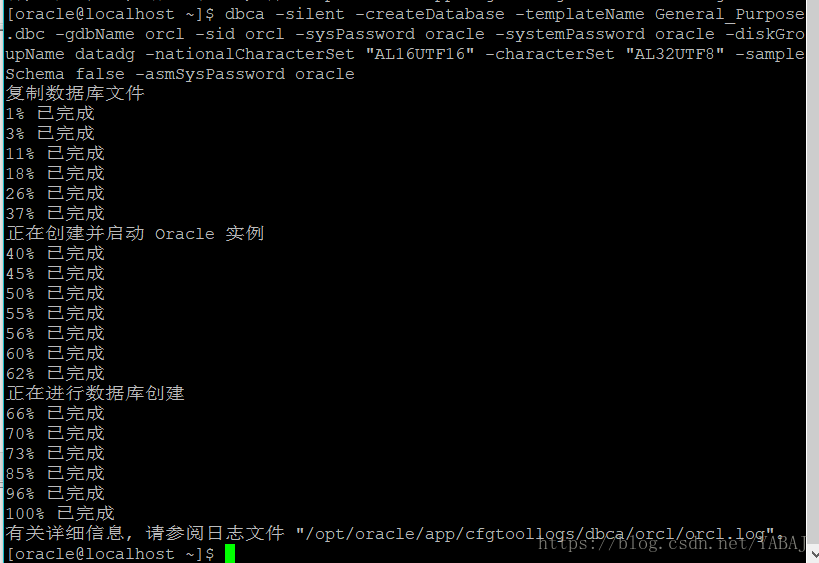
1.3.3 配置监听
在$ORACLE_HOME//network/admin下编辑文件:
listener.ora
SID_LIST_LISTENER =
    (SID_LIST =
         (SID_DESC =
             (GLOBAL_DBNAME = orcl)
             (ORACLE_HOME = /opt/oracle/app/product/11.2.0/db_1)
             (SID_NAME = orcl)
         )
    )
LISTENER =
    (DESCRIPTION =
        (ADDRESS = (PROTOCOL = TCP)(HOST = localhost)(PORT = 1521))
    )
tnsnames.ora
orcl =
(DESCRIPTION =
    (ADDRESS_LIST =
    (ADDRESS = (PROTOCOL = TCP)(HOST = localhost)(PORT = 1521))
    )
    (CONNECT_DATA =
    (SERVER = DEDICATED)
    (SERVICE_NAME = orcl)
    )
)
sqlnet.ora
 SQLNET.AUTHENTICATION_SERVICES= (ALL) NAMES.DIRECTORY_PATH=
 (TNSNAMES,HOSTNAME,EZCONNECT)
启动监听器:lsnrctl start
停止监听器:lsnrctl stop
查看监听:lsnrctl status
1.4 可能遇到的问题
出现LRM-00109:could not open parameter file initorcl.ora
解决:mv /opt/oracle/app/admin/orcl11g/pfile/init.ora.913201713916 /opt/oracle/app/product/11.2.0/db_1/dbs/initorcl.ora
inclusive mode
http://www.cnblogs.com/kerrycode/p/3656655.html
http://blog.csdn.net/abc5382334/article/details/45311279
ps -ef|grep mcfcm|grep -v grep|cut -c 9-15|xargs kill -9
2.weblogic安装
2.1 安装包
weblogic12(fmw_12.1.3.0.0_wls.jar)
百度网盘下载地址:
[https://pan.baidu.com/s/1B7QOfSTPdD1XSCmutOZEwg]
2.2 安装
2.2.1 前期准备
创建所需文件夹
mkdir -p /opt/weblogic/oraInventory
mkdir -p /opt/weblogic/app
建用户和组
groupadd weblogic
useradd weblogic
usermod -G weblogic weblogic
passwd weblogic
给用户权限
chown -R weblogic:weblogic /opt/weblogic
chown -R weblogic:weblogic /share/fmw_12.1.3.0.0_wls.jar
给安装文件读写执行权限,我直接给全部权限了,省的纠结…
chmod 777 /opt/weblogic
chmod 777 /share/fmw_12.1.3.0.0_wls.jar
安装jdk,如果已经有了就不必理会此步骤
mkdir -p /opt/jdk
解压jdk安装包到指定目录下:
tar -zxvf /share/jdk7u79linuxx64.tar.gz -C /opt/jdk/
JAVA_HOME=/opt/jdk/jdk1.7.0_79 export
JRE_HOME=/opt/jdk/jdk1.7.0_79/jre export
CLASSPATH=.: JRE_HOME/lib: JAVA_HOME/bin: PATH
编辑结束后,执行source ~/.bashrc命令使之生效
可以退出weblogic用户再登录,java -version查看是否配置成功
2.2.2 安装weblogic
这里需要创建两个必需的安装文件
响应文件
vim /share/wls.rsp
####################################wls.rsp

[ENGINE]
#DO NOT CHANGE THIS.
Response File Version=1.0.0.0.0
[GENERIC]
#The oracle home location. This can be an existing Oracle Home or a new Oracle Home
ORACLE_HOME=/opt/weblogic/app
#Set this variable value to the Installation Type selected. e.g. WebLogic Server, Coherence, Complete with Examples.
INSTALL_TYPE=WebLogic Server
#Provide the My Oracle Support Username. If you wish to ignore Oracle Configuration Manager configuration provide empty string for user name.
MYORACLESUPPORT_USERNAME=
#Provide the My Oracle Support Password
MYORACLESUPPORT_PASSWORD=<SECURE VALUE>
#Set this to true if you wish to decline the security updates. Setting this to true and providing empty string for My Oracle Support username will ignore the Oracle Configuration Manager configuration
DECLINE_SECURITY_UPDATES=true
#Set this to true if My Oracle Support Password is specified
SECURITY_UPDATES_VIA_MYORACLESUPPORT=false
#Provide the Proxy Host
PROXY_HOST=
#Provide the Proxy Port
PROXY_PORT=
#Provide the Proxy Username
PROXY_USER=
#Provide the Proxy Password
PROXY_PWD=<SECURE VALUE>
#Type String (URL format) Indicates the OCM Repeater URL which should be of the format [scheme[Http/Https]]://[repeater host]:[repeater port]
COLLECTOR_SUPPORTHUB_URL=
初始化环境文件
vim /share/oraInst.loc
####################################oraInst.loc

inventory_loc=/opt/weblogic/oraInventory
inst_group=weblogic
刚刚创建的两个文件需要给权限
chown -R weblogic:weblogic /share/wls.rsp
chown -R weblogic:weblogic /share/oraInst.loc
执行安装命令:
java -jar /share/fmw_12.1.3.0.0_wls.jar -silent -responseFile /share/wls.rsp -invPtrLoc /share/oraInst.loc
2.2.2 创建域
通过wstl创建域,
(1)建立文件vim /share/domain.py:
# Weblogic Domain Template
# Use Basic Domain Template
readTemplate("/opt/weblogic/app/wlserver/common/templates/wls/wls.jar")

# Config AdminServer Listen Address and Port
cd('Servers/AdminServer')
set('ListenAddress','')
set('ListenPort', 7001)

# Config username and password of Console User
cd('/')
# 'Security/base_domain/User/weblogic' The 'weblogic' is username
cd('/Security/base_domain/User/weblogic')
cmo.setName('weblogic')
#The password must be at least 8 alphanumeric characters with at least one number or special character
cmo.setPassword('Kgbweblogic123')

# If the domain already exists, overwrite the domain
setOption('OverwriteDomain', 'true')
#设置模式   这里为产品模式
setOption('ServerStartMode', 'prod')
# Config home directory for the JVM to be used when starting the weblogic server
setOption('JavaHome', '/opt/jdk1.7.0_79')
# Config the Domain folder path
writeDomain('/opt/weblogic/app/herysoft_projects/domains/domain1')

# Close Template
closeTemplate()

# Exit script
exit()
chown -R weblogic:weblogic /share/domain.py
(2)执行脚本
/opt/weblogic/app/wlserver/common/bin/wlst.sh /share/domain.py
2.2.3 发布
这里介绍配置文件发布方式:
修改发布文件/opt/weblogic/app/herysoft_projects/domains/domain1/config/config.xml,如下图在此处添加自己的war包相关信息:
  <app-deployment>
    <name>ExpertSys</name>
    <target>AdminServer</target>
    <module-type>war</module-type>
    <source-path>/share/xxxxxx.war</source-path>
    <security-dd-model>DDOnly</security-dd-model>
  </app-deployment>
2.3 可能遇到的问题
1
【Weblogic】在linux创建domain过慢的解决方法
修改Linux上Weblogic使用的jdk 文件($JAVA_HOME/jre/lib/security/java.security )将
securerandom.source=file:/dev/urandom
修改为
securerandom.source=file:/dev/./urandom
2
启动和关闭weblogic服务器时免用户验证问题,在启动和关闭文件中加入用户名和密码:
stopWeblogic.sh 开头加:
userID=”username=’weblogic’,”
password=”password=’yourpassword’,”
startWeblogic.sh 在trap ‘stopAll’ 1 2 3 15之前,SAVE_CLASSPATH=”“之后加:
WLS_USER=”weblogic”
WLS_PW=”yourpassword”
3
开启weblogic远程调试
编辑文件:vim /opt/weblogic/app/herysoft_projects/domains/domain1/bin/setDomainEnv.sh
在
if [ “${debugFlag}” = “true” ] ; then
前加上:
debugFlag=”true”
export debugFlag
在eclipse中:
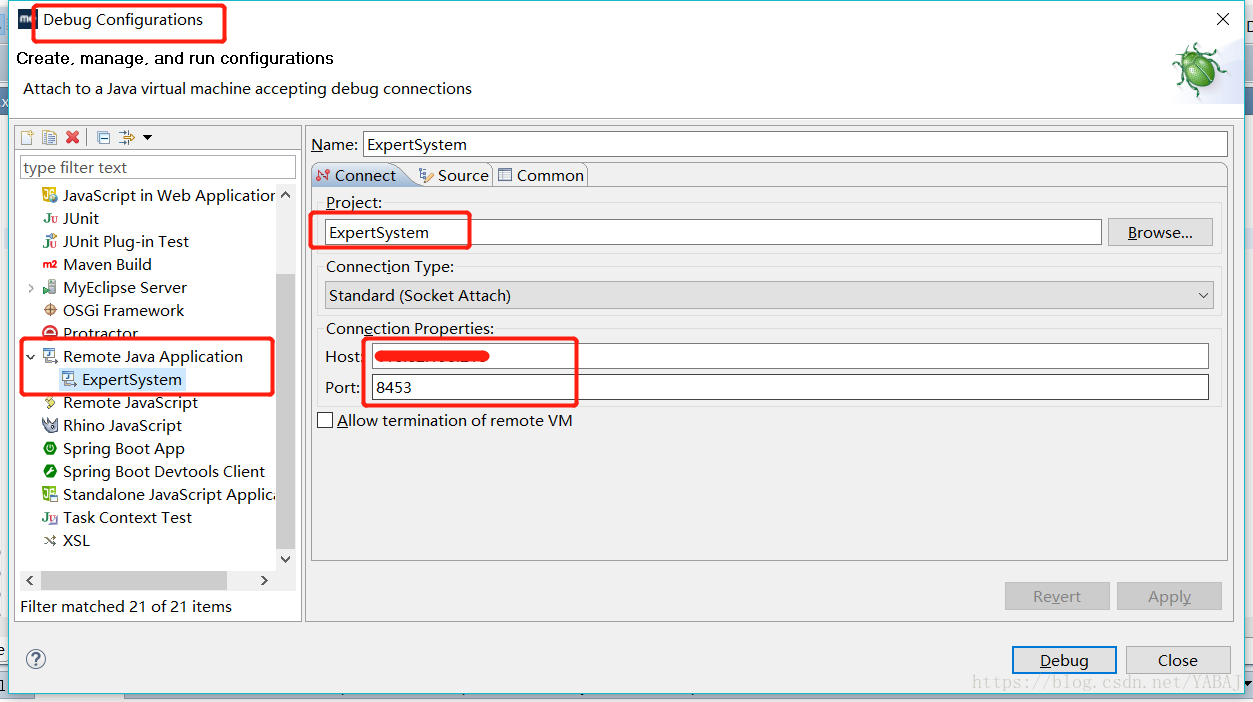
3
启动报错:Schema validation can be disabled by starting the server with the command line option: -Dweblogic.configuration.schemaValidationEnabled=false
修改startWeblogic,在以下位置的${JAVA_OPTIONS}后加-Dweblogic.configuration.schemaValidationEnabled=false:
if [ "${WLS_REDIRECT_LOG}" = "" ] ; then
        echo "Starting WLS with line:"
        echo "${JAVA_HOME}/bin/java ${JAVA_VM} ${MEM_ARGS} -Dweblogic.Name=${SERVER_NAME} -Djava.security.policy=${WL_HOME}/server/lib/weblogic.policy ${JAVA_OPTIONS} ${PROXY_SETTINGS} ${SERVER_CLASS}"
        ${JAVA_HOME}/bin/java ${JAVA_VM} ${MEM_ARGS} -Dweblogic.Name=${SERVER_NAME} -Djava.security.policy=${WL_HOME}/server/lib/weblogic.policy ${JAVA_OPTIONS} -Dweblogic.configuration.schemaValidationEnabled=false ${PROXY_SETTINGS} ${SERVER_CLASS}
else
        echo "Redirecting output from WLS window to ${WLS_REDIRECT_LOG}"
        ${JAVA_HOME}/bin/java ${JAVA_VM} ${MEM_ARGS} -Dweblogic.Name=${SERVER_NAME} -Djava.security.policy=${WL_HOME}/server/lib/weblogic.policy ${JAVA_OPTIONS} -Dweblogic.configuration.schemaValidationEnabled=false  ${PROXY_SETTINGS} ${SERVER_CLASS}  >"${WLS_REDIRECT_LOG}" 2>&1
fi

stopAll
4
java.lang.OutOfMemoryError: GC overhead limit exceeded
设置启动内存
第一种:
commonEnv.sh
JAVA_VM=-server
MEM_ARGS=”-Xms1024m -Xmx1024m -XX:MaxPermSize512m”
通过修过二处的=-Xms768m -Xmx1024m 可以达到修改JVM目的所在,修改后保存重启即可
第二种:
startWeblogic.sh
set JAVA_OPTIONS=-Xms256m –Xmx256m
第三种:
找到 bea\user_projects\domains\base_domain\bin目录下的setDomainEnv.cmd文件:
找到weblogic 具体使用的jdk块:设置 MEM_ARGS和-XX:MaxPermSize两个参数。
MEM_ARGS=-Xms512m -Xmx1024m
if [ “
{MEM_ARGS} ${MEM_DEV_ARGS} -XX:MaxPermSize=512m”
export MEM_ARGS
fi
修改完成以后保存,重启weblogic服务即可。
5
页面乱码
setDomainDev.sh/cmd
if NOT “%WEBLOGIC_EXTENSION_DIRS%”==”” (
set JAVA_OPTIONS=%JAVA_OPTIONS% -Dweblogic.ext.dirs=%WEBLOGIC_EXTENSION_DIRS%
)
set JAVA_OPTIONS=%JAVA_OPTIONS% -Dfile.encoding=utf-8
6
遇到任何死锁问题直接干掉weblogic进程即可
ps -ef|grep ‘weblogic’
kill -9 weblogic进程号
7
weblogic一启动就挂掉了
bin/startWebLogic.sh: line 186: 11872 Killed
${JAVA_HOME}/bin/java ${JAVA_VM} ${MEM_ARGS} -Dweblogic.Name=${SERVER_NAME} -Djava.security.policy=${WLS_POLICY_FILE} ${JAVA_OPTIONS} -Dweblogic.configuration.schemaValidationEnabled=false ${PROXY_SETTINGS} ${SERVER_CLASS}
我就心塞了,竟然看不懂是为什么…..
网上很多说法,但每一个能成功的….
说法一:jdk版本要装对
说法二:startWebLogic启动脚本里加一句:-Dsun.zip.disableMemoryMapping=true
说法三:
 Open the setDomainEnv file in a text editor.
Search for this comment line:
For Linux:
# IF USER_MEM_ARGS the environment variable is set, use it to override ALL MEM_ARGS values
For Windows:
@REM IF USER_MEM_ARGS the environment variable is set, use it to override ALL MEM_ARGS values
Immediately after the comment line, add one of these lines:
For Linux:
export USER_MEM_ARGS="-Xms128m -Xmx3072m ${MEM_DEV_ARGS} ${MEM_MAX_PERM_SIZE}"
For Windows:
set USER_MEM_ARGS=-Xms128m -Xmx3072m %MEM_DEV_ARGS% %MEM_MAX_PERM_SIZE%
Save the file.
Re-start WebLogic Server.
大致意思:在setDomainEnv.sh里找到这句注释“REM IF USER_MEM_ARGS the environment variable is set, use it to override ALL MEM_ARGS values”,在这句注释后加上一句:export USER_MEM_ARGS="-Xms128m -Xmx3072m ${MEM_DEV_ARGS} ${MEM_MAX_PERM_SIZE}"。
说是因为weblogic内存在启动时最少需要128M,而在运行过程中最大时需要3G,weblogic默认JVM堆大小是3G,你要修改就用上面那句,其实我也不是很明白,我的机器有4G内存应该够了才是,反正不管用就是了。
我现在找出的唯一解决方法,都不算是解决了,算是埋了个坑,就是换个weblogic所属用户就好了,我都没看懂这是为什么,希望能有大神来给解释下………T_T