首先要声明,这个demo很大程度上参考了这篇文章:
Springboot 实现 Restful 服务,基于 HTTP / JSON 传输
所以把它归为转载之列。
首先创建数据表并插入一条数据(数据库名随意):
- DROP TABLE IF EXISTS `city`;
- CREATE TABLE `city` (
- `id` int(10) unsigned NOT NULL AUTO_INCREMENT COMMENT '城市编号',
- `province_id` int(10) unsigned NOT NULL COMMENT '省份编号',
- `city_name` varchar(25) DEFAULT NULL COMMENT '城市名称',
- `description` varchar(25) DEFAULT NULL COMMENT '描述',
- PRIMARY KEY (`id`)
- ) ENGINE=InnoDB AUTO_INCREMENT=1 DEFAULT CHARSET=utf8;
- INSERT city VALUES (1 ,1,'温岭市','BYSocket 的家在温岭。');
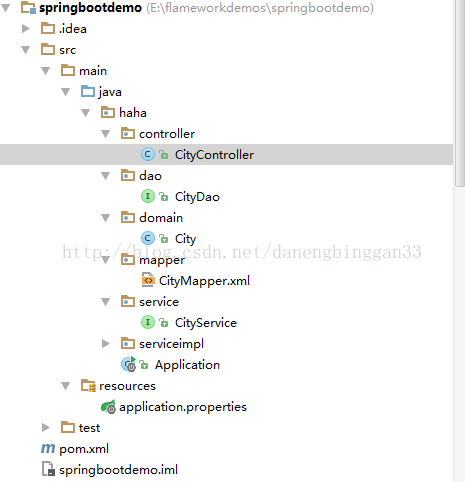
接下去是项目结构:
添加依赖:
- <!-- Spring Boot 启动父依赖 -->
- <parent>
- <groupId>org.springframework.boot</groupId>
- <artifactId>spring-boot-starter-parent</artifactId>
- <version>1.5.1.RELEASE</version>
- </parent>
- <properties>
- <mybatis-spring-boot>1.2.0</mybatis-spring-boot>
- <mysql-connector>5.1.39</mysql-connector>
- </properties>
- <dependencies>
- <!-- Spring Boot Web 依赖 -->
- <dependency>
- <groupId>org.springframework.boot</groupId>
- <artifactId>spring-boot-starter-web</artifactId>
- </dependency>
- <!-- Spring Boot Test 依赖 -->
- <dependency>
- <groupId>org.springframework.boot</groupId>
- <artifactId>spring-boot-starter-test</artifactId>
- <scope>test</scope>
- </dependency>
- <!-- Spring Boot Mybatis 依赖 -->
- <dependency>
- <groupId>org.mybatis.spring.boot</groupId>
- <artifactId>mybatis-spring-boot-starter</artifactId>
- <version>${mybatis-spring-boot}</version>
- </dependency>
- <!-- MySQL 连接驱动依赖 -->
- <dependency>
- <groupId>mysql</groupId>
- <artifactId>mysql-connector-java</artifactId>
- <version>${mysql-connector}</version>
- </dependency>
- <!-- Junit -->
- <dependency>
- <groupId>junit</groupId>
- <artifactId>junit</artifactId>
- <version>4.12</version>
- </dependency>
- </dependencies>
然后说说三个比较重要的文件,并附加部分说明:
1、配置文件application.properties(名字不可变)
- ## 数据源配置
- spring.datasource.url=jdbc:mysql://localhost:3306/springbootdb?useUnicode=true&characterEncoding=utf8
- spring.datasource.username=root
- spring.datasource.password=123456
- spring.datasource.driver-class-name=com.mysql.jdbc.Driver
- ## Mybatis 配置
- mybatis.typeAliasesPackage=haha.domain
- mybatis.mapperLocations=classpath*:haha/mapper/*.xml
各配置项根据自己情况修改,应该是一目了然的。
附:如果mapper像我一样不放在resources目录下的话,请在pom.xml中添加如下代码,否则你的.xml文件可能不在build文件中。
- <!--将xml文件打包-->
- <build>
- <resources>
- <resource>
- <directory>src/main/java</directory>
- <includes>
- <include>**/*.xml</include>
- </includes>
- <filtering>false</filtering>
- </resource>
- </resources>
- </build>
2、启动文件Application.java
- // Spring Boot 应用的标识
- @SpringBootApplication
- // mapper 接口类扫描包配置
- @MapperScan("haha.dao")
- public class Application {
- public static void main(String[] args) {
- // 程序启动入口
- // 启动嵌入式的 Tomcat 并初始化 Spring 环境及其各 Spring 组件
- SpringApplication.run(Application.class,args);
- }
- }
3、Controller类
- @RestController
- //是一类特殊的@Controller,它的返回值直接作为HTTP Response的Body部分返回给浏览器。
- //@Controller并非直接将字符串返回给浏览器,而是寻找名字为返回值的模板进行渲染
- public class CityController {
- @Autowired
- private CityService cityService;
- //@RequestMapping注解表明该方法处理那些URL对应的HTTP请求,也就是我们常说的URL路由(routing),请求的分发工作是有Spring完成的。
- //URL中的变量——PathVariable
- //例如@RequestMapping("/api/city/{id}")
- //URL中的变量可以用{variableName}来表示,同时在方法的参数中加上@PathVariable("variableName"),那么当请求被转发给该方法处理时,对应的URL中的变量会被自动赋值给被@PathVariable注解的参数
- @RequestMapping(value = "/api/city/{id}", method = RequestMethod.GET)
- public City findOneCity(@PathVariable("id") Long id) {
- return cityService.findCityById(id);
- }
- }
最后便是运行了,启动main函数,发现其实这段程序是个web应用,放置在内嵌的Servlet容器中。

访问url:http://127.0.0.1:8080/api/city/1

以上便是全部内容啦,谢谢阅读~~
差点忘了放上demo了。。