Swagger是我们常用的API Doc工具,非常便于开发人员调试,后台和前端开发人员协作,以及对外公布API使用。如何在生产环境中禁止swagger了?
如何禁止Swagger,方法有很多,我们选择最简单实用的,也就是直接在使用@Profile注解。
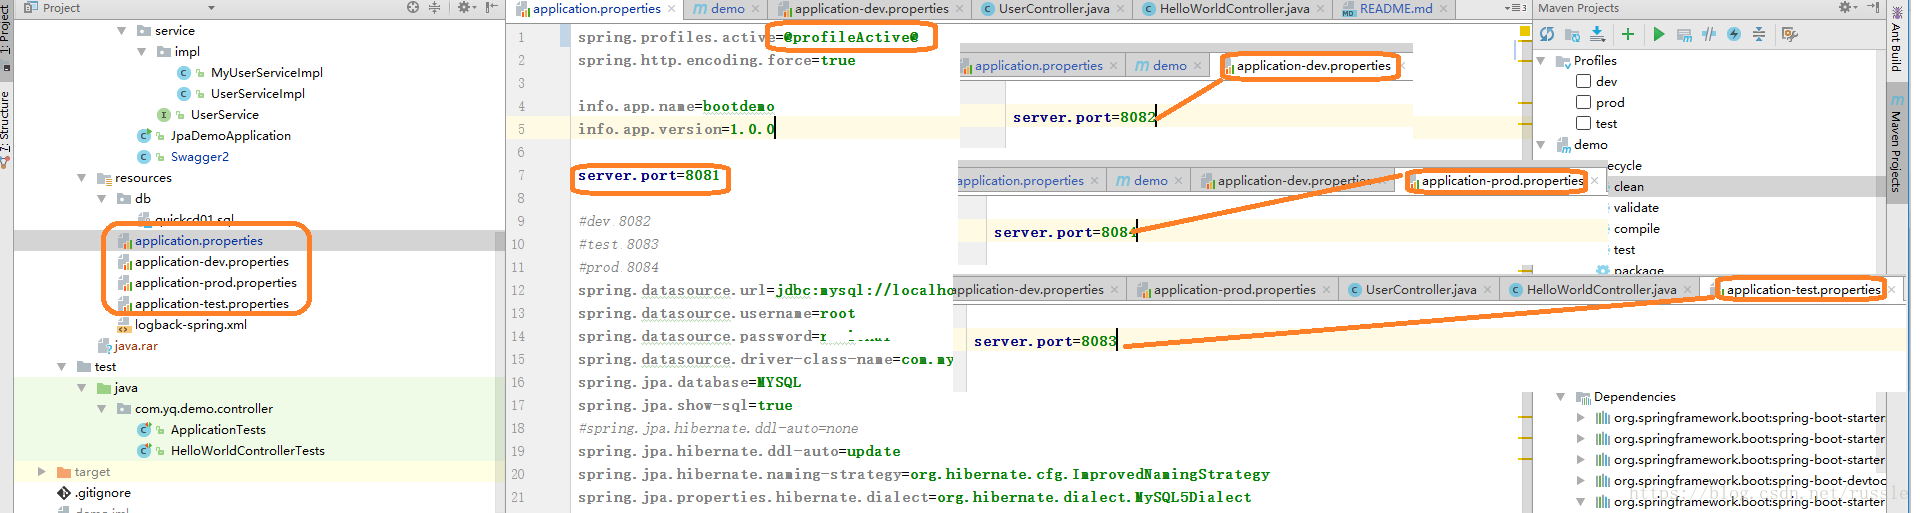
项目背景介绍, 我们有三个环境dev, test, prod,我们只在dev环境中使用swagger,test和prod都禁止使用,为了体现使用不同profile效果的不同, 我们修改了配置文件中的端口。具体如下
test和prod禁用swagger。 我们只需要这样
package com.yq.demo;
import org.springframework.context.annotation.Bean;
import org.springframework.context.annotation.Configuration;
import org.springframework.context.annotation.Profile;
import org.springframework.web.servlet.config.annotation.ResourceHandlerRegistry;
import org.springframework.web.servlet.config.annotation.WebMvcConfigurationSupport;
import springfox.documentation.builders.ApiInfoBuilder;
import springfox.documentation.builders.PathSelectors;
import springfox.documentation.builders.RequestHandlerSelectors;
import springfox.documentation.service.ApiInfo;
import springfox.documentation.service.Contact;
import springfox.documentation.spi.DocumentationType;
import springfox.documentation.spring.web.plugins.Docket;
import springfox.documentation.swagger2.annotations.EnableSwagger2;
@Configuration
@EnableSwagger2
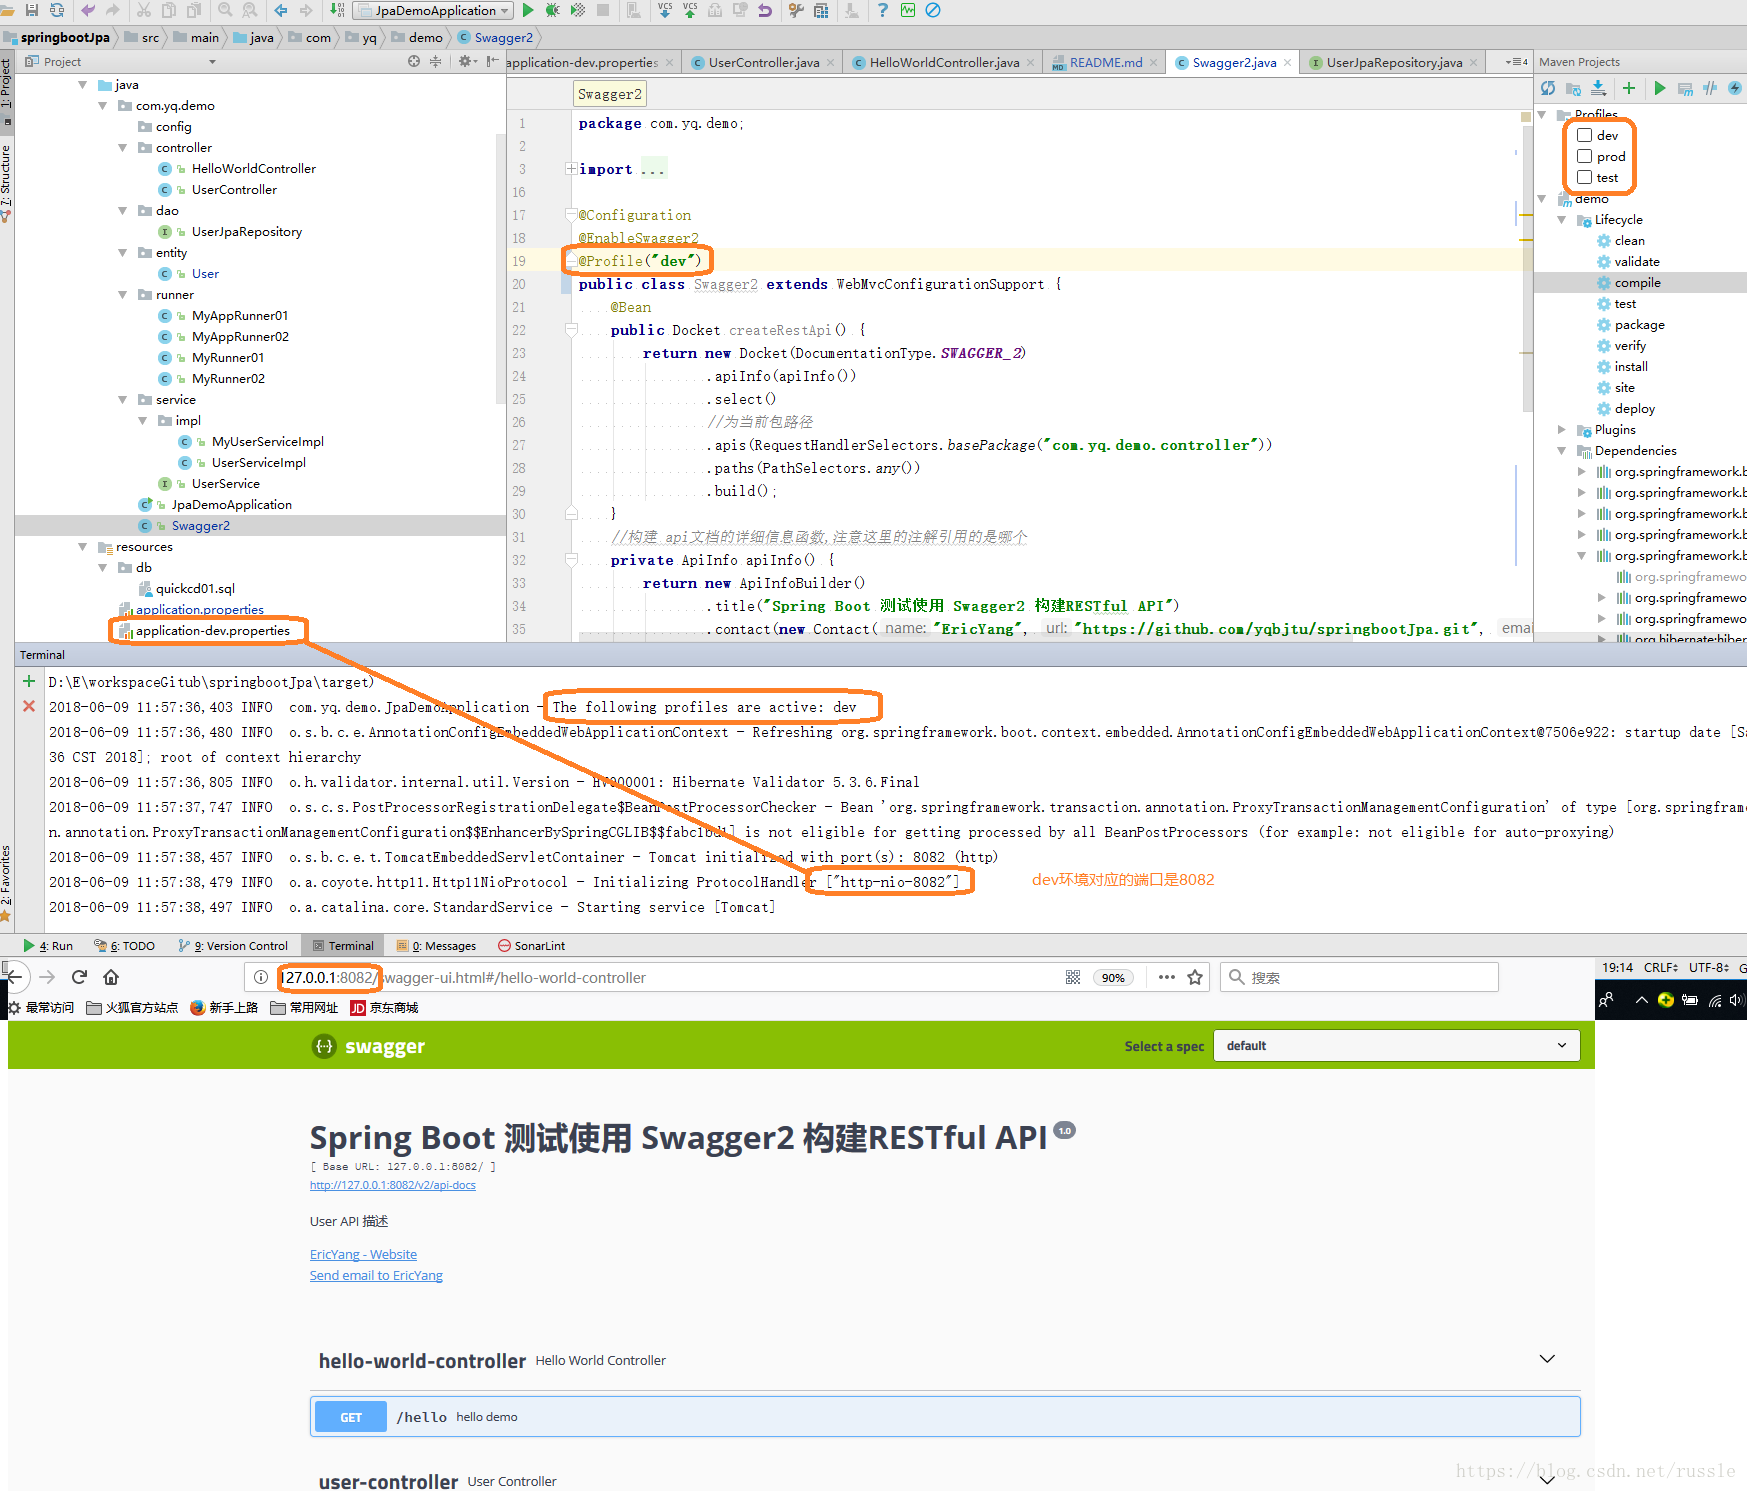
@Profile("dev")
public class Swagger2 extends WebMvcConfigurationSupport {
@Bean
public Docket createRestApi() {
return new Docket(DocumentationType.SWAGGER_2)
.apiInfo(apiInfo())
.select()
//为当前包路径
.apis(RequestHandlerSelectors.basePackage("com.yq.demo.controller"))
.paths(PathSelectors.any())
.build();
}
//构建 api文档的详细信息函数,注意这里的注解引用的是哪个
private ApiInfo apiInfo() {
return new ApiInfoBuilder()
.title("Spring Boot 测试使用 Swagger2 构建RESTful API")
.contact(new Contact("EricYang", "https://github.com/yqbjtu/springbootJpa.git", "[email protected]"))
.version("1.0")
.description("User API 描述")
.build();
}
@Override
protected void addResourceHandlers(ResourceHandlerRegistry registry) {
registry.addResourceHandler("/swagger-ui.html").addResourceLocations(
"classpath:/META-INF/resources/");
registry.addResourceHandler("/webjars/**").addResourceLocations(
"classpath:/META-INF/resources/webjars/");
}
}开发环境,启用Swagger
我们看看效果,如果是mvn package -P dev,这样生成的jar包,启动后可以看到swagger可以正常访问。
生产环境,禁用Swagger
接下来我们看看prod环境, 首先我们使用mvc package -P prod将代码编译打包,然后我们使用java -jar xxxx.jar启动.
我们新看看mvc package -P prod打包好的jar包有什么不一样。

可以看到新打包的jar中自动将spring.profiles.active=@profileActive@中的profileActive替换为prod了。
启动后的端口已经是8084
我们再看看swagger,以及rest是否工作正常。
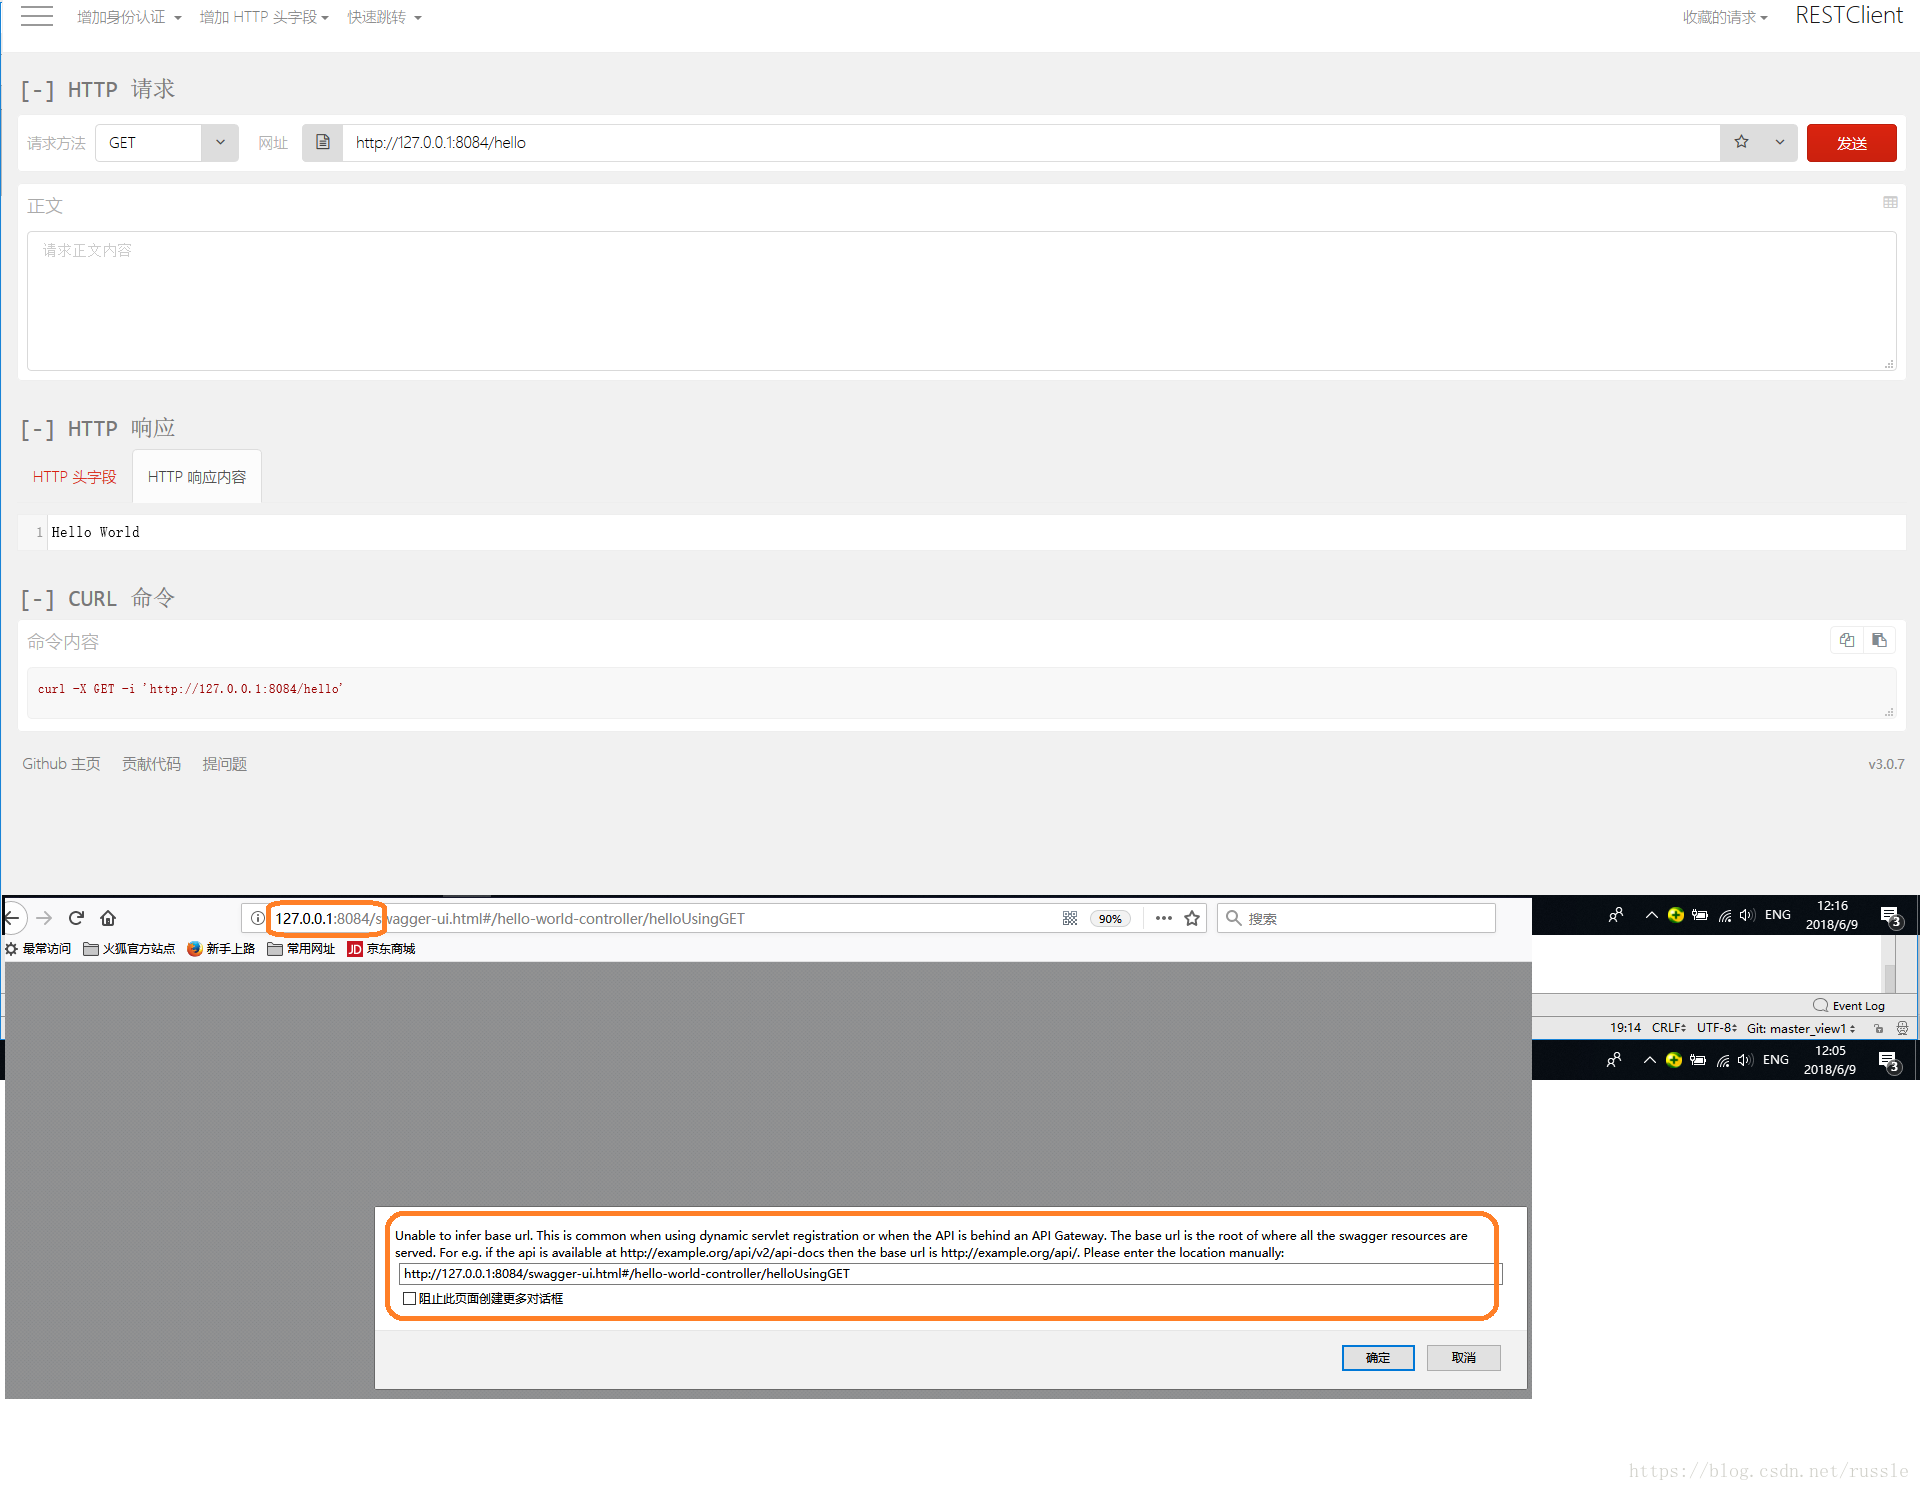
可以通过RestClient正常访问rest api,但是swagger不能显示API。
到此为止我们在dev环境中使用swagger, 在test和prod环境中禁用swagger就已经完全实现了,具体代码在这里,欢迎加星和fork。 谢谢!
注意事项:
如果我们使用mvn package, 默认没有指定profile,生成的jar中application.properties文件如下
spring.profiles.active=@profileActive@
spring.http.encoding.force=true
info.app.name=bootdemo
info.app.version=1.0.0
server.port=8081
当你启动的时候,系统提示没有profile,自动选择是用8081端口,swagger不能使用,也就是被禁用了。