用户的状态可以分为:未登录,登录但账户未确认和登录且账户确认。
目标是:
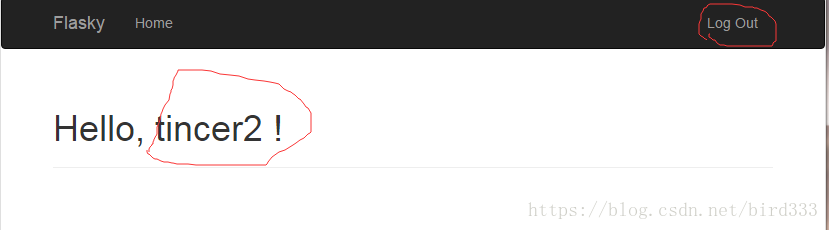
1.未登录。显示一个欢迎的页面:

2.登录但未确认。显示一个需要确认账户的页面和链接。

3.登录且账户确认:显示欢迎XXX的页面:
一、用户登录
# app/main/views.py

@main.route('/',methods=['GET','POST'])
def index():
    '''
    视图函数。主页。
    :return: 渲染后的模板
    '''
    return render_template('index.html')
# app/templates/index.html
{% extends "base.html" %}
{% import "bootstrap/wtf.html" as wtf %}
{% block title %}Flasky{% endblock %}
{% block page_content %}
<div class="page-header">
<h1>Hello,
{% if current_user.is_authenticated %} #flask-login提供的current_user对象可用来确认状态
{{ current_user.username }}
{% else %}
Stranger
{% endif %}
!
</h1>
</div>
{% endblock %}还记得我们之前说,要想使用flask-login扩展,必须实现的4个方法里就包括is_authenticated:如果用户已登录返回True,否则返回False。
这样,主页就分别针对是否登录,显示不同内容。
用户想要登录,需要点击右上角Log In。Log In的链接是在app/templates/base.html中实现的,用来被其他模板继承的。
# app/templates/base.html

{% block navbar %}
<div class="navbar navbar-inverse" role="navigation">
    <div class="container">
        <div class="navbar-header">
            <button type="button" class="navbar-toggle" data-toggle="collapse" data-target=".navbar-collapse">
                <span class="sr-only">Toggle navigation</span>
                <span class="icon-bar"></span>
                <span class="icon-bar"></span>
                <span class="icon-bar"></span>
            </button>
            <a class="navbar-brand" href="{{ url_for('main.index') }}">Flasky</a>
        </div>
        <div class="navbar-collapse collapse">
            <ul class="nav navbar-nav">
                <li><a href="{{ url_for('main.index') }}">Home</a></li>
            </ul>
            <ul class="nav navbar-nav navbar-right">
                {% if current_user.is_authenticated %}
                <li><a href="{{ url_for('auth.logout') }}">Log Out</a> </li>
                {% else %}
                <li><a href="{{ url_for('auth.login') }}">Log In</a> </li>
                {% endif %}
            </ul>
        </div>
    </div>
</div>
{% endblock %}但是,有一点不同:需要在log in的页面,加入注册的链接。
# app/templdates/auth/login.html

{% extends "base.html" %}
{% import "bootstrap/wtf.html" as wtf %}

{% block title %}Flasky - Login{% endblock %}

{% block page_content %}
<div class="page-header">
    <h1>Login</h1>
</div>
<div class="col-md-4">
    {{ wtf.quick_form(form) }}
    <p>
        New User?
        <a href="{{ url_for('auth.register') }}">
            Click Here to register
        </a>
    </p>
</div>
{% endblock %}二、用户注册
# app/auth/views.py

@auth.route('/register', methods=['GET', 'POST'])
def register():
    '''注册。数据库更新,发送确认邮件。'''
    form = RegistrationForm()
    if form.validate_on_submit():
        user = User(email=form.email.data, username=form.username.data, password=form.password.data)
        db.session.add(user)
        db.session.commit()
        token = user.generate_confirmation_token()  # 生成token必须要用到user.id,因此必须要先提交到数据库
        send_mail(user.email, '注册', 'auth/mail/confirm', user=user, token=token)
        flash('一份确认的邮件需要您到邮箱确认.')
        return redirect(url_for('main.index'))
return render_template('auth/register.html', form=form)register接受GET和POST两种请求。GET请求,则返回空表单的这也页面给用户;POST请求,则更新到数据库,生成令牌,把令牌发送到注册邮箱,让用户点击包含令牌的链接进行确认,返回主页。
三、用户登录邮箱,进行确认
邮件的内容
# app/templates/auth/mail/confirm.html

<p>Dear {{ user.username }},</p>
<p>Welcome to <b>Flasky</b>!</p>
<p>To confirm your account please <a href="{{ url_for('auth.confirm', token=token, _external=True) }}">click here</a>.</p>
<p>Alternatively, you can paste the following link in your browser's address bar:</p>
<p>{{ url_for('auth.confirm', token=token, _external=True) }}</p>
<p>Sincerely,</p>
<p>The Flasky Team</p>
<p><small>Note: replies to this email address are not monitored.</small></p>
带有token(令牌)的URL被发给用户。处理的视图函数是auth.confirm。
四、服务器进行用户确认
# app/auth/views.py

@auth.route('/confirm/<token>')
@login_required
def confirm(token):
    '''确认用户 带token的URL
    保护路由:只能在登录状态下执行'''
    if current_user.confirmed:
        return redirect(url_for('main.index'))
    if current_user.confirm(token):
        db.session.commit()
        flash('you have confirmed your account. thanks!')
    else:
        flash('the confirmation link is invalid or has expired.')
    return redirect(url_for('main.index'))