上一节DB已经集成过redis了,就是下面这个
<!-- redis -->
<dependency>
    <groupId>org.springframework.boot</groupId>
    <artifactId>spring-boot-starter-data-redis</artifactId>
</dependency>
今天希望能把redis搞通吧
配置类
package com.jiataoyuan.demo.springboot.config;

import org.springframework.beans.factory.annotation.Autowired;
import org.springframework.cache.annotation.CachingConfigurerSupport;
import org.springframework.cache.annotation.EnableCaching;
import org.springframework.context.annotation.Bean;
import org.springframework.context.annotation.Configuration;
import org.springframework.data.redis.connection.RedisConnectionFactory;
import org.springframework.data.redis.core.StringRedisTemplate;
import org.springframework.data.redis.listener.PatternTopic;
import org.springframework.data.redis.listener.RedisMessageListenerContainer;
import org.springframework.data.redis.listener.adapter.MessageListenerAdapter;

import java.util.concurrent.CountDownLatch;

/**
 * @author TaoYuan
 * @version V1.0.0
 * @date 2018/4/18 0018
 * @description description
 */
@Configuration
@EnableCaching
public class RedisConfig extends CachingConfigurerSupport{

    @Bean
    RedisMessageListenerContainer container(RedisConnectionFactory connectionFactory,
                                            MessageListenerAdapter listenerAdapter) {

        RedisMessageListenerContainer container = new RedisMessageListenerContainer();
        container.setConnectionFactory(connectionFactory);
        container.addMessageListener(listenerAdapter, new PatternTopic("chat"));

        return container;
    }

    @Bean
    MessageListenerAdapter listenerAdapter(Receiver receiver) {
        return new MessageListenerAdapter(receiver, "receiveMessage");
    }

    @Bean
    Receiver receiver(CountDownLatch latch) {
        return new Receiver(latch);
    }

    @Bean
    CountDownLatch latch() {
        return new CountDownLatch(1);
    }

    @Bean
    StringRedisTemplate template(RedisConnectionFactory connectionFactory) {
        return new StringRedisTemplate(connectionFactory);
    }

    public class Receiver {


        private CountDownLatch latch;

        @Autowired
        public Receiver(CountDownLatch latch) {
            this.latch = latch;
        }

        public void receiveMessage(String message) {
            latch.countDown();
        }
    }


}
关于配置类,有时候不一定是必须的,因为有的需要,有时候不需要,加个注解也可以达到通用的效果,就比如上一节的MyBatis就没写配置类,所以,如果不想在写这个配置类的话,也可以直接在application类中加@EnableCaching注解
配置
spring:
    thymeleaf:
        cache: false
    freemarker:
        cache: false
    groovy:
        template.cache: false
    # 数据源
    datasource:
        # 数据库的URL、帐号、密码、驱动
        url: jdbc:mysql://localhost:3306/test?useUnicode=true&characterEncoding=utf-8
        username: root
        password: 123456
        driver-class-name: com.mysql.jdbc.Driver
        # 使用druid连接池
        type: com.alibaba.druid.pool.DruidDataSource
        # druid连接池的配置信息
        initialSize: 5
        # 最小连接数量
        minIdle: 5
        # 最大连接数量
        maxActive: 20
        # 获取连接等待超时的时间
        maxWait: 60000
        # 间隔多久进行一次检测(需要关闭的空闲连接)
        timeBetweenEvictionRunsMillis: 30000
        # 连接在池中最小生存的时间
        minEvictableIdleTimeMillis: 30000
        testWhileIdle: true
        testOnBorrow: false
        testOnReturn: false
    # Redis 配置
    redis:
        # Redis数据库索引(默认为0)
        database: 0
        # Redis服务器地址,默认localhost
        host: 127.0.0.1
        # 端口 默认6379
        port: 6379
        # 密码 默认空
        password:
        # 连接超时时间
        pool:
            # 连接池最大连接数(使用负值表示没有限制)
            max-active: 8
            # 连接池最大阻塞等待时间(使用负值表示没有限制)
            max-wait: -1
            # 连接池中的最大空闲连接
            max-idle: 8
            # 连接池中的最小空闲连接
            min-idle: 0
        timeout: 0


# MyBatis 配置
mybatis:
    # mybatis的mapper.xml文件的路径
    mapper-locations: classpath:mapper/*.xml
    # mybatis的model所在的包
    type-aliases-package: com.jiataoyuan.demo.springboot.model
到这里,整合基本就完成了
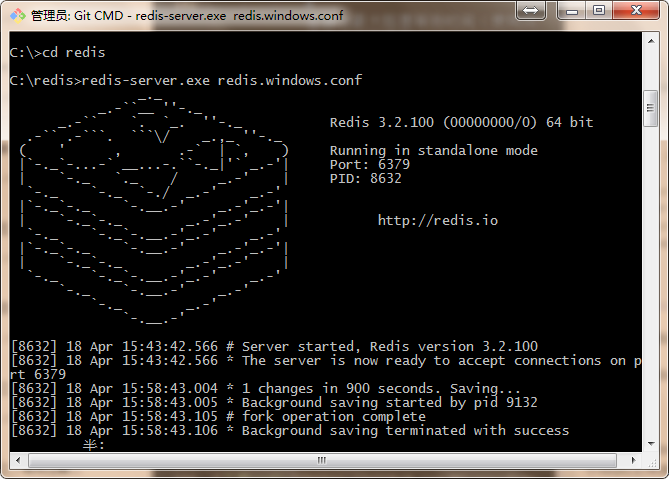
如果没装redis的话,先装一下,然后开启服务
上面是windows版本的,直接解压即可,建议在C盘单独建个redis文件夹,然后命令行进入,并执行一下命令,就开启了
redis-server.exe redis.windows.conf
然后编写业务逻辑
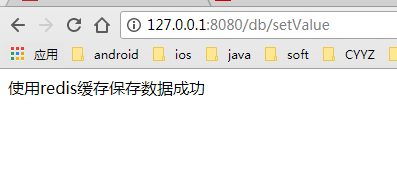
    @RequestMapping("/setValue")
    public String setValue(){
        if(!template.hasKey("name")){
            template.opsForValue().append("name", "王二小");
            return "使用redis缓存保存数据成功";
        }else{
            template.delete("name");
            return "key已存在";
        }
    }

    @RequestMapping("/getValue")
    public String getValue(){

        if(!template.hasKey("name")){
            return "key不存在,请先保存数据";
        }else{
            String name = template.opsForValue().get("name");//根据key获取缓存中的val
            return "获取到缓存中的数据:name:"+name;
        }
    }
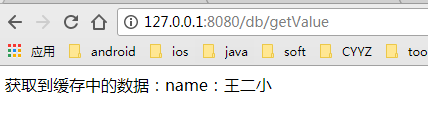
这就是一个最基本的redis使用案例了
关于redis更多的,可以查查详细的教程,由于现在主要学SpringBoot,redis就先放放吧。
redis菜鸟教程