1. 设置网络
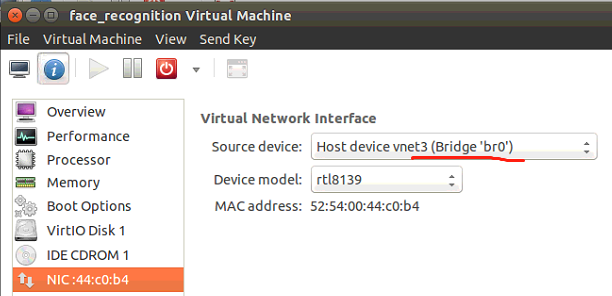
设置网络时,一定要设置好网卡,第一个网卡一定要设置为‘br0’(如下图),设置为其他的上不去网。
修改网络配置文件,命令:sudo gedit /etc/network/interfaces
- 单个网卡配置文件
# interfaces(5) file used by ifup(8) and ifdown(8)

auto lo
iface lo inet loopback  #设置本地环回

auto eth0
iface eth0 inet static  #设置静态IP
address 192.168.0.118  #静态IP地址
netmask 255.255.255.0   #子网掩码
gateway 192.168.0.1     #网关
- 双网卡配置文件
# interfaces(5) file used by ifup(8) and ifdown(8)

auto lo
iface lo inet loopback

auto eth0  #第一个网卡(接外网)
iface eth0 inet static
address 192.168.0.118
netmask 255.255.255.0
gateway 192.168.0.1

auto eth1  #第二个网卡(接内网)
iface eth1 inet static
address 192.168.213.103
netmask 255.255.255.0
auto br0
iface br0 inet dhcp
bridge_ports eth0
bridge_stp off
bridge_fd 0

auto br1
iface br1 inet static
bridge_ports eth1
bridge_stp off
bridge_fd 0
2. 更新为国内源,并安装vim
1 sudo cp /etc/apt/sources.list /etc/apt/sources.list.bak #备份
2 sudo vim /etc/apt/sources.list #修改
3 sudo apt-get update #更新列表
# 阿里源
deb http://mirrors.aliyun.com/ubuntu/ trusty main restricted universe multiverse
deb http://mirrors.aliyun.com/ubuntu/ trusty-security main restricted universe multiverse
deb http://mirrors.aliyun.com/ubuntu/ trusty-updates main restricted universe multiverse
deb http://mirrors.aliyun.com/ubuntu/ trusty-proposed main restricted universe multiverse
deb http://mirrors.aliyun.com/ubuntu/ trusty-backports main restricted universe multiverse
deb-src http://mirrors.aliyun.com/ubuntu/ trusty main restricted universe multiverse
deb-src http://mirrors.aliyun.com/ubuntu/ trusty-security main restricted universe multiverse
deb-src http://mirrors.aliyun.com/ubuntu/ trusty-updates main restricted universe multiverse
deb-src http://mirrors.aliyun.com/ubuntu/ trusty-proposed main restricted universe multiverse
deb-src http://mirrors.aliyun.com/ubuntu/ trusty-backports main restricted universe multiverse
3. 下载并安装搜狗输入法
百度“搜狗输入法”,下载linux版,双击打开deb包,在ubuntu中心安装即可,安装成功后,重启生效。
4. 安装anaconda工具包
百度“anaconda 清华源”,下载最新版的linux版的anaconda包,下载好后,在终端输入:bash 包名,一步步往下走即可;
5. 安装cmake
Installation of Cmake:(it tooks a while to install ~1.5 min)
1 sudo wget  https://cmake.org/files/v3.9/cmake-3.9.0-rc5.tar.gz -O cmake.tar.gz
2 sudo tar -xvf cmake.tar.gz
3 cd cmake-3.9.0-rc5/
4 sudo chmod +x bootstrap
5 sudo ./bootstrap
6 sudo make
7 sudo make install

注:安装好cmake后,输入cmake -version查看cmake版本是否安装成功。
*6. 安装dlib库
- 下面通过手动编译dlib的方式进行安装dlib
1 git clone https://github.com/davisking/dlib.git     //Clone the code from github
2 cd dlib
3 mkdir build
4 cd build
5 cmake .. -DDLIB_USE_CUDA=0 -DUSE_AVX_INSTRUCTIONS=1  //以AVX指令的方式编译dlib
6 cmake --build .
7 cd ..
8 sudo python3 setup.py install --yes USE_AVX_INSTRUCTIONS --no DLIB_USE_CUDA

注:最后一步需要等待一些时间。如果使用python3.x版本,最后一步命令python改为python3
安装完成后,运行python3,输入
import dlib
*7. 安装face_recognition人脸识别库
- 安装face_recognition
$ sudo pip install face_recognition
安装完成后,运行python3,输入
import face_recognition
*8. 安装setuptools包
wget https://bootstrap.pypa.io/ez_setup.py -O - | sudo python
*9. 安装teamviewer
*10. 安装vlc
终端输入:sudo apt-get install vlc