搭建openvpn
环境说明
系统版本 CentOS 6.9 x86_64
软件版本 openvpn-2.4.6 easy-rsa-3.0.3
OpenVPN是一个用于创建虚拟专用网络(Virtual Private Network)加密通道的免费开源软件。使用OpenVPN可以方便地在家庭、办公场所、住宿酒店等不同网络访问场所之间搭建类似于局域网的专用网络通道。OpenVPN使用方便,运行性能优秀,支持Solaris、Linux 2.2+(Linux 2.2+表示Linux 2.2及以上版本,下同)、OpenBSD 3.0+、FreeBSD、NetBSD、Mac OS X、Android和Windows 2000+的操作系统,并且采用了高强度的数据加密,再加上其开源免费的特性,使得OpenVPN成为中小型企业及个人的VPN首选产品。使用OpenVPN配合特定的代理服务器,可用于访问Youtube、FaceBook、Twitter等受限网站,也可用于突破公司的网络限制。
1、开启内核转发
-
[root@m01 ~]# vim /etc/sysctl.conf
-
net.ipv4.ip_forward = 1
-
[root@m01 ~]# sysctl -p
2、生成证书
服务端证书,客户端证书,CA证书
[root@m01 ~]# yum install easy-rsa -y #安装easy-rsa
[root@m01 ~]# cd /opt/
[root@m01 opt]# mkdir easy-rsa #创建目录
[root@m01 opt]# cd easy-rsa/
[root@m01 easy-rsa]# cp -a /usr/share/easy-rsa/3.0.3/* . #拷贝默认的文件到当前目录下
[root@m01 easy-rsa]# cp /usr/share/doc/easy-rsa-3.0.3/vars.example vars #拷贝默认的vars文件并重命名为vars,vim进行编辑
[root@m01 easy-rsa]# vim vars #去掉以下几处前面的注释,后面内容对部分进行修改,这里只修改了最后一个
set_var EASYRSA_DN "cn_only"
set_var EASYRSA_REQ_COUNTRY "US"
set_var EASYRSA_REQ_PROVINCE "California"
set_var EASYRSA_REQ_CITY "San Francisco"
set_var EASYRSA_REQ_ORG "Copyleft Certificate Co"
set_var EASYRSA_REQ_EMAIL "[email protected]"
set_var EASYRSA_REQ_OU "My Organizational Unit"
set_var EASYRSA_NS_SUPPORT "yes" #此处记得将no改为yes
[root@m01 easy-rsa]# ./easyrsa init-pki #初始化创建pki目录,用于存储一些中间变量及最终生成的证书
Your newly created PKI dir is: /opt/easy-rsa/pki #成功后提示生成的pki目录路径
[root@m01 easy-rsa]# ./easyrsa build-ca #创建根证书
Verifying - Enter PEM pass phrase: #提示属于密码123456回车
Common Name (eg: your user, host, or server name) [Easy-RSA CA]: #提示直接回车,也可手动修改
Your new CA certificate file for publishing is at:
/opt/easy-rsa/pki/ca.crt #成功后提示生成的ca根证书路径
[root@m01 easy-rsa]# ./easyrsa gen-req server nopass
#创建server端证书和private key,nopass表示不加密private key
Common Name (eg: your user, host, or server name) [server]: #提示直接回车,也可手动修改
Keypair and certificate request completed. Your files are:
req: /opt/easy-rsa/pki/reqs/server.req
key: /opt/easy-rsa/pki/private/server.key #成功后提示生成的server端证书及密钥文件路径
[root@m01 easy-rsa]# ./easyrsa sign server server #给server端证书做签名
Type the word 'yes' to continue, or any other input to abort.
Confirm request details: yes #输入yes回车
Using configuration from ./openssl-1.0.cnf
Enter pass phrase for /opt/easy-rsa/pki/private/ca.key: #输入密码123456回车
Check that the request matches the signature
Signature ok
The Subject's Distinguished Name is as follows
commonName :PRINTABLE:'server'
Certificate is to be certified until May 13 07:24:59 2028 GMT (3650 days)
Write out database with 1 new entries
Data Base Updated
Certificate created at: /opt/easy-rsa/pki/issued/server.crt #成功后提示生成的server端签名文件路径
[root@m01 easy-rsa]# ./easyrsa gen-dh #创建Diffie-Hellman,需要耐心等待较长时间
DH parameters of size 2048 created at /opt/easy-rsa/pki/dh.pem #成功后提示生成的交换文件路径
[root@m01 easy-rsa]# ./easyrsa gen-req client nopass
#创建client端证书和private key,nopass表示不加密private key
Common Name (eg: your user, host, or server name) [client]:
Keypair and certificate request completed. Your files are:
req: /opt/easy-rsa/pki/reqs/client.req
key: /opt/easy-rsa/pki/private/client.key #成功后提示生成的客户端证书及密钥文件路径
[root@m01 easy-rsa]# ./easyrsa sign client client #给client端证书做签名
Type the word 'yes' to continue, or any other input to abort.
Confirm request details: yes #输入yes回车
Using configuration from ./openssl-1.0.cnf
Enter pass phrase for /opt/easy-rsa/pki/private/ca.key: #输入密码123456回车
Check that the request matches the signature
Signature ok
The Subject's Distinguished Name is as follows
commonName :PRINTABLE:'client'
Certificate is to be certified until May 13 07:30:06 2028 GMT (3650 days)
Write out database with 1 new entries
Data Base Updated
Certificate created at: /opt/easy-rsa/pki/issued/client.crt #成功后提示生成的client端签名文件路径
3、配置服务端
3.1、安装openvpn
在安装openvpn之前需要配置epel源
-
[root@m01 ~]# wget -O /etc/yum.repos.d/epel.repo http://mirrors.aliyun.com/repo/epel-6.repo
-
[root@m01 ~]# yum makecache
-
[root@m01 ~]# yum -y install openvpn #安装openvpn
3.2、配置
[root@m01 client]# cd /etc/openvpn/
[root@m01 openvpn]# #拷贝默认server端配置文件,也可直接进行编辑,不拷贝
cp /usr/share/doc/openvpn-2.4.6/sample/sample-config-files/server.conf /etc/openvpn/server.conf.bak
[root@m01 openvpn]# grep -Ev '^$|^#|^;' server.conf.bak >server.conf #最小化配置文件
[root@m01 openvpn]# vim server.conf #编辑server端配置文件
port 1194 #指定openvpn端口
proto tcp #指定使用tcp协议
dev tun #指定使用tun模式,也可以使用tap模式
ca ca.crt #证书的位置,相对路径
cert server.crt
key server.key
dh dh.pem
server 10.8.0.0 255.255.255.0 #为客户端指定一个使用的ip段,与服务器ip不同
push "route 192.168.1.0 255.255.255.0" #vpn访问的网段
ifconfig-pool-persist ipp.txt #指定ip地址池,存放每个人使用的ip
keepalive 10 120 #保持连接的时间
comp-lzo #开启vpn压缩,提高速度
#duplicate-cn #允许多人使用同一个证书连接VPN,不建议使用,注释状态
persist-key
persist-tun
status openvpn-status.log #状态日志
verb 3 #日志级别
client-to-client
duplicate-cn
log /var/log/openvpn.log #访问日志
#拷贝以下四个文件到服务端目录下
[root@m01 openvpn]# cp /opt/easy-rsa/pki/ca.crt .
[root@m01 openvpn]# cp /opt/easy-rsa/pki/issued/server.crt .
[root@m01 openvpn]# cp /opt/easy-rsa/pki/private/server.key .
[root@m01 openvpn]# cp /opt/easy-rsa/pki/dh.pem .
[root@m01 client]# ls /etc/openvpn/
ca.crt server.conf server.key
dh.pem server.crt
[root@m01 easy-rsa]# mkdir client
[root@m01 easy-rsa]# cd client/
#拷贝以下三个文件到创建的客户端目录下
[root@m01 client]# cp /opt/easy-rsa/pki/ca.crt .
[root@m01 client]# cp /opt/easy-rsa/pki/issued/client.crt .
[root@m01 client]# cp /opt/easy-rsa/pki/private/client.key .
[root@m01 client]# ls
ca.crt client.crt client.key
3.3、启动
-
[root@m01 client]# /etc/init.d/openvpn start
-
Starting openvpn: [ OK ]
-
[root@m01 client]# netstat -lntup|grep 1194
-
tcp 0 0 0.0.0.0:1194 0.0.0.0:* LISTEN 21105/openvpn
4、配置客户端
4.1、安装
下载windows客户端安装包并安装官网为www.openvpn.net

4.2、配置
进入到Windows的openvpn安装路径,进入config目录,下载这三个客户端文件(根证书,客户端证书,客户端密钥)
-
[root@m01 client]# ls
-
ca.crt client.crt client.key
-
[root@m01 client]# sz *
新建名为client.ovpn的客户端配置文件
编辑内容并保存,配置内容与服务端对应,也可以参照服务端默认的客户端配置文件进行编辑,路径为
/usr/share/doc/openvpn-2.4.6/sample/sample-config-files/client.conf
client
dev tun
proto tcp
remote 10.0.0.61 1194
resolv-retry infinite
nobind
persist-key
persist-tun
ca ca.crt
cert client.crt
key client.key
ns-cert-type server
comp-lzo
verb 3
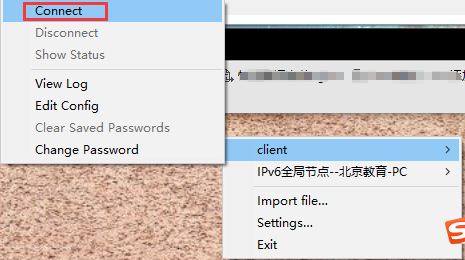
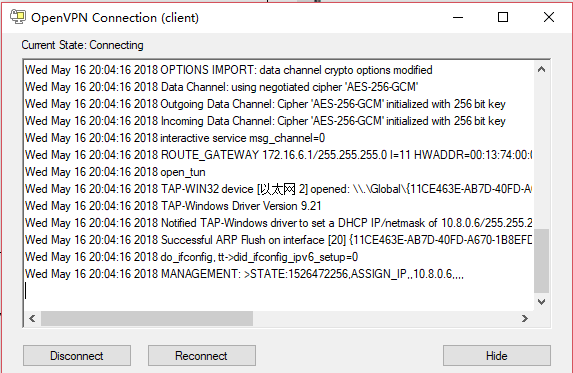
4.3、启动
在Windows右键以管理员方式启动openvpn,并加载到客户端配置文件,点击connect,如果只有一个配置文件则不需要选择,默认加载进行连接,连接成功后桌面有提示,并且右下角图标变绿,这时就可以成功连接到vpn服务器
5、配置vpn访问内网网段
方案一:
在连接到的vpn服务器所在内网网段的其他服务器上配置,将该vpn服务器作为内部机器的网关,具体做法为在其他机器上添加路由,例如这里使用的内网网段是192.168.1.0,vpn服务器的内网地址为192.168.1.61
[root@web01 ~]# route add -net 10.8.0.0/24 gw 192.168.1.61
或者直接指定默认网关
[root@web01 ~]# route add default gw 192.168.1.61
[root@web01 ~]# tcpdump -i eth1 #在客户端执行ping命令,抓包进行查看
tcpdump: verbose output suppressed, use -v or -vv for full protocol decode
listening on eth1, link-type EN10MB (Ethernet), capture size 65535 bytes
22:52:47.063020 IP 10.8.0.6 > 192.168.1.7: ICMP echo request, id 1, seq 366, length 40
22:52:47.063044 IP 192.168.1.7 > 10.8.0.6: ICMP echo reply, id 1, seq 366, length 40
22:52:48.063590 ARP, Request who-has 192.168.1.7 tell 192.168.1.61, length 46
22:52:48.063605 ARP, Reply 192.168.1.7 is-at 00:0c:32:e7:44:c0 (oui Unknown), length 28
22:52:48.065214 IP 10.8.0.6 > 192.168.1.7: ICMP echo request, id 1, seq 367, length 40
22:52:48.065231 IP 192.168.1.7 > 10.8.0.6: ICMP echo reply, id 1, seq 367, length 40
此种方法虽然实现了需求,但是若内部服务器很多,这样就需要多次重复操作,不是很实用,推荐使用方案二
方案二:
在连接到的vpn服务器上配置nat转换即可达到目的
[root@db01 ~]# iptables -t nat -A POSTROUTING -s 10.8.0.0/24 -o eth1 -j MASQUERADE
[root@web01 ~]# tcpdump -i eth1 #同样在客户端执行ping命令,抓包进行查看
tcpdump: verbose output suppressed, use -v or -vv for full protocol decode
listening on eth1, link-type EN10MB (Ethernet), capture size 65535 bytes
19:52:40.930523 IP 192.168.1.61 > 192.168.1.51: ICMP echo request, id 1, seq 1090, length 40
19:52:40.930561 IP 192.168.1.51 > 192.168.1.61: ICMP echo reply, id 1, seq 1090, length 40
19:52:41.928726 IP 192.168.1.61 > 192.168.1.51: ICMP echo request, id 1, seq 1091, length 40
19:52:41.928746 IP 192.168.1.51 > 192.168.1.61: ICMP echo reply, id 1, seq 1091, length 40