html +css + JavaScript 复盘
1、网页第一代文本标签(直接上代码,看保姆级注解)
<!-- doctype: document type  -->
<!DOCTYPE html>
<html lang="en">
<head>
    <!-- meta标签是元数据标签,告诉浏览器要做的任务 -->
    <meta charset="UTF-8">
    <meta http-equiv="X-UA-Compatible" content="IE=edge">
    <meta name="viewport" content="width=device-width, initial-scale=1.0">
    <title>Document</title>
</head>
<body>
    <!-- h:heading 标题 -->
    <h1>1.福建农林大学</h1>
    <h2>1.1福建农林大学</h2>
    <h3>1.1.1福建农林大学</h3>
    <h4>1.1.1.1福建农林大学</h4>
    <h5>1.1.1.1.1福建农林大学</h5>
    <h6>1.1.1.1.1.1福建农林大学</h6>
    <!-- horizontal ruler -->
    <!-- 单标签 -->
    <hr>
    <p>meta标签是元数据标签,告诉浏览器要做的任务meta标签是元数据标签,告诉浏览器要做的任务meta标签是元数据标签</p>

    <p>meta标签是元数据标签,告诉浏览器要做的任务meta标签是元数据标签,告诉浏览器要做的任务meta标签是元数据标签,告诉浏览器要做的任务</p>

    <p>meta标签是元数据标签,告诉浏览器要做的任务meta标签是元数据标签,告诉浏览器要做的任务meta标签是元数据标签,告诉浏览器要做的任务</p>
    <hr>
    <!-- ul:unordered list 无序列表, li:list item 列表项-->
    <!-- emmet语法 -->
    <ul type="square">
        <li>星期一
            <ol>   <!--ol:有序列表 li:列表项-->
                <li>语文课</li>
                <li>数学课</li>
                <li>英语课</li>
                <li>体育课</li>
            </ol>
        </li>
        <li>星期二</li>
        <li>星期三</li>
        <li>星期四</li>
    </ul>
    <!-- 单属性 -->
    <!--type:指定序号类型,start:开始的序号,reversed:指定成倒叙(默认是升序)-->
    <ol type="1" start="50" reversed>
        <li>语文课</li>
        <li>数学课</li>
        <li>英语课</li>
        <li>体育课</li>
    </ol>
    <hr>
    <!-- dl:definition list 定义一个列表,
         dt: definition title 定义一个标题 ,
         dd: definition description 定义一个标题的描述-->
    <dl>
        <dt>计算机</dt>
        <dd>一种能自动计算的设备</dd>
        <dt>javaEE</dt>
        <dd>一种java web解决方案</dd>
    </dl>
    <hr>
    <!-- i:italic 斜体 , b:bold 加粗 ,del:delect,删除,  ins:insert下划线-->
    <font size="30" color="red" face="verdana"><i>this</i> <b>is</b> <del>a</del> <ins>flower</ins>!</font>
    <hr>
    <!-- sub:下标,   sup:上标 -->
    H<sub>2</sub>O, a<sup>2</sup>+b<sup>2</sup>=c<sup>2</sup>
    <hr>
    <!-- 表格是多个标签协同工作的结果  tr:table row, th: table header, td:table data-->
    <table border="1" cellspacing="0" cellpadding="5px">
        <caption align="bottom">学生表</caption>
        <!-- <thead> -->
            <tr> <!--tr:table row :表格行,th:table head :表头-->
              <th>学号</th>
              <th>姓名</th>
              <th>年龄</th>
            </tr>
        <!-- </thead> -->
        <!-- <tbody> -->
            <tr> <!--tr:table row :表格行,td:table data:表格数据-->
                <td>s001</td>
                <td>mary</td>
                <td>12</td>
            </tr>
            <tr>
                <td>s002</td>
                <td>kate</td>
                <td rowspan="2">11</td>  <!--行合并-->
            </tr>
            <tr>
                <td>s003</td>
                <td>陈海</td>
            </tr>
            <tr>
                <td>s004</td>
                <!-- line,column -->
                <td colspan="2">信息不详1</td> <!--列合并-->
            </tr>
        <!-- </tbody> -->
    </table>
    <hr>
    <!-- 设置宽度或者高度,另外一侧是自动等比例缩放 -->
    <img src="car.jpg" height="400" alt="这是一张宝马轿车图片"> ,<!--alt:在图片加载不出来的时候用来提示该区域是什么的作用-->
    <!-- br:break and return  -->
    <br><br><br><br><br><br><br><br><br><br>    <!--br 换行符-->
</body>
</html>
实验一中的制作表格代码(亦可回顾https://blog.csdn.net/qq_52495761/article/details/134759245)
<!DOCTYPE html>
<html lang="en">
<head>
    <meta charset="UTF-8">
    <meta name="viewport" content="width=device-width, initial-scale=1.0">
    <title>学生信息登记表</title>

    <style>
        table {


            border-collapse: collapse;

        }

        th, td {


            border: 1px solid black;
            padding: 5px;
            text-align: left;
            min-width: 80px; /* 设置最小宽度,根据实际需要调整 */
        }

        th {


            text-align: center;
        }
        textarea {


            width: calc(100%);
            border: 0; /*隐藏 输入框的边框*/
            padding: 6px;
            box-sizing: border-box;
            height: 100%; /* Set the height to 100% to fill the entire cell */
            resize: vertical;
        }

        input[type="text"] {


            width: calc(100%); /* Adjust the input field width */
            border: 0;/*隐藏多行输入框的边框*/
            padding: 6px; /* Adjust the padding for better appearance */
            box-sizing: border-box; /* Include padding and border in the element's total width and height */
        }

        .vertical-text {


            writing-mode: vertical-rl; /* 设置垂直显示 */
            text-align: center;
        }
    </style>
</head>
<body>

<h3 style="text-align: center;">2013-2014年度第一学期国土资源学院学生信息登记表</h3>

<table style="margin: auto;height: 100vh;width: auto;">
    <tr>
        <th>姓名</th>
        <td><input type="text" name="name"></td>
        <th>性别</th>
        <td><input type="text" name="gender"></td>
        <th>出生年月</th>
        <td><input type="text" name="birthdate" ></td>
        <td rowspan="4" style="width: 180px;"></td>
    </tr>
    <tr>
        <th>年级班</th>
        <td><input type="text" name="grade"></td>
        <th>专业</th>
        <td><input type="text" name="major"></td>
        <th>学号</th>
        <td><input type="text" name="studentId"></td>
    </tr>
    <tr>
        <th>联系方式</th>
        <td><input type="text" name="contact"></td>
        <th>寝室号</th>
        <td><input type="text" name="dormitory"></td>
        <th>政治面貌</th>
        <td><input type="text" name="politicalStatus"></td>
    </tr>
    <tr>
        <th>身份证号</th>
        <td colspan="5"><input type="text" name="idNumber"></td>
    </tr>
    <tr>
        <th>家庭住址</th>
        <td colspan="6"><input type="text" name="homeAddress"></td>
    </tr>
    <tr>
        <th rowspan="2">家长电话</th>
        <td colspan="6"><input type="text" name="parentContact1"></td>
    </tr>
    <tr>
        <td colspan="6"><input type="text" name="parentContact2"></td>
    </tr>

    <tr>
        <th>紧急联系人</th>
        <td><input type="text" name="emergencyContactName"></td>
        <th>联系方式</th>
        <td><input type="text" name="emergencyContactNumber"></td>
        <th>与本人关系</th>
        <td colspan="2"><input type="text" name="emergencyContactRelationship"></td>
    </tr>
    <tr>
        <th class="vertical-text" rowspan="5">上期情况</th>
        <th>获奖情况</th>
        <td colspan="5"><input type="text" name="award"></td>
    </tr>
    <tr>
        <th>任职情况</th>
        <td colspan="5"><input type="text" name="position"></td>
    </tr>
    <tr>
        <th>过级情况</th>
        <td colspan="5"><input type="text" name="promotion"></td>
    </tr>
    <tr>
        <th>考证情况</th>
        <td colspan="5"><input type="text" name="certification"></td>
    </tr>
    <tr>
        <th>实践情况</th>
        <td colspan="5"><input type="text" name="practice"></td>
    </tr>
    <tr>
        <th class="vertical-text">本期目标</th>
        <td colspan="6" rowspan="5"><textarea name="goals"></textarea></td>
    </tr>
</table>

</body>
</html>
2、表单标签(直接上代码,看注解)
<!DOCTYPE html>
<html lang="en">
<head>
    <meta charset="UTF-8">
    <meta http-equiv="X-UA-Compatible" content="IE=edge">
    <meta name="viewport" content="width=device-width, initial-scale=1.0">
    <title>Document</title>
</head>
<body>
    <h3>新生登记表</h3>
    <!--action 是定义的是一个当点击submit的时候所需要跳转的页面的路径
        method定义的是表单的提交方式 两种提交的方式区别以及各自的优缺点:
        1. get提交,数据被放在网址后头,也就是url后头提交模式是:
             url?key1=value1&key2=value2&......&keyn=valuen

        process.html?
           seccode=AESH1
           &stuno=s00001
           &schoolId=03025
           &stuname=mike
           &stupwd=123456
           &gender=m
           &birth=2023-09-21
           &favourcolor=%235977f0
           &photo=chrome_elf.dll
           &hobby=cm&hobby=rn&hobby=rd
           &stuorigin=qz
           &stumemo=good

        缺点:
           1)url允许的长度有限,无法提交大数据
           2)安全性不够
           3)不适合传英文之外的语言符号

        优点:
           成本很低

        url?id=10

        2. post提交, 系统先预先在内存中构建了一个容器,然后把数据保存到容器中,偷偷发送给服务器,网址上看不见

        优点:
           1)可以传大数据,几个GB都没问题
           2)安全保密性高
           3)可以传中文

        缺点:
           成本高

        表单提交一般都是使用post打包传送
    -->
    <form action="process.html" method="post">
         <!--这是表单中的一个隐藏输入字段,用于存储对用户不可见的数据。
            它存储了一个名为 seccode,值为 "AESH1" 的安全码。
        -->
        <input type="hidden" name="seccode" value="AESH1">
        <div>
            <label>学生学号:</label>
            <input type="text" name="stuno" maxlength="6" size="30" placeholder="请输入6位学号"><!--placeholder:在输入字段中显示占位符文本-->
        </div>
        <div>
            <label>学校编码:</label>
            <input type="text" name="schoolId" value="03025" size="10" readonly><!--readonly:只读-->
        </div>
        <div>
            <label>学生姓名:</label>
            <input type="text" name="stuname">
        </div>
        <div>
            <label>学生密码:</label>
            <input type="password" name="stupwd" maxlength="6" size="10">
        </div>
        <div>
            <labe>学生性别</label>
            <!-- name设置为一致,形成互斥组 -- 从而实现多个radio是只能选中其中的一个,默认选中通过checked-->
            <input type="radio" name="gender" value="f" checked>女
            <input type="radio" name="gender" value="m">男
            <input type="radio" name="gender" value="s">保密
        </div>
        <div>
            <label>学生生日</label>
            <input type="date" name="birth">
        </div>
        <div>
            <label>最爱色彩</label>
            <input type="color" name="favourcolor">
        </div>
        <div>
            <label>学生照片</label>
            <input type="file" name="photo">
        </div>
        <div>
            <label>学生爱好</label>
            <!-- 同样的名字,hobby,会形成一个数组, 其就是数组的名字 ,默认选中通过checked-->
            <input type="checkbox" name="hobby" value="cm" checked>爬山
            <input type="checkbox" name="hobby" value="rn">跑步
            <input type="checkbox" name="hobby" value="rd" checked>阅读
            <input type="checkbox" name="hobby" value="sw">游泳
        </div>
        <div>
            <label>学生籍贯</label>
            <select name="stuorigin"><!--下拉选择框,通过selected实现默认选中-->
                <option value="">--请选择--</option>
                <option value="fz">福州</option>
                <option value="xm" selected>厦门</option>
                <option value="qz">泉州</option>
                <option value="np">南平</option>
            </select>
        </div>
        <div>
            <label>学生备注</label>
            <textarea name="stumemo" cols="60" rows="4">请留言</textarea><!--多行输入框-->
        </div>
        <div>
            <input type="submit" value="确认登记">
            <input type="reset" value="取消">
        </div>
    </form>

</body>
</html>
3、why-css(样式表的优势)
<!--使用在标签上进行渲染-->
<!DOCTYPE html>
<html lang="en">
<head>
    <meta charset="UTF-8">
    <meta name="viewport" content="width=device-width, initial-scale=1.0">
    <title>Document</title>
</head>
<body>
    <div><font size="16" color="red">福州大学</font></div>
    <div><font size="16" color="red">福建农林大学</font></div>
</body>
</html>
<!--通过css样式进行渲染-->
<!DOCTYPE html>
<html lang="en">
<head>
    <meta charset="UTF-8">
    <meta name="viewport" content="width=device-width, initial-scale=1.0">
    <title>Document</title>
    <link rel="stylesheet" href="style.css">
</head>
<body>
    <div>龙岩学院</div>
    <div>福建工程学院</div>
</body>
</html>
div{


    color:red;
    font-size: 16px;
}
上述的两种形式都可以实现对div中方文字进行渲染
使用标签做外观渲染的缺点:
1)一眼看过去,看到的都是做外观的标签,不容易阅读到正文
2)内容和外观相混合,无法做到合理分工
3)渲染成本高,使用标签,要额外占用内存空间。
4)使用标签做外观,网页比较冗长,网络带宽占用大
那么怎么解决这个问题?引入css,在css中单独进行定义样式(装修)
使用css样式的优点:(优缺点的的对比就是为什么需要css的原因)
1.容易阅读正文,内容和显示效果相分离,有利于分工协作
2.提高了渲染速度,减少了标签的数量
3.实现了类似函数的效果,可以一处修改,处处修改。同时可以通过外部样式表的形式,控制多个页面的外观
4. 减少了网页的体积,提高了网站负载,降低了运营成本
5. 样式表渲染效果更好,选项更多
selector 的优先级( id选择器 > 类选择器 > 标签选择器 )
<!DOCTYPE html>
<html lang="en">
<head>
    <meta charset="UTF-8">
    <meta name="viewport" content="width=device-width, initial-scale=1.0">
    <title>Document</title>
    <style>
         div{


            color:red;
            font-size: 20px;
         }

         /* 类选择器(class selector)
             1) 类选择器优先级高于标签选择器,如果有属性设置冲突,则类选择器优先
             2) 类选择器可以跨标签,无论什么标签,只要设置好class属性即可被选中
             3) 可以用多个类来同时修饰一个标签, 后定义的类的优先级高于先定义的类
            id选择器优先级高于类选择器
         */
         .u211{


            color:blue;
            background-color: yellow;
         }

         .u985{


            font-size: 30px;
            color:pink;
            text-decoration: underline;
         }

         #host{


            font-size: 40px;
            text-shadow: 3px 3px 3px #666;
         }
    </style>
</head>
<body>
    <div class="u211">福州大学</div>
    <div>福建农林大学</div>
    <div>江夏学院</div>
    <!-- 内联样式的优先级比id还高 -->
    <div class="u211 u985" id="host" style="font-size: 50px;">厦门大学</div>
    <div>福建师范大学</div>
    <div class="u211 u985">清华大学</div>
    <span class="u211">高校会议组委会</span>
</body>
</html>

<!--

    样式的混合运算:
        font-size: 20px;
        color:blue;
        background-color: yellow;

 -->
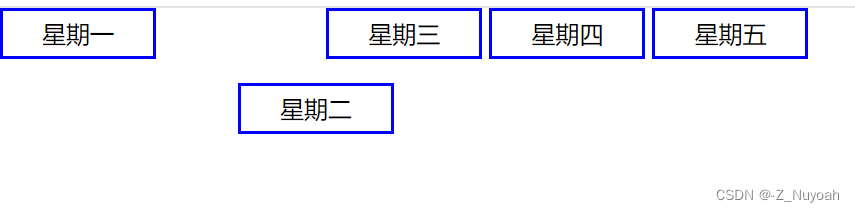
4、盒子定位
1、静态定位(默认情况就是静态定位)
<!DOCTYPE html>
<html lang="en">
<head>
    <meta charset="UTF-8">
    <meta name="viewport" content="width=device-width, initial-scale=1.0">
    <title>Document</title>
    <style>
        /*
        每个网页元素都是盒子,称为盒子模型(box model)
        盒子在页面中的排列,默认定位是静态定位(static position)
        */
        *{


            margin: 0px;
            padding: 0px;
        }
        span{


         	/* position: static; */
            border: 2px solid blue;
            display: inline-block;
            width: 100px;
            height: 30px;
            text-align: center;/*水平居中*/
            line-height: 30px;
        }
    </style>
</head>
<body>
   <span>星期一</span>
   <span>星期二</span>
   <span>星期三</span>
   <span>星期四</span>
   <span>星期五</span>
</body>
</html>
效果图

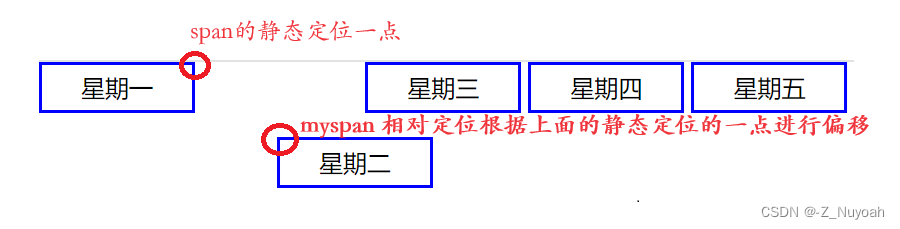
2、相对定位(相对定位是根据静态定位的某一个顶点进行偏移,偏移后的位置空着 )
<!DOCTYPE html>
<html lang="en">
<head>
    <meta charset="UTF-8">
    <meta name="viewport" content="width=device-width, initial-scale=1.0">
    <title>Document</title>
    <style>

        *{


            margin: 0px;
            padding: 0px;
        }
        /* body{
            padding: 100px;
        } */
        span{


            border: 2px solid blue;
            display: inline-block;
            width: 100px;
            height: 30px;
            text-align: center;/*水平居中*/
            line-height: 30px;/*垂直居中*/

        }
        /* 相对定位是根据静态定位的某一个顶点进行偏移,偏移后的位置空着 */
        .myspan{


            position: relative;
            /* left: 50px;
            top: 50px; */
            right: -50px;
            bottom: -50px;
        }
    </style>
</head>
<body>
   <span>星期一</span>
   <span class="myspan">星期二</span>
   <span>星期三</span>
   <span>星期四</span>
   <span>星期五</span>
</body>
</html>
效果图(偏移解释)
相对于静态的某一点进行相对定位的偏移(原来的位置还在)
3、绝对定位
1、绝对定位-1
<!--效果图1 -->
<!DOCTYPE html>
<html lang="en">
<head>
    <meta charset="UTF-8">
    <meta name="viewport" content="width=device-width, initial-scale=1.0">
    <title>Document</title>
    <style>
        *{


            margin: 0px;
            padding: 0px;
        }

        span{


            border: 2px solid blue;
            display: inline-block;
            width: 100px;
            height: 30px;
            text-align: center;/*水平居中*/
            line-height: 30px;/*垂直居中*/

        }
        /* 绝对于父容器进行偏移,原来位置消失 */
        .myspan{


            position: absolute;
            left: 100px;
            top: 100px;

        }
        /* span的父容器是body 最后一个元素绝对与body进行偏离 */
        span:last-child{


            position: absolute;
            right: 100px;
            bottom: 100px;
        }

        /* 测试时需将myspan关上才能生效,span的父容器是body ,倒数第四个元素绝对与body进行偏离 */
        /* span:nth-last-child(4){
            position: absolute;
            left: 100px;
            bottom: 100px;
        } */
    </style>
</head>
<body>
   <span>星期一</span>
   <span class="myspan">星期二</span>
   <span>星期三</span>
   <span>星期四</span>
   <span>星期五</span>
</body>
</html>
效果图 1

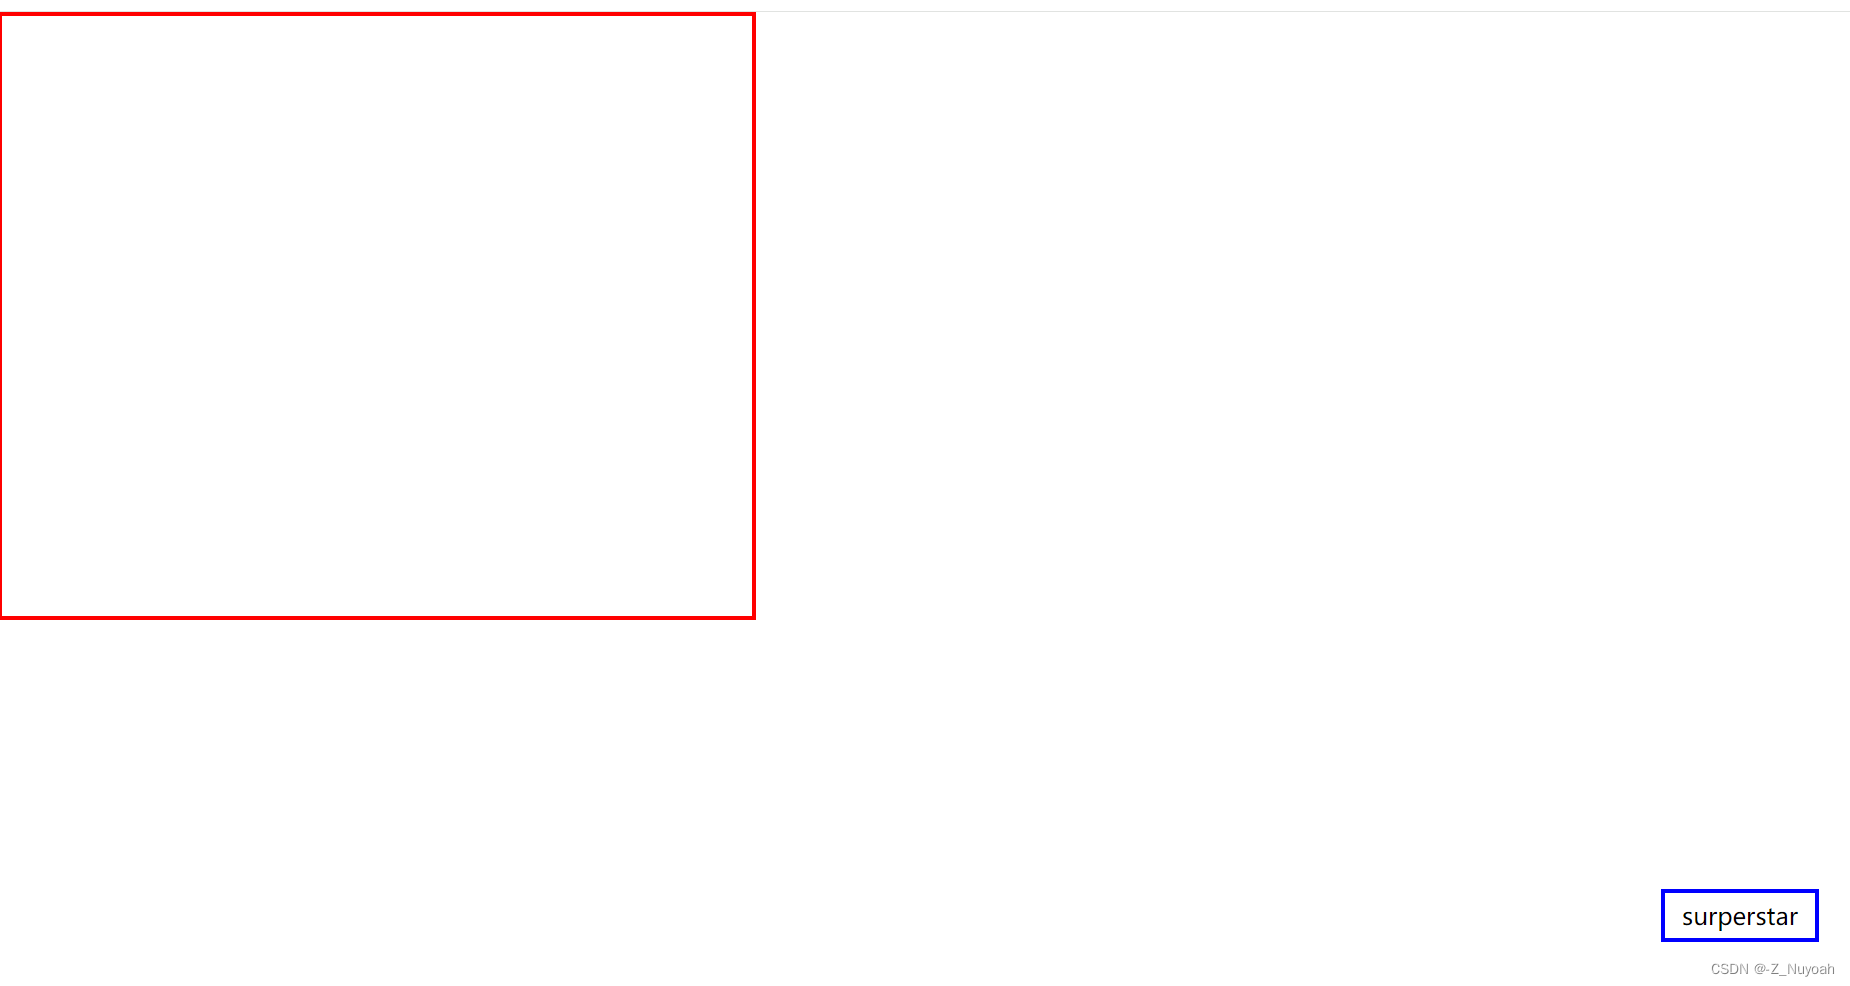
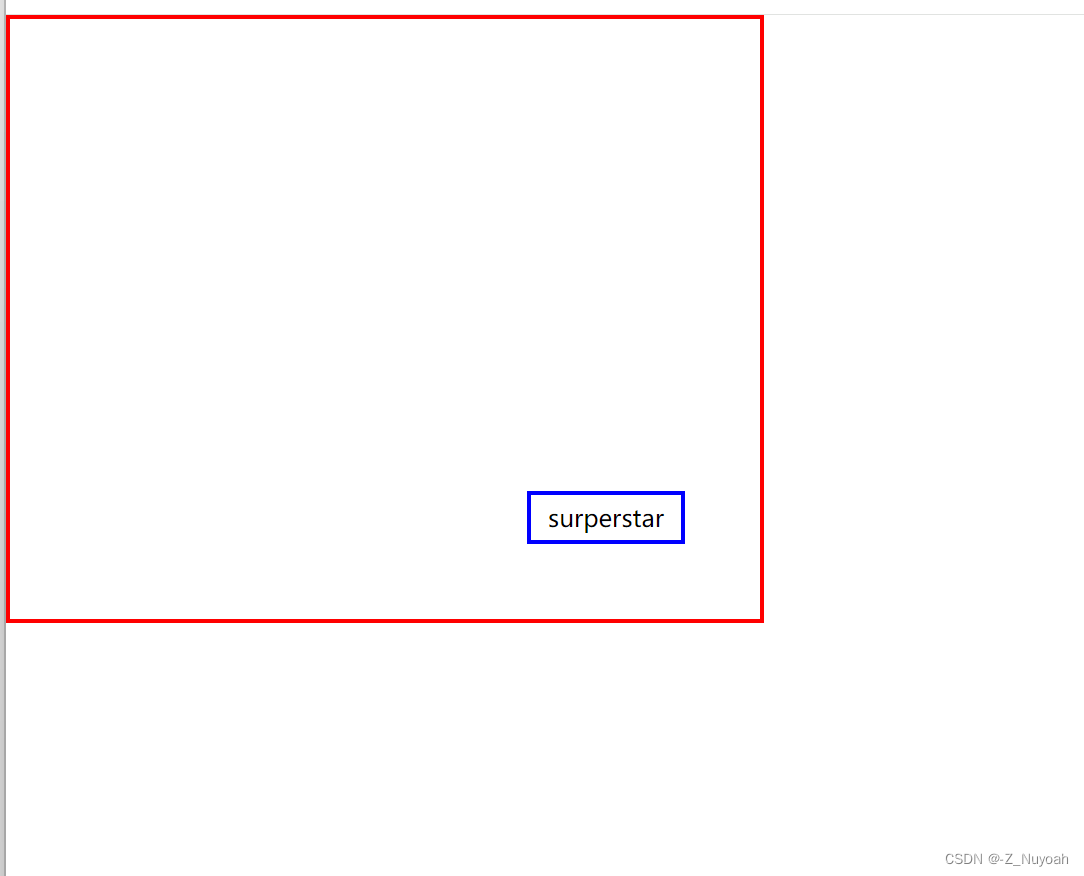
2、绝对定位–2

<!--效果图 2 -- 3 -->
<!DOCTYPE html>
<html lang="en">
<head>
    <meta charset="UTF-8">
    <meta name="viewport" content="width=device-width, initial-scale=1.0">
    <title>Document</title>
    <style>

        *{


            margin: 0px;
            padding: 0px;
        }
        /* id选择器,选中id=mydiv的元素 */
      #mydiv{


        width: 500px;
        height: 400px;
        border: 3px solid red;
        /* 测试这个的有无,即可体现不一样 */
        position: relative;

      }
      /* 绝对定位的元素要寻找最接近的被定位过的祖先(非静态定位)作为定位参照物,如果没有,就以body作为参照物 */
      #mydiv>span{


        display: inline-block;
        width: 100px;
        height: 30px;
        text-align: center;
        line-height: 30px;
        border: 3px solid blue;
        position: absolute;
        right: 50px;
        bottom: 50px;
      }

    </style>
</head>
<body>
   <div id="mydiv">
    <span>surperstar</span>
   </div>
</body>
</html>
效果图 2(无position) – 3(有position)
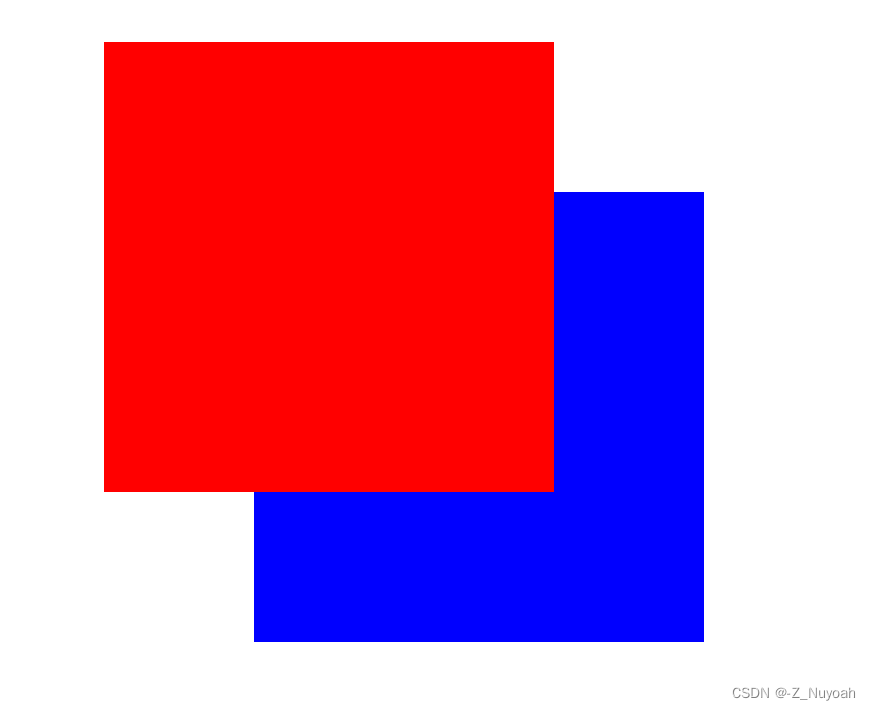
3、绝对定位-3
在定位过程中,如果有元素重合,可以使用
z-index进行堆叠顺序,数值大的在上面 。
如果没有设置z-index,发生重合时,后面的定义的在前面的上面。
<!DOCTYPE html>
<html lang="en">
<head>
    <meta charset="UTF-8">
    <meta name="viewport" content="width=device-width, initial-scale=1.0">
    <title>Document</title>
    <style>

        *{


            margin: 0px;
            padding: 0px;
        }

      #mydiv{


       width: 300px;
       height: 300px;
       background-color: red;
        position: absolute;
        left: 150px;
        top: 150px;
        z-index: 2;

      }
      #mydiv2{


        width: 300px;
        height: 300px;
        background-color: blue;
        position: absolute;
        left: 250px;
        top: 250px;
        z-index: 1;
        /* 在定位过程中,如果有元素重合,可以使用z-index进行堆叠顺序,数值大的在上面 */
      }
    </style>
</head>
<body>
  <!-- 如果没有设置z-index,发生重合时,后面的定义的在前面的上面 -->
   <div id="mydiv">
   </div>
   <div id="mydiv2"></div>
</body>
</html>
效果图 4
补充扩展内容(考虑一下绝对和相对的区别)
<!DOCTYPE html>
<html lang="en">
<head>
    <meta charset="UTF-8">
    <meta name="viewport" content="width=device-width, initial-scale=1.0">
    <title>Document</title>
    <style>
        .div1{


            background-color: red;
            padding: 10px;
            margin: 5px;
            color: white;
            font-weight: bold;
        }
        .div2{


            background-color: green;
            padding: 10px;
            margin: 5px;
            color: white;
            font-weight: bold;
        }
        .div3{


            background-color: blue;
            padding: 10px;
            margin: 5px;
            color: white;
            font-weight: bold;
        }
        .div4{


            background-color: greenyellow;
            padding: 10px;
            margin: 5px;
            color: white;
            font-weight: bold;
        }
    </style>
</head>
<body>
    <div class="div1">div1</div>
    <div class="div2">div2</div>
    <div class="div3">div3</div>
    <div class="div4">div4</div>
</body>

</html>
初始效果图

1、给第二个div设置absolute:

<style>
 .div2{


      background-color: red;
       padding: 10px;
       margin: 5px;
       color: white;
       font-weight: bold;
       /*添加一下部分*/
       position: absolute;
       top: 50px;
       left: 50px;
        }
 </style>
效果图一
解释:第二个div设置了absolute,则该div的宽度就由文本决定,
且下面的div会上移占据之前第二个div的位置,top和left是相对于离它最近且不是static定位的父元素来定位的,在此div1因为没有父元素,所以第二个div相对于根元素body来定位。

2、将div1的position设置成relative
<style>
 .div2{


      background-color: red;
       padding: 10px;
       margin: 5px;
       color: white;
       font-weight: bold;
       /*添加一下部分*/
       position: relative;
       top: 50px;
       left: 50px;
        }
 </style>
效果图二
偏移解释:设置relative的div
不会影响其他div的位置,且top和left是相对于它原本自身的位置来定位,并且原来的位置还在不会覆盖住。

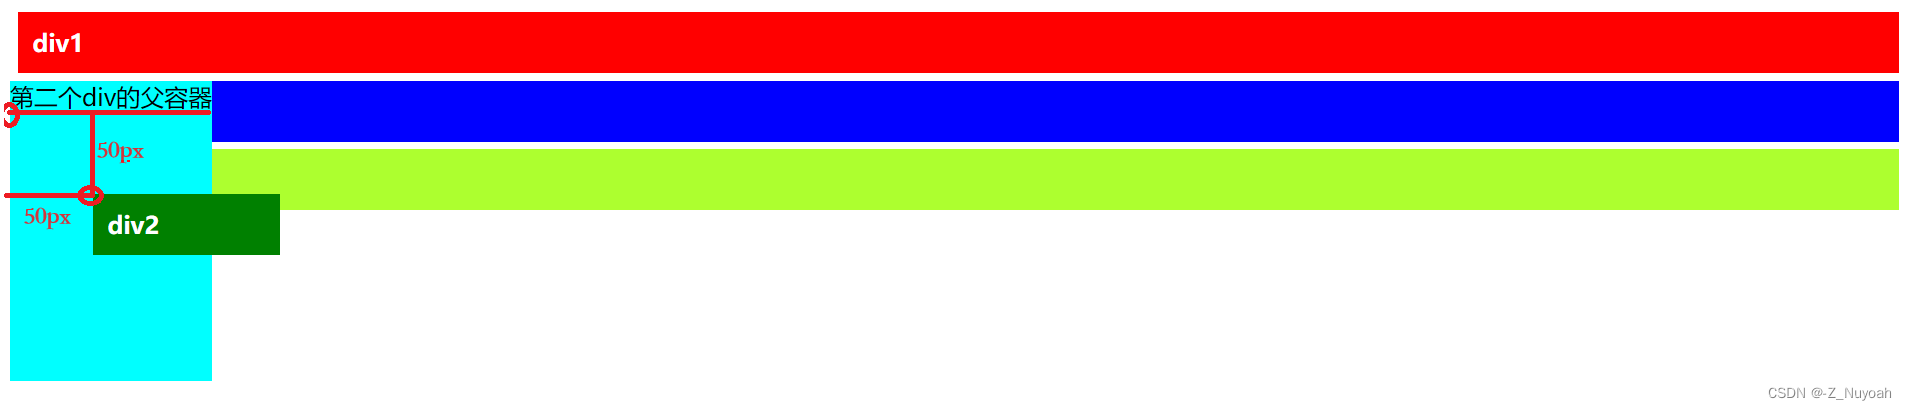
3、给第二个div添加一个父div:
<style>
 .div2{


      background-color: red;
       padding: 10px;
       margin: 5px;
       color: white;
       font-weight: bold;
       /*添加一下部分*/
       position: absolute;
       top: 50px;
       left: 50px;
        }
         .container1{


          position: absolute;
          height: 200px;
          background-color: aqua;
        }
 </style>
 <div class="container1">
        第二个div的父容器
        <div class="div2">div2</div>
    </div>
效果图三
效果图解释:div2的父div设置为absolute,下面的div3,div4会上移,div2也设置为absolute,div2就会相对于父div来定位。

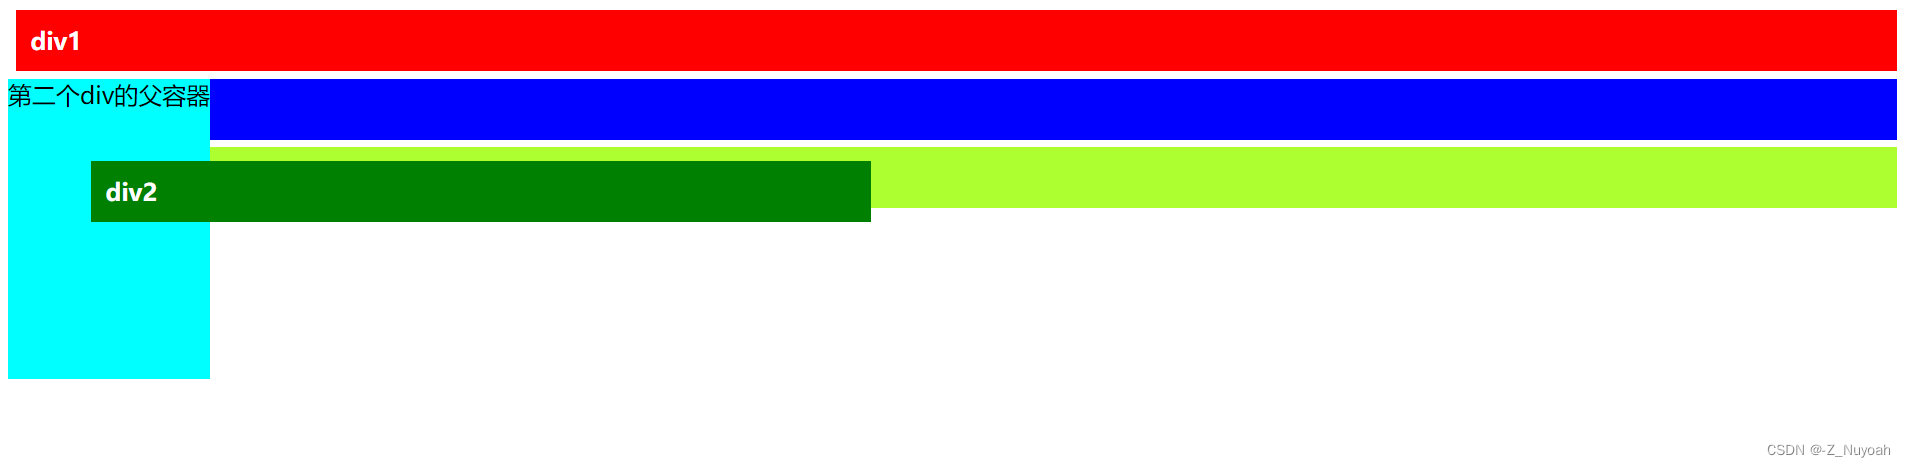
4、若只将第二个div的absolute改为relative
<style>
 .div2{


      background-color: red;
       padding: 10px;
       margin: 5px;
       color: white;
       font-weight: bold;
       /*添加一下部分*/
       position: relative;
       top: 50px;
       left: 50px;
        }
 </style>
效果图四
解释:这是时的定位应是文字下的点作为参照点,进行偏移。
注意:上面两个图的第二个div与父div的上边距是不同的,第一个是相对父div来定位,第二个是相对原来本身的位置来定位。可能此时你会注意到两个图的第二个div的宽度不同,在没有给div设置宽度的情况下,第一个是设为absolute,所以宽度为文本宽度,第二个是relative,所以宽度与父元素宽度相同。
5、若在3,4的基础上只改变div2的宽度,观察absolute 和relative的区别
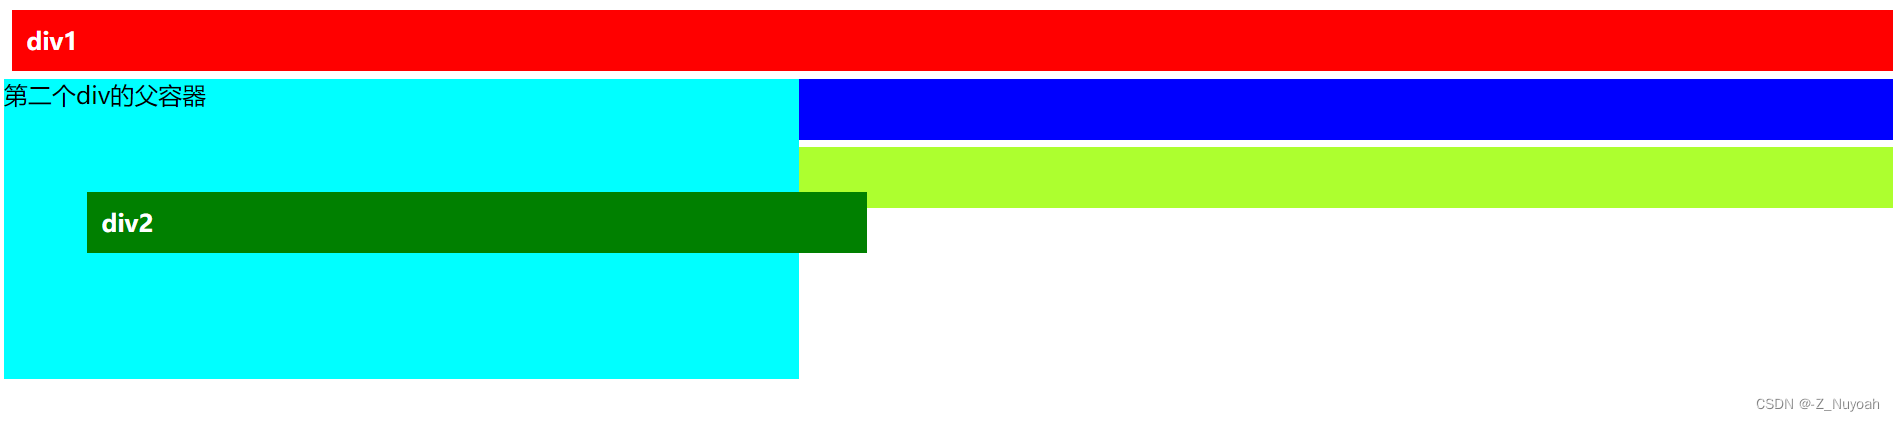
由上图可以知道,absolute定位的子元素宽度不会影响父元素的宽,而relative定位的子元素会撑大父元素。
4、固定定位
<!DOCTYPE html>
<html lang="en">
<head>
    <meta charset="UTF-8">
    <meta name="viewport" content="width=device-width, initial-scale=1.0">
    <title>Document</title>
    <style>

        *{


            margin: 0px;
            padding: 0px;
        }

     #notice{


      width: 300px;
      height: 60px;
      text-align: center;
      line-height: 60px;
      font-size: 16px;
      font-weight:bold ;
      font-family: "微软雅黑";
      border: 3px solid blue;
      position: fixed;
      right: 0px;
      bottom: 0px;
     }


    </style>
</head>
<body>
  <div id="notice">
    你已欠费,请缴费
  </div>
  <h2>测试</h2>
  <h2>测试</h2>
  <h2>测试</h2>
  <h2>测试</h2>
  <h2>测试</h2>
  <h2>测试</h2>
  <h2>测试</h2>
  <h2>测试</h2>
  <h2>测试</h2>
  <h2>测试</h2>
  <h2>测试</h2>
  <h2>测试</h2>
  <h2>测试</h2>
  <h2>测试</h2>
  <h2>测试</h2>
  <h2>测试</h2>
  <h2>测试</h2>
  <h2>测试</h2>
  <h2>测试</h2>
  <h2>测试</h2>
  <h2>测试</h2>
  <h2>测试</h2>
  <h2>测试</h2>
  <h2>测试</h2>
  <h2>测试</h2>
  <h2>测试</h2>
  <h2>测试</h2>
  <h2>测试</h2>
  <h2>测试</h2>
  <h2>测试</h2>
  <h2>测试</h2>
  <h2>测试</h2>
  <h2>测试</h2>
  <h2>测试</h2>
  <h2>测试</h2>
  <h2>测试</h2>
  <h2>测试</h2>
  <h2>测试</h2>
  <h2>测试</h2>
  <h2>测试</h2>
  <h2>测试</h2>
  <h2>测试</h2>
  <h2>测试</h2>
  <h2>测试</h2>
  <h2>测试</h2>
  <h2>测试</h2>
  <h2>测试</h2>
  <h2>测试</h2>
  <h2>测试</h2>
  <h2>测试</h2>
  <h2>测试</h2>
  <h2>测试</h2>
  <h2>测试</h2>
  <h2>测试</h2>
  <h2>测试</h2>
  <h2>测试</h2>
  <h2>测试</h2>
  <h2>测试</h2>
  <h2>测试</h2>
  <h2>测试</h2>
  <h2>测试</h2>
  <h2>测试</h2>
  <h2>测试</h2>
  <h2>测试</h2>
  <h2>测试</h2>
  <h2>测试</h2>
  <h2>测试</h2>
  <h2>测试</h2>
  <h2>测试</h2>
  <h2>测试</h2>
  <h2>测试</h2>
  <h2>测试</h2>
  <h2>测试</h2>
  <h2>测试</h2>
  <h2>测试</h2>
  <h2>测试</h2>
  <h2>测试</h2>
  <h2>测试</h2>
  <h2>测试</h2>
  <h2>测试</h2>
  <h2>测试</h2>
  <h2>测试</h2>
  <h2>测试</h2>
  <h2>测试</h2>
  <h2>测试</h2>
  <h2>测试</h2>
  <h2>测试</h2>
  <h2>测试</h2>
  <h2>测试</h2>
  <h2>测试</h2>
  <h2>测试</h2>
  <h2>测试</h2>
  <h2>测试</h2>
  <h2>测试</h2>
  <h2>测试</h2>
  <h2>测试</h2>
  <h2>测试</h2>
  <h2>测试</h2>
  <h2>测试</h2>
  <h2>测试</h2>
</body>
</html>
效果图(某个模块钉在某个位置不移动)

5、浮动定位
<!DOCTYPE html>
<html lang="en">
<head>
    <meta charset="UTF-8">
    <meta name="viewport" content="width=device-width, initial-scale=1.0">
    <title>Document</title>
    <style>

        *{


            margin: 0px;
            padding: 0px;
        }
       /* 网页上的主页选项卡就属于浮动定位 */
        span{


            border: 2px solid blue;
            display: inline-block;
            width: 300px;
            height: 30px;
            text-align: center;/*水平居中*/
            line-height: 30px;/*垂直居中*/
            float: left;

        }

    </style>
</head>
<body>
  <span>星期一</span>
  <span>星期二</span>
  <!--clear: both; 表示该元素不允许左侧或右侧存在浮动元素。
  		它会导致元素出现在前面的所有浮动元素的下方,
  		而不允许浮动元素出现在该元素的左侧或右侧。-->
  <span style="clear: both;">星期三</span>
  <span>星期四</span>
  <span>星期五</span>
</body>
</html>
效果图

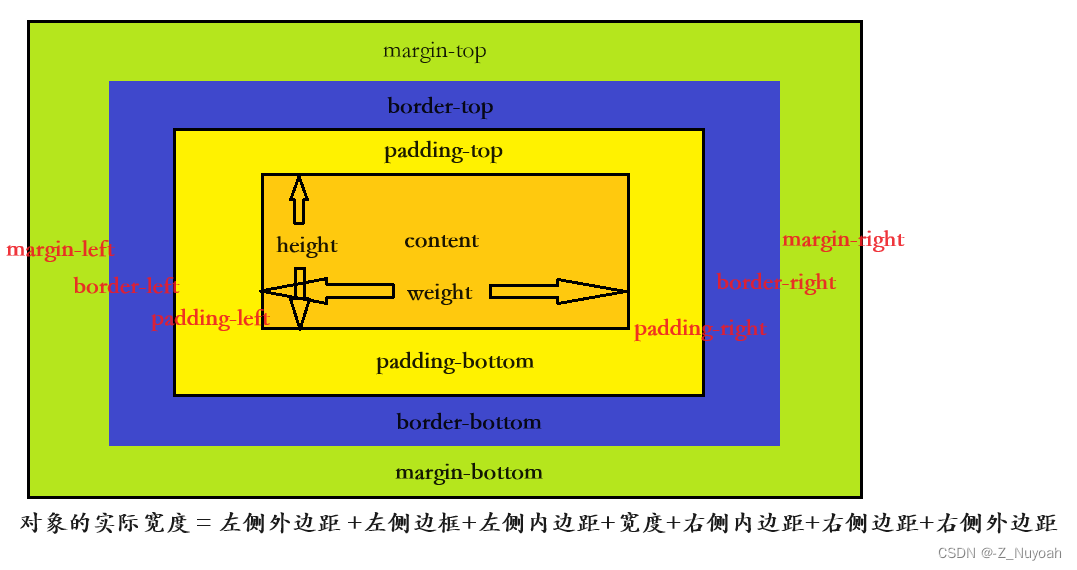
5、盒子模型
W3C盒子模型由内容(content)、填充(padding)、边框(border)、边界(margin)组成
border边框
border属性设置一个元素的边框,它有三个要素:宽、样式、颜色,统称“边框三要素”。
border:宽度 样式 颜色
border: 1px solid red;
border-style设置边框的样式,有五种常用样式可选
1、点状dotted
2、实线solid
3、双线double ( 需要最起码设置为3像素,不然显示不下)
4、虚线dashed
5、无边框none
border的三要素可以统一写在”border”属性中,也可以单独设置。
统一的写法:border: 1px solid red;
单独设置的写法:
// 不写width会有默认3像素的值。
// 不写颜色会默认为黑色。
border-width:;
border-style:; //在style属性为空的情况下,整个边框是不会出现的。
border-color:;
外边距
围绕在元素边框周围的空白区域
会在元素外创建额外的空白区域
外边距是透明的
margin-top/right/bottom/left: value;
// value可取值为像素,%,auto,负值
margin:value(四个方向相同) ;
margin: value(上下) value(左右);
margin: value(上) value(左右) value(下);
margin: value(上) value(右) value(下) value(左);
内边距
内容区域和边框之间的空间
会扩大元素边框所占用的区域
语法:padding:value;
padding-top/right/bottom/left:value;
// value可取值为像素,百分比,但不能为负数
  padding:value(四个方向相同) ;
  padding: value(上下) value(左右);
  padding: value(上) value(左右) value(下);
  padding: value(上) value(右) value(下) value(左);
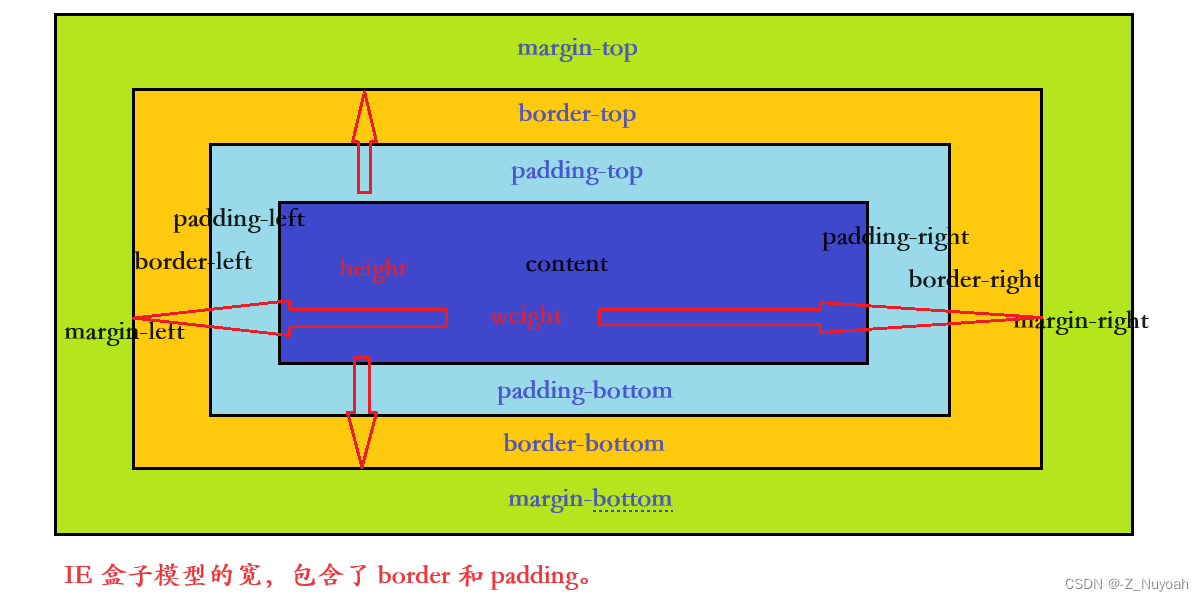
怪异盒子模型
盒子模型分两种,一种是符合W3C规范的标准例子模型,另一种是IE的盒子模型,IE的盒子模型也被叫怪异盒子。
box-sizing – 指定盒子类型
box-sizing属性允许你以“W3C的盒模型”或“IE盒模型”来定义元素,以适应区域。换句话说,当前元素使用哪种盒模型,可以由box-sizing属性来指定
box-sizing 的两个值
1、content-box(标准)
padding和border不被包含在width和height内,元素的实际大小为宽高+border+padding,此为标准模式下的盒模型。
2、border-box(怪异)
padding和border被包含在定义的width和height中,元素实际的大小为你定义了多宽就是多宽。此属性为怪异模式下的盒模型。
6、背景处理
1、背景颜色绘制区域
<!DOCTYPE html>
<html lang="en">
<head>
    <meta charset="UTF-8">
    <meta name="viewport" content="width=device-width, initial-scale=1.0">
    <title>Document</title>
    <style>
        #mydiv{


            width: 300px;
            height: 200px;
            padding: 30px;
            margin: 10px;
            border: 10px dashed blue;
            background-color: red;
            /* background-clip: padding-box; 从padding开始绘制颜色*/
            /* background-clip: content-box;  从content开始绘制颜色*/
            background-clip: border-box; /*从border开始绘制颜色*/
        }
    </style>
</head>
<body>
    <div id="mydiv"></div>
</body>
</html>
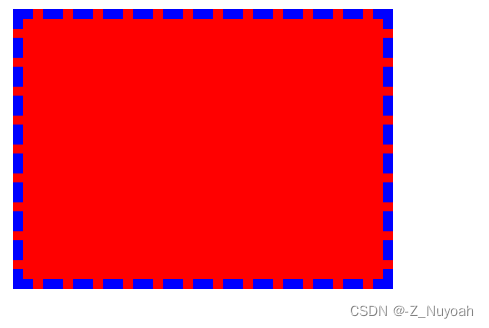
三种绘制的效果图
border-box
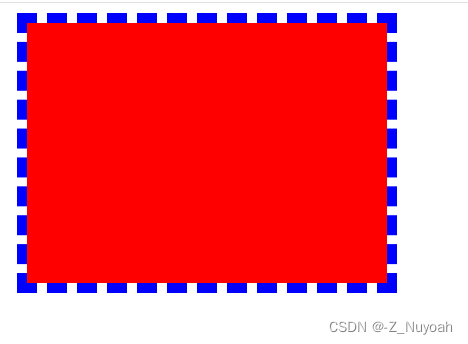
padding-box
content-box

2、背景图 (背景图和背景颜色同时存在时,背景图在背景颜色上面(背景图优先))
<!DOCTYPE html>
<html lang="en">
<head>
    <meta charset="UTF-8">
    <meta name="viewport" content="width=device-width, initial-scale=1.0">
    <title>Document</title>
    <style>
        #mydiv{


            width: 600px;
            height: 590px;
            padding: 30px;
            margin: 10px;
            border: 10px dashed blue;
            background-color: red;
            /* background-clip: padding-box; */
            /* background-clip: content-box; */
            /* 背景图和背景颜色同时存在时,背景图在背景颜色上面(背景图优先) */
            background-clip: border-box;
            background-image: url(./bg125.jpg);/*背景图的设置*/
            background-size: 35%,45%;
            /* background-repeat: no-repeat;
            background-repeat: repeat-x;
            background-repeat: repeat-y; */
            background-repeat: repeat;/*图片是否需要重复以及重复的方向*/

        }
    </style>
</head>
<body>
    <div id="mydiv"></div>
</body>
</html>
四种background-repeat的效果图
background-repeat: no-repeat 不重复
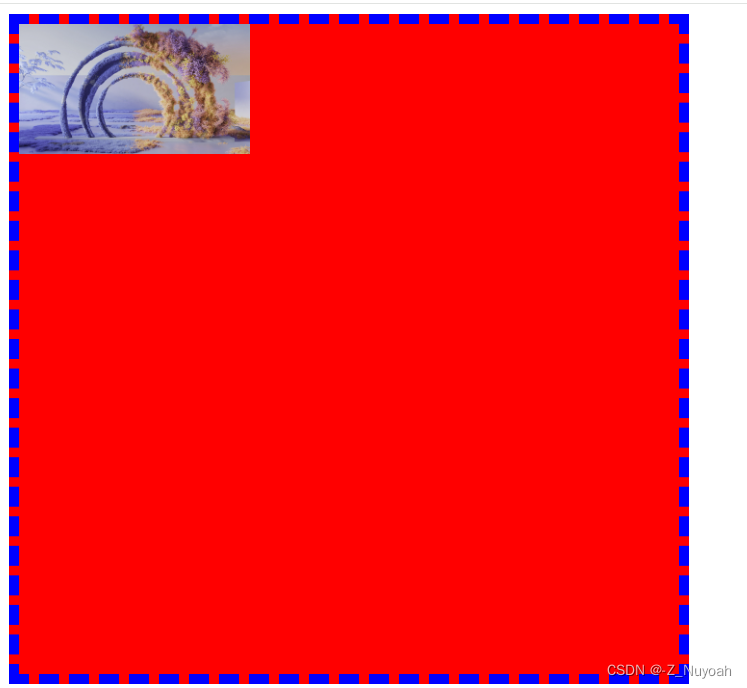
background-repeat: repeat-x 横向重复
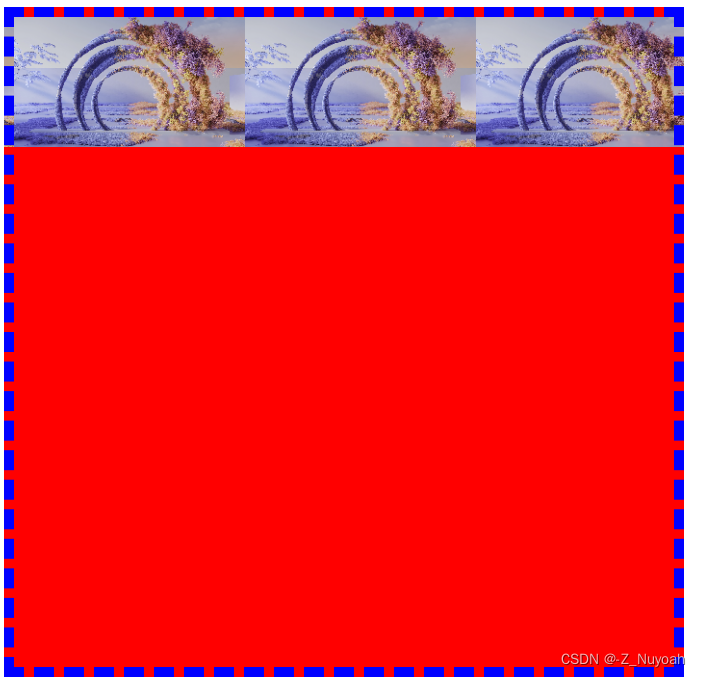
background-repeat: repeat-y 纵向重复
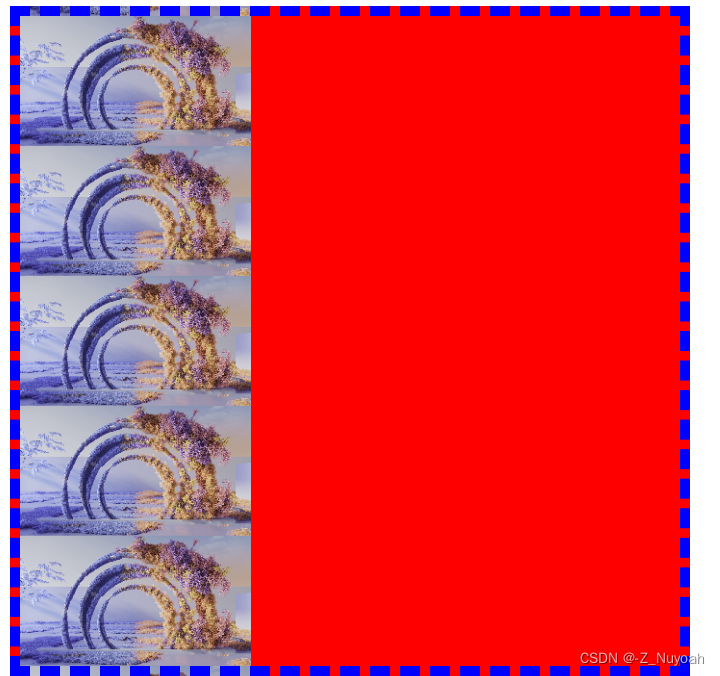
background-repeat: repeat 横纵向都重复

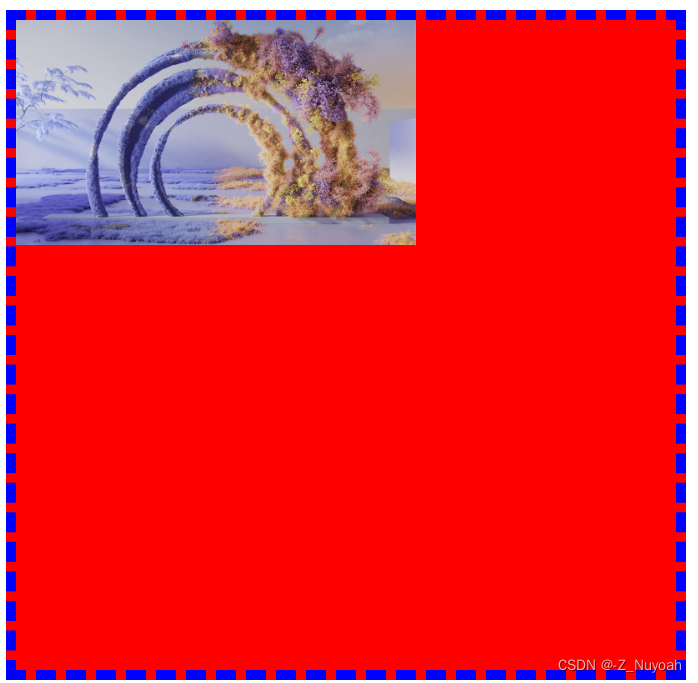
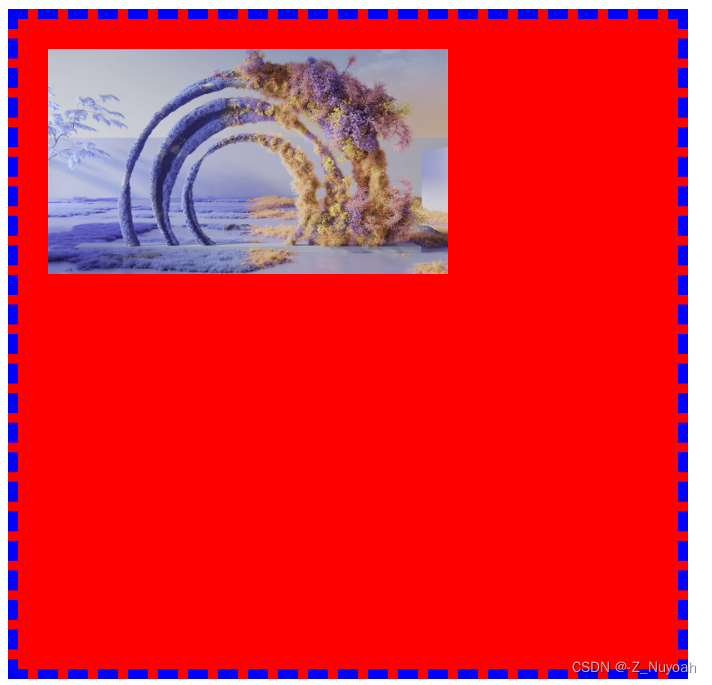
3、背景图的cover和contain
<!DOCTYPE html>
<html lang="en">
<head>
    <meta charset="UTF-8">
    <meta name="viewport" content="width=device-width, initial-scale=1.0">
    <title>Document</title>
    <style>
        #mydiv{


            width: 600px;
            height: 590px;
            padding: 30px;
            margin: 10px;
            border: 10px dashed blue;
            background-color: red;
            /* background-clip: padding-box; */
            /* background-clip: content-box; */
            /* 背景图和背景颜色同时存在时,背景图在背景颜色上面(背景图优先) */
            background-clip: border-box;
            background-image: url(./bg125.jpg);
            background-size: contain; /* 让这张图片全部显示出来,不能切割 */
            /* background-size: cover;覆盖界面,图片会被切割 */
            background-repeat: no-repeat;
        }
    </style>
</head>
<body>
    <div id="mydiv"></div>
</body>
</html>
两种方式的效果图
background-size: contain; -- 让这张图片全部显示出来,不能切割

background-size: cover; -- 覆盖界面,图片会被切割

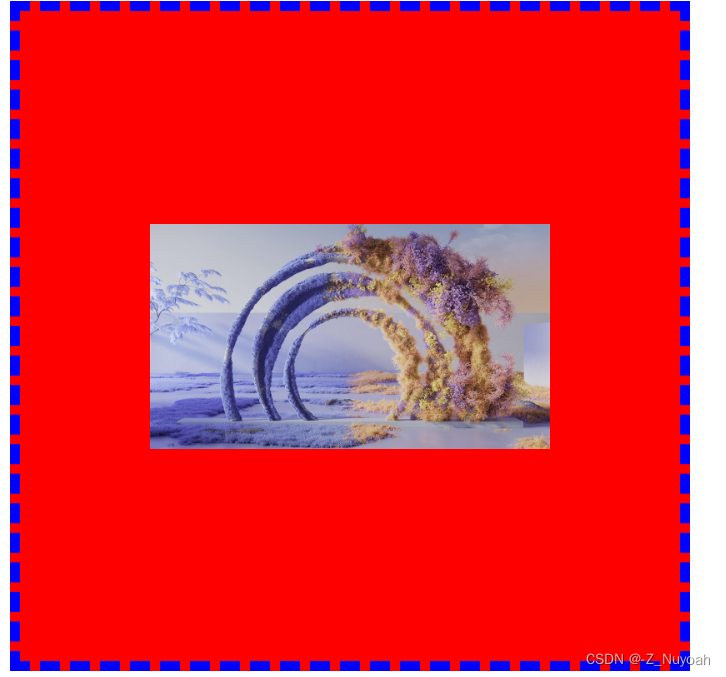
4、背景图position
<!DOCTYPE html>
<html lang="en">
<head>
    <meta charset="UTF-8">
    <meta name="viewport" content="width=device-width, initial-scale=1.0">
    <title>Document</title>
    <style>
        #mydiv{


            width: 600px;
            height: 590px;
            padding: 30px;
            margin: 10px;
            border: 10px dashed blue;
            background-color: red;
            background-clip: border-box;
            background-image: url(./bg125.jpg);
            background-size: 400px,200px;
            background-position: 50%,50%;/*right,top*/
            background-repeat: no-repeat;
        }
    </style>
</head>
<body>
    <div id="mydiv"></div>
</body>
</html>
效果图
5、背景图 origin – 三种填充
<!DOCTYPE html>
<html lang="en">
<head>
    <meta charset="UTF-8">
    <meta name="viewport" content="width=device-width, initial-scale=1.0">
    <title>Document</title>
    <style>
        #mydiv{


            width: 600px;
            height: 590px;
            padding: 30px;
            margin: 10px;
            border: 10px dashed blue;
            background-image: url(./bg125.jpg);
            background-size: 400px,200px;
            background-repeat: no-repeat;
            background-color: red;
            /* background-origin: content-box; 从content开始填充*/
            /* background-origin: padding-box; 从padding开始填充*/
            background-origin: border-box; /*从border开始填充*/
        }
    </style>
</head>
<body>
    <div id="mydiv"></div>
</body>
</html>
三种效果图
background-origin: border-box; /*从border开始填充*/

background-origin: padding-box; 从padding开始填充
background-origin: content-box; 从content开始填充
6、背景图 attachment – 黏贴在某个位置
<!DOCTYPE html>
<html lang="en">
<head>
<meta charset="UTF-8">
<meta name="viewport" content="width=device-width, initial-scale=1.0">
<title>Document</title>
<style>
#mydiv{
background-image: url(./bg125.jpg);
background-size: 400px,190px;
background-repeat: no-repeat;
/* background-attachment: scroll; */
/* attachment是设置图片是否钉在某个位置 */
background-attachment: fixed;
}
</style>
</head>
<body>
<div id="mydiv">
<h2>你好</h2>
<h2>你好</h2>
<h2>你好</h2>
<h2>你好</h2>
<h2>你好</h2>
<h2>你好</h2>
<h2>你好</h2>
<h2>你好</h2>
<h2>你好</h2>
<h2>你好</h2>
<h2>你好</h2>
<h2>你好</h2>
<h2>你好</h2>
<h2>你好</h2>
<h2>你好</h2>
<h2>你好</h2>
<h2>你好</h2>
<h2>你好</h2>
<h2>你好</h2>
<h2>你好</h2>
<h2>你好</h2>
<h2>你好</h2>
<h2>你好</h2>
<h2>你好</h2>
<h2>你好</h2>
<h2>你好</h2>
<h2>你好</h2>
<h2>你好</h2>
<h2>你好</h2>
<h2>你好</h2>
<h2>你好</h2>
<h2>你好</h2>
<h2>你好</h2>
<h2>你好</h2>
<h2>你好</h2>
<h2>你好</h2>
<h2>你好</h2>
<h2>你好</h2>
<h2>你好</h2>
<h2>你好</h2>
<h2>你好</h2>
<h2>你好</h2>
<h2>你好</h2>
<h2>你好</h2>
<h2>你好</h2>
<h2>你好</h2>
<h2>你好</h2>
<h2>你好</h2>
<h2>你好</h2>
<h2>你好</h2>
<h2>你好</h2>
<h2>你好</h2>
<h2>你好</h2>
<h2>你好</h2>
<h2>你好</h2>
<h2>你好</h2>
<h2>你好</h2>
<h2>你好</h2>
<h2>你好</h2>
<h2>你好</h2>
<h2>你好</h2>
<h2>你好</h2>
<h2>你好</h2>
<h2>你好</h2>
<h2>你好</h2>
<h2>你好</h2>
<h2>你好</h2>
<h2>你好</h2>
<h2>你好</h2>
<h2>你好</h2>
<h2>你好</h2>
<h2>你好</h2>
<h2>你好</h2>
<h2>你好</h2>
<h2>你好</h2>
<h2>你好</h2>
<h2>你好</h2>
<h2>你好</h2>
<h2>你好</h2>
<h2>你好</h2>
<h2>你好</h2>
<h2>你好</h2>
<h2>你好</h2>
<h2>你好</h2>
<h2>你好</h2>
<h2>你好</h2>
<h2>你好</h2>
<h2>你好</h2>
<h2>你好</h2>
<h2>你好</h2>
<h2>你好</h2>
<h2>你好</h2>
<h2>你好</h2>
<h2>你好</h2>
<h2>你好</h2>
<h2>你好</h2>
<h2>你好</h2>
<h2>你好</h2>
<h2>你好</h2>
<h2>你好</h2>
</div>
</body>
</html>
效果
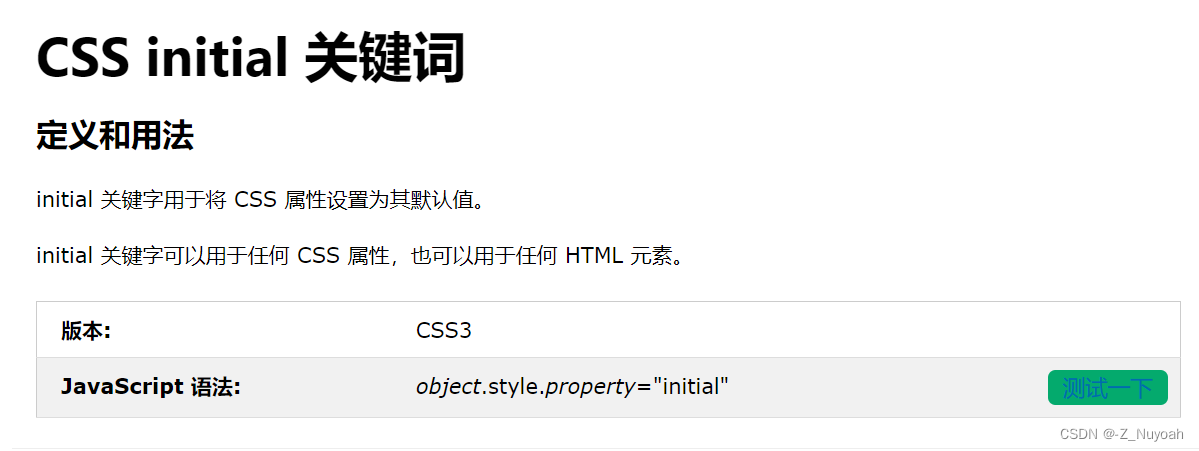
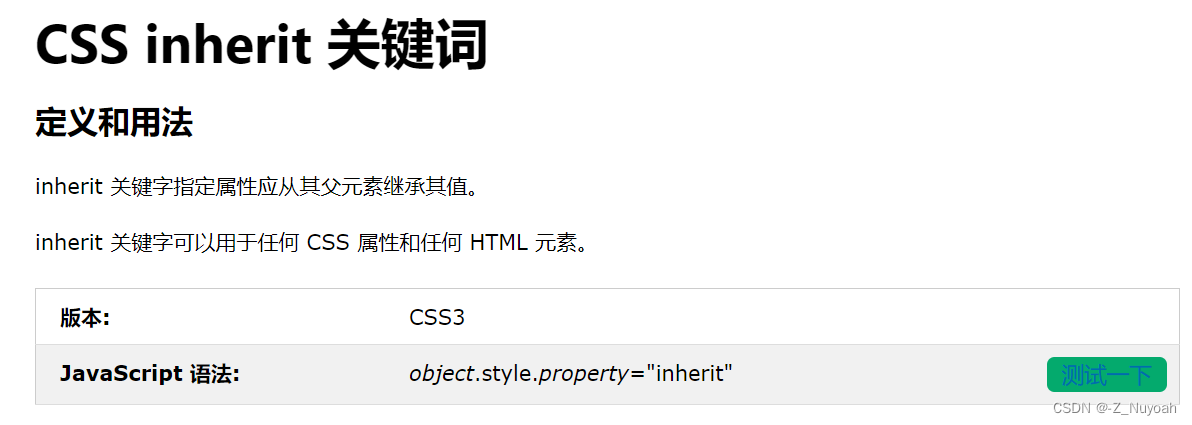
7、两个关键字 initial 和 inherit

1、initial设置默认值
<!DOCTYPE html>
<html>
<head>
<style>
div {


  color: red;
}
</style>
</head>
<body>

<h1>使用 JavaScript 设置初始值 initial</h1>

<div>
  <h1 id="bc">Hello World</h1>
  <ul>
    <li id="a">Item one</li>
    <li id="b">Item two</li>
    <li id="c">Item three</li>
  </ul>
</div>

<p>单击“试一试”按钮,将第二个列表项的颜色属性值设置为"initial":</p>

<button onclick="myFunction()">试一试</button>

<script>
function myFunction() {


  document.getElementById("b").style.color = "initial";
}
</script>

<p><b>注意:</b>“initial”关键字在 Internet Explorer 11 及更早版本中不受支持。</p>

</body>
</html>
效果
2、inherit 继承父元素的值
<!DOCTYPE html>
<html>
<head>
<style>
span {


  color: blue;
  border:1px solid black;
}
</style>
</head>
<body>

<h1>使用 JavaScript 设置继承</h1>

<div>这是<span>一个 span 元素</span> 在一个没有设置颜色属性的元素中。
  <div style="color:green">
    这是 <span id="mySpan">一个 span 元素</span> 在一个颜色为 color:green 的元素中。
  </div>
  <div style="color:red">
    这是 <span>一个 span 元素</span> 在一个颜色为 color:red 元素中。
  </div>
</div>

<p>单击“试一试”按钮,将第二个 SPAN 元素的颜色属性值设置为继承"inherit":</p>
<button onclick="myFunction()">试一试</button>

<script>
function myFunction() {


  document.getElementById("mySpan").style.color = "inherit";
}
</script>

</body>
</html>
效果
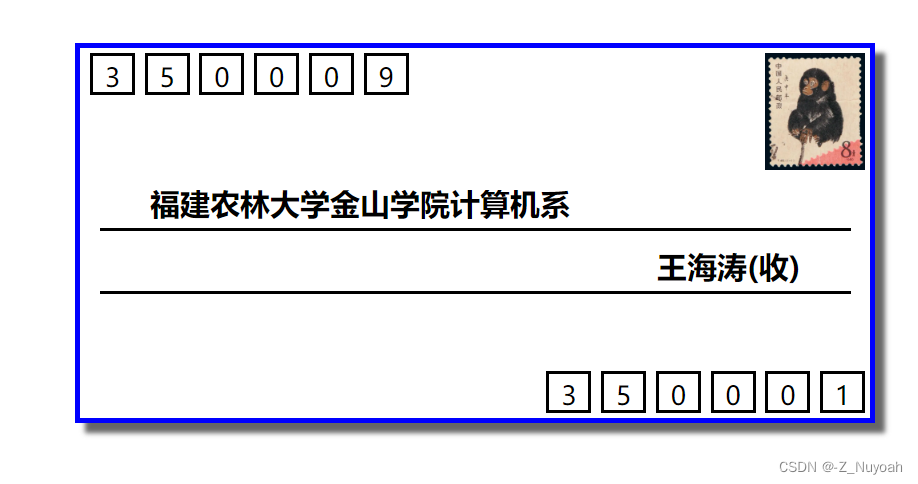
7、css原型信封 – 应用以上知识实战
<!DOCTYPE html>
<html lang="en">
<head>
    <meta charset="UTF-8">
    <meta http-equiv="X-UA-Compatible" content="IE=edge">
    <meta name="viewport" content="width=device-width, initial-scale=1.0">
    <title>Document</title>
    <style>
        body,div,span{


           margin: 0px;
           padding: 0px;
           box-sizing: border-box;
           font-family: "微软雅黑";
        }

        #letter{


            width: 800px;
            height: 380px;
            border:5px solid blue;
            margin: 140px auto;
            box-shadow: 10px 10px 5px #666;;
            position: relative;
        }

        #recevier-postcode{


            position: absolute;
            left: 5px;
            top: 5px;
            /* border:1px solid red; */
        }

        #sender-postcode{


            position: absolute;
            right: 5px;
            bottom: 5px;
            /* border:1px solid red; */
        }

        #recevier-postcode>span,#sender-postcode>span{


            display: inline-block;
            width: 45px;
            height: 42px;
            margin-left: 5px;
            border:3px solid black;
            text-align: center;
            line-height: 42px;
            font-size: 26px;
        }


        #address{


            position: absolute;
            left: 20px;
            top: 120px;
            width: 95%;
        }

        #address>span{


            display: block;/*分行的一种办法,将span设置成一个块,独占一行*/
            border-bottom:3px solid black;
            margin-top: 15px;
            padding-bottom: 5px;
            font-size:30px;
            font-weight: bold;
        }

        #address>span:first-child{


            padding-left: 50px;
        }

        #address>span:nth-child(2){


            text-align: right;
            padding-right: 50px;
        }

        #stamp{


            width: 100px;
            height: 120px;
            display: inline-block;
            /* border:1px solid red; */
            position: absolute;
            right: 5px;
            top: 5px;
            background-image: url(./stamp.jpg);
            background-size: contain;
            background-repeat: no-repeat;
        }

    </style>
</head>
<body>
    <div id="letter">
        <div id="recevier-postcode">
            <span>3</span>
            <span>5</span>
            <span>0</span>
            <span>0</span>
            <span>0</span>
            <span>9</span>
        </div>
        <div id="sender-postcode">
            <span>3</span>
            <span>5</span>
            <span>0</span>
            <span>0</span>
            <span>0</span>
            <span>1</span>
        </div>
        <div id="address">
            <span>福建农林大学金山学院计算机系</span>
            <span>王海涛(收)</span>
        </div>
        <span id="stamp"></span>
    </div>
</body>
</html>
效果图
8、JavaScript - array(base and method)
<!DOCTYPE html>
<html lang="en">
<head>
<meta charset="UTF-8">
<meta name="viewport" content="width=device-width, initial-scale=1.0">
<title>Document</title>
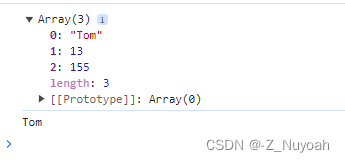
<script>
var arr1 = new Array(100,200,"福州",true);
var info = new Array(
new Array('Tom', 13, 155),
new Array('Lucy', 11, 152)
);
console.log(info[0]); // 输出结果:(3) ["Tom", 13, 155]
console.log(info[0][0]); // 输出结果:Tom
</script>
</head>
<body>
</body>
</html>
效果图
<!DOCTYPE html>
<html lang="en">
<head>
<meta charset="UTF-8">
<meta name="viewport" content="width=device-width, initial-scale=1.0">
<title>Document</title>
<script>
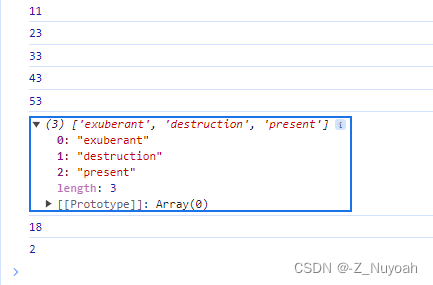
var arr=[11,20,30,40,50];
var arr1 = ['spray', 'elite', 'exuberant', 'destruction', 'present'];
function work(a){
console.log(a);
}
// arr.forEach(work);
// arr.forEach(function(a){
// console.log(a);
// });
arr.forEach(function(val,idx){
// foreach
if(val%2==0)
arr[idx]+=3;
console.log(arr[idx]);
})
var arr1_change = arr1.filter((word)=>word.length>6); // fitter
console.log(arr1_change);
var ages = [3, 10, 18, 20];
function checkAdult(age) {
return age >= 18;
}
console.log(ages.find(checkAdult));
console.log(ages.findIndex(checkAdult));
</script>
</head>
<body>
</body>
</html>
效果图
9、函数 function (arguments 、callback)
1、function的基本实现
<!DOCTYPE html>
<html lang="en">
<head>
<meta charset="UTF-8">
<meta name="viewport" content="width=device-width, initial-scale=1.0">
<title>Document</title>
<script>
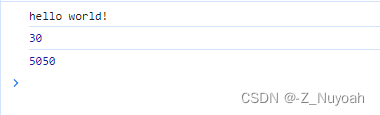
function sayHello(){
console.log("hello world!");
}
sayHello();
function add(a,b){
console.log(a+b);
}
add(10,20);
function calcSum(a,b){
let sum = 0;
for(let i=a;i<=b;i++)
sum += i;
return sum;
}
console.log(calcSum(1,100));
function work(a,b){
console.log(a,b);
}
</script>
</head>
<body>
</body>
</html>
效果图
2、arguments 的传递
<!DOCTYPE html>
<html lang="en">
<head>
<meta charset="UTF-8">
<meta name="viewport" content="width=device-width, initial-scale=1.0">
<title>Document</title>
<script>
function add(){
//arguments是一个类似数组的对象,注意,其不是数组,但是支持数组的一些操作模式
console.log(arguments.length);
for(let i=0;i<arguments.length;i++)
console.log(arguments[i]);
}
// add();
// add(1);
// add(1,2,3);
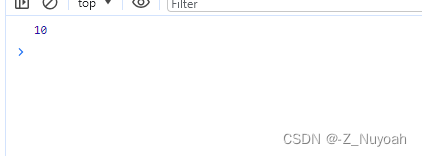
function add2(a,b){
//实现多参数(大于两个参数的时候也能适用)的之和
// a->arguments[0]
// b->arguments[1]
// 所谓形式参数,其实就是arguments对象成员的一种快捷访问方式
let sum = a+b;
if(arguments.length>2)
for(let i=2;i<arguments.length;i++)
sum += arguments[i];
return sum;
}
console.log(add2(1,2,3,4));
</script>
</head>
<body>
</body>
</html>
效果图
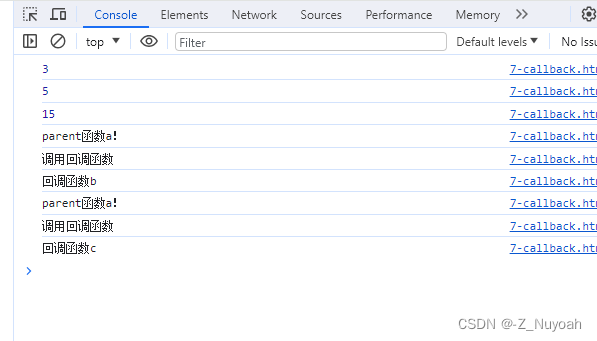
3、callback的实现
被作为实参传入另一函数,并在该外部函数内被调用,用以来完成某些任务的函数,称为回调函数。
调用过程:函数a的参数为函数b,当函数a执行完之后再去执行b
打个比方:
你去上学,妈妈送你去上学并叮嘱你要记得将缴费单交给老师。
此时,函数a为妈妈送你上学,函数b为你将缴费单交给老师。也就是你要做完函数a,才会去执行函数b。
问题:那么问题来了,为什么不直接把整个事情在函数a中写好,而是要通过一个参数进行回调呢?
答:如果你直接写进去,function a(){…;b();},那就直接写死了,
失去了变量的灵活性。当你要传入别的函数时,需要重新写一遍函数a。
<!DOCTYPE html>
<html lang="en">
<head>
    <meta charset="UTF-8">
    <meta name="viewport" content="width=device-width, initial-scale=1.0">
    <title>Document</title>
    <script>

         //回调函数 callback

         function calc(num1,num2,calcMethod){


            console.log(calcMethod(num1,num2));
         }

         function add(a,b){


            return a+b;
         }

         function sub(a,b){


            return a-b;
         }

         function multiply(a,b){


            return a*b;
         }

         calc(1,2,add);
         calc(10,5,sub);
         calc(3,5,multiply);

         function a(callback) {


            console.log("parent函数a!");
            console.log("调用回调函数");
            callback(); // 调用回调函数
         }

         function b(){

       console.log("回调函数b"); }

         function c() {

       console.log("回调函数c"); }

         function test(){

       a(b); a(c); }

         test();
    </script>
</head>
<body>

</body>
</html>
效果图
10、简单编程题
1、九九乘法表
<!DOCTYPE html>
<html lang="en">
<head>
    <meta charset="UTF-8">
    <meta name="viewport" content="width=device-width, initial-scale=1.0">
    <title>Document</title>
    <script>
        // n*n的乘法表
        // n的数量手动录入,范围1-9, 如果输入9, 就是九九乘法表
        /*
           1*1=1
           2*1=2 2*2=4
           3*1=3 3*2=6 3*3=9
        */
        var lines = parseInt(prompt("请输入乘法表的行数:","9"));

        var lineContent;
        for(let i=1;i<=lines;i++){

       //行的循环
            lineContent="";
            for(let j=1;j<=i;j++) //列的循环
                 lineContent += `${
        i}*${
        j}=${
        i*j}\t`;
            console.log(lineContent);
        }

    </script>
</head>
<body>
</body>
</html>
**效果图 **
2、求某范围数字和
<!DOCTYPE html>
<html lang="en">
<head>
    <meta charset="UTF-8">
    <meta name="viewport" content="width=device-width, initial-scale=1.0">
    <title>Document</title>
    <script>
        //获取用户输入的范围下限
        var lowerLimit = prompt("请输入范围下限:")
        // 获取用户输入的范围上限
        var upperLimit = prompt("请输入范围上限:");

        // 将用户输入的字符串转换为数字
        lowerLimit = parseInt(lowerLimit);
        upperLimit = parseInt(upperLimit);

        // 检查输入是否为有效数字
        if (!isNaN(upperLimit)&&!isNaN(lowerLimit)) {


            // 初始化和的变量
            var sum = 0;

            // 计算范围内所有数字的和
            for (var i = lowerLimit; i <= upperLimit; i++) {


                sum += i;
            }

            // 输出结果
            alert("范围"+lowerLimit+"到" + upperLimit + " 的所有数字的和是: " + sum);
        } else {


            // 用户输入无效,弹出提示
            alert("请输入有效的数字。");
        }

    </script>
</head>
<body>

</body>
</html>
效果图
3、求某范围质数和
<!DOCTYPE html>
<html lang="en">
<head>
    <meta charset="UTF-8">
    <meta name="viewport" content="width=device-width, initial-scale=1.0">
    <title>计算质数和</title>
    <script>
        function isPrime(num) {


            if (num < 2) {


                return false;
            }
            for (var i = 2; i <= Math.sqrt(num); i++) {


                if (num % i === 0) {


                    return false;
                }
            }
            return true;
        }

        // 获取用户输入的范围下限
        var lowerLimit = prompt("请输入范围下限:");
        // 获取用户输入的范围上限
        var upperLimit = prompt("请输入范围上限:");

        // 将用户输入的字符串转换为数字
        lowerLimit = parseInt(lowerLimit);
        upperLimit = parseInt(upperLimit);

        // 检查输入是否为有效数字
        if (!isNaN(upperLimit) && !isNaN(lowerLimit)) {


            // 初始化和的变量
            var sumOfPrimes = 0;

            // 计算范围内所有质数的和
            for (var i = lowerLimit; i <= upperLimit; i++) {


                if (isPrime(i)) {


                    console.log(i);
                    sumOfPrimes += i;
                }
            }

            // 输出结果
            alert("范围 " + lowerLimit + " 到 " + upperLimit + " 的所有质数的和是: " + sumOfPrimes);
        } else {


            // 用户输入无效,弹出提示
            alert("请输入有效的数字。");
        }

    </script>
</head>
<body>
</body>
</html>
效果图
11、DOM
1、dom的基本概念
DOM:文档对象模型,是W3C组织推荐的处理可扩展标记语言的标准
编程接口。
2、获取元素
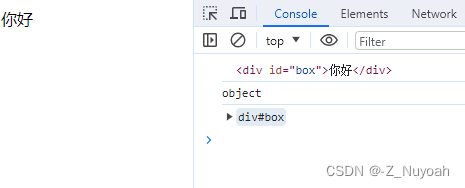
1、根据id获取元素
1|document.getElementById('id')
<!DOCTYPE html>
<html>
  <head>
    <meta charset="UTF-8">
    <title>Document</title>
  </head>
  <body>
    <div id="box">你好</div>
    <script>
      var Obox = document.getElementById('box');
      console.log(Obox);         	// 结果为:<div id="box">你好</div>
      console.log(typeof Obox); 	// 结果为:object
      console.dir(Obox);          // 结果为:div#box
    </script>
  </body>
</html>
效果图
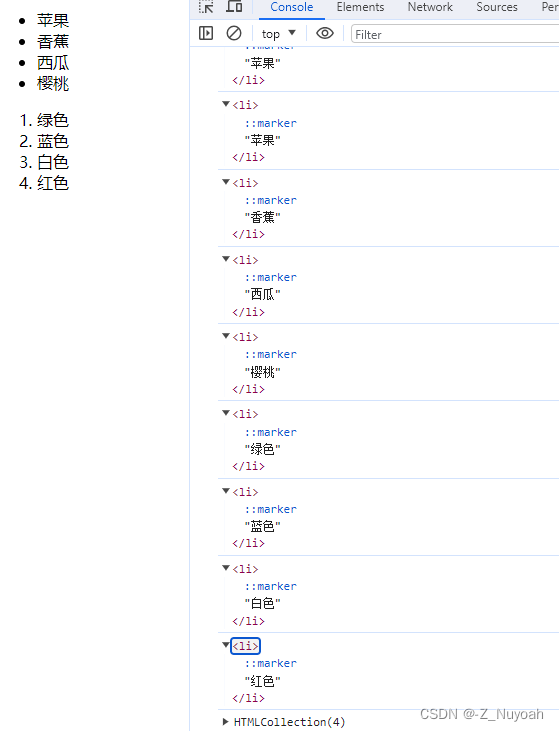
2、根据标签获取元素
1|document.getElementsByTagName("TagName")
<!DOCTYPE html>
<html>
  <head>
    <meta charset="UTF-8">
    <title>Document</title>
  </head>
  <body>
    <ul>
      <li>苹果</li>
      <li>香蕉</li>
      <li>西瓜</li>
      <li>樱桃</li>
    </ul>
    <ol id="ol">
      <li>绿色</li>
      <li>蓝色</li>
      <li>白色</li>
      <li>红色</li>
    </ol>
    <script>
      var lis = document.getElementsByTagName('li');
      // 结果为:HTMLCollection(8) [li, li, li, li, li, li, li, li]
      console.log(lis);
      // 查看集合中的索引为0的元素,结果为:<li>苹果</li>
      console.log(lis[0]);
      // 遍历集合中的所有元素
      for (var i = 0; i < lis.length; i++) {


        console.log(lis[i]);
      }
      // 通过元素对象获取元素
      var ol = document.getElementById('ol');
      // 结果为:HTMLCollection(4) [li, li, li, li]
      console.log(ol.getElementsByTagName('li'));
    </script>
  </body>
</html>
效果
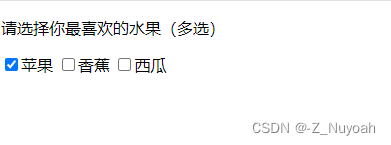
3、根据name获取元素
1|document.getElementsByName('Name')
<!DOCTYPE html>
<html>
  <head>
    <meta charset="UTF-8">
    <title>Document</title>
  </head>
  <body>
    <p>请选择你最喜欢的水果(多选)</p>
    <label><input type="checkbox" name="fruit" value="苹果">苹果</label>
    <label><input type="checkbox" name="fruit" value="香蕉">香蕉</label>
    <label><input type="checkbox" name="fruit" value="西瓜">西瓜</label>
    <script>
      var fruits = document.getElementsByName('fruit');
      fruits[0].checked = true;
    </script>
  </body>
</html>
效果图
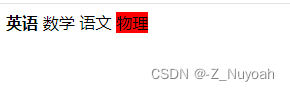
4、H5新增三种的获取方式
1、document.getElementsByClassName('');
<!DOCTYPE html>
<html>
  <head>
    <meta charset="UTF-8">
    <title>Document</title>
  </head>
  <body>
    <span class="one">英语</span> <span class="two">数学</span>
    <span class="one">语文</span> <span class="two">物理</span>
    <script>
      var Ospan1 = document.getElementsByClassName('one');
      var Ospan2 = document.getElementsByClassName('two');
      Ospan1[0].style.fontWeight = 'bold';
      Ospan2[1].style.background = 'red';
    </script>
  </body>
</html>
效果图
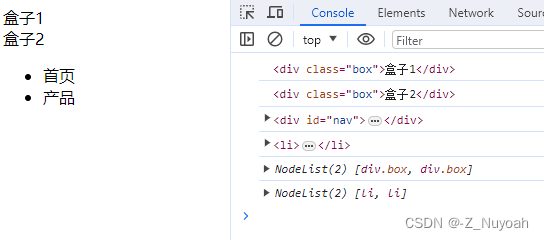
2、querySelector() 返回的是指定选择器的第一个元素对象
<!DOCTYPE html>
<html>
  <head>
    <meta charset="UTF-8">
    <title>Document</title>
  </head>
  <body>
    <div class="box">盒子1</div>
    <div class="box">盒子2</div>
    <div id="nav">
      <ul>
        <li>首页</li>
        <li>产品</li>
      </ul>
    </div>
    <script>
      var firstBox = document.querySelector('.box');
      console.log(firstBox); // 获取class为box的第1个div

      var secondBox = document.querySelectorAll('.box')[1];
      console.log(secondBox);// 获取class为box的第2个div

      var nav = document.querySelector('#nav');
      console.log(nav);      // 获取id为nav的第1个div
      var li = document.querySelector('li');
      console.log(li);       // 获取匹配到的第一个li
      var allBox = document.querySelectorAll('.box');
      console.log(allBox);   // 获取class为box的所有div
      var lis = document.querySelectorAll('li');
      console.log(lis);      // 获取匹配到的所有li
    </script>
  </body>
</html>
效果
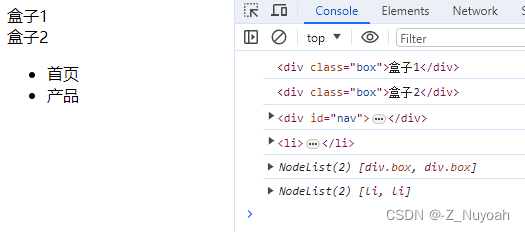
3、document.querySelectorAll() 返回所有,若要返回除了第一个以外的元素对象,需要通过这个实现
<!DOCTYPE html>
<html>
  <head>
    <meta charset="UTF-8">
    <title>Document</title>
  </head>
  <body>
    <div class="box">盒子1</div>
    <div class="box">盒子2</div>
    <div id="nav">
      <ul>
        <li>首页</li>
        <li>产品</li>
      </ul>
    </div>
    <script>
      var firstBox = document.querySelector('.box');
      console.log(firstBox); // 获取class为box的第1个div

      var secondBox = document.querySelectorAll('.box')[1];
      console.log(secondBox);// 获取class为box的第2个div

      var nav = document.querySelector('#nav');
      console.log(nav);      // 获取id为nav的第1个div
      var li = document.querySelector('li');
      console.log(li);       // 获取匹配到的第一个li
      var allBox = document.querySelectorAll('.box');
      console.log(allBox);   // 获取class为box的所有div
      var lis = document.querySelectorAll('li');
      console.log(lis);      // 获取匹配到的所有li
    </script>
  </body>
</html>
效果
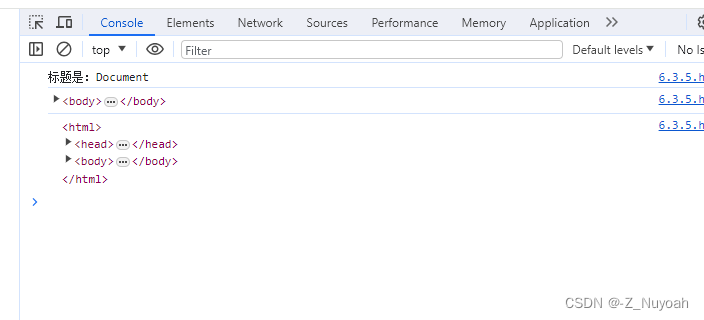
4、document对象的属性
<!DOCTYPE html>
<html>
  <head>
    <meta charset="UTF-8">
    <title>Document</title>
  </head>
  <body>
    <script>

      var htmlTitle = document.title; // 返回标题
      console.log("标题是:"+htmlTitle);
      var bodyEle = document.body; // 返回body
      console.log("body是"+bodyEle);
      console.dir("dump详情"+bodyEle);// console.dir主要用来dump某些对象的详细信息

      var htmlEle = document.documentElement;// 返回html
      console.log(htmlEle);
    </script>
  </body>
</html>
效果
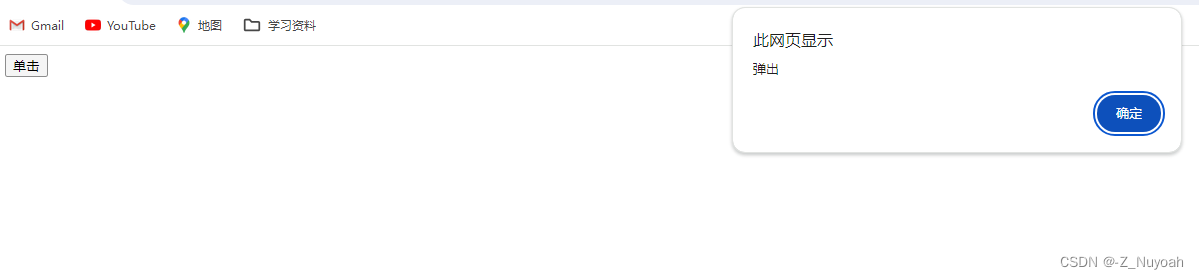
3、事件
事件是指可以被JavaScript侦测到的行为,
是一种‘触发-响应’的机制。
三要素
1、事件源 —谁触发了事件
2、事件类型 —触发了什么事件
3、事件处理程序 –触发事件以后要做什么
<!DOCTYPE html>
<html>
  <head>
    <meta charset="UTF-8">
    <title>Document</title>
  </head>
  <body>
    <button id="btn">单击</button>
    <script>
      var btn = document.getElementById('btn'); // 第1步:获取事件源
      // 第2步:注册事件btn.onclick
      btn.onclick = function () {

       // 第3步:添加事件处理程序(采取函数赋值形式)
        alert('弹出');
      };
    </script>
  </body>
</html>
效果
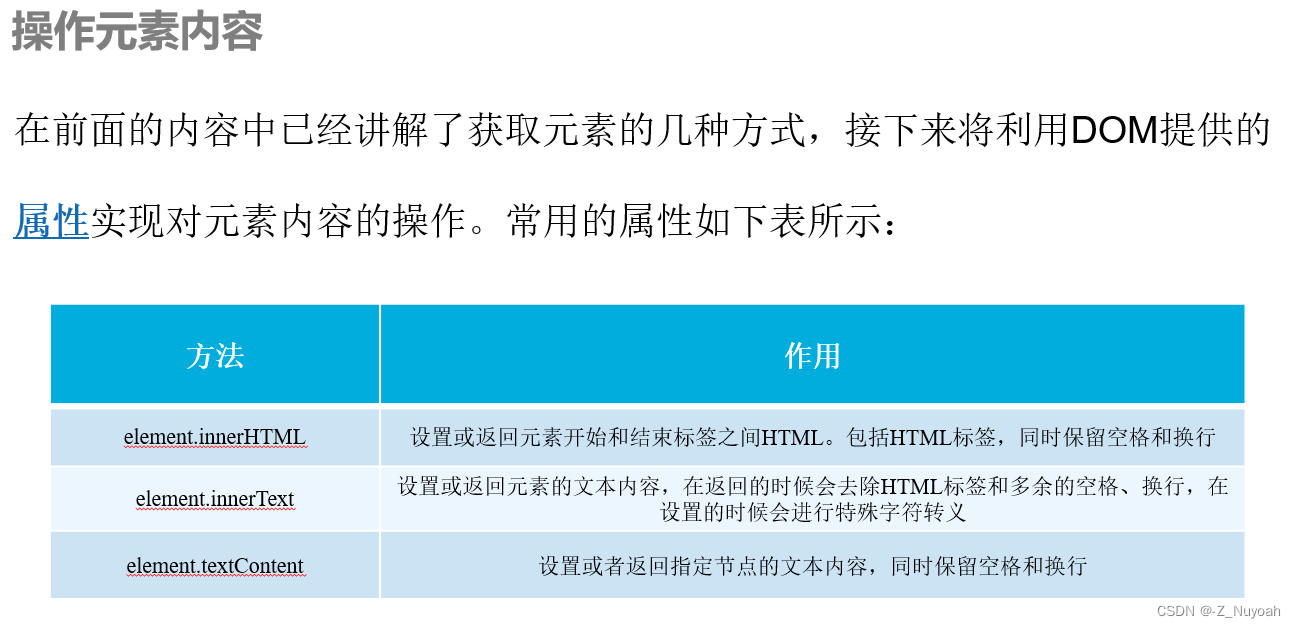
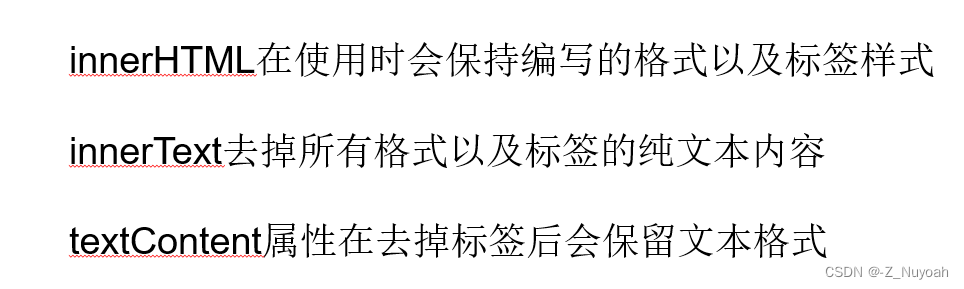
4、操作元素
1、操作元素内容
<!DOCTYPE html>
<html>
<head>
<meta charset="UTF-8">
<title>Document</title>
</head>
<body>
<div id="box">
The first paragraph...
<p>
The second paragraph...
<a href="http://www.example.com">third</a>
</p>
</div>
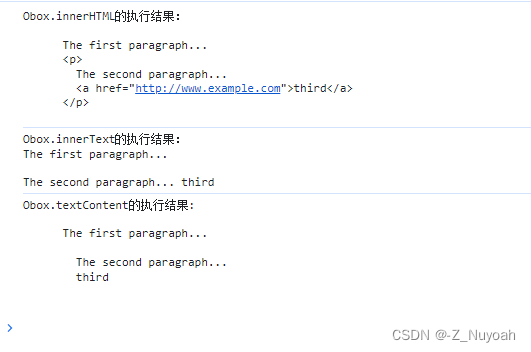
<script>
var Obox = document.getElementById('box')
console.log("Obox.innerHTML的执行结果:\n"+Obox.innerHTML)
console.log("Obox.innerText的执行结果:\n"+Obox.innerText)
console.log("Obox.textContent的执行结果:\n"+Obox.textContent)
</script>
</body>
</html>
2、操作元素属性 -- 重要 案例 --四叶草和鲜花的切换

<!DOCTYPE html>
<html>
  <head>
    <meta charset="UTF-8">
    <title>Document</title>
  </head>
  <body>
    <button id="flower">鲜花</button>
    <button id="grass">四叶草</button> <br>
    <img src="images/grass.png" alt="" title="四叶草">
    <script>
      // 1. 获取元素
      var flower = document.getElementById('flower');
      var grass = document.getElementById('grass');
      var img = document.querySelector('img');
      // 2. 注册事件处理程序
      flower.onclick = function () {


        img.src = 'images/flower.png';
        img.title = '鲜花';
      };
      grass.onclick = function () {


        img.src = 'images/grass.png';
        img.title = '四叶草';
      };
    </script>
  </body>
</html>
效果
3、dom对象 -- 全选,随机选择的按键
<!DOCTYPE html PUBLIC "-//W3C//DTD HTML 4.01 Transitional//EN" "http://www.w3.org/TR/html4/loose.dtd">
<html>
<head>
<meta http-equiv="Content-Type" content="text/html; charset=UTF-8">
<title>全选练习</title>
<script type="text/javascript">

    var items;
	window.onload = function(){


		//获取四个多选框items
		var items = document.getElementsByName("items");
		//获取全选/全不选的多选框
		var checkedAllBox = document.getElementById("checkedAllBox");

		/*
		 * 全选按钮
		 * 	- 点击按钮以后,四个多选框全都被选中
		 */

		//1.#checkedAllBtn
		//为id为checkedAllBtn的按钮绑定一个单击响应函数
		var checkedAllBtn = document.getElementById("checkedAllBtn");
		checkedAllBtn.onclick = function(){


			//遍历items
			for(var i=0 ; i<items.length ; i++){


				//通过多选框的checked属性可以来获取或设置多选框的选中状态
				//alert(items[i].checked);

				//设置四个多选框变成选中状态
				items[i].checked = true;
			}

			//将全选/全不选设置为选中
			checkedAllBox.checked = true;


		};

		/*
		 * 全不选按钮
		 * 	- 点击按钮以后,四个多选框都变成没选中的状态
		 */
		//2.#checkedNoBtn
		//为id为checkedNoBtn的按钮绑定一个单击响应函数
		var checkedNoBtn = document.getElementById("checkedNoBtn");
		checkedNoBtn.onclick = function(){


			for(var i=0; i<items.length ; i++){


				//将四个多选框设置为没选中的状态
				items[i].checked = false;
			}

			//将全选/全不选设置为不选中
			checkedAllBox.checked = false;

		};

		/*
		 * 反选按钮
		 * 	- 点击按钮以后,选中的变成没选中,没选中的变成选中
		 */
		//3.#checkedRevBtn
		var checkedRevBtn = document.getElementById("checkedRevBtn");
		checkedRevBtn.onclick = function(){


			//将checkedAllBox设置为选中状态
			checkedAllBox.checked = true;

			for(var i=0; i<items.length ; i++){


				//判断多选框状态
				/*if(items[i].checked){
					//证明多选框已选中,则设置为没选中状态
					items[i].checked = false;
				}else{
					//证明多选框没选中,则设置为选中状态
					items[i].checked = true;
				}*/

				items[i].checked = !items[i].checked;

				//判断四个多选框是否全选
				//只要有一个没选中则就不是全选
				if(!items[i].checked){


					//一旦进入判断,则证明不是全选状态
					//将checkedAllBox设置为没选中状态
					checkedAllBox.checked = false;
				}
			}
			//在反选时也需要判断四个多选框是否全都选中
		};

		/*
		 * 提交按钮:
		 * 	- 点击按钮以后,将所有选中的多选框的value属性值弹出
		 */
		//4.#sendBtn
		//为sendBtn绑定单击响应函数
		var sendBtn = document.getElementById("sendBtn");
		sendBtn.onclick = function(){


			//遍历items
			for(var i=0 ; i<items.length ; i++){


				//判断多选框是否选中
				if(items[i].checked){


					alert(items[i].value);
				}
			}
		};

		//5.#checkedAllBox
		/*
		 * 全选/全不选 多选框
		 * 	- 当它选中时,其余的也选中,当它取消时其余的也取消
		 *
		 * 在事件的响应函数中,响应函数是给谁绑定的this就是谁
		 */
		//为checkedAllBox绑定单击响应函数
		checkedAllBox.onclick = function(){


			//alert(this === checkedAllBox);

			//设置多选框的选中状态
			for(var i=0; i <items.length ; i++){


				items[i].checked = this.checked;
			}

		};

		//6.items
		/*
		 * 如果四个多选框全都选中,则checkedAllBox也应该选中
		 * 如果四个多选框没都选中,则checkedAllBox也不应该选中
		 */
		//为四个多选框分别绑定点击响应函数
		for(var i=0 ; i<items.length ; i++){


			items[i].onclick = function(){


				//将checkedAllBox设置为选中状态
				checkedAllBox.checked = true;

				for(var j=0 ; j<items.length ; j++){


					//判断四个多选框是否全选
					//只要有一个没选中则就不是全选
					if(!items[j].checked){


						//一旦进入判断,则证明不是全选状态
						//将checkedAllBox设置为没选中状态
						checkedAllBox.checked = false;
						//一旦进入判断,则已经得出结果,不用再继续执行循环
						break;
					}
				}
			};
		}
        //7.#randomBtn
        //为id为randomBtn的按钮绑定一个单击响应函数
        var randomBtn = document.getElementById("randomBtn");
        randomBtn.onclick = function(){


            //随机选择四个多选框的状态
            for(var i=0; i<items.length ; i++){


                //生成随机数,决定多选框的选中状态
                var randomState = Math.random() < 0.5; // 50% chance of being true
                items[i].checked = randomState;
            }

            //更新全选/全不选多选框的状态
            updateCheckedAllBoxState();
        }
	};


</script>
</head>
<body>

	<form method="post" action="">
		你爱好的运动是?<input type="checkbox" id="checkedAllBox" />全选/全不选

		<br />
		<input type="checkbox" name="items" value="足球" />足球
		<input type="checkbox" name="items" value="篮球" />篮球
		<input type="checkbox" name="items" value="羽毛球" />羽毛球
		<input type="checkbox" name="items" value="乒乓球" />乒乓球
		<br />
		<input type="button" id="checkedAllBtn" value="全 选" />
		<input type="button" id="checkedNoBtn" value="全不选" />
		<input type="button" id="checkedRevBtn" value="反 选" />
        <input type="button" id="randomBtn" value="随机选择" />
		<input type="button" id="sendBtn" value="提 交" />
	</form>
</body>
</html>
效果图
4、排他思维按键案例
排他思想:简单理解就是排除掉其他的(包括自己),然后再给自己设置想要实现的效果。总而言之,
排他思维的实现步骤就是所有元素全部清除与设置当前元素。
<!DOCTYPE html>
<html>
  <head>
    <meta charset="UTF-8">
    <title>Document</title>
  </head>
  <body>
    <button>按钮1</button>
    <button>按钮2</button>
    <button>按钮3</button>
    <button>按钮4</button>
    <button>按钮5</button>
    <script>
      // 获取所有按钮元素
      var btns = document.getElementsByTagName('button');
      // btns得到的是类数组对象,使用btns[i]访问数组里的每一个元素
      for (var i = 0; i < btns.length; i++) {


        btns[i].onclick = function () {


          // (1) 先把所有的按钮背景颜色去掉
          for (var i = 0; i < btns.length; i++) {


            btns[i].style.backgroundColor = '';
          }
          // (2) 然后设置当前的元素背景颜色
          this.style.backgroundColor = 'pink';
        }
      }
    </script>
  </body>
</html>
效果图
5、鼠标指针经过时背景变色
<!DOCTYPE html>
<html>
  <head>
    <meta charset="UTF-8">
    <title>Document</title>
    <style>
      table {


        width: 800px;
        margin: 100px auto;
        text-align: center;
        border-collapse: collapse;
        font-size: 14px;
      }

      thead tr {


        height: 30px;
        background-color: skyblue;
      }

      tbody tr {


        height: 30px;
      }

      tbody td {


        border-bottom: 1px solid #d7d7d7;
        font-size: 12px;
        color: blue;
      }

      .bg {


        background-color: pink;
      }
    </style>
  </head>
  <body>
    <table>
      <thead>
        <tr>
          <th>代码</th>
          <th>名称</th>
          <th>最新公布净值</th>
          <th>累计净值</th>
          <th>前单位净值</th>
          <th>净值增长率</th>
        </tr>
      </thead>
      <tbody>
        <tr>
          <td>0035**</td>
          <td>3个月定期开放债券</td>
          <td>1.075</td>
          <td>1.079</td>
          <td>1.074</td>
          <td>+0.047%</td>
        </tr>
        <tr>
          <td>0035**</td>
          <td>3个月定期开放债券</td>
          <td>1.075</td>
          <td>1.079</td>
          <td>1.074</td>
          <td>+0.047%</td>
        </tr>
        <tr>
          <td>0035**</td>
          <td>3个月定期开放债券</td>
          <td>1.075</td>
          <td>1.079</td>
          <td>1.074</td>
          <td>+0.047%</td>
        </tr>
        <tr>
          <td>0035**</td>
          <td>3个月定期开放债券</td>
          <td>1.075</td>
          <td>1.079</td>
          <td>1.074</td>
          <td>+0.047%</td>
        </tr>
      </tbody>
    </table>
    <script>
      // 1. 获取元素
      var trs = document.querySelector('tbody').querySelectorAll('tr');
      // 2. 利用循环绑定注册事件
      for (var i = 0; i < trs.length; i++) {


        // 3. 鼠标经过事件 onmouseover
        trs[i].onmouseover = function () {


          this.className = 'bg';
        };
        // 4. 鼠标离开事件 onmouseout
        trs[i].onmouseout = function () {


          this.className = '';
        };
      }
    </script>
  </body>
</html>
效果

6、Tab栏切换
<!DOCTYPE html>
<html>
  <head>
    <meta charset="UTF-8">
    <title>Document</title>
    <style>
      * {


        margin: 0;
        padding: 0;
      }

      li {


        list-style-type: none;
      }

      .tab {


        width: 978px;
        margin: 100px auto;
      }

      .tab_list {


        height: 39px;
        border: 1px solid #ccc;
        background-color: #f1f1f1;
      }

      .tab_list li {


        float: left;
        height: 39px;
        line-height: 39px;
        padding: 0 20px;
        text-align: center;
        cursor: pointer;
      }

      .tab_list .current {


        background-color: #c81623;
        color: #fff;
      }

      .item_info {


        padding: 20px 0 0 20px;
      }

      .item {


        display: none;
        height: 400px;
        background-color: #ccc;
        border:1px solid blue;
        text-align: center;
        line-height: 400px;
      }

      .item:nth-child(2n){


        background-color: pink;
      }
    </style>
  </head>
  <body>
    <div class="tab">
      <div class="tab_list">
        <ul>
          <li class="current">商品介绍</li>
          <li>规格与包装</li>
          <li>售后保障</li>
          <li>商品评价(50000)</li>
          <li>手机社区</li>
        </ul>
      </div>
      <div class="tab_con">
        <div class="item" style="display: block;">商品介绍模块内容</div>
        <div class="item">规格与包装模块内容</div>
        <div class="item">售后保障模块内容</div>
        <div class="item">商品评价(50000)模块内容</div>
        <div class="item">手机社区模块内容</div>
      </div>
    </div>
    <script>
      // 获取标签部分的所有元素对象
      var tab_list = document.querySelector('.tab_list');
      var lis = tab_list.querySelectorAll('li');
      // 获取内容部分的所有内容对象
      var items = document.querySelectorAll('.item');
      for (var i = 0; i < lis.length; i++) {

      	// for循环绑定点击事件
        lis[i].setAttribute('index', i);		// 开始给5个小li设置索引号
        lis[i].onclick = function () {


          for (var i = 0; i < lis.length; i++) {


            lis[i].className = '';
          }
          this.className = 'current';
          // 下面的显示内容模块
          var index = this.getAttribute('index');
          for (var i = 0; i < items.length; i++) {


            items[i].style.display = 'none';
          }
          items[index].style.display = 'block';
        };
      }
    </script>
  </body>
</html>
效果
7、简易留言板
<!DOCTYPE html>
<html>
  <head>
    <meta charset="UTF-8">
    <title>Document</title>
    <style>
      * {


        margin: 0;
        padding: 0;
      }

      body {


        padding: 100px;
      }

      textarea {


        width: 200px;
        height: 100px;
        border: 1px solid pink;
        outline: none;
        resize: none;
      }

      ul {


        margin-top: 50px;
      }

      li {


        width: 300px;
        padding: 5px;
        background-color: #eee;
        font-size: 14px;
        margin: 15px 0;
      }

      li a {


        float: right;
      }
    </style>
  </head>
  <body>
    <textarea name="" id=""></textarea>
    <button>发布</button>
    <ul></ul>
    <script>
      // 1. 获取元素
      var btn = document.querySelector('button');
      var text = document.querySelector('textarea');
      var ul = document.querySelector('ul');
      // 2. 注册事件
      btn.onclick = function () {


        if (text.value == '') {


          alert('您没有输入内容');
          return false;
        } else {


          // (1) 创建元素
          var li = document.createElement('li');
          // li.innerHTML = text.value;
          li.innerHTML = text.value + '<a href="javascript:;">删除</a>';
          // (2) 添加元素
          ul.insertBefore(li, ul.children[0]);
          var as = document.querySelectorAll('a');
          for (var i = 0; i < as.length; i++) {


            as[i].onclick = function () {


              ul.removeChild(this.parentNode);
            };
          }
        }
      };
    </script>
  </body>
</html>
效果
更详细的js内容见下链接
链接:https://pan.baidu.com/s/1NDjYPcbzb1ApNq6Vh5j0MQ?pwd=19tk
提取码:19tk