前言:
下面的例子只为演示组件间传值的几种方式的使用方式。为了方便查看,忽略了组件的拆分和代码规范化写法。
一、父组件传值给子组件(props)
父组件想传递任何东西,都可以通过props来传递给子组件。
例如:变量,函数、jsx组件等等。
import React, {

     useState } from 'react';

// 父组件
const PropsCom = () => {


    const [name, setName] = useState('winne');

    return (
        <div>
            <h2>父组件</h2>
            {

    /* 这里是重要代码,向子组件传递parentName这个prop,值为name变量 */}
            <ChildrenCom parentName={

    name} />
        </div>
    );
};

// 子组件
const ChildrenCom = (props) => (
    <div>
        <h4>子组件</h4>
        <p>获取父组件传过来的值:{

    props.parentName}</p>
    </div>
);

export default PropsCom;
二、父组件给后代组件传值(context)
const value = useContext(MyContext);
useContext接收一个 context 对象(React.createContext 的返回值)并返回该 context 的当前值。当前的 context 值由上层组件中距离当前组件最近的 <MyContext.Provider> 的 value prop 决定。
使用context 可以实现跨组件传值。
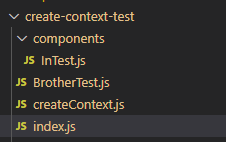
完整使用例子(举例的目录参考):
1、首先我们新建个createContext.js文件(方便扩展和引用)
// createContext.js文件
import {

     createContext } from 'react';

const myContext = createContext(null);

export default myContext;
2、在index.js文件写如下代码(我们的最顶层Test组件)
import React, {

     useReducer } from 'react';
import {

     Button } from 'antd';

import myContext from './createContext';
import BrotherTest from './BrotherTest';

const reducer = (state, action) => {


    const [type, payload] = action;
    switch (type) {


        case 'set':
            return {


                ...state,
                ...payload,
            };
        default:
            return {


                ...state,
                ...payload,
            };
    }
};

const initData = {


    count: 0,
    text: 'Text-顶层组件',
};

const Test = () => {


    const [state, dispatch] = useReducer(reducer, initData);

    return (
        <div style={

    {

     backgroundColor: '#f2f2f2' }}>
            <h1>
                Test最顶层组件----实现跨组件间传值。
            </h1>
            <Button
                onClick={

    () => {


                    dispatch(['set', {

     count: state.count + 1 }]);
                }}
            >
                点我修改count
            </Button>
            <Button
                onClick={

    () => {


                    dispatch([
                        'set',
                        {

     text: '最顶层组件Test修改了自己的text---' },
                    ]);
                }}
            >
                点我修改text
            </Button>
            <br />
            Test组件的最顶层组件----count:{

    state.count}
            <br />
            Test组件的最顶层组件----text:{

    state.text}
            <br />
            <myContext.Provider value={

    {


                count: state.count,
                text: state.text,
                // 把最顶层Test组件的dispatch传递下去给后代组件,这样后代组件就都能修改最顶层组件的数据了。
                proDispatch: dispatch,
            }}
            >
                {

    /* 子组件 */}
                <BrotherTest />
            </myContext.Provider>
        </div>
    );
};

export default Test;
3、在BrotherTest.js 和 InTest.js文件中写入如下代码
从截图中可以看到,通过context上下文这种方式,我们能实现跨组件的传值和操作,不需要再一层一层通过props来传值。

三、父组件调用子组件的函数(useImperativeHandle & forwardRef)
如果想在父组件中调用子组件的某个函数,或者是使用子组件的某个值,可以使用这个方式(尽量少用)。
react官网的一段文字描述:
useImperativeHandle 可以让你在使用 ref 时自定义暴露给父组件的实例值。在大多数情况下,应当避免使用 ref 这样的命令式代码。useImperativeHandle 应当与 forwardRef 一起使用。
import React, {


    useState,
    useRef,
    useImperativeHandle,
    forwardRef,
} from 'react';
import {

     Button } from 'antd';

// 父组件
const ParentCom = () => {


    // 获取子组件实例
    const childRef = useRef();

    // 调用子组件的onChange方法
    const onClickChange = () => {


        childRef.current.onChange();
    };

    return (
        <div>
            <h2>父组件</h2>
            <Button onClick={

    onClickChange}>点击调用子组件onChange函数</Button>
            <ChildrenCom ref={

    childRef} />
        </div>
    );
};

// 子组件
const ChildrenCom = forwardRef((props, ref) => {


    const [value, setValue] = useState(0);
    const [name, setName] = useState('winne');

    // 自定义暴露给父组件的实例值 (useImperativeHandle 要配合 forwardRef使用)
    useImperativeHandle(ref, () => ({


        // 暴露函数给父组件调用
        onChange,
        // 也可以暴露子组件的状态值给父组件使用
    }));

    const onChange = () => {


        setValue(value + 1);
        setName(name === 'winne' ? 'xf' : 'winne');
    };

    return (
        <div>
            <h4>子组件</h4>
            <p>子组件的value: {

    value}</p>
            <p>子组件的name: {

    name}</p>
            <Button onClick={

    onChange}>点击改变value和name</Button>
        </div>
    );
});

export default ParentCom;
四、子组件传值给父组件(父组件props传递回调函数)
如果子组件想向父组件传递某些值,或者是子组件在执行某一段逻辑后想执行父组件中的某一段逻辑,此时可以在父组件中写好对应的逻辑函数,通过props传递这个函数给子组件进行调用即可。
如果传递的函数需要进行昂贵的计算,需要优化的时候使用useCallback配合memo 。(使用方法可以参考:这里)
import React, {

     useState } from 'react';
import {

     Button } from 'antd';

// 父组件
const CallbackCom = () => {


    const [count, setCount] = useState(0);

    // 获取子组件传过来的value值并设置到count,val参数就是子组件的value值
    const getChildrenValue = (val) => {


        setCount(val);
    };

    return (
        <div>
            <h2>父组件</h2>
            <p>获取子组件传过来的值:{

    count}</p>
            {

    /* 这里是重要代码,向子组件传递getValue这个prop,它的值是一个回调函数 */}
            <ChildrenCom getValue={

    getChildrenValue} />
        </div>
    );
};

// 子组件
const ChildrenCom = (props) => {


    const [value, setValue] = useState(0);

    const addValue = () => {


        setValue(value + 1);
        // 向父组件传递每次递增的value值
        props.getValue(value + 1);
    };

    return (
        <div>
            <h4>子组件</h4>
            <Button onClick={

    addValue}>点击改变子组件的value值:{

    value}</Button>
        </div>
    );
};

export default CallbackCom;