一、16进制颜色模型
16进制颜色是一种用16个字符(0-9,a-f)来表示颜色的方式。其中前两个字符表示红色分量,接下来两个字符表示绿色分量,最后两个字符表示蓝色分量。每个分量的取值范围为00到FF(十进制的0-255)。
16进制颜色是在网络和Web开发中最常用的颜色编码方式。它通常以“#”开头,后面跟着6个十六进制数字(00到FF)。每个数字代表一个颜色通道(红色、绿色和蓝色),范围从00(最小值,黑色)到FF(最大值,白色)。例如,#FF0000代表红色。
DEMO
<!DOCTYPE html>
<html>
<head>
<title>16进制颜色演示</title>
<style type="text/css">
#color-box {
width: 100px;
height: 100px;
background-color: #FF0000;
}
</style>
</head>
<body>
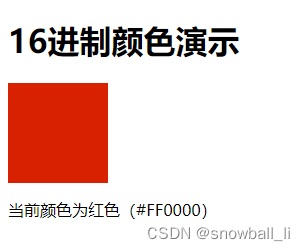
<h1>16进制颜色演示</h1>
<div id="color-box"></div>
<p>当前颜色为红色(#FF0000)</p>
</body>
</html>
效果
二、RGB颜色模型
RGB颜色模型是一种用红、绿、蓝三个颜色通道来表示颜色的方式,它是计算机颜色模型中最常用的一种。在RGB模型中,每个颜色通道的取值范围是0~255,表示颜色的深浅程度。
RGB颜色是一种加色模型,其中R(红色)、G(绿色)和B(蓝色)是三个基本颜色。当所有这三个颜色以最大值(255)混合时,会产生白色。RGB颜色模型广泛应用于计算机图形和数字图像。
DEMO
<!DOCTYPE html>
<html>
<head>
	<title>RGB颜色演示</title>
	<style type="text/css">
		#color-box {
			width: 100px;
			height: 100px;
			background-color: rgb(255, 0, 0);
		}
	</style>
</head>
<body>
	<h1>RGB颜色演示</h1>
	<div id="color-box"></div>
	<p>当前颜色为红色(rgb(255, 0, 0))</p>
</body>
</html>
效果

三、RGBA颜色模型
RGBA颜色模型是在RGB颜色模型的基础上增加了透明度的属性,用四个值来表示颜色,分别是红、绿、蓝三个通道的值和透明度值,透明度的取值范围是0~1。在前端开发中,我们常常使用RGBA颜色模型来设置元素的背景色和边框颜色,以达到半透明的效果。
DEMO
<!DOCTYPE html>
<html>
<head>
	<title>RGBA颜色演示</title>
	<style type="text/css">
		#color-box {
			width: 100px;
			height: 100px;
			background-color: rgba(255, 0, 0, 0.5);
			border: 1px solid rgba(0, 0, 255, 0.5);
		}
	</style>
</head>
<body>
	<h1>RGBA颜色演示</h1>
	<div id="color-box"></div>
	<p>当前颜色为半透明的红色(rgba(255, 0, 0, 0.5))</p>
</body>
</html>
效果

四、HSL颜色模型
HSL颜色模型是一种基于色相、饱和度和亮度三个属性来描述颜色的模型,其中:
1、色相(Hue)是一个0-360度的值,表示颜色在色轮上的位置,例如红色在0度,绿色在120度,蓝色在240度。
2、饱和度(Saturation)是一个0-100%的值,表示颜色的饱和度,即颜色的纯度。0%的饱和度表示灰度色,100%的饱和度表示完全饱和的颜色。
3、亮度(Lightness)是一个0-100%的值,表示颜色的亮度,即颜色的明暗程度。0%的亮度表示黑色,100%的亮度表示白色。
在前端开发中,我们通常使用HSL颜色模型来定义颜色,因为它更直观地表达了颜色的特征,更容易调整颜色的饱和度和亮度等属性。
DEMO
<!DOCTYPE html>
<html>
<head>
<title>HSL颜色演示</title>
<style type="text/css">
#color-box {
width: 100px;
height: 100px;
background-color: hsl(0, 100%, 50%);
}
</style>
</head>
<body>
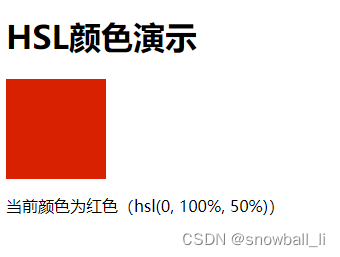
<h1>HSL颜色演示</h1>
<div id="color-box"></div>
<p>当前颜色为红色(hsl(0, 100%, 50%))</p>
</body>
</html>
在上面的代码中,我们使用CSS样式表来设置一个div元素的背景色为红色。使用HSL颜色模型,我们将色相设为0度,饱和度设为100%,亮度设为50%,这样就得到了红色。
效果
五、HSA颜色模型
前端并不存在HSA颜色模型
HSA颜色是一种颜色模型,其中H代表色调(Hue),S代表饱和度(Saturation),A代表透明度(Opacity)。在HSA颜色模型中,色调是颜色的基本属性,饱和度描述了颜色的强度或纯度,透明度则表示颜色的深浅程度。
HSA颜色模型是一种少用的颜色模型,用于表示色相、饱和度和透明度。最常见的颜色模型是RGB、CMYK和HSB,但在某些应用场景下,HSA可能更适合。
以下是一些常见的HSA颜色模型应用场景。
1. 图片编辑器:在图片编辑器中,HSA可以用于调整图层的透明度并结合色相和饱和度来改变图像的颜色。
2. UI设计:在UI设计中,使用透明度可以让设计师调整UI元素的不透明度,或者让图形元素逐渐消失。
3. 数据可视化:在数据可视化中,使用透明度可以让用户看到图表的背景,或者让线条、柱状图等元素逐渐呈现。
HSA颜色模型可以用于任何需要结合透明度、色相和饱和度的应用场景。但需要注意的是,由于HSA是一种少用的颜色模型,因此可能需要特定的工具或软件才能使用它。
六、HSB颜色模型
HSB(Hue,Saturation,Brightness)是一种很常用的颜色模型,用于表示色相、饱和度和亮度。以下是一个简单的前端demo,演示如何使用HSB颜色模型生成颜色。
DEMO
<!DOCTYPE html>
<html lang="en">
  <head>
    <meta charset="UTF-8" />
    <meta name="viewport" content="width=device-width, initial-scale=1.0" />
    <title>HSB Color Picker</title>
    <style>
      body {
        margin: 0;
        padding: 0;
        font-family: Arial, sans-serif;
      }

      .container {
        display: flex;
        flex-wrap: wrap;
        justify-content: center;
        align-items: center;
        height: 100vh;
        background: #444;
      }

      .color-box {
        width: 100px;
        height: 100px;
        margin: 10px;
        border-radius: 5px;
        cursor: pointer;
      }

      .color-info {
        margin: 0 auto;
        text-align: center;
        color: #fff;
        font-weight: bold;
      }

      .slider {
        width: 80%;
        margin: 20px auto;
      }

      .slider label {
        display: block;
        color: #fff;
        font-weight: bold;
      }

      .slider input[type="range"] {
        width: 100%;
        -webkit-appearance: none;
        height: 10px;
        border-radius: 5px;
        background-color: #a0a0a0;
        outline: none;
        margin-top: 5px;
      }

      .slider input[type="range"]::-webkit-slider-thumb {
        -webkit-appearance: none;
        appearance: none;
        width: 20px;
        height: 20px;
        border-radius: 50%;
        background-color: #fff;
        cursor: pointer;
      }

      .slider input[type="range"]:focus {
        outline: none;
      }

      .slider input[type="range"]:focus::-webkit-slider-thumb {
        box-shadow: 0 0 0 5px #ddd;
      }
    </style>
  </head>
  <body>
    <div class="container">
      <div class="color-box" id="color-box"></div>
      <div class="color-info" id="color-info"></div>
      <div class="slider">
        <label for="hue">Hue</label>
        <input type="range" min="0" max="360" value="0" id="hue" />
        <label for="saturation">Saturation</label>
        <input type="range" min="0" max="100" value="0" id="saturation" />
        <label for="brightness">Brightness</label>
        <input type="range" min="0" max="100" value="100" id="brightness" />
      </div>
    </div>
    <script>
      const colorBox = document.getElementById("color-box");
      const colorInfo = document.getElementById("color-info");
      const hueSlider = document.getElementById("hue");
      const saturationSlider = document.getElementById("saturation");
      const brightnessSlider = document.getElementById("brightness");

      function updateColor() {
        const hue = hueSlider.value;
        const saturation = saturationSlider.value;
        const brightness = brightnessSlider.value;
        const color = `hsl(${hue}, ${saturation}%, ${brightness}%)`;
        colorBox.style.backgroundColor = color;
        colorInfo.textContent = color.toUpperCase();
      }

      hueSlider.addEventListener("input", updateColor);
      saturationSlider.addEventListener("input", updateColor);
      brightnessSlider.addEventListener("input", updateColor);
    </script>
  </body>
</html>
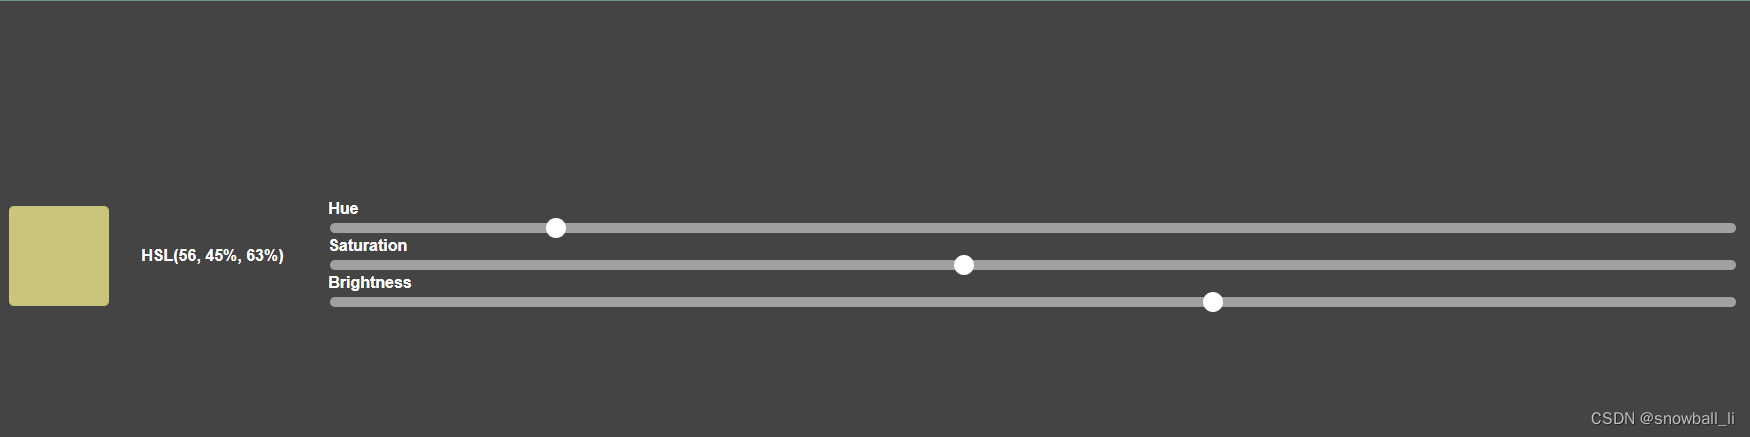
这个样例代码创建了一个由三个滑块控件组成的 HSB 颜色选择器,用于调整背景颜色。通过监听滑块的 input 事件,我们可以从滑块的值中计算出当前的颜色,并将其应用于背景色和颜色信息框中。
效果
七、LAB颜色模型
LAB颜色模型是一种用于表示颜色的色彩空间,也是一种设备无关的颜色模型。与RGB颜色模型和CMYK颜色模型相比,它更符合人类视觉的感知方式,更容易进行色彩调整和识别。
在LAB颜色空间中,颜色由三个参数表示:L表示亮度,A表示绿色/红色的偏移量,B表示蓝色/黄色的偏移量。该颜色模型的特点是,亮度的变化不受色彩的影响,因此L参数是线性的;而A和B则表示相对于亮度的偏移量,因此是非线性的。
在前端开发中,LAB颜色模型主要被用于色彩调整和图片处理。由于LAB颜色空间更接近于人类视觉的感知,因此可以更准确地对颜色进行调整,使图片更加真实自然。同时,在前端开发中也可以使用JavaScript库比如color-convert和color-space,快速地将RGB颜色值转换为LAB颜色值。
DEMO
<!DOCTYPE html>
<html lang="en">
  <head>
    <meta charset="UTF-8" />
    <meta name="viewport" content="width=device-width, initial-scale=1.0" />
    <title>LAB Color Picker</title>
    <style>
      body {
        margin: 0;
        padding: 0;
        font-family: Arial, sans-serif;
      }

      .container {
        display: flex;
        flex-wrap: wrap;
        justify-content: center;
        align-items: center;
        height: 100vh;
        background: #444;
      }

      .color-box {
        width: 100px;
        height: 100px;
        margin: 10px;
        border-radius: 5px;
        cursor: pointer;
      }

      .color-info {
        margin: 0 auto;
        text-align: center;
        color: #fff;
        font-weight: bold;
      }

      .slider {
        width: 80%;
        margin: 20px auto;
      }

      .slider label {
        display: block;
        color: #fff;
        font-weight: bold;
      }

      .slider input[type="range"] {
        width: 100%;
        -webkit-appearance: none;
        height: 10px;
        border-radius: 5px;
        background-color: #a0a0a0;
        outline: none;
        margin-top: 5px;
      }

      .slider input[type="range"]::-webkit-slider-thumb {
        -webkit-appearance: none;
        appearance: none;
        width: 20px;
        height: 20px;
        border-radius: 50%;
        background-color: #fff;
        cursor: pointer;
      }

      .slider input[type="range"]:focus {
        outline: none;
      }

      .slider input[type="range"]:focus::-webkit-slider-thumb {
        box-shadow: 0 0 0 5px #ddd;
      }
    </style>
  </head>
  <body>
    <div class="container">
      <div class="color-box" id="color-box"></div>
      <div class="color-info" id="color-info"></div>
      <div class="slider">
        <label for="lightness">Lightness</label>
        <input type="range" min="0" max="100" value="50" id="lightness" />
        <label for="a">A</label>
        <input type="range" min="-128" max="127" value="0" id="a" />
        <label for="b">B</label>
        <input type="range" min="-128" max="127" value="0" id="b" />
      </div>
    </div>
    <script>
      const colorBox = document.getElementById("color-box");
      const colorInfo = document.getElementById("color-info");
      const lightnessSlider = document.getElementById("lightness");
      const aSlider = document.getElementById("a");
      const bSlider = document.getElementById("b");

      function updateColor() {
        const lightness = lightnessSlider.value;
        const a = aSlider.value;
        const b = bSlider.value;
        const color = `lab(${lightness}, ${a}, ${b})`;
        colorBox.style.backgroundColor = color;
        colorInfo.textContent = color.toUpperCase();
      }

      lightnessSlider.addEventListener("input", updateColor);
      aSlider.addEventListener("input", updateColor);
      bSlider.addEventListener("input", updateColor);
    </script>
  </body>
</html>
需要注意的是,由于LAB颜色模型相对于RGB颜色模型和CMYK颜色模型更为复杂,因此可能需要一定的数学基础才能理解其原理和应用。
效果

八、LCH颜色模型
LCH颜色模型是一种基于LAB颜色空间的色彩模型,它将LAB颜色空间的a和b两个参数转换为色相(hue)和饱和度(chroma),使得颜色的表示更加直观。其中,色相表示颜色在色轮上的位置,饱和度表示颜色鲜艳程度。
在前端开发中,LCH颜色模型主要被用于色彩调整和颜色选择器的开发。在颜色调整方面,LCH颜色模型可以帮助开发者更直观地理解颜色参数的含义,更加精准地对颜色进行调节;而在颜色选择器方面,LCH颜色模型可以实现更加友好自然的用户体验,吸引更多用户的使用。
DEMO
<!DOCTYPE html>
<html>

<head>
  <title>LCH Color Model Demo</title>
</head>

<body>
  <h1>LCH Color Model Demo</h1>
  <p>Select a color using the LCH model:</p>
  <div>
    <label for="lightness">Lightness:</label>
    <input type="range" id="lightness" name="lightness" min="0" max="100" value="50" step="1" onchange="updateColor()">
  </div>
  <div>
    <label for="chroma">Chroma:</label>
    <input type="range" id="chroma" name="chroma" min="0" max="100" value="50" step="1" onchange="updateColor()">
  </div>
  <div>
    <label for="hue">Hue:</label>
    <input type="range" id="hue" name="hue" min="0" max="360" value="0" step="1" onchange="updateColor()">
  </div>
  <div>
    <p>Selected color: <span id="color">rgb(0, 0, 0)</span></p>
    <div style="width: 100px; height: 100px; background-color: rgb(0, 0, 0);"></div>
  </div>

  <script>
    const lightnessSlider = document.getElementById('lightness')
    const chromaSlider = document.getElementById('chroma')
    const hueSlider = document.getElementById('hue')
    const colorDiv = document.getElementById('color')

    function updateColor() {
      const lightness = lightnessSlider.value / 100
      const chroma = chromaSlider.value / 100
      const hue = hueSlider.value
      const rgb = lchToRgb(lightness, chroma, hue)
      const colorString = `rgb(${rgb.r}, ${rgb.g}, ${rgb.b})`
      colorDiv.innerHTML = colorString
      colorDiv.style.backgroundColor = colorString
    }

    // LCH to RGB conversion function
    function lchToRgb(l, c, h) {
      const L = l // L is 0-1
      const C = c * 0.01 // C is 0-1
      const H = h / 360 // H is 0-1
      const X = C * (1 - Math.abs((H * 6) % 2 - 1))
      const m = L - C / 2
      let r, g, b
      if (H < 1 / 6) {
        [r, g, b] = [C, X, 0]
      } else if (H < 1 / 3) {
        [r, g, b] = [X, C, 0]
      } else if (H < 1 / 2) {
        [r, g, b] = [0, C, X]
      } else if (H < 2 / 3) {
        [r, g, b] = [0, X, C]
      } else if (H < 5 / 6) {
        [r, g, b] = [X, 0, C]
      } else {
        [r, g, b] = [C, 0, X]
      }
      return {
        r: Math.round((r + m) * 255),
        g: Math.round((g + m) * 255),
        b: Math.round((b + m) * 255)
      }
    }
  </script>
</body>

</html>
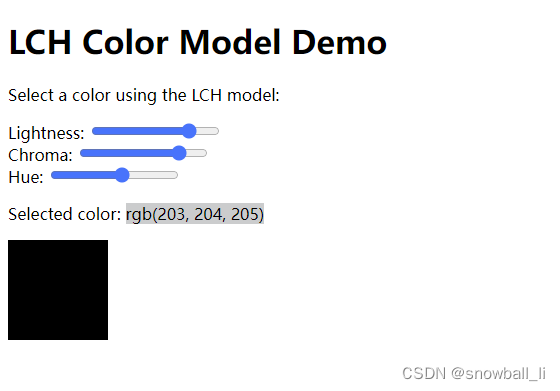
这个 DEMO 允许用户使用三个滑块选择颜色,分别控制亮度、饱和度和色相。在滑块值发生变化时,页面会计算并显示所选颜色的 RGB 值,并将背景颜色设置为所选颜色。实现这个功能的关键在于 lchToRgb 函数,它将 LCH 值转换为 RGB 值。
效果
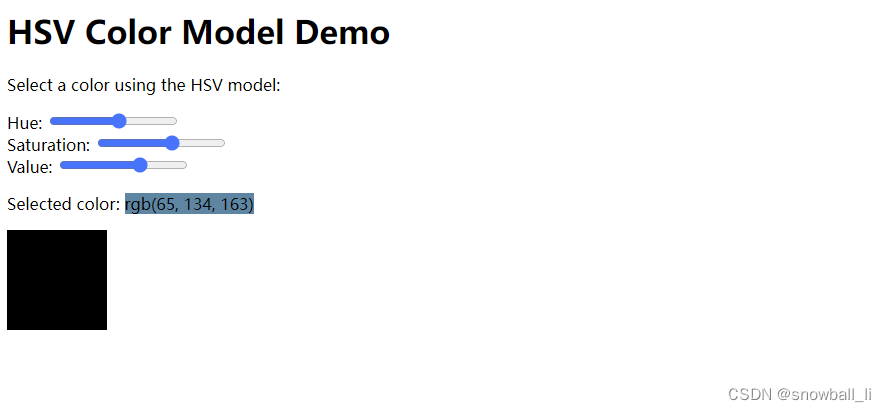
九、HSV颜色模型
HSV颜色模型是一种将RGB颜色空间参数转换为色相(hue)、饱和度(saturation)和亮度(value)三个参数的色彩模型。其中,色相表示颜色在色轮上的位置,饱和度表示颜色的纯度,亮度表示颜色的明暗程度。
在前端开发中,HSV颜色模型主要被用于色彩调整和颜色选择器的开发。在颜色调整方面,HSV颜色模型可以帮助开发者更直观地理解颜色参数的含义,更加精准地对颜色进行调节;而在颜色选择器方面,HSV颜色模型可以实现更加友好自然的用户体验,吸引更多用户的使用。
DEMO
<!DOCTYPE html>
<html>

<head>
  <title>HSV Color Model Demo</title>
</head>

<body>
  <h1>HSV Color Model Demo</h1>
  <p>Select a color using the HSV model:</p>
  <div>
    <label for="hue">Hue:</label>
    <input type="range" id="hue" name="hue" min="0" max="360" value="0" step="1" onchange="updateColor()">
  </div>
  <div>
    <label for="saturation">Saturation:</label>
    <input type="range" id="saturation" name="saturation" min="0" max="100" value="0" step="1" onchange="updateColor()">
  </div>
  <div>
    <label for="value">Value:</label>
    <input type="range" id="value" name="value" min="0" max="100" value="0" step="1" onchange="updateColor()">
  </div>
  <div>
    <p>Selected color: <span id="color">rgb(0, 0, 0)</span></p>
    <div style="width: 100px; height: 100px; background-color: rgb(0, 0, 0);"></div>
  </div>

  <script>
    const hueSlider = document.getElementById('hue')
    const saturationSlider = document.getElementById('saturation')
    const valueSlider = document.getElementById('value')
    const colorDiv = document.getElementById('color')

    function updateColor() {
      const hue = hueSlider.value / 360
      const saturation = saturationSlider.value / 100
      const value = valueSlider.value / 100
      const rgb = hsvToRgb(hue, saturation, value)
      const colorString = `rgb(${rgb.r}, ${rgb.g}, ${rgb.b})`
      colorDiv.innerHTML = colorString
      colorDiv.style.backgroundColor = colorString
    }

    // HSV to RGB conversion function
    function hsvToRgb(h, s, v) {
      let r, g, b, i, f, p, q, t
      if (s === 0) {
        r = g = b = v // achromatic
      } else {
        h *= 6 // sector 0 to 5
        i = Math.floor(h)
        f = h - i // factorial part of h
        p = v * (1 - s)
        q = v * (1 - s * f)
        t = v * (1 - s * (1 - f))
        switch (i) {
          case 0:
            r = v
            g = t
            b = p
            break
          case 1:
            r = q
            g = v
            b = p
            break
          case 2:
            r = p
            g = v
            b = t
            break
          case 3:
            r = p
            g = q
            b = v
            break
          case 4:
            r = t
            g = p
            b = v
            break
          default: // case 5:
            r = v
            g = p
            b = q
            break
        }
      }
      return {
        r: Math.round(r * 255),
        g: Math.round(g * 255),
        b: Math.round(b * 255)
      }
    }
  </script>
</body>

</html>
这个 DEMO 允许用户使用三个滑块选择颜色,分别控制色相、饱和度和亮度。在滑块值发生变化时,页面会计算并显示所选颜色的 RGB 值,并将背景颜色设置为所选颜色。实现这个功能的关键在于 hsvToRgb 函数,它将 HSV 值转换为 RGB 值。
效果
十、YUV颜色模型
YUV颜色模型是一种将RGB颜色空间参数转换为亮度(luma)和色度(chroma)两个参数的色彩模型。其中,亮度luma表示颜色的明暗程度,而色度chroma表示颜色的色彩饱和度。
在前端开发中,YUV颜色模型主要被应用于视频编码或图像处理领域,例如常见的视频压缩算法H.264和HEVC就是基于YUV颜色空间编码的。此外,YUV颜色模型也可以用于实现灰度图像的效果,或者实现色彩调整功能。
DEMO
<!DOCTYPE html>
<html>
  <head>
    <meta charset="UTF-8">
    <title>YUV Color Picker</title>
    <style>
      body {
        margin: 0;
        padding: 0;
        font-family: Arial, sans-serif;
      }

      .container {
        display: flex;
        flex-wrap: wrap;
        justify-content: center;
        align-items: center;
        height: 100vh;
        background: #444;
      }

      .color-box {
        width: 100px;
        height: 100px;
        margin: 10px;
        border-radius: 5px;
        cursor: pointer;
        transition: background-color 0.2s;
      }

      .color-box:hover {
        transform: scale(1.1);
      }

      .color-info {
        text-align: center;
        color: #fff;
        font-weight: bold;
      }

      .slider {
        width: 80%;
        margin: 20px auto;
      }

      .slider label {
        display: block;
        color: #fff;
        font-weight: bold;
      }

      .slider input[type="range"] {
        width: 100%;
        -webkit-appearance: none;
        height: 10px;
        border-radius: 5px;
        background-color: #a0a0a0;
        outline: none;
        margin-top: 5px;
      }

      .slider input[type="range"]::-webkit-slider-thumb {
        -webkit-appearance: none;
        appearance: none;
        width: 20px;
        height: 20px;
        border-radius: 50%;
        background-color: #fff;
        cursor: pointer;
      }

      .slider input[type="range"]:focus {
        outline: none;
      }

      .slider input[type="range"]:focus::-webkit-slider-thumb {
        box-shadow: 0 0 0 5px #ddd;
      }
    </style>
  </head>
  <body>
    <div class="container">
      <div class="color-box" id="color-box"></div>
      <div class="color-info" id="color-info"></div>
      <div class="slider">
        <label for="y">Y</label>
        <input type="range" min="0" max="255" value="128" id="y">
        <label for="u">U</label>
        <input type="range" min="-128" max="127" value="0" id="u">
        <label for="v">V</label>
        <input type="range" min="-128" max="127" value="0" id="v">
      </div>
    </div>
    <script>
      const colorBox = document.getElementById("color-box");
      const colorInfo = document.getElementById("color-info");
      const ySlider = document.getElementById("y");
      const uSlider = document.getElementById("u");
      const vSlider = document.getElementById("v");

      function updateColor() {
        const y = ySlider.value;
        const u = uSlider.value;
        const v = vSlider.value;
        const r = Math.round(y + 1.13983 * v);
        const g = Math.round(y - 0.39465 * u - 0.58060 * v);
        const b = Math.round(y + 2.03211 * u);
        const color = `rgb(${r}, ${g}, ${b})`;
        colorBox.style.backgroundColor = color;
        colorInfo.textContent = color.toUpperCase();
      }

      ySlider.addEventListener("input", updateColor);
      uSlider.addEventListener("input", updateColor);
      vSlider.addEventListener("input", updateColor);
    </script>
  </body>
</html>
在这个 Demo 中,我们使用了 YUV 转 RGB 的公式来计算颜色值,并使用 RGB 值来设置方块的背景颜色。请注意,该转换的结果可能会超出 RGB 可接受的范围,需要使用 Math.round() 函数来进行舍入处理。
同时,该 Demo 含有一些基本的 CSS 样式,例如设置 .color-box 的颜色、宽度、高度、边距和边框半径属性,以及添加了一个 .color-box:hover 的伪类选择器,这可以使方块在鼠标悬停时有一个小的缩放动画。
效果

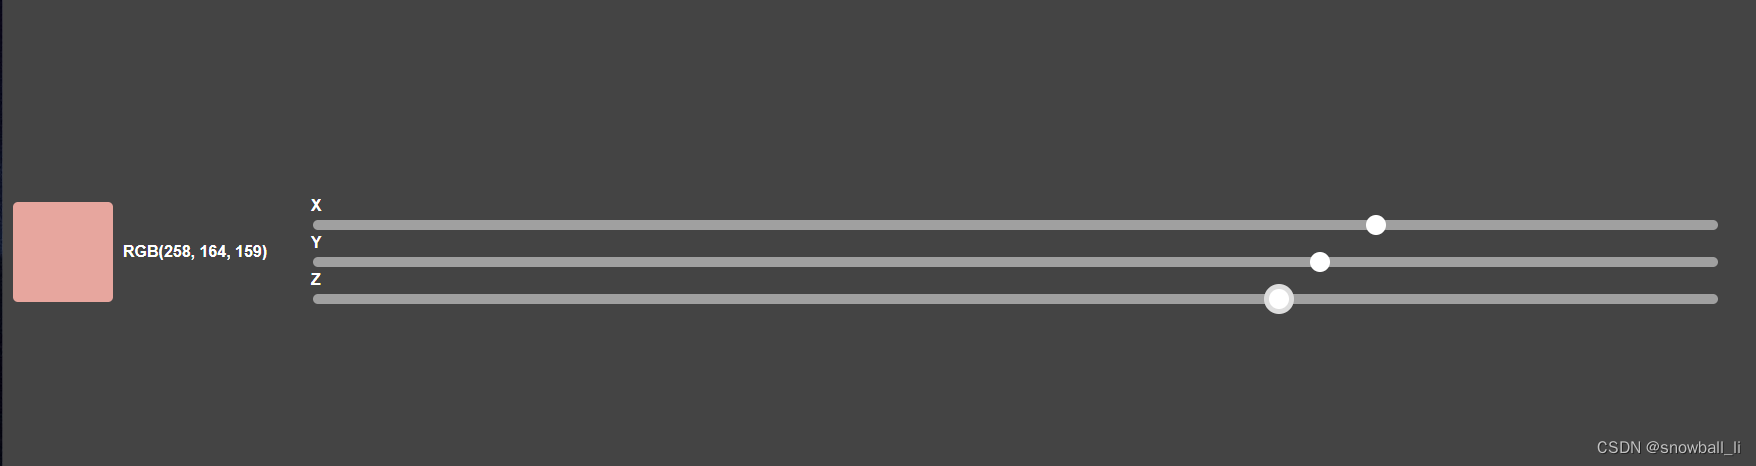
十一、XYZ颜色模型
XYZ颜色模型是一种基于人眼感知的色彩模型,同时也是一种标准化的色彩空间,常用于计算机图形学、颜色管理和色彩研究等领域。
DEMO
<!DOCTYPE html>
<html>
  <head>
    <meta charset="UTF-8">
    <title>XYZ Color Picker</title>
    <style>
      body {
        margin: 0;
        padding: 0;
        font-family: Arial, sans-serif;
      }

      .container {
        display: flex;
        flex-wrap: wrap;
        justify-content: center;
        align-items: center;
        height: 100vh;
        background: #444;
      }

      .color-box {
        width: 100px;
        height: 100px;
        margin: 10px;
        border-radius: 5px;
        cursor: pointer;
        transition: background-color 0.2s;
      }

      .color-box:hover {
        transform: scale(1.1);
      }

      .color-info {
        text-align: center;
        color: #fff;
        font-weight: bold;
      }

      .slider {
        width: 80%;
        margin: 20px auto;
      }

      .slider label {
        display: block;
        color: #fff;
        font-weight: bold;
      }

      .slider input[type="range"] {
        width: 100%;
        -webkit-appearance: none;
        height: 10px;
        border-radius: 5px;
        background-color: #a0a0a0;
        outline: none;
        margin-top: 5px;
      }

      .slider input[type="range"]::-webkit-slider-thumb {
        -webkit-appearance: none;
        appearance: none;
        width: 20px;
        height: 20px;
        border-radius: 50%;
        background-color: #fff;
        cursor: pointer;
      }

      .slider input[type="range"]:focus {
        outline: none;
      }

      .slider input[type="range"]:focus::-webkit-slider-thumb {
        box-shadow: 0 0 0 5px #ddd;
      }
    </style>
  </head>
  <body>
    <div class="container">
      <div class="color-box" id="color-box"></div>
      <div class="color-info" id="color-info"></div>
      <div class="slider">
        <label for="x">X</label>
        <input type="range" min="0" max="1" step="0.01" value="0.5" id="x">
        <label for="y">Y</label>
        <input type="range" min="0" max="1" step="0.01" value="0.5" id="y">
        <label for="z">Z</label>
        <input type="range" min="0" max="1" step="0.01" value="0.5" id="z">
      </div>
    </div>
    <script>
      const colorBox = document.getElementById("color-box");
      const colorInfo = document.getElementById("color-info");
      const xSlider = document.getElementById("x");
      const ySlider = document.getElementById("y");
      const zSlider = document.getElementById("z");

      function updateColor() {
        const x = xSlider.value;
        const y = ySlider.value;
        const z = zSlider.value;
        const r = Math.round(255 * (3.2406 * x - 1.5372 * y - 0.4986 * z));
        const g = Math.round(255 * (-0.9689 * x + 1.8758 * y + 0.0415 * z));
        const b = Math.round(255 * (0.0557 * x - 0.2040 * y + 1.0570 * z));
        const color = `rgb(${r}, ${g}, ${b})`;
        colorBox.style.backgroundColor = color;
        colorInfo.textContent = color.toUpperCase();
      }

      xSlider.addEventListener("input", updateColor);
      ySlider.addEventListener("input", updateColor);
      zSlider.addEventListener("input", updateColor);
    </script>
  </body>
</html>
在这个 Demo 中,我们使用了 XYZ 转 RGB 的公式来计算颜色值,并使用 RGB 值来设置方块的背景颜色。请注意,该转换的结果可能会超出 RGB 可接受的范围,需要使用 Math.round() 函数来进行舍入处理。
同时,该 Demo 含有一些基本的 CSS 样式,例如设置 .color-box 的颜色、宽度、高度、边距和边框半径属性,以及添加了一个 .color-box:hover 的伪类选择器,这可以使方块在鼠标悬停时有一个小的缩放动画。
效果
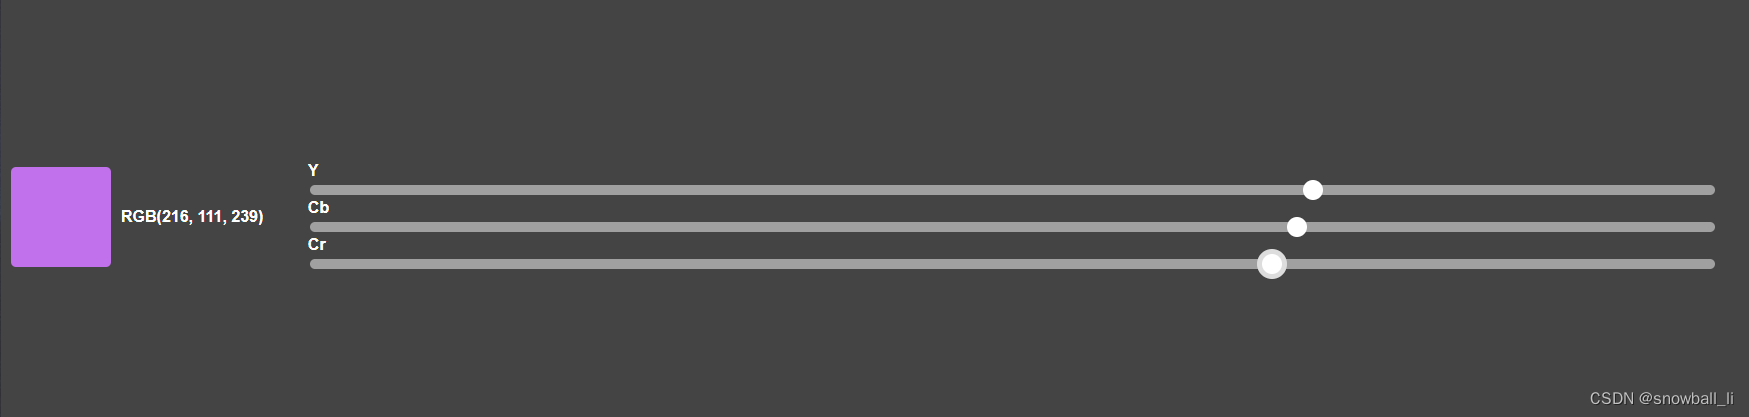
十二、YCbCr颜色模型
YCbCr颜色模型是一种基于RGB颜色模型转换而来的一种颜色空间,主要用于数字视频、图像压缩等领域。在前端开发中,可以使用现有的JavaScript库如color-convert等来进行YCbCr颜色空间的计算和应用。
DEMO
<!DOCTYPE html>
<html>
  <head>
    <meta charset="UTF-8">
    <title>YCbCr Color Picker</title>
    <style>
      body {
        margin: 0;
        padding: 0;
        font-family: Arial, sans-serif;
      }

      .container {
        display: flex;
        flex-wrap: wrap;
        justify-content: center;
        align-items: center;
        height: 100vh;
        background: #444;
      }

      .color-box {
        width: 100px;
        height: 100px;
        margin: 10px;
        border-radius: 5px;
        cursor: pointer;
        transition: background-color 0.2s;
      }

      .color-box:hover {
        transform: scale(1.1);
      }

      .color-info {
        text-align: center;
        color: #fff;
        font-weight: bold;
      }

      .slider {
        width: 80%;
        margin: 20px auto;
      }

      .slider label {
        display: block;
        color: #fff;
        font-weight: bold;
      }

      .slider input[type="range"] {
        width: 100%;
        -webkit-appearance: none;
        height: 10px;
        border-radius: 5px;
        background-color: #a0a0a0;
        outline: none;
        margin-top: 5px;
      }

      .slider input[type="range"]::-webkit-slider-thumb {
        -webkit-appearance: none;
        appearance: none;
        width: 20px;
        height: 20px;
        border-radius: 50%;
        background-color: #fff;
        cursor: pointer;
      }

      .slider input[type="range"]:focus {
        outline: none;
      }

      .slider input[type="range"]:focus::-webkit-slider-thumb {
        box-shadow: 0 0 0 5px #ddd;
      }
    </style>
  </head>
  <body>
    <div class="container">
      <div class="color-box" id="color-box"></div>
      <div class="color-info" id="color-info"></div>
      <div class="slider">
        <label for="y">Y</label>
        <input type="range" min="16" max="235" step="1" value="128" id="y">
        <label for="cb">Cb</label>
        <input type="range" min="16" max="240" step="1" value="128" id="cb">
        <label for="cr">Cr</label>
        <input type="range" min="16" max="240" step="1" value="128" id="cr">
      </div>
    </div>
    <script>
      const colorBox = document.getElementById("color-box");
      const colorInfo = document.getElementById("color-info");
      const ySlider = document.getElementById("y");
      const cbSlider = document.getElementById("cb");
      const crSlider = document.getElementById("cr");

      function updateColor() {
        const y = ySlider.value - 16;
        const cb = cbSlider.value - 128;
        const cr = crSlider.value - 128;
        const r = Math.round(y + 1.402 * cr);
        const g = Math.round(y - 0.344 * cb - 0.714 * cr);
        const b = Math.round(y + 1.772 * cb);
        const color = `rgb(${r}, ${g}, ${b})`;
        colorBox.style.backgroundColor = color;
        colorInfo.textContent = color.toUpperCase();
      }

      ySlider.addEventListener("input", updateColor);
      cbSlider.addEventListener("input", updateColor);
      crSlider.addEventListener("input", updateColor);
    </script>
  </body>
</html>
在这个 Demo 中,我们使用了 YCbCr 转 RGB 的公式来计算颜色值,并使用 RGB 值来设置方块的背景颜色。请注意,与 XYZ 和 HSV 模型不同,YCbCr 模型的 Y、Cb、Cr 值都需要进行偏移和缩放。具体来说,Y 的范围是 16 到 235,Cb 和 Cr 的范围是 16 到 240。因此,在函数 updateColor() 中,我们需要对三个滑块的值进行处理,以便正确计算 RGB 值。
同时,该 Demo 含有一些基本的 CSS 样式,例如设置 .color-box 的颜色、宽度、高度、边距和边框半径属性,以及添加了一个 .color-box:hover 的伪类选择器,这可以使方块在鼠标悬停时有一个小的缩放动画。
效果
十三、CMYK颜色模型
CMYK颜色是一种基于印刷油墨颜色的颜色模型,其中C表示青色(Cyan),M表示洋红色(Magenta),Y表示黄色(Yellow),K表示黑色(Black)。这种颜色模型主要用于印刷和打印领域,因为这四种颜色可以组合出几乎所有的颜色,而且它们之间有很好的互补性,可以最大限度地使用印刷油墨而不会浪费。
CMYK颜色模型是一种减色模型,常用于印刷行业中。在前端开发中,我们可以使用现有的JavaScript库如color-convert等来进行CMYK颜色空间的计算和应用。
DEMO
<!DOCTYPE html>
<html>
  <head>
    <meta charset="UTF-8">
    <title>CMYK Color Picker</title>
    <style>
      body {
        margin: 0;
        padding: 0;
        font-family: Arial, sans-serif;
      }

      .container {
        display: flex;
        flex-wrap: wrap;
        justify-content: center;
        align-items: center;
        height: 100vh;
        background: #444;
      }

      .color-box {
        width: 100px;
        height: 100px;
        margin: 10px;
        border-radius: 5px;
        cursor: pointer;
        transition: background-color 0.2s;
      }

      .color-box:hover {
        transform: scale(1.1);
      }

      .color-info {
        text-align: center;
        color: #fff;
        font-weight: bold;
      }

      .slider {
        width: 80%;
        margin: 20px auto;
      }

      .slider label {
        display: block;
        color: #fff;
        font-weight: bold;
      }

      .slider input[type="range"] {
        width: 100%;
        -webkit-appearance: none;
        height: 10px;
        border-radius: 5px;
        background-color: #a0a0a0;
        outline: none;
        margin-top: 5px;
      }

      .slider input[type="range"]::-webkit-slider-thumb {
        -webkit-appearance: none;
        appearance: none;
        width: 20px;
        height: 20px;
        border-radius: 50%;
        background-color: #fff;
        cursor: pointer;
      }

      .slider input[type="range"]:focus {
        outline: none;
      }

      .slider input[type="range"]:focus::-webkit-slider-thumb {
        box-shadow: 0 0 0 5px #ddd;
      }
    </style>
  </head>
  <body>
    <div class="container">
      <div class="color-box" id="color-box"></div>
      <div class="color-info" id="color-info"></div>
      <div class="slider">
        <label for="c">C</label>
        <input type="range" min="0" max="100" step="1" value="0" id="c">
        <label for="m">M</label>
        <input type="range" min="0" max="100" step="1" value="0" id="m">
        <label for="y">Y</label>
        <input type="range" min="0" max="100" step="1" value="0" id="y">
        <label for="k">K</label>
        <input type="range" min="0" max="100" step="1" value="0" id="k">
      </div>
    </div>
    <script>
      const colorBox = document.getElementById("color-box");
      const colorInfo = document.getElementById("color-info");
      const cSlider = document.getElementById("c");
      const mSlider = document.getElementById("m");
      const ySlider = document.getElementById("y");
      const kSlider = document.getElementById("k");

      function updateColor() {
        const c = cSlider.value / 100;
        const m = mSlider.value / 100;
        const y = ySlider.value / 100;
        const k = kSlider.value / 100;
        const r = Math.round(255 * (1 - c) * (1 - k));
        const g = Math.round(255 * (1 - m) * (1 - k));
        const b = Math.round(255 * (1 - y) * (1 - k));
        const color = `rgb(${r}, ${g}, ${b})`;
        colorBox.style.backgroundColor = color;
        colorInfo.textContent = color.toUpperCase();
      }

      cSlider.addEventListener("input", updateColor);
      mSlider.addEventListener("input", updateColor);
      ySlider.addEventListener("input", updateColor);
      kSlider.addEventListener("input", updateColor);
    </script>
  </body>
</html>
在这个 Demo 中,我们使用了 CMYK 转 RGB 的公式来计算颜色值,并使用 RGB 值来设置方块的背景颜色。请注意,与其他模型不同,CMYK 模型的 C、M、Y、K 值都是 0 到 100 的百分比值。因此,在函数 updateColor() 中,我们需要将四个滑块的值除以 100,以便正确计算 RGB 值。
同时,该 Demo 含有一些基本的 CSS 样式,例如设置 .color-box 的颜色、宽度、高度、边距和边框半径属性,以及添加了一个 .color-box:hover 的伪类选择器,这可以使方块在鼠标悬停时有一个小的缩放动画。
效果

十四、Gray颜色模型
灰度颜色模型是一种只有亮度信息的颜色模型,用于表示黑白图像或将彩色图像转换为黑白图像。在前端开发中,我们可以使用HTML5 Canvas绘制灰度图像。
DEMO
<!DOCTYPE html>
<html>
  <head>
    <meta charset="UTF-8">
    <title>Gray Color Picker</title>
    <style>
      body {
        margin: 0;
        padding: 0;
        font-family: Arial, sans-serif;
      }

      .container {
        display: flex;
        flex-wrap: wrap;
        justify-content: center;
        align-items: center;
        height: 100vh;
        background: #444;
      }

      .color-box {
        width: 100px;
        height: 100px;
        margin: 10px;
        border-radius: 5px;
        cursor: pointer;
        transition: background-color 0.2s;
      }

      .color-box:hover {
        transform: scale(1.1);
      }

      .color-info {
        text-align: center;
        color: #fff;
        font-weight: bold;
      }

      .slider {
        width: 80%;
        margin: 20px auto;
      }

      .slider label {
        display: block;
        color: #fff;
        font-weight: bold;
      }

      .slider input[type="range"] {
        width: 100%;
        -webkit-appearance: none;
        height: 10px;
        border-radius: 5px;
        background-color: #a0a0a0;
        outline: none;
        margin-top: 5px;
      }

      .slider input[type="range"]::-webkit-slider-thumb {
        -webkit-appearance: none;
        appearance: none;
        width: 20px;
        height: 20px;
        border-radius: 50%;
        background-color: #fff;
        cursor: pointer;
      }

      .slider input[type="range"]:focus {
        outline: none;
      }

      .slider input[type="range"]:focus::-webkit-slider-thumb {
        box-shadow: 0 0 0 5px #ddd;
      }
    </style>
  </head>
  <body>
    <div class="container">
      <div class="color-box" id="color-box"></div>
      <div class="color-info" id="color-info"></div>
      <div class="slider">
        <label for="gray">Gray</label>
        <input type="range" min="0" max="255" step="1" value="0" id="gray">
      </div>
    </div>
    <script>
      const colorBox = document.getElementById("color-box");
      const colorInfo = document.getElementById("color-info");
      const graySlider = document.getElementById("gray");

      function updateColor() {
        const grayValue = graySlider.value;
        const color = `rgb(${grayValue}, ${grayValue}, ${grayValue})`;
        colorBox.style.backgroundColor = color;
        colorInfo.textContent = color.toUpperCase();
      }

      graySlider.addEventListener("input", updateColor);
    </script>
  </body>
</html>
我们使用了 Gray 颜色模型来计算颜色值,并将颜色值设置为 RGB 三个通道都相同的值,从而创建出一种灰色。请注意,Gray 模型的值只有一个(0 到 255),因此我们只需要一个滑块来调整颜色值。
同时,该 Demo 含有一些基本的 CSS 样式,例如设置 .color-box 的颜色、宽度、高度、边距和边框半径属性,以及添加了一个 .color-box:hover 的伪类选择器,这可以使方块在鼠标悬停时有一个小的缩放动画。
效果
