- 创建Spring Boot项目:使用Spring Initializr创建一个新的Spring Boot项目。
- 依赖配置:在
pom.xml文件中(方便起见使用的是thymeleaf模板引擎):
<dependencies>
    <dependency>
        <groupId>org.springframework.boot</groupId>
        <artifactId>spring-boot-starter-thymeleaf</artifactId>
    </dependency>
    <dependency>
        <groupId>org.springframework.boot</groupId>
        <artifactId>spring-boot-starter-web</artifactId>
    </dependency>
</dependencies>
- HTML目录结构:在
src/main/resources/templates目录下创建HTML视图。这里提供两个示例视图,error-page.html和result-page.html:
error-page.html:
<!DOCTYPE html>
<html xmlns:th="http://www.thymeleaf.org">
<head>
    <title>错误页面</title>
</head>
<body>
<h1>错误</h1>
<p th:text="${message}"></p>
</body>
</html>
result-page.html:
<!DOCTYPE html>
<html xmlns:th="http://www.thymeleaf.org">
<head>
    <title>结果页面</title>
</head>
<body>
<h1>结果</h1>
<p th:text="'结果是:' + ${result}"></p>
</body>
</html>
- 定义自定义异常类:创建一个自定义异常类,例如
MyCustomException:
public class MyCustomException extends Exception {
    public MyCustomException(String message) {
        super(message);
    }
}
- 异常处理器类:创建一个异常处理器类
MyCustomExceptionHandler,并配置多个@ExceptionHandler方法来处理不同类型的异常:
import com.lfsun.demolfsunstudythymeleafcustomexception.exception.MyCustomException;
import org.springframework.web.bind.annotation.ControllerAdvice;
import org.springframework.web.bind.annotation.ExceptionHandler;
import org.springframework.web.servlet.ModelAndView;

@ControllerAdvice
public class MyCustomExceptionHandler {

    @ExceptionHandler(MyCustomException.class)
    public ModelAndView handleCustomException(MyCustomException ex) {
        ModelAndView modelAndView = new ModelAndView();
        modelAndView.addObject("message", "自定义异常发生了: " + ex.getMessage());
        modelAndView.setViewName("error-page");
        return modelAndView;
    }

    @ExceptionHandler(Exception.class)
    public ModelAndView handleAllOtherExceptions(Exception ex) {
        ModelAndView modelAndView = new ModelAndView();
        modelAndView.addObject("message", "发生了其他异常: " + ex.getMessage());
        modelAndView.setViewName("error-page");
        return modelAndView;
    }
}
- 控制器类:创建一个控制器类,例如
DemoController,并在其中抛出自定义异常:
import com.lfsun.demolfsunstudythymeleafcustomexception.exception.MyCustomException;
import org.springframework.stereotype.Controller;
import org.springframework.ui.Model;
import org.springframework.web.bind.annotation.GetMapping;
import org.springframework.web.bind.annotation.RequestParam;
@Controller
public class DemoController {
@GetMapping("/divide")
public String divide(@RequestParam int dividend, @RequestParam int divisor, Model model) throws MyCustomException {
if (divisor == 0) {
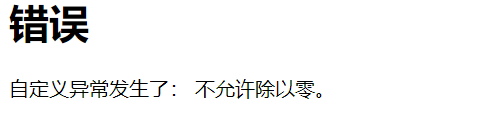
throw new MyCustomException("不允许除以零。");
}
int result = dividend / divisor;
model.addAttribute("result", result);
return "result-page";
}
}
- 运行项目:运行Spring Boot应用程序。
- 访问应用程序:在浏览器中访问
http://localhost:8080/divide?dividend=10&divisor=2这个URL,将会执行DemoController中的divide方法,并显示结果5。尝试访问http://localhost:8080/divide?dividend=10&divisor=0来看到自定义异常处理器的效果。