介绍
- Express 是一个第三方模块,用于快速搭建服务器 类似于jquery与DOM
- Express 是一个基于 Node.js 平台,快速、开放、极简的 web 开发框架。
- express保留了http模块的基本API,使用express的时候,也能使用http的API
- express还额外封装了一些新方法,能让我们更方便的搭建服务器
Express 官网
Express 中文文档(非官方)
Express GitHub仓库
node框架
node-http模块 ==⇒ express框架 ==⇒ koa =⇒ egg.js
安装
npm i express
express封装的新方法
- express
express.static()– 开放静态资源express.urlencoded()– 获取POST请求体
- app
app.get()– 处理客户端的GET请求app.post()– 处理客户端的POST请求app.use()– 设置应用级别的配置
- req
req.body– 获取POST请求体req.params– 获取GET请求动态参数req.query– 获取GET请求参数(获取查询字符串参数)
- res
res.sendFile(文件的绝对路径)– 读取文件,并将结果响应res.set({name, value})– 设置响应头res.status(200)– 设置响应状态码res.send(字符串或对象)– 响应结果res.json(对象)– 以JSON格式响应结果res.jsonp()– 以JSONP格式响应结果
请注意,在express中,我们仍然可以使用http模块中的方法。
简单请求和复杂请求
简单请求
符合以下条件的,为简单请求:
- 请求方式只能 为:GET, HEAD , POST
- 且Content-Type的值仅限于
- text-plain
- multipart/form-data
- application/x-www-form-urlencoded
复杂请求
特点:发两次请求
会先发一次预检请求 OPTIONS
如果OPTIONS中又允许跨域的头信息,浏览器会发第二次请求
使用Express构造Web服务器
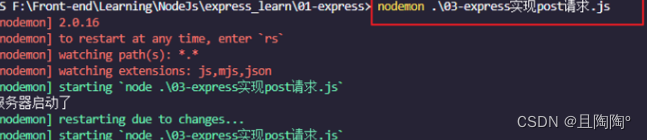
nodemon 启动服务。
步骤
- 加载 express 模块
- 创建 express 服务器
- 开启服务器
- 监听浏览器请求并进行处理
// 1. 导入express模块
const express = require('express')
// 2. 创建服务器
const app = express()
// 3. 启动服务器
app.listen(3000, function () {


  console.log('服务器启动成功')
})

// express 处理用户请求
// app.get() 用于处理用户的get请求
// app.post() 用于处理用户的post请求
app.get('/index',(req,res) => {


  res.send('你好,新世界')
})
app.get('/login', (req,res) => {


  res.send('<h1>哈哈</h1>')
})
// 更多的是返回一个数据(express自动把这个对象转化为JSON )
app.get('/user', (req,res) => {


  res.send({


    name: 'zs',
    age: 18,
    gender: '女'
  })
})
实现get接口
接口服务器:
根据用户的请求返回数据(JSON数据)
实现一个简单的get接口
const express = require('express')

const app = express()
app.listen(3000, () => {


  console.log('服务器启动成功了')
})
app.get('/login', (req, res) => {


  // 允许该接口跨域访问  CROS
  res.setHeader('Access-Control-Allow-Origin', '*') // *表示都可以跨域访问
  res.send({


    code: 200,
    message: '成功'

  })
})
获取查询字符串
什么是查询字符串?
url地址后面的这些:

使用req.query获取查询字符串
- 接口
const express = require('express')

const app = express()
app.listen(3000, () => {


  console.log('服务器启动成功了')
})
app.get('/login', (req, res) => {


  // 允许该接口跨域访问
  res.setHeader('Access-Control-Allow-Origin', '*') // *表示都可以跨域访问
  console.log(req.query)
  const {

    username, password} = req.query
  if(username === 'admin' && password === '123456') {


    res.send({


      code: 200,
      message: '成功'
    })
  } else {


    res.send({


      code: 400,
      message: '用户名或密码错误'
    })
  }
})
获取到的查询字符串:

- 页面
<!DOCTYPE html>
<html lang="en">
<head>
  <meta charset="UTF-8">
  <meta http-equiv="X-UA-Compatible" content="IE=edge">
  <meta name="viewport" content="width=device-width, initial-scale=1.0">
  <title>Document</title>
</head>
<body>
  <input type="text" placeholder="请输入用户名" class="username">
  <br>
  <input type="text" placeholder="请输入密  码" class="pwd">
  <br>
  <button>登录</button>
  <script src="node_modules/axios/dist/axios.js"></script>
  <script>
    document.querySelector('button').onclick = async function () {


      const username = document.querySelector('.username').value
      const password = document.querySelector('.pwd').value
      const res = await axios({


        method: 'get',
        url: 'http://localhost:3000/login',
        params: {


          username,
          password
        }
      })
      console.log(res)
    }
  </script>
</body>
</html>
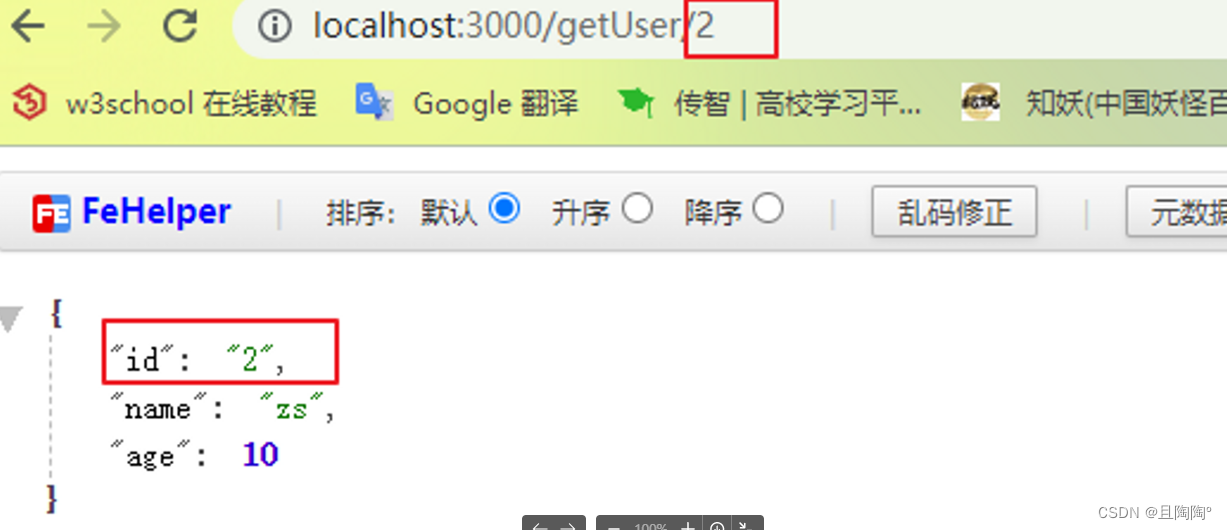
获取动态参数
url/:id/:name/:age :后面的就叫动态参数
使用req.params获取动态参数
app.get('/getUser/:id', (req, res) => {


  // 允许该接口跨域访问
  res.setHeader('Access-Control-Allow-Origin', '*')
  console.log(req.params)
  res.send({


    id: req.params.id,
    name: 'zs',
    age: 10

  })
})

接口风格
目前比较流行的是rest风格, 即简洁的接口风格
表现: id直接拼接到url中,也就是使用动态参数
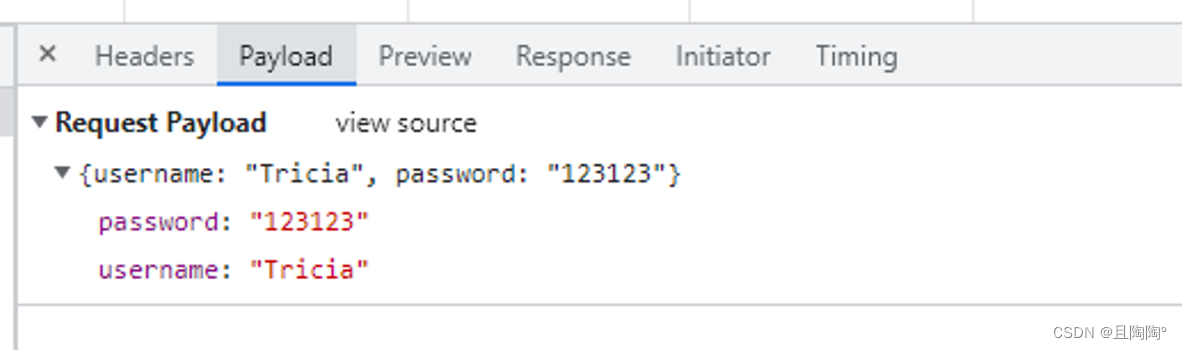
实现post请求
注意:由于post请求的Content-Type是application/json , 所以它是一个复杂请求。
发送post请求步骤
- 处理所有的options请求
app.options('*', (req, res) => {


  // 允许CORS跨域的域名
  res.setHeader('Access-Control-Allow-Origin', '*')
  // 允许CORS跨域的请求方式,默认只有GET,POST
  res.setHeader('Access-Control-Allow-Methods', 'GET,POST,PUT,PATCH,DELETE')
  // 允许CORS跨域请求的请求头
  res.setHeader('Access-Control-Allow-Headers', 'content-type')
  res.send(null)
})
- 发送post请求
app.post('/login', (req, res) => {


  res.setHeader('Access-Control-Allow-Origin', '*')
  res.send({


    code: 200,
    message: '登陆成功'
  })
})
- 如果要拿到post请求的请求体
- 使用
req.body - 必须使用一个**内置的中间件
**express.json()
- 使用
app.use(express.json())
...
...
app.post('/login', (req, res) => {


  res.setHeader('Access-Control-Allow-Origin', '*')
  console.log(req.body)
  res.send({


    code: 200,
    message: '登陆成功'
  })
})

服务器端接收不同类型的请求体,使用的方式是不同的
- urlencoded —>
app.use(express.urlencoded({extended: false})); - application/json —>
app.use(express.json());– 没有演示 - form-data —> 服务器端使用第三方模块处理(
multer)
中间件
特质业务处理流程中的中间处理环节
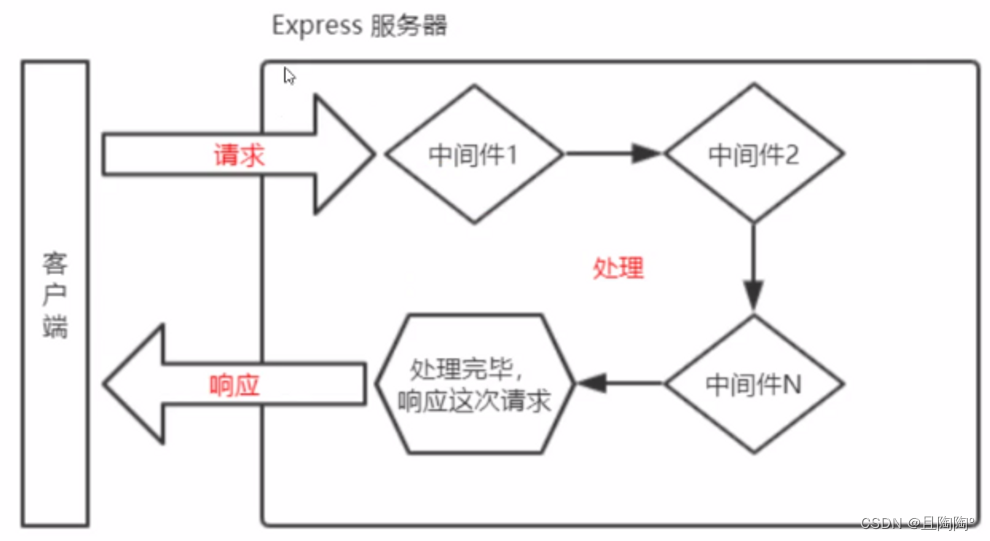
-
中间件就是一个函数, 一般写在请求之前
-
有三个基本参数
- req 请求相关的对象
- res 响应相关的对象
- next 函数,必须调用next 中间件才会向下传递
const express = require('express')
const app = express()
// app.use(中间件) // 所有的请求之前都会调用中间件
const middle = function (req, res, next) {


  console.log('我是中间件')
  // 处理完一定要记得调用next
  next()
}
app.use(middle)
app.listen(3000, () => {


  console.log('服务器启动了')
})

app.get('/login', (req, res) => {


  res.send('登录')
})
app.get('/user', (req, res) => {


  res.send('用户')
})
app.get('/index', (req, res) => {


  res.send('首页')
})

用中间件解决跨域
声明一个中间件AllowCrossDomain
const express = require('express')
const app = express()
// app.use(中间件) // 所有的请求之前都会调用中间件
const AllowCrossDomain = function (req, res, next) {


  // 允许CORS跨域的域名
  res.setHeader('Access-Control-Allow-Origin', '*')
  // 允许CORS跨域的请求方式,默认只有GET,POST
  res.setHeader('Access-Control-Allow-Methods', 'GET,POST,PUT,PATCH,DELETE')
  // 允许CORS跨域请求的请求头
  res.setHeader('Access-Control-Allow-Headers', 'content-type')
  // 处理完一定要记得调用next
  next()
}
app.use(AllowCrossDomain)
app.listen(3000, () => {


  console.log('服务器启动了')
})

app.post('/login', (req, res) => {


  res.send({


    code: 200,
    message: '登陆成功'
  })
})
app.get('/user', (req, res) => {


  res.send('用户')
})
app.get('/index', (req, res) => {


  res.send('首页')
})
express内置的中间件
- static
静态资源
// img是一个文件夹
// 直接把img作为公共的静态资源目录
app.use(express.static('img'))
- urlencoded
- 处理
application/x-www-form-urlencoded - 把请求体挂到req.body上
- json
- 处理
application/json - 把请求体挂到req.body上
- 处理
一般 2, 3 同时使用
// 处理json数据
app.use(express.json())
// 处理form-urlencoded数据
app.use(express.urlencoded({

    extended: false}))