任务要求
在Android应用中,有时需要从一个Activity向另一个Activity传递数据,并在第二个Activity处理后将结果传递回第一个Activity。
这种情况下,我们可以使用startActivityForResult()和onActivityResult()方法来实现数据回传。
实现步骤
-
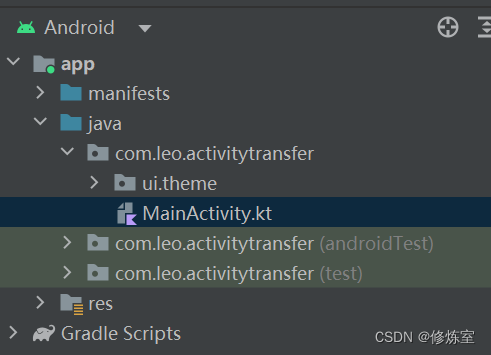
创建新的Android项目:
打开Android Studio并创建一个新的Android项目,确保选择适当的项目名称和包名。
-
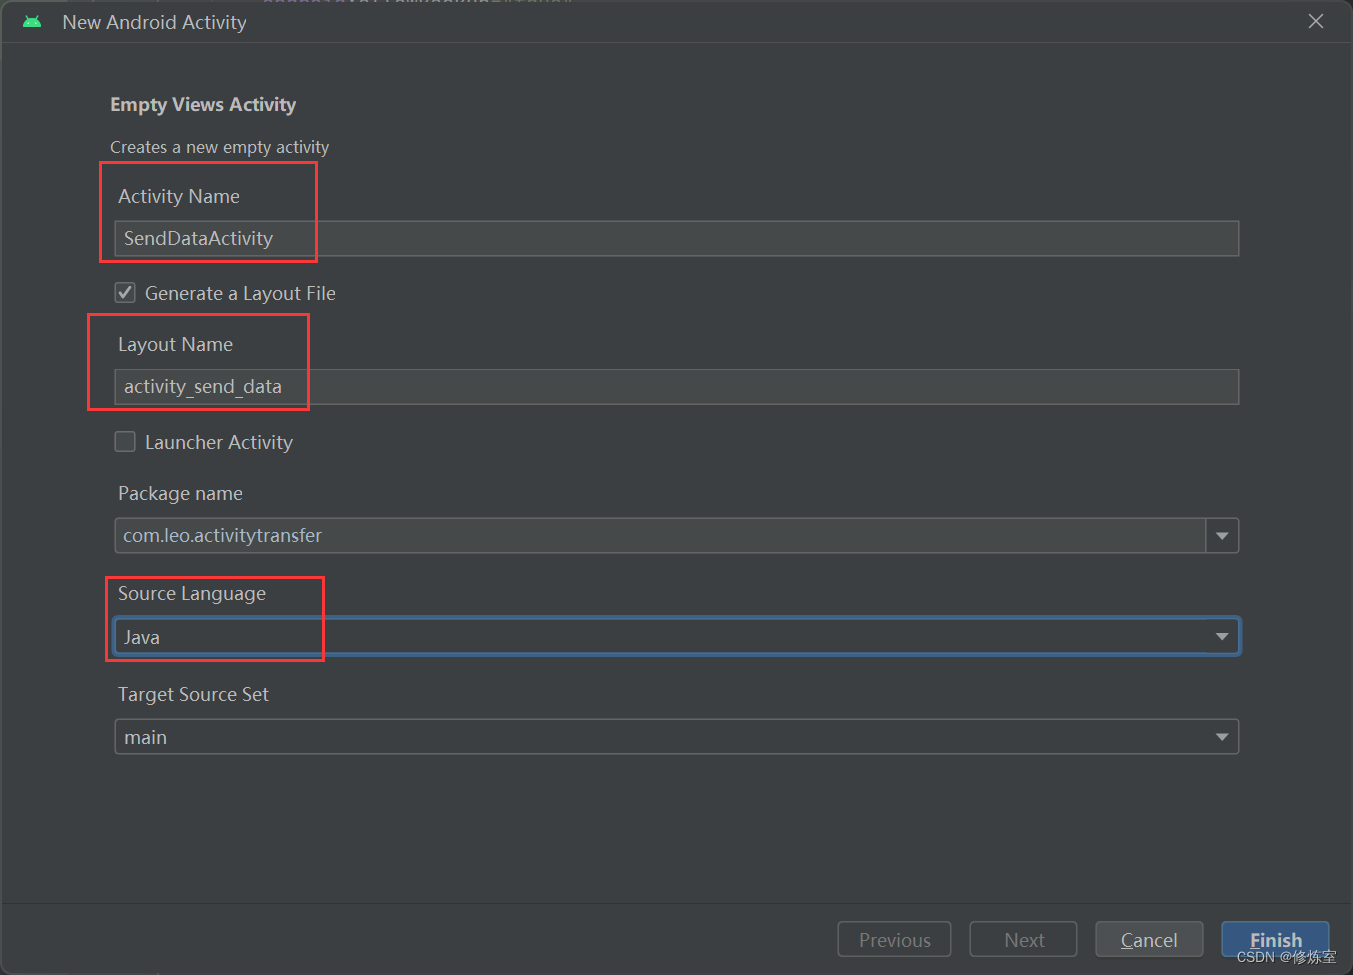
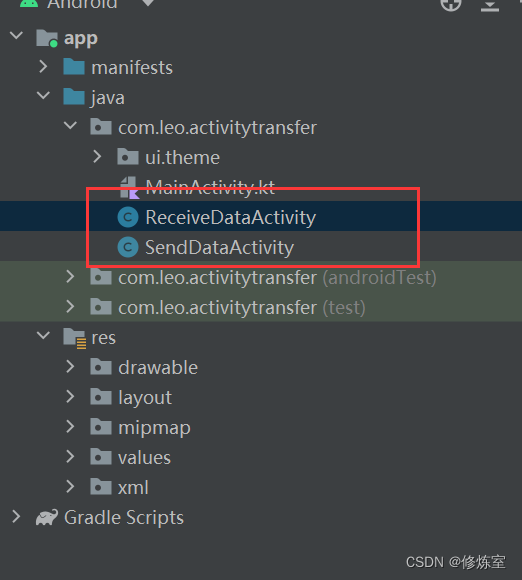
创建两个Activity:
在项目中创建两个Activity,一个用于发送数据,另一个用于接收和处理数据。
右键单击app文件夹,然后选择New>Activity来创建这些Activity。 -
创建两个Activity:在项目中创建两个Activity,一个用于发送数据,另一个用于接收数据。分别命名它们为
SendDataActivity和ReceiveDataActivity。
-
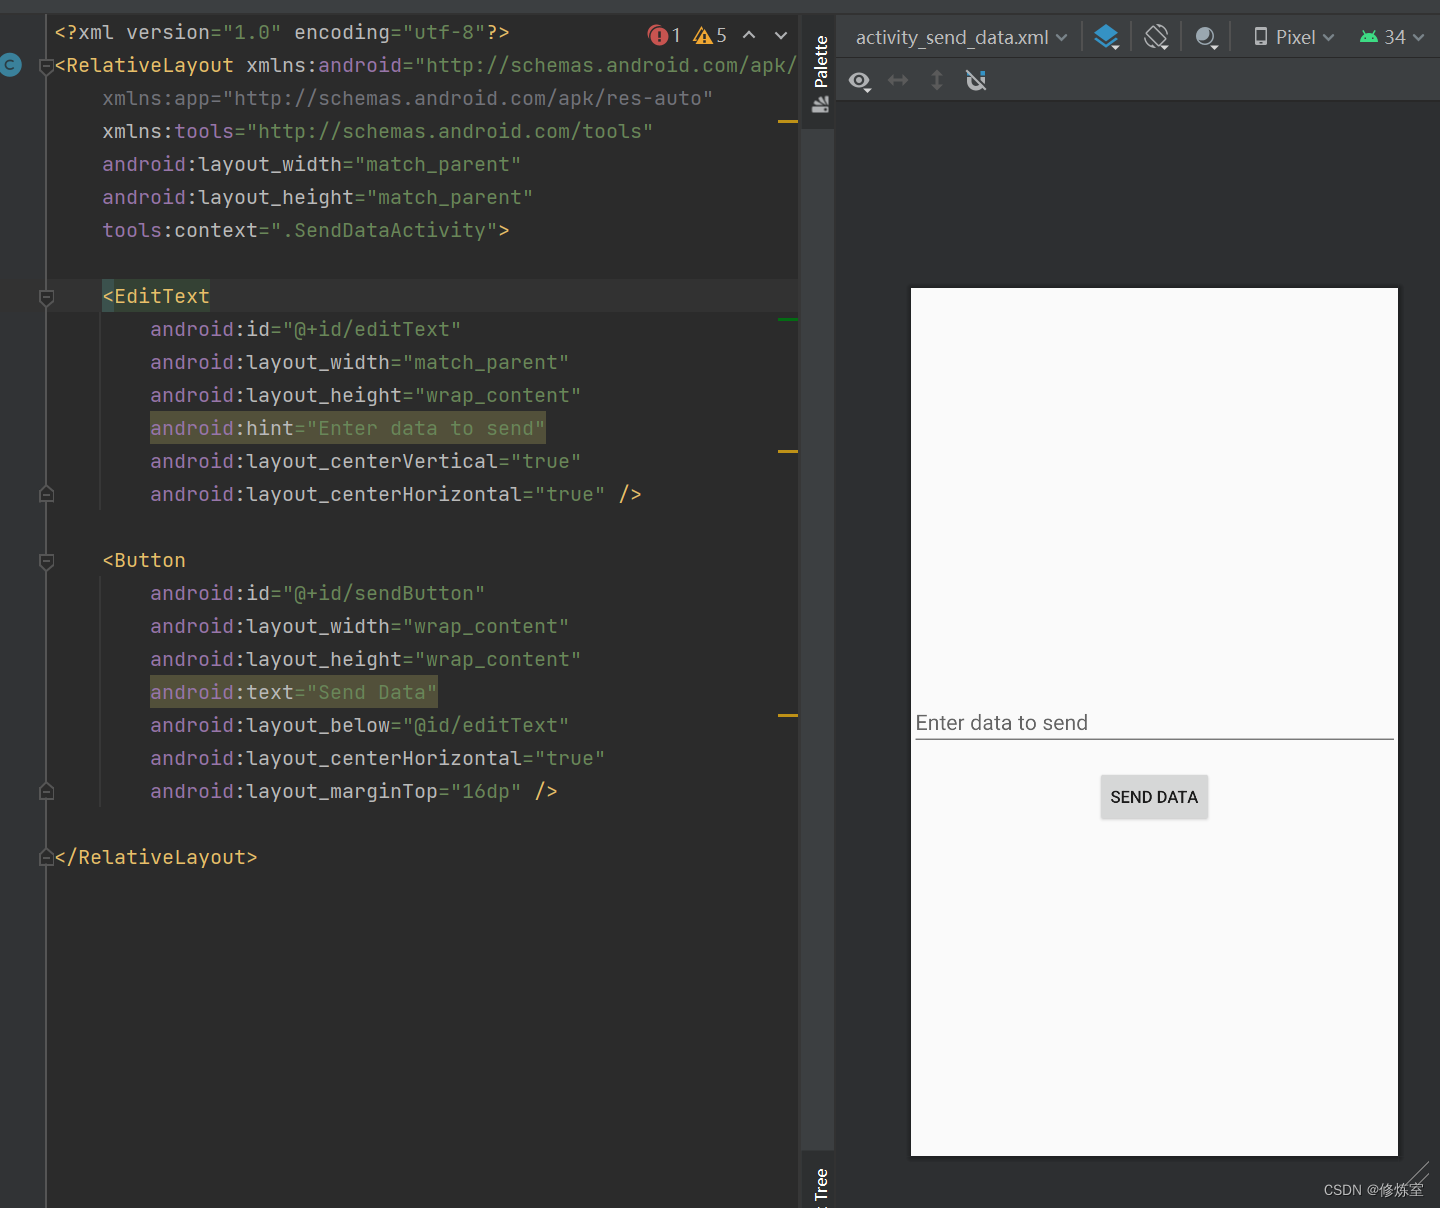
设计SendDataActivity界面:在
activity_send_data.xml中设计SendDataActivity的界面,添加一个EditText和一个Button,用于输入数据并发送它。<?xml version="1.0" encoding="utf-8"?> <RelativeLayout xmlns:android="http://schemas.android.com/apk/res/android" xmlns:app="http://schemas.android.com/apk/res-auto" xmlns:tools="http://schemas.android.com/tools" android:layout_width="match_parent" android:layout_height="match_parent" tools:context=".SendDataActivity"> <EditText android:id="@+id/editText" android:layout_width="match_parent" android:layout_height="wrap_content" android:hint="Enter data to send" android:layout_centerVertical="true" android:layout_centerHorizontal="true" /> <Button android:id="@+id/sendButton" android:layout_width="wrap_content" android:layout_height="wrap_content" android:text="Send Data" android:layout_below="@id/editText" android:layout_centerHorizontal="true" android:layout_marginTop="16dp" /> </RelativeLayout>
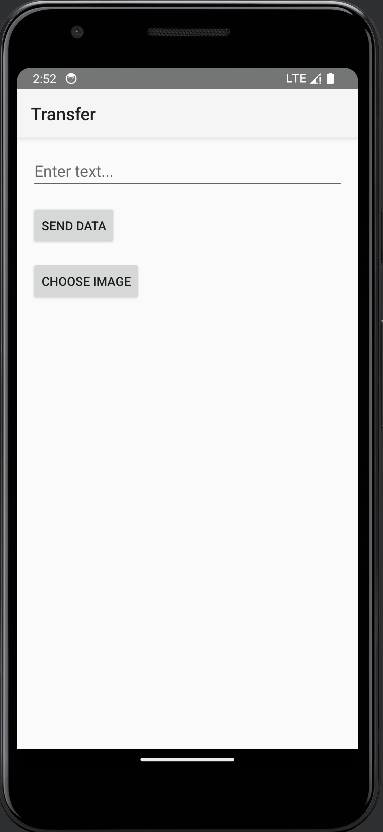
实现效果
- 设计ReceiveDataActivity界面:在
activity_receive_data.xml中设计ReceiveDataActivity的界面,添加一个TextView用于显示接收到的数据。
<?xml version="1.0" encoding="utf-8"?>
<RelativeLayout xmlns:android="http://schemas.android.com/apk/res/android"
    xmlns:app="http://schemas.android.com/apk/res-auto"
    xmlns:tools="http://schemas.android.com/tools"
    android:layout_width="match_parent"
    android:layout_height="match_parent"
    tools:context=".ReceiveDataActivity">

    <TextView
        android:id="@+id/receivedDataTextView"
        android:layout_width="wrap_content"
        android:layout_height="wrap_content"
        android:layout_centerInParent="true"
        android:text="这里将显示接收到的值"
        android:textSize="24sp"
        android:textColor="#FF5733"
        android:textStyle="bold"
        android:letterSpacing="0.05"
        android:lineSpacingExtra="8dp"
        android:background="#F2F2F2"
        android:padding="16dp"
        android:drawablePadding="8dp" />

    <Button
        android:id="@+id/returnButton"
        android:layout_width="wrap_content"
        android:layout_height="wrap_content"
        android:text="返回数据"
        android:layout_below="@id/receivedDataTextView"
        android:layout_centerHorizontal="true"
        android:layout_marginTop="16dp" />

</RelativeLayout>
实现效果

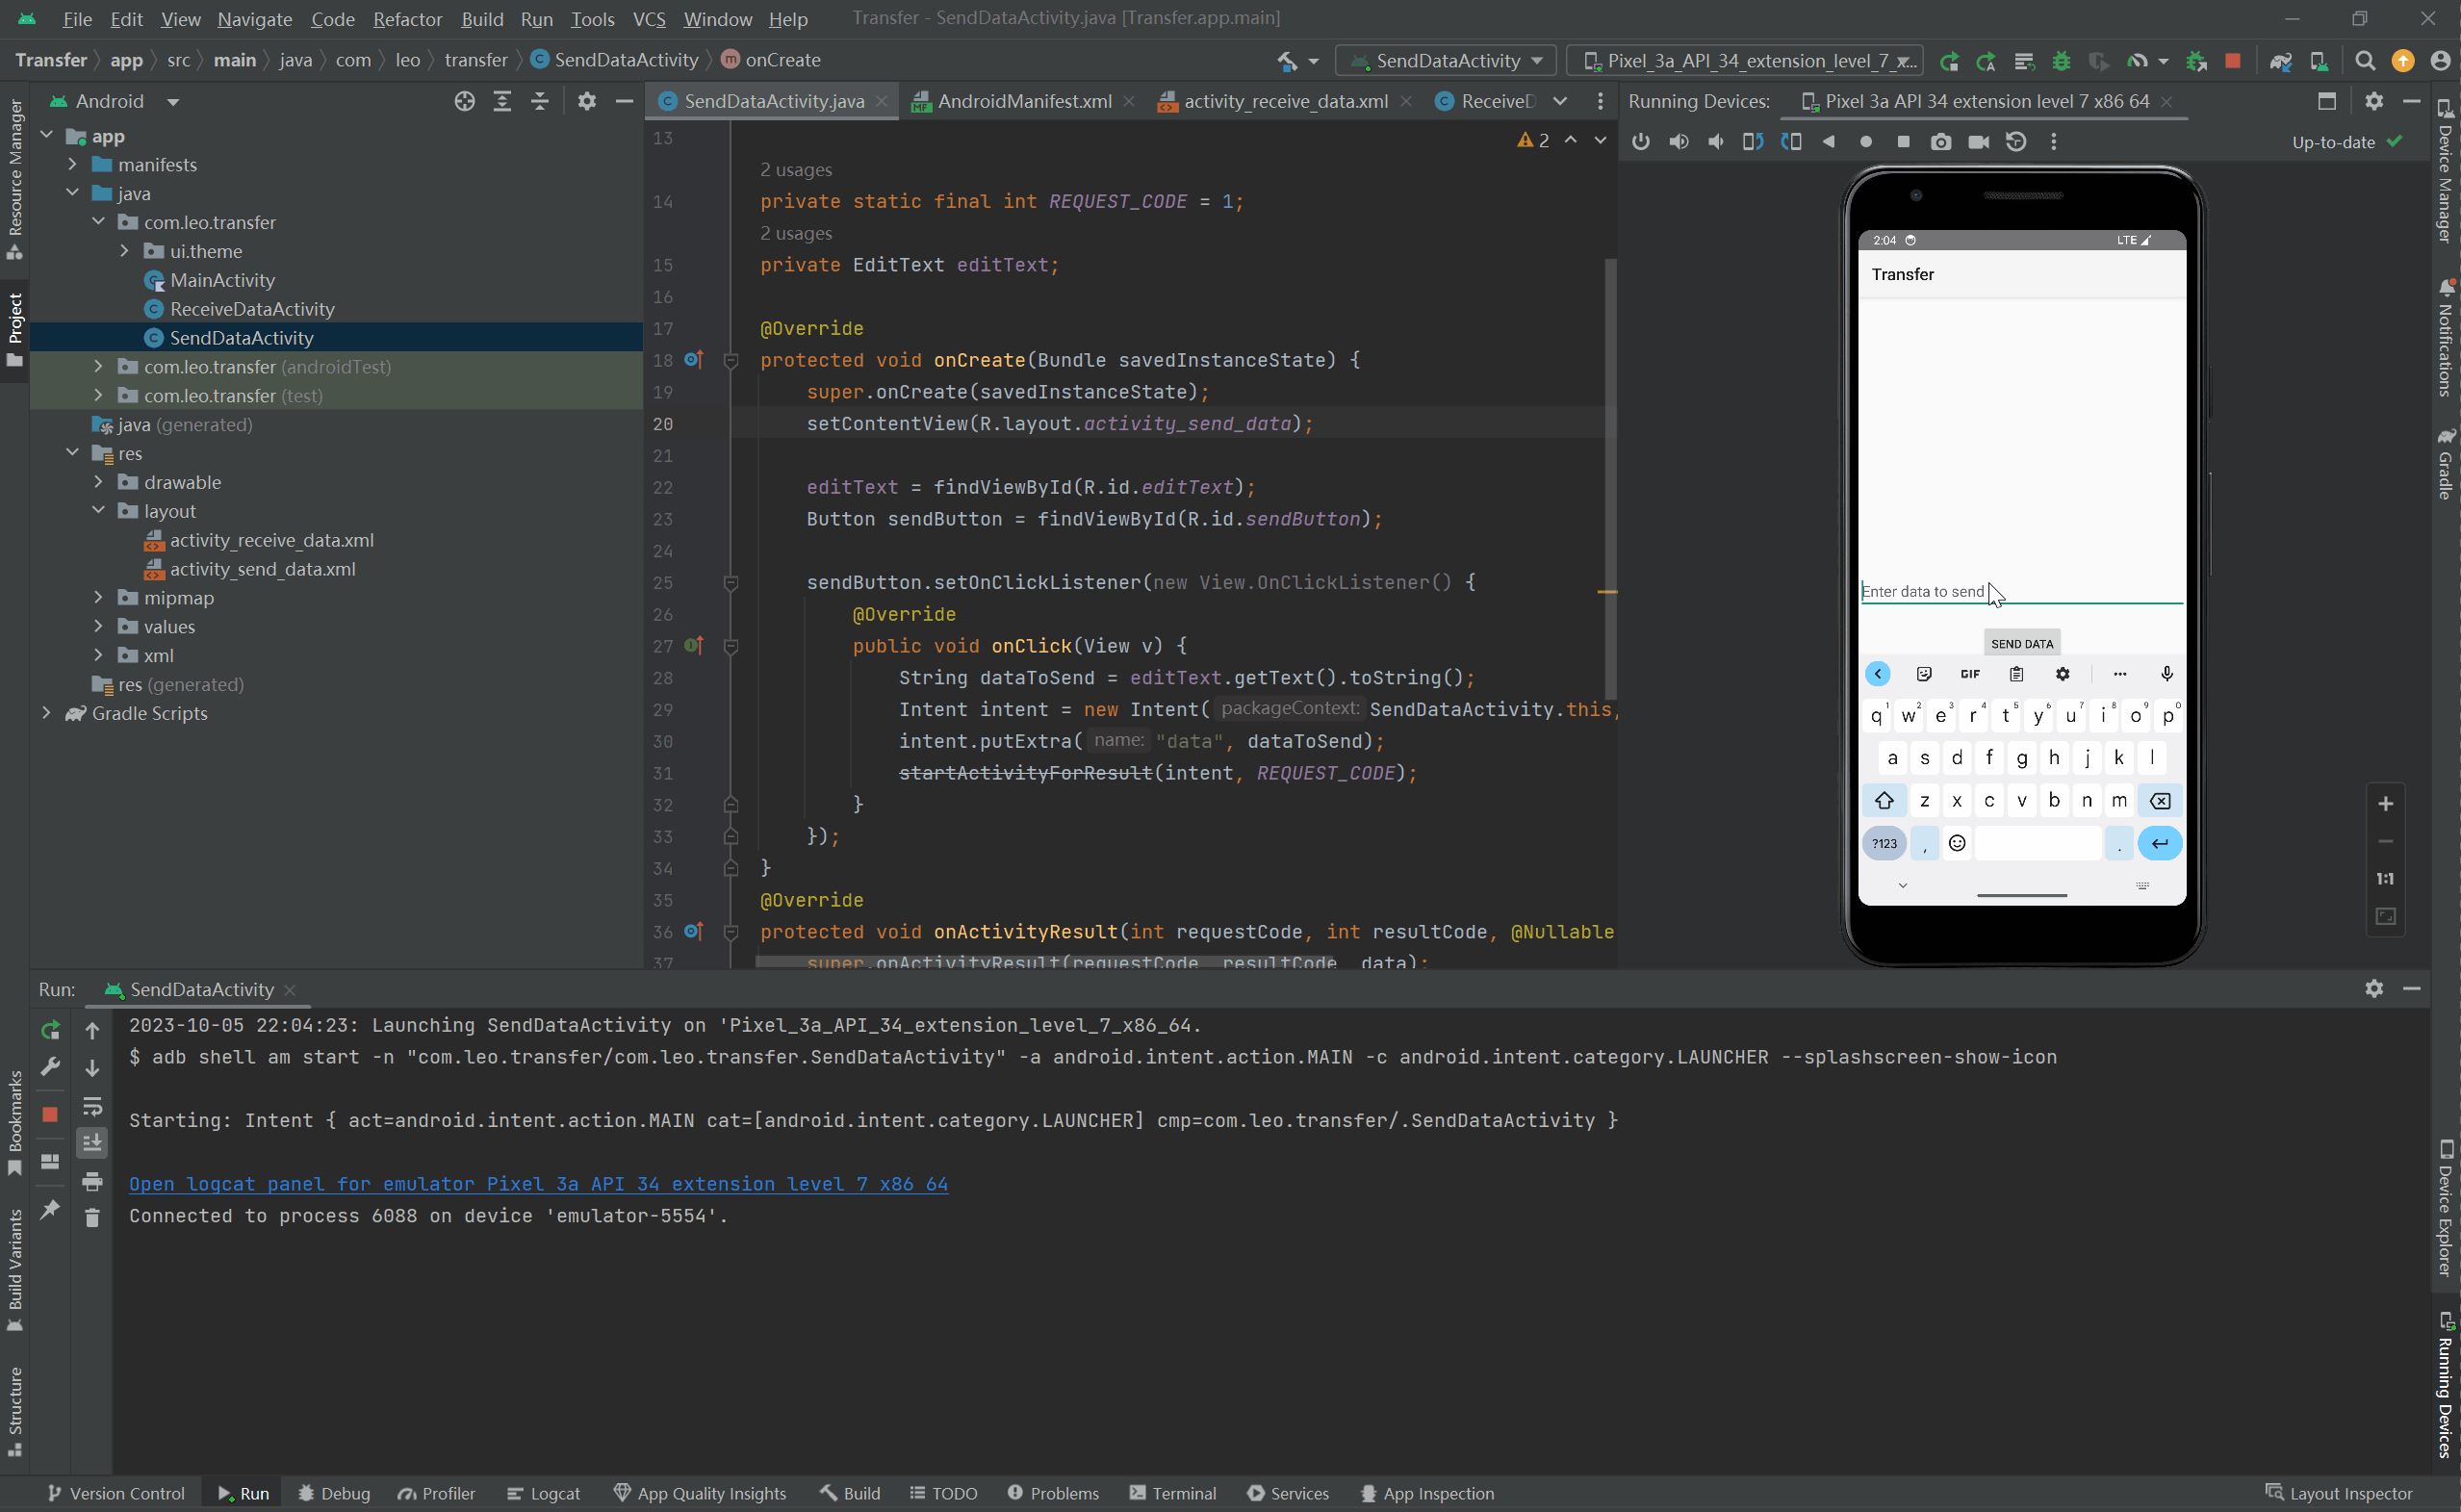
- 在SendDataActivity中发送数据:在
SendDataActivity.java中,使用startActivityForResult()发送数据到ReceiveDataActivity。首先,定义一个 请求码(可以是任何整数)和一个数据键来标识数据。
package com.leo.activitytransfer;

import androidx.appcompat.app.AppCompatActivity;

import android.content.Intent;
import android.os.Bundle;
import android.view.View;
import android.widget.Button;
import android.widget.EditText;

public class SendDataActivity extends AppCompatActivity {


    private static final int REQUEST_CODE = 1;
    private EditText editText;

    @Override
    protected void onCreate(Bundle savedInstanceState) {


        super.onCreate(savedInstanceState);
        setContentView(R.layout.activity_send_data);

        editText = findViewById(R.id.editText);
        Button sendButton = findViewById(R.id.sendButton);

        sendButton.setOnClickListener(new View.OnClickListener() {


            @Override
            public void onClick(View v) {


                String dataToSend = editText.getText().toString();
                Intent intent = new Intent(SendDataActivity.this, ReceiveDataActivity.class);
                intent.putExtra("data", dataToSend);
                startActivityForResult(intent, REQUEST_CODE);
            }
        });
    }

}
- 在ReceiveDataActivity中接收数据:在
ReceiveDataActivity.java中,使用getIntent()来接收来自SendDataActivity的数据,并将其显示在TextView中。
package com.leo.activitytransfer;

import androidx.appcompat.app.AppCompatActivity;

import android.content.Intent;
import android.os.Bundle;
import android.widget.TextView;

public class ReceiveDataActivity extends AppCompatActivity {


    private TextView receivedDataTextView;

    @Override
    protected void onCreate(Bundle savedInstanceState) {


        super.onCreate(savedInstanceState);
        setContentView(R.layout.activity_receive_data);

        receivedDataTextView = findViewById(R.id.receivedDataTextView);

        Intent intent = getIntent();
        if (intent != null) {


            String receivedData = intent.getStringExtra("data");
            if (receivedData != null) {


                receivedDataTextView.setText(receivedData);
            }
        }
    }
}
-
处理回传数据:在
SendDataActivity中,使用onActivityResult()方法来处理从ReceiveDataActivity回传的数据。@Override protected void onActivityResult(int requestCode, int resultCode, @Nullable Intent data) { super.onActivityResult(requestCode, resultCode, data); if (requestCode == REQUEST_CODE) { if (resultCode == RESULT_OK && data != null) { String receivedData = data.getStringExtra("dataFromReceive"); // 处理回传的数据 System.out.println(receivedData); } } } -
在ReceiveDataActivity中回传数据:在
ReceiveDataActivity中,如果需要回传数据给SendDataActivity,可以通过setResult()方法进行回传。@Override public void onBackPressed() { // 在返回键按下时回传数据给SendDataActivity String dataToReturn = "Data from ReceiveDataActivity"; Intent resultIntent = new Intent(); resultIntent.putExtra("dataFromReceive", dataToReturn); setResult(RESULT_OK, resultIntent); finish(); }
当然,也可以直接设置返回按钮的响应事件
private TextView receivedDataTextView;
private Button returnButton;
@Override
protected void onCreate(Bundle savedInstanceState) {
super.onCreate(savedInstanceState);
setContentView(R.layout.activity_receive_data);
receivedDataTextView = findViewById(R.id.receivedDataTextView);
returnButton = findViewById(R.id.returnButton);
Intent intent = getIntent();
if (intent != null) {
String receivedData = intent.getStringExtra("data");
if (receivedData != null) {
receivedDataTextView.setText(receivedData);
}
}
returnButton.setOnClickListener(new View.OnClickListener() {
@Override
public void onClick(View v) {
// 在按钮点击事件中触发数据回传
String dataToReturn = "Data from ReceiveDataActivity";
Intent resultIntent = new Intent();
resultIntent.putExtra("dataFromReceive", dataToReturn);
setResult(RESULT_OK, resultIntent);
finish();
}
});
}
- 配置AndroidManifest.xml:确保在AndroidManifest.xml文件中正确配置两个Activity的声明。
<?xml version="1.0" encoding="utf-8"?>
<manifest xmlns:android="http://schemas.android.com/apk/res/android"
xmlns:tools="http://schemas.android.com/tools">
<application
android:allowBackup="true"
android:dataExtractionRules="@xml/data_extraction_rules"
android:fullBackupContent="@xml/backup_rules"
android:icon="@mipmap/ic_launcher"
android:label="@string/app_name"
android:roundIcon="@mipmap/ic_launcher_round"
android:supportsRtl="true"
android:theme="@style/Theme.AppCompat.DayNight"
tools:targetApi="31">
<activity
android:name=".SendDataActivity"
android:exported="true"
android:label="@string/app_name"
android:theme="@style/Theme.AppCompat.DayNight">
<intent-filter>
<action android:name="android.intent.action.MAIN" />
<category android:name="android.intent.category.LAUNCHER" />
</intent-filter>
</activity>
<activity
android:name=".ReceiveDataActivity"
android:exported="false" />
</application>
</manifest>
实现效果
下面我将解释一下原理,并验证是否成功回传了数据。
-
原理:
- 当你从
SendDataActivity启动ReceiveDataActivity时,你使用startActivityForResult()方法,传递了一个请求码(REQUEST_CODE)。 - 在
ReceiveDataActivity中,当用户按下返回键或者点击returnButton按钮时,你设置了回传的数据,并调用了setResult()方法来设置结果码和传递数据。 - 然后,
ReceiveDataActivity调用了finish()来关闭自身,将数据回传给调用它的SendDataActivity。 SendDataActivity中,你实现了onActivityResult()方法,在这个方法中,你检查返回的请求码和结果码,如果它们符合预期,就从data中提取回传的数据。
- 当你从
-
验证是否成功回传了数据:
- 在
ReceiveDataActivity中,你在按钮点击事件和onBackPressed()方法中都设置了回传数据。这确保了不论用户是点击按钮还是返回键,都会回传数据。 - 在
SendDataActivity中,你实现了onActivityResult()方法,用于接收回传的数据。
- 在
要验证是否成功回传了数据,你可以按照以下步骤进行:
- 运行你的应用程序并打开
SendDataActivity。 - 在
SendDataActivity中输入一些数据,然后点击发送按钮。 - 这将启动
ReceiveDataActivity,并将数据传递给它。 - 在
ReceiveDataActivity中,你可以看到传递的数据显示在receivedDataTextView中。 - 然后,你可以点击返回按钮或按下返回键,
ReceiveDataActivity将被关闭,并将数据回传给SendDataActivity。 - 在
SendDataActivity的onActivityResult()方法中,你会看到回传的数据。你已经在这个方法中使用了System.out.println()来打印数据,所以你可以在控制台中看到打印的数据。
如果你看到控制台中输出的数据是"返回的数据 Data from ReceiveDataActivity",那就表示成功回传了数据。这就是验证是否成功回传了数据的方式。
请确保在
SendDataActivity中使用正确的请求码(REQUEST_CODE),并检查回传的结果码和数据是否符合你的预期,以确保数据回传的成功与否。
应用实例: 实现图片选择并显示:
如果要实现图片选择和显示功能,我们可以使用Android的图像选择器来实现。在接收数据的Activity中,启动图像选择器,然后在成功选择图像后,将图像的URI传递给发送数据的Activity。
1. 在AndroidManifest.xml中添加权限:
<uses-permission android:name="android.permission.READ_EXTERNAL_STORAGE" />
这是为了获取访问外部存储的权限。
2. 创建placeholder_image.xml文件:
为了在ImageView中显示默认的占位图像,我们可以直接在虚拟机中拍照
3. 修改布局文件:
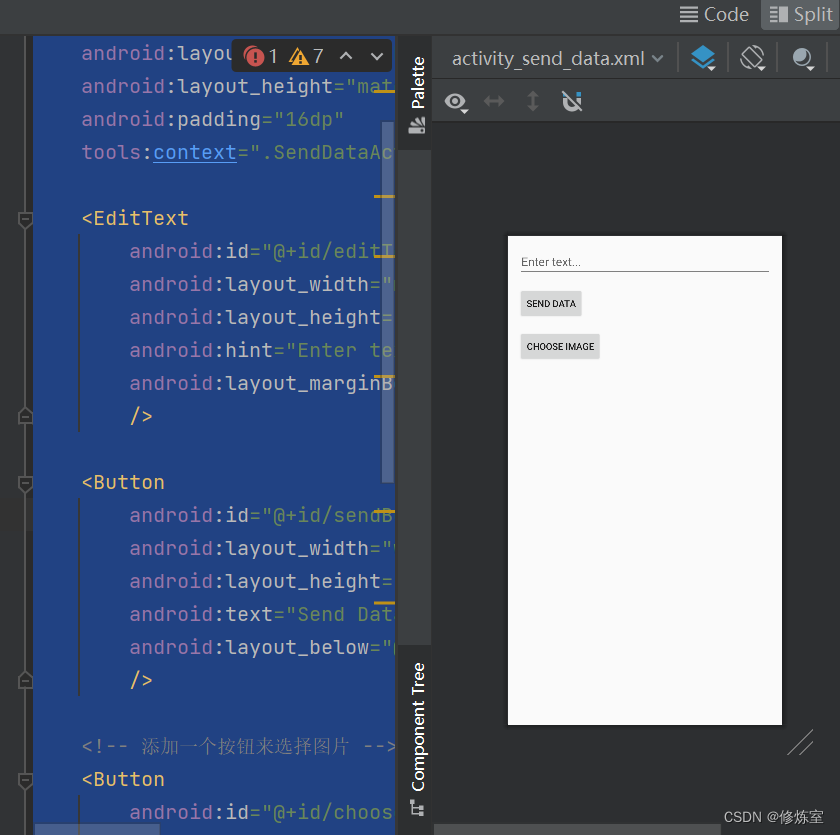
activity_send_data.xml
<RelativeLayout xmlns:android="http://schemas.android.com/apk/res/android"
xmlns:app="http://schemas.android.com/apk/res-auto"
xmlns:tools="http://schemas.android.com/tools"
android:layout_width="match_parent"
android:layout_height="match_parent"
android:padding="16dp"
tools:context=".SendDataActivity">
<EditText
android:id="@+id/editText"
android:layout_width="match_parent"
android:layout_height="wrap_content"
android:hint="Enter text..."
android:layout_marginBottom="16dp"
/>
<Button
android:id="@+id/sendButton"
android:layout_width="wrap_content"
android:layout_height="wrap_content"
android:text="Send Data"
android:layout_below="@id/editText"
/>
<!-- 添加一个按钮来选择图片 -->
<Button
android:id="@+id/chooseImageButton"
android:layout_width="wrap_content"
android:layout_height="wrap_content"
android:text="Choose Image"
android:layout_below="@id/sendButton"
android:layout_marginTop="16dp"
/>
<!-- 用于显示选择的图片 -->
<ImageView
android:id="@+id/selectedImageView"
android:layout_width="match_parent"
android:layout_height="wrap_content"
android:layout_below="@id/chooseImageButton"
android:layout_marginTop="16dp"
android:visibility="gone"
/>
</RelativeLayout>
这里我们添加了一个ImageView用于显示选择的图片,并添加了一个按钮用于触发图片选择操作。
实现效果
activity_receive_data.xml
<RelativeLayout xmlns:android="http://schemas.android.com/apk/res/android"
xmlns:app="http://schemas.android.com/apk/res-auto"
xmlns:tools="http://schemas.android.com/tools"
android:layout_width="match_parent"
android:layout_height="match_parent"
android:padding="16dp"
tools:context=".ReceiveDataActivity">
<TextView
android:id="@+id/receivedDataTextView"
android:layout_width="match_parent"
android:layout_height="wrap_content"
android:layout_marginBottom="16dp"
android:text=""
/>
<Button
android:id="@+id/returnButton"
android:layout_width="wrap_content"
android:layout_height="wrap_content"
android:text="Return Data"
android:layout_below="@id/receivedDataTextView"
/>
<!-- 添加一个ImageView来显示选择的图片 -->
<ImageView
android:id="@+id/receivedImageView"
android:layout_width="match_parent"
android:layout_height="wrap_content"
android:layout_below="@id/returnButton"
android:layout_marginTop="16dp"
android:visibility="gone"
/>
</RelativeLayout>
3. 修改activity文件:
SendDataActivity.java
package com.leo.transfer;
import android.content.Intent;
import android.graphics.Bitmap;
import android.net.Uri;
import android.os.Bundle;
import android.provider.MediaStore;
import android.view.View;
import android.widget.Button;
import android.widget.EditText;
import android.widget.ImageView;
import androidx.annotation.Nullable;
import androidx.appcompat.app.AppCompatActivity;
public class SendDataActivity extends AppCompatActivity {
private static final int REQUEST_CODE = 1;
private EditText editText;
private ImageView selectedImageView;
@Override
protected void onCreate(Bundle savedInstanceState) {
super.onCreate(savedInstanceState);
setContentView(R.layout.activity_send_data);
editText = findViewById(R.id.editText);
Button sendButton = findViewById(R.id.sendButton);
selectedImageView = findViewById(R.id.selectedImageView); // 添加ImageView的引用
sendButton.setOnClickListener(new View.OnClickListener() {
@Override
public void onClick(View v) {
String dataToSend = editText.getText().toString();
Intent intent = new Intent(SendDataActivity.this, ReceiveDataActivity.class);
intent.putExtra("data", dataToSend);
startActivityForResult(intent, REQUEST_CODE);
}
});
// 添加按钮点击事件来选择图片
Button chooseImageButton = findViewById(R.id.chooseImageButton);
chooseImageButton.setOnClickListener(new View.OnClickListener() {
@Override
public void onClick(View v) {
// 打开系统图库应用
openGallery();
}
});
}
// 打开系统图库应用
private void openGallery() {
Intent intent = new Intent(Intent.ACTION_PICK, MediaStore.Images.Media.EXTERNAL_CONTENT_URI);
startActivityForResult(intent, REQUEST_CODE);
}
@Override
protected void onActivityResult(int requestCode, int resultCode, @Nullable Intent data) {
super.onActivityResult(requestCode, resultCode, data);
if (requestCode == REQUEST_CODE) {
if (resultCode == RESULT_OK) {
if (data != null) {
String receivedData = data.getStringExtra("dataFromReceive");
// 处理回传的文本数据
// ...
// 处理回传的图片数据
Uri selectedImageUri = data.getData();
if (selectedImageUri != null) {
Intent intent = new Intent(SendDataActivity.this, ReceiveDataActivity.class);
intent.putExtra("dataFromSend", receivedData);
intent.putExtra("imageUri", selectedImageUri.toString());
startActivityForResult(intent, REQUEST_CODE);
}
}
}
}
}
}
这个代码中,我们首先在onCreate方法中初始化了ImageView和按钮。然后,在按钮的点击事件中,我们启动了图库选择图片的意图。
在onActivityResult方法中,我们检查是否返回了正确的请求码(REQUEST_CODE)和结果码。如果一切正常,我们获取选中的图片的URI,并使用MediaStore.Images.Media.getBitmap()方法将图片加载到ImageView中,从而显示出来。
ReceiveDataActivity.java
package com.leo.transfer;
import android.content.Intent;
import android.graphics.Bitmap;
import android.net.Uri;
import android.os.Bundle;
import android.provider.MediaStore;
import android.view.View;
import android.widget.Button;
import android.widget.ImageView;
import android.widget.TextView;
import androidx.appcompat.app.AppCompatActivity;
public class ReceiveDataActivity extends AppCompatActivity {
private TextView receivedDataTextView;
private ImageView receivedImageView;
private Button returnButton;
@Override
protected void onCreate(Bundle savedInstanceState) {
super.onCreate(savedInstanceState);
setContentView(R.layout.activity_receive_data);
receivedDataTextView = findViewById(R.id.receivedDataTextView);
receivedImageView = findViewById(R.id.receivedImageView); // 添加ImageView的引用
returnButton = findViewById(R.id.returnButton);
Intent intent = getIntent();
if (intent != null) {
String receivedData = intent.getStringExtra("dataFromSend");
if (receivedData != null) {
receivedDataTextView.setText(receivedData);
}
String imageUriString = intent.getStringExtra("imageUri");
if (imageUriString != null) {
Uri imageUri = Uri.parse(imageUriString);
try {
Bitmap bitmap = MediaStore.Images.Media.getBitmap(this.getContentResolver(), imageUri);
receivedImageView.setVisibility(View.VISIBLE);
receivedImageView.setImageBitmap(bitmap);
} catch (Exception e) {
e.printStackTrace();
}
}
}
returnButton.setOnClickListener(new View.OnClickListener() {
@Override
public void onClick(View v) {
// 在按钮点击事件中触发数据回传
String dataToReturn = "Data from ReceiveDataActivity";
Intent resultIntent = new Intent();
resultIntent.putExtra("dataFromReceive", dataToReturn);
setResult(RESULT_OK, resultIntent);
finish();
}
});
}
 @Override
 public void onBackPressed() {


     // 在返回键按下时回传数据给SendDataActivity
     String dataToReturn = "Data from ReceiveDataActivity";
     Intent resultIntent = new Intent();
     resultIntent.putExtra("dataFromReceive", dataToReturn);
     setResult(RESULT_OK, resultIntent);
     finish();
 }
}
现在,我们的应用程序能够允许用户选择图片,并在ReceiveDataActivity中显示它。按照以下步骤验证:
- 运行程序,并打开
SendDataActivity。 - 在
SendDataActivity中点击 “Select Image” 按钮。 - 选择一个图片(从图库中选择)。
- 选中的图片应该显示在
ReceiveDataActivity的ImageView中。
实现效果