引言
在iOS9.0以前,我们可以使用UIAlertView、UIActionSheet两种系统弹窗进行交互操作,分别用于信息提示和操作选项选择,采用代理的设计模式传递用户操作事件,其缺点也异常明显:1、使用不够简便,代理模式使得视图和事件分离,不易维护;2、页面存在多个弹窗时,需要分别区分,代码上不够清晰,这两个缺点也恰恰是笔者很头痛的事情。
到了iOS9.0,Apple废弃了,UIAlertView、UIActionSheet两种控件,将其进行统一,即UIAlertController,同时也将其做为UIViewController的形式出现,而不是UIView(这个方式是将AlertView显示到了新的UIWindow上,此时应用的keyWindow被改变,如果此时使用[[[UIApplication sharedApplication] keyWindow] rootViewController]取不到应用的根控制器,正确的应该是[[[[UIApplication sharedApplication] delegate] window] rootViewController],这种方式才是应用的根控制器)。
UIAlertController不仅将UIAlertView、UIActionSheet做了统一,而且将操作对象UIAlertAction和事件通过block绑定在了一起,这样逻辑变得清晰,而由此带来的缺点是,操作选项越多,需要创建的UIAlertAction则越多
综述:本文旨在将UIAlertViewController、UIAlertView、UIActionSheet进行统一,并能够便捷使用,另外,提供一种弹窗形式,使得我们仅需关注自定义视图的事务即可。
统一弹窗的思路:
1、由于可能需要设置的东西较多,因此定义一个对象用来存储这些配置,包括标题、提示信息等等
2、新建一个视图,如LLAlertView,使用该视图完成调用等操作
3、通过block模式完成操作事件的传递
简化UIAlertController
步骤一
定义设置信息体LLAlertMessage
.h 文件
@interface LLAlertMessage : NSObject
@property (assign ,nonatomic) UIAlertControllerStyle style;
@property (copy ,nonatomic) NSString *title;
@property (copy ,nonatomic) NSString *message;
@property (copy ,nonatomic) NSArray *bts;   // 按钮的标题数组
@property (copy ,nonatomic) NSArray *bss;   // 按钮的样式数组
// 快捷构建AlertView设置信息
+(instancetype)newAlertViewWithTitle:(NSString*)title message:(NSString*)msg buttonTitles:(NSArray*)bts;
// 快捷构建ActionSheet设置信息
+(instancetype)newActionSheetWithTitle:(NSString*)title message:(NSString*)msg buttonTitles:(NSArray*)bts;
// 构建通用信息
+(instancetype)newWithStyle:(UIAlertControllerStyle)style title:(NSString*)title message:(NSString*)msg buttonTitles:(NSArray*)bts buttonStyles:(NSArray<NSNumber*>*)bss;
@end
.m 实现文件
@implementation LLAlertMessage
+(instancetype)newAlertViewWithTitle:(NSString *)title message:(NSString *)msg buttonTitles:(NSArray *)bts{
    return [self newWithStyle:UIAlertControllerStyleAlert title:title message:msg buttonTitles:bts buttonStyles:nil];
}
+(instancetype)newActionSheetWithTitle:(NSString *)title message:(NSString *)msg buttonTitles:(NSArray *)bts{
    return [self newWithStyle:UIAlertControllerStyleActionSheet title:title message:msg buttonTitles:bts buttonStyles:nil];
}
+(instancetype)newWithStyle:(UIAlertControllerStyle)style title:(NSString*)title message:(NSString*)msg buttonTitles:(NSArray *)bts buttonStyles:(NSArray<NSNumber *> *)bss{
    LLAlertMessage *body = [LLAlertMessage new];
    body.style = style;
    body.title = title;
    body.message = msg;
    body.bts = bts;
    body.bss = bss;
    return body;
}
@end
步骤二
定义显示方法,参数包括设置信息体及事件回调block
定义事件回调,为了保证共性,这里回调只回调事件索引,具体实现由使用者完成
typedef void(^LLAlertViewBlock)(NSInteger index);@class LLAlertMessage;
@interface LLAlertView : UIView
+(UIAlertController*)showSystemAlertViewMessageBody:(LLAlertMessage*)body clickBlock:(LLAlertViewBlock)block;
@end实现调用方法
+(UIAlertController*)showSystemAlertViewMessageBody:(LLAlertMessage *)body clickBlock:(LLAlertViewBlock)block{
    if (body==nil) {
        return nil;
    }
    UIAlertController *alertCtrl = [UIAlertController alertControllerWithTitle:body.title message:body.message preferredStyle:body.style];
    for (int i=0; i<body.bts.count; i++) {
        NSString *title = body.bts[i];
        UIAlertActionStyle style = UIAlertActionStyleDefault;
        if (body.bss.count==body.bts.count) {
            style = [body.bss[i] integerValue];
        }
        UIAlertAction *action = [UIAlertAction actionWithTitle:title style:style handler:^(UIAlertAction * _Nonnull action) {
            if (block) {
                block(i);
            }
        }];
        [alertCtrl addAction:action];
    }
    // 遍历,找出当前视图
    UIViewController *currentCtrl = [[UIApplication sharedApplication] currentViewController];
    [currentCtrl presentViewController:alertCtrl animated:YES completion:nil];
    return alertCtrl;
}注:[[UIApplication sharedApplication] currentViewController];方法来自另一份文件,文章最后附上的Demo中有文件实现,目的是获取到当前控制器。
至此,我们就完成了UIAlertController快速调用,使用:
a、调用 Alert
AlertMessage *messageBody = [LLAlertMessage newWithStyle:UIAlertControllerStyleAlert title:@"提示" message:@"文件错误!" buttonTitles:@[@"重试",@"跳转"] buttonStyles:@[@(UIAlertActionStyleDefault),@(UIAlertActionStyleDestructive)]];
[LLAlertView showSystemAlertViewMessageBody:messageBody clickBlock:^(NSInteger index) {
    NSLog(@"选择了%ld",index);
}];
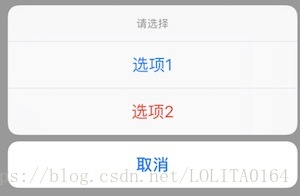
b、调用 ActionSheet
LLAlertMessage *messageBody = [LLAlertMessage newWithStyle:UIAlertControllerStyleActionSheet title:@"请选择" message:nil buttonTitles:@[@"选项1",@"选项2",@"取消"] buttonStyles:@[@(UIAlertActionStyleDefault),@(UIAlertActionStyleDestructive),@(UIAlertActionStyleCancel)]];
[LLAlertView showSystemAlertViewMessageBody:messageBody clickBlock:^(NSInteger index) {
    NSLog(@"选择了%ld",index);
}];
补充:
如果你的需要的弹窗样式比较普通,觉得构造设置信息体比较麻烦,你也可以定义一个相对简单的方法
+(UIAlertController*)showSystemAlertViewMessage:(NSString*)message buttonTitles:(NSArray *)bts clickBlock:(LLAlertViewBlock)block;上述方法只能设置消息和按钮标题,下面是实现部分
+(UIAlertController *)showSystemAlertViewMessage:(NSString *)message buttonTitles:(NSArray *)bts clickBlock:(LLAlertViewBlock)block{
    LLAlertMessage *messageBody = [LLAlertMessage newAlertViewWithTitle:@"提示" message:message buttonTitles:bts];
    return [self showSystemAlertViewMessageBody:messageBody clickBlock:block];
}
那么调用就变得简单了:
[LLAlertView showSystemAlertViewMessage:@"alertCtrl提示哦" buttonTitles:@[@"取消",@"弹窗"] clickBlock:^(NSInteger index) {
    NSLog(@"选择了%ld",index);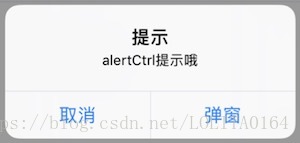
简化UIAlertView、UIActionSheet
注意到UIAlertView和UIActionSheet中cancelButtonTitle和destructiveButtonTitle都是在初始化时赋予的,这两个样式分别对应UIAlertViewController里样UIAlertActionStyleCancel和UIAlertActionStyleDestructive,因此我们给设置信息体LLAlertMessage里追加两个属性和设置方法
@property (copy ,nonatomic) NSString *cancelTitle;  // 只对UIAlertView有效
@property (copy ,nonatomic) NSString *destructiveTitle; // 只对UIAlertView有效
/**
 只对UIAlertView有效,会占据最前的索引
 */
-(void)addCancelButtonTitle:(NSString*)cancel destructiveButtonTitle:(NSString*)title;
另外,UIAlertView和UIActionSheet是通过代理的方式来传递操作事件的,因此我们必须需要实例方法来显示了,这也是区别UIAlertController调用方法的不同点。
.h 文件信息方法
@property (copy ,nonatomic) LLAlertViewBlock block; // 用于记录回调
@property (strong ,nonatomic) id object;    // 用于循环引用

/**
 UIAlertView,标题数组
 */
-(UIAlertView*)showSystemAlertViewMessage:(NSString*)message buttonTitles:(NSArray *)bts clickBlock:(LLAlertViewBlock)block;
/**
 UIAlertView + UIActionSheet,弹窗信息体,可选
 */
-(id)showSystemAlertViewMessageBody:(LLAlertMessage*)body clickBlock:(LLAlertViewBlock)block;
.m 新增的实现部分
/**
 UIAlertView,弹窗信息体,可选
 */
-(id)showSystemAlertViewMessageBody:(LLAlertMessage*)body clickBlock:(LLAlertViewBlock)block{
    if (body==nil) {
        return nil;
    }
    if (body.style==UIAlertControllerStyleAlert) {
        UIAlertView *alertView = [[UIAlertView alloc] initWithTitle:body.title message:body.message delegate:self cancelButtonTitle:body.cancelTitle otherButtonTitles:nil];
        for (NSString *title in body.bts) {
            [alertView addButtonWithTitle:title];
        }
        [alertView show];
        self.block = block; // 记录当前block,用于传递点击事件
        self.object = self; // 采用循环引用避免被系统提前释放
        return alertView;
    }
    else{
        UIActionSheet *sheet = [[UIActionSheet alloc] initWithTitle:body.title delegate:self cancelButtonTitle:body.cancelTitle destructiveButtonTitle:body.destructiveTitle otherButtonTitles:nil, nil];
        for (NSString *title in body.bts) {
            [sheet addButtonWithTitle:title];
        }
        [sheet showInView:[[[UIApplication sharedApplication] currentViewController] view]];
        self.block = block; // 记录当前block,用于传递点击事件
        self.object = self; // 采用循环引用避免被系统提前释放
        return sheet;
    }
}
-(UIAlertView *)showSystemAlertViewMessage:(NSString *)message buttonTitles:(NSArray *)bts clickBlock:(LLAlertViewBlock)block{
    LLAlertMessage *messageBody = [LLAlertMessage newAlertViewWithTitle:@"提示" message:message buttonTitles:bts];
    return [self showSystemAlertViewMessageBody:messageBody clickBlock:block];
}
-(void)alertView:(UIAlertView *)alertView clickedButtonAtIndex:(NSInteger)buttonIndex{
    if (self.block) {
        self.block(buttonIndex);
        self.object = nil;  // 断掉强引用,让系统释放该对象self
    }
}
-(void)actionSheet:(UIActionSheet *)actionSheet clickedButtonAtIndex:(NSInteger)buttonIndex{
    if (self.block) {
        self.block(buttonIndex);
        self.object = nil;  // 断掉强引用,让系统释放该对象self
    }
}
注:我们注意到,.h文件中新增了两个属性,一个是记录事件block,一个是故意制造循环引用,前者是为了将UIAlertView和UIActionSheet的代理中的操作事件回调,后者是防止,UIAlertView和UIActionSheet局部创建使用时,一旦出了作用域,就被释放了,这时用户的点击事件是无法响应到代理事件的,因此我这里故意循环引用,再其完成代理事件时再断开引用,达到延迟被系统释放的目的
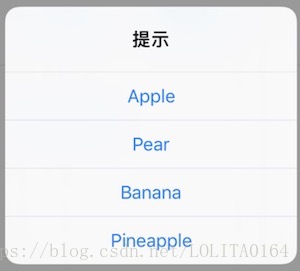
a、调用 Alert
使用和之前差不多,需要注意的是,正由之前的解释,UIAlertView和UIActionSheet需要实例来调用
NSArray* titles = @[@"Apple",@"Pear",@"Banana",@"Pineapple"];
[[LLAlertView new] showSystemAlertViewMessage:nil buttonTitles:titles clickBlock:^(NSInteger index) {
    NSLog(@"选择了%ld",index);
}];
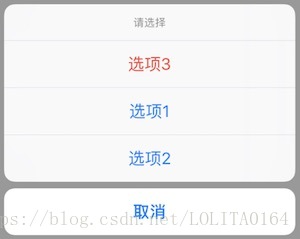
b、调用 ActionSheet
LLAlertMessage *messageBody = [LLAlertMessage newWithStyle:UIAlertControllerStyleActionSheet title:@"请选择" message:nil buttonTitles:@[@"选项1",@"选项2"] buttonStyles:nil];
[messageBody addCancelButtonTitle:@"取消" destructiveButtonTitle:@"选项3"];
[[LLAlertView new] showSystemAlertViewMessageBody:messageBody clickBlock:^(NSInteger index) {
    NSLog(@"选择了%ld",index);
}];
自定义弹窗
本来是想模仿一下UIAlertViewController的使用方式,将Action对象和操作绑定到一起,通过Action的style来设置样式,当时考虑到弹窗到样式多种多样,如果造了一个和系统类似的毫无意义,不如将视图外面控制,只提供统一的显示背景视图要好。
弹出自定义视图的思路:
1、既定弹出背景视图,将其添加到当前window上
2、将自定义视图添加到当前背景视图上
3、完成背景视图的相关操作事件,包括弹出收起动画、屏幕旋转等
#pragma mark - <************************** 显示自定义弹窗 **************************>
@property (strong, nonatomic) UIView *contentView;      // 内容视图
@property (assign ,nonatomic) BOOL touchToClose;        // 是否点击背景关闭,默认不需要
@property (nonatomic,copy) void(^touchBgView)(LLAlertView*alertView);   // 点击背景视图回调
// 初始化
-(instancetype)initWithContentView:(UIView*)view;
-(void)show;
-(void)hide;
-(void)hideCompletion:(void(^)())block;
实现部分不再累赘,给个效果图吧
获取当前页面
Demo
拓展
一款app,想必拥有自己的一套提示视图,包括显示动画统一,针对这种情况,我们那可以在自定义弹窗的思路上做文章,我们可以继承自 LLAlertView ,创建其子视图,通过枚举,完成多种自定义视图样式,控制出现的动画等,将这些视图和动画进行组合,实现多种弹窗样式风格,这里不再列举详细等实现部分。