Application 的作用
- Application 是系统组件,生命周期很长,进程在他就在,所以可以在 Application 中维护一些全局变量(但是建议用单例来做)。
- 应用进程启动之后做一些初始化操作。因为 Application 生命周期长,生成对象早。
- 提供上下文:也不会有内存泄漏
Application 是根据进程走的,有几个进程就有几个 Application 所以多进程开发时需要根据进程来处理好初始化的内容。
Application 的继承类关系以及生命周期
public class Application extends ContextWrapper implements ComponentCallbacks2 {


}

public class ContextWrapper extends Context {


  Context mBase;

    public ContextWrapper(Context base) {


        mBase = base;
    }

    protected void attachBaseContext(Context base) {


        if (mBase != null) {


            throw new IllegalStateException("Base context already set");
        }
        mBase = base;
    }
    public Context getBaseContext() {


        return mBase;
    }
}
Application 继承自 Context 的包装类 ContextWrapper,ContextWrapper又继承自 Context,所以 Application 可以当作一个 Context 来用。Application 所有的调用最后都交给了 ContextWrapper 的 mBase 来处理,这就是一个静态代理
- Application 生命周期
构造函数 —> attachBaseContext(base: Context) —> onCreate() — > onTerminate()(onTerminate一般不生效,打断点也不走)。
深入理解 Application 的初始化原理
- 应用进程启动后的入口函数在 ActivityThread 的 main() 函数
public static void main(String[] args) {


	Looper.prepareMainLooper();

	ActivityThread thread = new ActivityThread();
    thread.attach(false, startSeq);

    if (sMainThreadHandler == null) {


       sMainThreadHandler = thread.getHandler();
    }
    Looper.loop();
}
入口函数一个是准备主线程 looper 一个是通过 ActivityThread 像 AMS 发消息。thread.attach方法如下:
private void attach(boolean system, long startSeq) {


 // 获取了 AMS 的 binder 对象
 final IActivityManager mgr = ActivityManager.getService();
            try {


                mgr.attachApplication(mAppThread, startSeq);
            } catch (RemoteException ex) {


                throw ex.rethrowFromSystemServer();
            }

}
调用了 AMS 的 attachApplication() 函数
   @Override
    public final void attachApplication(IApplicationThread thread, long startSeq) {


    // synchronized 是因为当前是跑在 binder 线程里面
        synchronized (this) {


            int callingPid = Binder.getCallingPid();
            final int callingUid = Binder.getCallingUid();
            final long origId = Binder.clearCallingIdentity();
            attachApplicationLocked(thread, callingPid, callingUid, startSeq);
            Binder.restoreCallingIdentity(origId);
        }
    }
- attachApplicationLocked()
// 参数。IApplicationThread 是应用端发过来的 binder 对象
private final boolean attachApplicationLocked(IApplicationThread thread,
            int pid, int callingUid, long startSeq) {


	// 里面代码很多 主要代码如下
	// bindApplication 是一个 IPC 操作,会调用到应用进程 的 bindApplication()
	thread.bindApplication(...)

}
- ActivityThread 的 bindApplication()
// 把所有的参数都封装到 AppBindData 中
AppBindData data = new AppBindData();
// 。。。
// 封装成消息 发送到应用主线程中
sendMessage(H.BIND_APPLICATION, data);
 public void handleMessage(Message msg) {


            if (DEBUG_MESSAGES) Slog.v(TAG, ">>> handling: " + codeToString(msg.what));
            switch (msg.what) {


                case BIND_APPLICATION:
                    // 获取 data 后,创建了 handleBindApplication() 传入了 data
                    AppBindData data = (AppBindData)msg.obj;
                    handleBindApplication(data);
                    Trace.traceEnd(Trace.TRACE_TAG_ACTIVITY_MANAGER);
                    break;
- 调用了 handleBindApplication(data); 方法
private void handleBindApplication(AppBindData data) {


	// 获取 data.info 描述应用安装包信息的对象 data.info 就是 LoadedApk
	data.info = getPackageInfoNoCheck(data.appInfo, data.compatInfo);
	//。。。
	Application app;
	// 通过 makeApplication 方法创建 Application 对象
    app = data.info.makeApplication(data.restrictedBackupMode, null);
    // 。。。
    // 调用 Application 的 onCreate() 函数
     mInstrumentation.callApplicationOnCreate(app);
}
makeApplication() 是怎么创建 application 对象的
public Application makeApplication(boolean forceDefaultAppClass,Instrumentation instrumentation) {


	if (mApplication != null) {


		return mApplication;
	}
	final java.lang.ClassLoader cl = getClassLoader();
	// 为 Application 创建一个 Context
	ContextImpl appContext = ContextImpl.createAppContext(mActivityThread, this);
	// 为 Application 创建对象 传入了 appContext;所以 Application 的 Context 的实现类是 ContextImpl
	app = mActivityThread.mInstrumentation.newApplication(cl, appClass, appContext);
	return app;
}
newApplication() 方法
    public Application newApplication(ClassLoader cl, String className, Context context)
            throws InstantiationException, IllegalAccessException,
            ClassNotFoundException {


            // 通过工厂创建
        Application app = getFactory(context.getPackageName())
                .instantiateApplication(cl, className);
                // 调用 attch 里面会把 Context 赋值给 mBase ;attach 会调用 attachBaseContext()
        app.attach(context);
        return app;
    }
applocation 的上下文对象是在 app.attach 之后才赋值的,所以在构造函数中无法获取到 applocation 的上下文对象,所以需要上下文对象获取的组件就都获取不到,比如 gerResource() 等。
- instantiateApplication()
    public @NonNull Application instantiateApplication(@NonNull ClassLoader cl,
            @NonNull String className)
            throws InstantiationException, IllegalAccessException, ClassNotFoundException {


            // 通过 ClassLoader 创建 Application 对象;所以 Application 的构造器中不能有参数
        return (Application) cl.loadClass(className).newInstance();
    }
总结和注意
-
application 的流程:new Application() --> application.attachBaseContext() —> application.onCreate()
-
在 attachBaseContext() 之前是无法获取上下文对象的,比如如果你在构造器中获取 resource 等是获取不到的。
-
不要执行耗时操作:bindApplication() 是在主线程回调生命周期的,不仅影响项目启动速度,还有影响项目应用各种组件的启动速度。
-
在 Application 中使用静态变量的问题
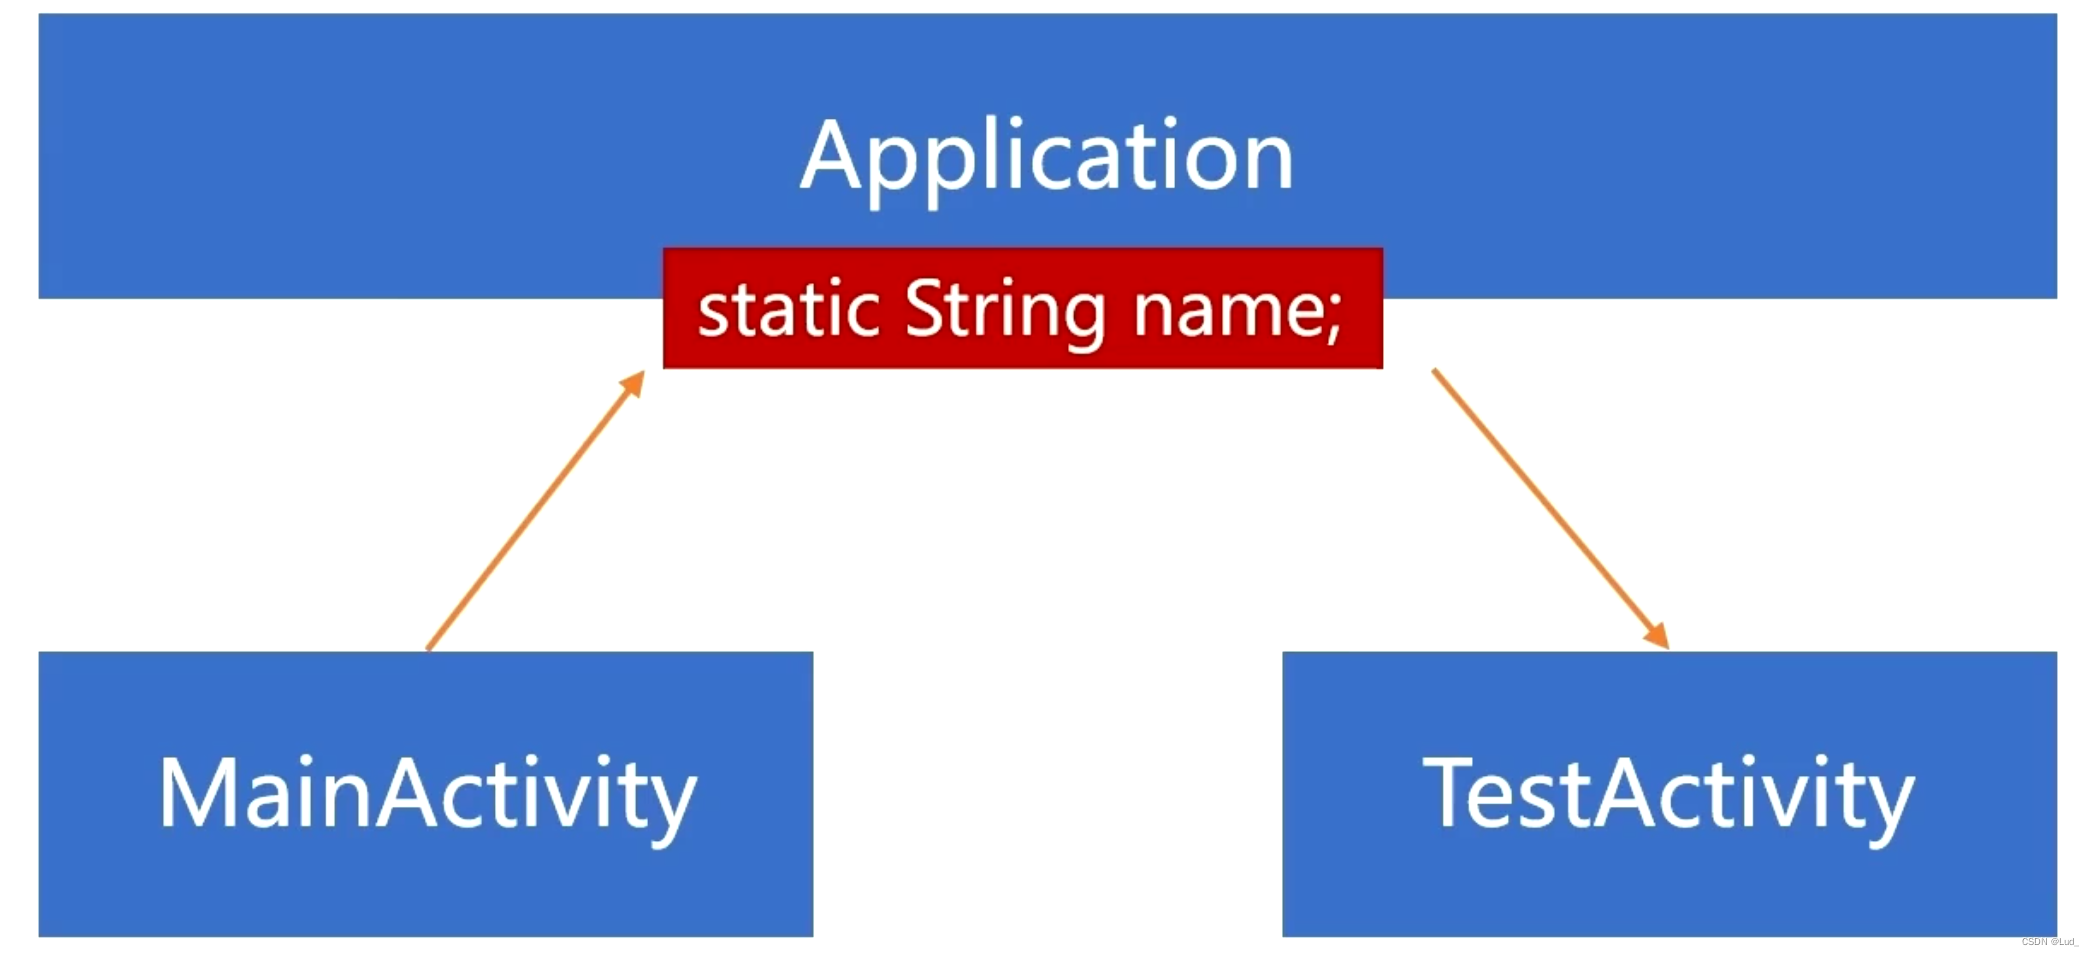
假设 Application 中有一个静态变量,name 是在 MainActivity 赋值的,赋值后跳转到 TestActivity,然后切换到后台,加入应用此时因为内粗问题被回收了,再次打开应用是会重建 Application 然后再恢复 TestActivity 此时 name 是null的。