项目中做了一套电商的购物流程,很多都是照着淘宝做的,之前一直疑惑淘宝的弹框
时,底部的控制器向内凹陷是什么鬼,这动画有点理解不了,一直就放着没有做,这周
末突然在github上看到一个老外写的库,真的有点强啊,我这里简单写了个Demo给大家分析下,然后再用这个牛B的库集成下展示最终成果

老规矩,看图说话,一个是自己写的Demo,一个是通过库展示给大家

在介绍库之前先自己写个Demo捋一捋思路
第一个View:根部控制器,我们设置为黑色
第二个View:根部VC上面加载另一个用来做动画的AnimationVC (addChildViewController)
第三个View:在AnimationVC上面add一个MaskView
第四个View:最后就是弹出的最终popView(加载到Window上面,类似于系统的Alert or sheet)
第一步:布局View
// 设置底部的背景颜色 (第一层)
    self.view.backgroundColor = [UIColor blackColor];

    // 设置AnimationVC的属性 (第二层)
    self.mkjVC = [[MKJAnimationViewController alloc] init];
    self.mkjVC.view.backgroundColor = [UIColor whiteColor];
    self.mkjVC.view.frame = CGRectMake(0, 0, [UIScreen mainScreen].bounds.size.width, [UIScreen mainScreen].bounds.size.height);
    self.mkjVC.title = @"Animation";
    self.nvc = [[UINavigationController alloc] initWithRootViewController:self.mkjVC];

    [self addChildViewController:self.nvc];
    [self.view addSubview:self.nvc.view];
    // 设置开始按钮
    UIButton *button = [UIButton buttonWithType:UIButtonTypeCustom];
    [button setTitle:@"show" forState:UIControlStateNormal];
    [button setTitleColor:[UIColor purpleColor] forState:UIControlStateNormal];
    [button addTarget:self action:@selector(clickShow:) forControlEvents:UIControlEventTouchUpInside];
    button.frame = CGRectMake(0, 0, 100, 30);
    button.center = self.nvc.view.center;
    [self.nvc.view addSubview:button];

    // 设置maskView (第三层)
    self.maskView = [[UIView alloc] initWithFrame:self.mkjVC.view.bounds];
    self.maskView.backgroundColor = [[UIColor blackColor] colorWithAlphaComponent:0.5];
    self.maskView.alpha = 0;
    [self.nvc.view addSubview:self.maskView];

    // 设置popVIew (第四层)
    self.popView = [[UIView alloc] initWithFrame:CGRectMake(0, [UIScreen mainScreen].bounds.size.height, [UIScreen mainScreen].bounds.size.width, [UIScreen mainScreen].bounds.size.height / 2)];
    self.popView.backgroundColor = [UIColor redColor];
    self.popView.layer.shadowColor = [UIColor blackColor].CGColor;
    self.popView.layer.shadowOffset = CGSizeMake(3, 3);
    self.popView.layer.shadowOpacity = 0.8;
    self.popView.layer.shadowRadius = 5.0f;

    // closeButton
    UIButton *button1 = [UIButton buttonWithType:UIButtonTypeCustom];
    [button1 setTitle:@"Cancel" forState:UIControlStateNormal];
    [button1 setTitleColor:[UIColor blueColor] forState:UIControlStateNormal];
    button1.frame = CGRectMake(5, 5, 100, 30);
    [button1 addTarget:self action:@selector(close:) forControlEvents:UIControlEventTouchUpInside];
    [self.popView addSubview:button1];
第二步:形变动画(最关键,分两段)
先解释下M34是什么东西
transform本身就是个结构体,首先要实现View的透视效果(近大远小),就是通过它来实现的
CATransform3D rotationAndPerspectiveTransform = CATransform3DIdentity;
rotationAndPerspectiveTransform.m34 = 1.0 / -500;
m34负责z轴方向的translation(移动),m34= -1/D, 默认值是0,也就是说D无穷大,这意味layer in projection plane(投射面)和layer in world coordinate重合了。
D越小透视效果越明显。所谓的D,是eye(观察者)到投射面的距离
形变1
// 第一次形变
- (CATransform3D)transform1{
    // 每次进来都进行初始化 回归到正常状态
    CATransform3D form1 = CATransform3DIdentity;
    // m34就是实现视图的透视效果的(俗称近大远小)
    form1.m34 = 1.0/-900;
    //缩小的效果
    form1 = CATransform3DScale(form1, 0.95, 0.95, 1);
    //x轴旋转
    form1 = CATransform3DRotate(form1, 15.0 * M_PI/180.0, 1, 0, 0);
    return form1;

}
形变2
// 第二次形变
- (CATransform3D)transform2{
    // 初始化 再次回归正常
    CATransform3D form2 = CATransform3DIdentity;
    // 用上面用到的m34 来设置透视效果
    form2.m34 = [self transform1].m34;
    //向上平移一丢丢 让视图平滑点
    form2 = CATransform3DTranslate(form2, 0, self.view.frame.size.height * (-0.08), 0);
    //最终再次缩小到0.8倍
    form2 = CATransform3DScale(form2, 0.8, 0.8, 1);
    return form2;
}
第三步:动画的开始和结束
// 点击动画开始
- (void)clickShow:(UIButton *)button
{
    // 开始的时候把popView加载到window上面去,类似于系统的actionSheet之类的弹窗
    [[UIApplication sharedApplication].windows[0] addSubview:self.popView];
    // 先计算出popView的弹出高度
    CGRect rec = self.popView.frame;
    rec.origin.y = self.view.bounds.size.height / 2;
    [UIView animateWithDuration:0.3 animations:^{
        // 先逆时针X轴旋转 缩小到0.95呗,向内凹陷的透视效果 如果不进行下一波操作,那么这个效果就是View向内倾斜了
        self.nvc.view.layer.transform = [self transform1];
    } completion:^(BOOL finished) {
        // 倾斜完之后,我们再进行第二段操作,先把transform设置为初始化,然后透视还是和第一段一样,让他回归到正常(不倾斜)同时让大小动画为0.8,高度向上移动一点点,maskView出来,popView也顺着出来指定高度
        [UIView animateWithDuration:0.3 animations:^{

            self.nvc.view.layer.transform = [self transform2];
            self.maskView.alpha = 0.5;
            self.popView.frame = rec;
        } completion:^(BOOL finished) {
        }];
    }];
}
// 动画关闭
- (void)close:(UIButton *)button
{
    // 先计算出popView回去的位置
    CGRect rec = self.popView.frame;
    rec.origin.y = self.view.bounds.size.height;

    // 动画回去
    [UIView animateWithDuration:0.4 animations:^{
        // popView回去
        self.popView.frame = rec;
        // mask回0
        self.maskView.alpha = 0;
        // 在进行旋转,向内凹陷,大小缩为0.95倍
        self.nvc.view.layer.transform = [self transform1];

    } completion:^(BOOL finished) {

        // 折叠完之后让transform回归到正常水平就好了
        [UIView animateWithDuration:0.3 animations:^{

            self.nvc.view.layer.transform = CATransform3DIdentity;

        } completion:^(BOOL finished) {

            // 把popView从Window中移除
            [self.popView removeFromSuperview];

        }];

    }];

}
 Demo就这样,该有的效果就出来了,大伙可以自己试试
OK,现在来个成熟的框架,效果那肯定是杠杠的KNSemiModalViewController点击打开链接
先看看官方给出的效果图
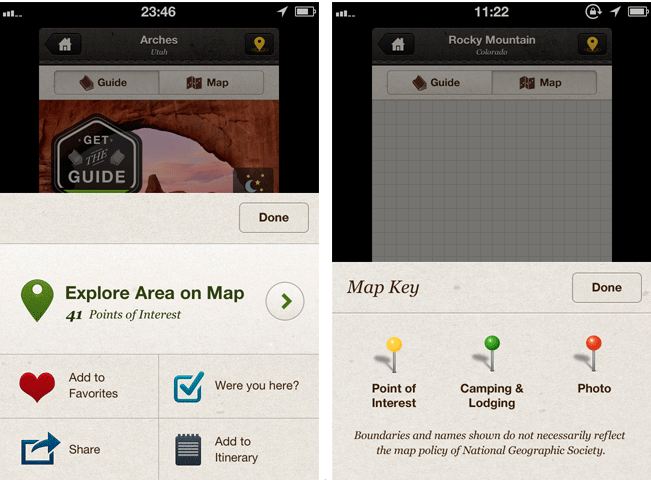
可以弹控制器也可以弹View,自定义非常高
-(void)presentSemiViewController:(UIViewController*)vc;
-(void)presentSemiViewController:(UIViewController*)vc withOptions:(NSDictionary*)options;
-(void)presentSemiView:(UIView*)vc;
-(void)presentSemiView:(UIView*)view withOptions:(NSDictionary*)options;
首先:导入source里面的两个文件,在需要的地方包含这个类扩展
然后:把需要弹出来的信息写在另一个控制器里面,直接在想要弹的地方调用
[self.navigationController presentSemiViewController:self.chooseVC withOptions:@{
                                                               KNSemiModalOptionKeys.pushParentBack    : @(YES),
                                                               KNSemiModalOptionKeys.animationDuration : @(2.0),
                                                               KNSemiModalOptionKeys.shadowOpacity     : @(0.3),
                                                               KNSemiModalOptionKeys.backgroundView : [[UIImageView alloc] initWithImage:[UIImage imageNamed:@"background_01"]]
                                                               }];

喂喂喂,结束了么,我刚买了瓜子和饮料来看???你就给我看这个?

没错,结束了,各回各家,各找各妈,瓜子和饮料都给我吧

噢,对了,弹出来的View里面的tag布局传送门 点击打开链接tag布局
这里大家用库的时候绝对会遇到几个坑,最常见的给大家罗列下
1.问题一
ld: 1 duplicate symbol for architecture x86_64
clang: error: linker command failed with exit code 1 (use -v to see invocation)
方法:
add typedef
typedef NS_ENUM(NSUInteger, KNSemiModalTransitionStyle) {
KNSemiModalTransitionStyleSlideUp,
KNSemiModalTransitionStyleFadeInOut,
KNSemiModalTransitionStyleFadeIn,
KNSemiModalTransitionStyleFadeOut,
};
2.问题二
Exception: Defaults must have been set when accessing
如果你要的根控制器是有导航栏的
[self.navigationController presentSemiViewController....
如果没有导航栏
[self presentSemiViewController....
不然我的做,你就飞了
可以了,再BB就要被打了
自己写的Demo:点击打开链接简单Demo
用库集成的超级Demo:点击打开链接超级Demo
tag标签布局传送:点击打开链接Tag
8.24日更新--->针对iOS10以上的autolayout计算问题修复,避免出现约束冲突问题,已修复
少年,点个赞再走好么,不会少块肉的。。。。。。
点你妹啊,你知道按一下鼠标有多累么!!??!?会触电的!!!
好吧。。。。。。

注意啦
如果你Push的时候没这么做,你的界面会
出BUG,下面是我的解决方案
- (void)show:(UITapGestureRecognizer *)tap
{
    if (!self.chooseVC)
    {

        self.chooseVC = [[ChooseGoodsPropertyViewController alloc] init];

    }
    self.chooseVC.enterType = FirstEnterType;
    __weak typeof(self)weakSelf = self;
    self.chooseVC.block = ^{

        NSLog(@"点击回调去购物车");
        // 下面一定要移除,不然你的控制器结构就乱了,基本逻辑层级我们已经写在上面了,这个效果其实是addChildVC来的,最后的展示是在Window上的,一定要移除
        [weakSelf.chooseVC.view removeFromSuperview];
        [weakSelf.chooseVC removeFromParentViewController];
        weakSelf.chooseVC.view = nil;
        weakSelf.chooseVC = nil;

        MKJShoppingCartViewController *shop = [MKJShoppingCartViewController new];
        [weakSelf.navigationController pushViewController:shop animated:YES];

    };
    self.chooseVC.price = 256.0f;
    [self.navigationController presentSemiViewController:self.chooseVC withOptions:@{
                                                                                     KNSemiModalOptionKeys.pushParentBack    : @(YES),
                                                                                     KNSemiModalOptionKeys.animationDuration : @(0.6),
                                                                                     KNSemiModalOptionKeys.shadowOpacity     : @(0.3),
                                                                                     KNSemiModalOptionKeys.backgroundView : [[UIImageView alloc] initWithImage:[UIImage imageNamed:@"background_01"]]
                                                                                    }];
}