遇到一个需求,需要前端自行生成用户的个人名片分享二维码,并提供二维码下载功能。在网上找到很多解决方案,最终吭哧吭哧做完了,把它整理记录一下,方便后续学习使用!嘿嘿O(∩_∩)O~
这个小东西有以下功能特点:
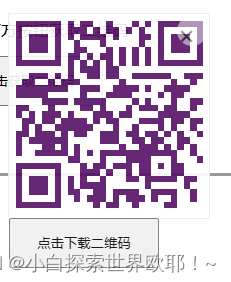
1.可以生成密密麻麻程度不一样的二维码
2.可以生成不同颜色的二维码
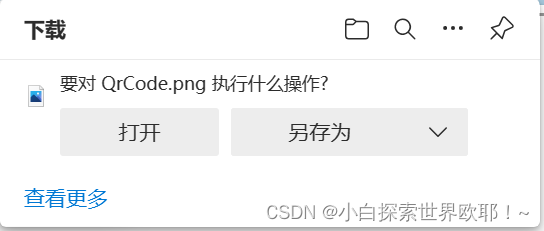
3.二维码支持下载
4.代码简洁且通俗易懂(小白只能这样啦!)
首先,先记录一下我的实验版本,因为怕把项目搞砸,所以我就自己create一个单独的小demo来实验,等功能实现了再搬过去用。系不系很机智!!!

一、实验小Demo
1、点击获取二维码
<template>
<div class="click-code">
<div class="click-code-pic">
<img class="logo" :src="src">
</div>
<div class="click-code-info">
<h6>{
{title}}</h6>
<p>{
{text}}</p>
<button @click="getCode(1)">点击获取二维码</button>
<div class="isShow" v-if="isClick==1">
<div class="img-box">
<!-- 这里一定要记得写绑定,一开始一直弹不出来,最后才发现是没绑定!!! -->
<JkQrcode :url="url" :color="color" :margin="margin" class="cover-img"/>
<span class="image-remove" @click="getCode(0)">+</span>
</div>
</div>
</div>
</div>
</template>
<script>
import JkQrcode from'./JkQrcode'
export default {
name: 'ClickCode',
components: {
JkQrcode,
},
data() {
return {
isClick: 0,
title:'你好呀!',
text:'点击下方按钮获取二维码',
width: 500,
margin: 1,
src:require('../assets/logo.png') ,
url:'',
color:'#'
};
},
methods:{
getCode(a){
if(a==1){
this.isClick=1;
// 生成不同的二维码(在实际项目中,这些信息是通过后端返回的信息来绑定的,而不是这样随机生成啥就是啥)
let arr = ["a","b","c","d","e","f","g","h","i","j","k","l","m","n","o","p","q","r","s","t","u","v","w","x","y","z",
"A","B","C","D","E","F","G","H","I","J","K","L","M","N","O","P","Q","R","S","T","U","V","W","X","Y","Z",
"0","1","2","3","4","5","6","7","8","9"];
// //生成不同的颜色
let lit=["0","1","2","3","4","5","6","7","8","9","a","b","c","d","e","f"];
// 为了降低重复率,多几个拼接,发现循环次数越多,二维码越密密麻麻
for(let i=0;i<16;i++){
this.url+=arr[Math.floor(Math.random()*36)];
}
// this.url="http://"+this.url+".png";
for(var j=0;j<3;j++){
this.color+=lit[Math.floor(Math.random()*16)];
}
var HisUrl=this.url;
var HisCol=this.color;
}
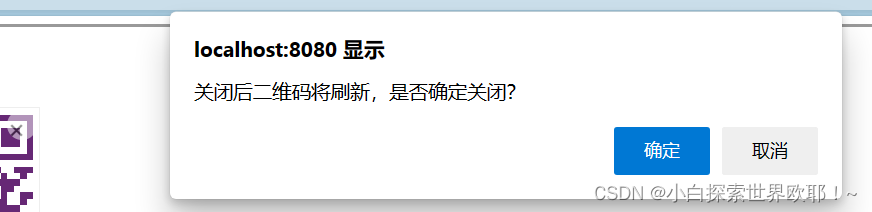
if(a==0){
if(!confirm("关闭后二维码将刷新,是否确定关闭?"))
{
this.url=HisUrl;
this.color=HisCol;
}
else{
this.isClick=0;
// 这里一定要初始化,不然它会一只连接下去,越来越长越来越长
this.url="";
this.color="#";
}
}
}
}
}
</script>
<style>
button{
width:150px;
height:50px;
position: absolute;
}
.img-box{
display: inline-block;
border: 1px solid #ececec;
position: relative;
}
.cover-img{
max-width: 800px;
min-width: 200px;
}
.image-remove{
background-color: white;
font-color: #ececec;
font-size: 30px;
width: 30px;
height: 30px;
text-align: center;
border-radius: 100%;
transform: rotate(45deg);
cursor:pointer;
opacity: 0.5;
top:2px;
right:2px;
display: block;
position: absolute;
}
.isShow{
display: true;
position: absolute;
top: 10%;
left: 15%;
/* opacity属性指定了一个元素后面的背景的被覆盖程度。【设置透明度:越低越透明】*/
opacity: .90;
}
.logo{
width: 200px;
height: 200px;
border-radius: 15px;
}
.click-code {
display: flex;
height: 200px;
border: 3px solid #999;
padding: 20px;
border-radius: 21px;
&-pic {
display: flex;
flex-direction: column;
justify-content: center;
img {
height: 100%;
}
}
&-info {
display: flex;
flex-direction: column;
justify-content: center;
h6 {
font-size: 46px;
}
p {
font-size: 36px;
margin-top: 20px;
}
}
}
</style>
2、点击下载二维码
<template>
  <div class="qrcode-box">
    <img :src="imgUrl" alt="二维码图片"/><br/>
    <!-- 一开始写在ClickCode,一直获取不到图片,写在这里面就可以顺利找到图片地址了 -->
    <button @click="downloadCodeImg" >点击下载二维码</button>
  </div>
</template>

<script>
import QRCode from 'qrcode'

export default {
  name: 'JkQrcode',
  props: {
    url: {
      type: String,
      default: ''
    },
    color: {
      type: String,
      default: '#000'
    },
    width: {
      type: Number,
      default: 200
    },
    margin: {
      type: Number,
      default: 1
    }
  },
  data() {
    return {
      imgUrl: ''
    }
  },
  watch: {
    url() {
      this.createQRCode()
    }
  },
  mounted() {
    this.createQRCode()
  },
  methods: {
    createQRCode() {
      if (!this.url) return
      QRCode.toDataURL(this.url, {
        errorCorrectionLevel: 'H',
        color: { dark: this.color, light: '#fff' },
        width: this.width,
        margin: this.margin
      })
        .then(url => {
          this.imgUrl = url
        })
        .catch(err => {
          console.error(err)
        })
    },
    //https://blog.csdn.net/sumimg/article/details/102969740 //下载二维码
     downloadCodeImg(){
     let link = document.createElement('a')
     let url =  this.imgUrl//要下载的路径
     // 这里是将url转成blob地址,
     fetch(url).then(res => res.blob()).then(blob => { //将链接地址字符内容转变成blob地址
         link.href = URL.createObjectURL(blob)
         console.log(link.href)
         link.download ='QrCode'
         document.body.appendChild(link)
         link.click()
     })
  }
  }
}
</script>
<style>
button{
  width:150px;
  height:50px;
  position: absolute;
}
.qrcode-box {

}
</style>
3、使用组件
<template>
  <clickCode/>
</template>

<script>
import ClickCode from './components/ClickCode'

export default {
  name:'App',
  components: {
    ClickCode
  }
}
</script>
4、效果

二、在小程序项目中使用(用Canvas)
在这里,二维码的大小是自适应的
qrwidth: 200 / 750 * wx.getSystemInfoSync().windowWidth,1、使用入口
<view><button class="edit-btn" @tap="handleShareCard">分享名片</button></view><canvas v-show="showQrcode" class="canvas-qcode" canvas-id="qrcanvas" :style="'width:' + qrwidth + 'px;height:' + qrwidth + 'px;'"></canvas><canvas class="temp-canvas" canvas-id="tempCanvas" style="position: absolute; left: -10000px; top: 10000px;" :style="'width:' + qrwidth + 'px;height:' + qrwidth + 'px'"></canvas>
2、生成唯一的二维码
      const text = getApp().globalData.QCODE_URL + (_self.company.tyshxydm || "") + "&companyName=" + _self.company.jgmc
      drawQrcode({
        width: _self.qrwidth,
        height: _self.qrwidth,
        foreground: _self.qrColor,
        canvasId: "qrcanvas",
        text,
        image: {},
        callback: res => {}
      });
// 在名片中这么处理,在详情页不需要处理中间图片
drawQrcode({
width: _self.qrwidth,
height: _self.qrwidth,
foreground: '#000',
canvasId: "tempCanvas",
text: text + "&companyMobile=" + _self.userInfo.mobile,
callback: res => {
// 读取二维码,并绘制二维码
_self.canvasToImg({
canvasId: "tempCanvas",
width: _self.imageWidth,
height: _self.imageWidth * 0.6,
callback(res) {
console.info("canvasToImg", res.tempFilePath);
_self.canvasImg = res.tempFilePath;
}
});
}
});3、保存
    // 保存名片
    onTapSaveCard(e) {
      let _self = this;
      _self.canvasToImg({
        canvasId: "cardCanvas",
        width: _self.imageWidth,
        height: _self.imageWidth * 0.6,
        callback(res) {
          debugger
          _self.saveImg(res.tempFilePath);
        }
      });
    },
因为不能泄露公司的一些业务,就只放一些核心代码就好啦!~
总而言之,导师说用canvas绘制会性能更好些。