(一)简介
- 本文将带你手把手的实现一个简单的 android 查快递小程序 让你更了解
- android 项目的创建
- github的使用
- JSON数据的解析
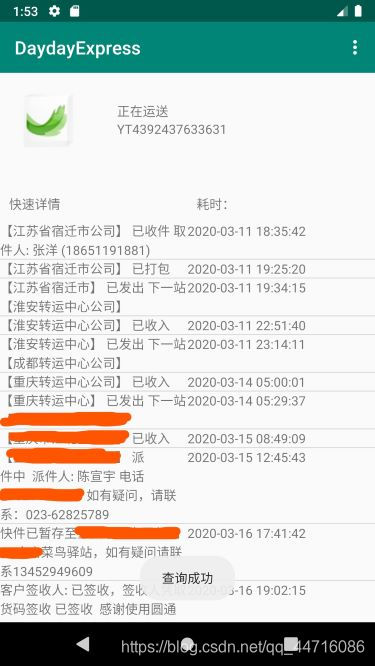
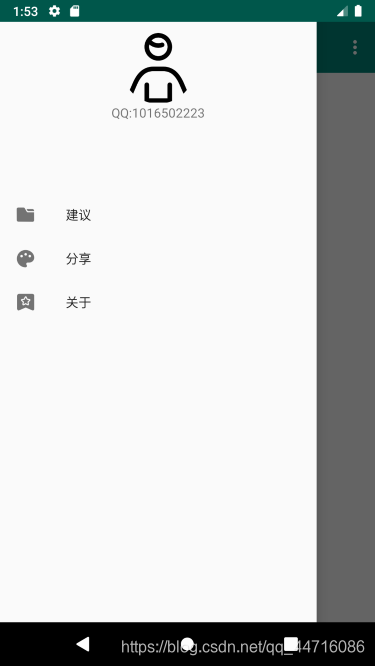
以下是程序的截图(大神勿喷呀)

(二)开始工程
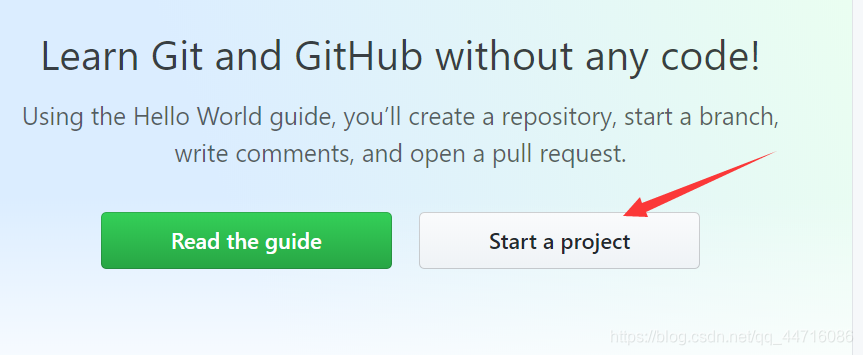
(1)在github上创建你的代码库
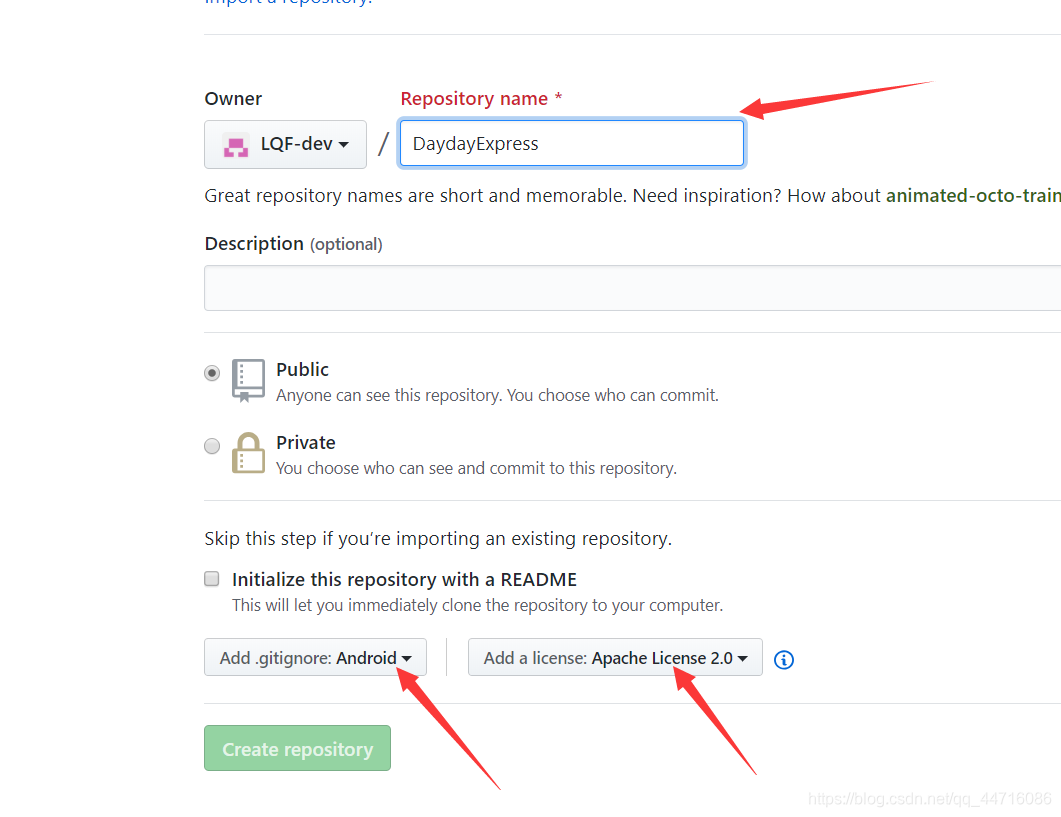
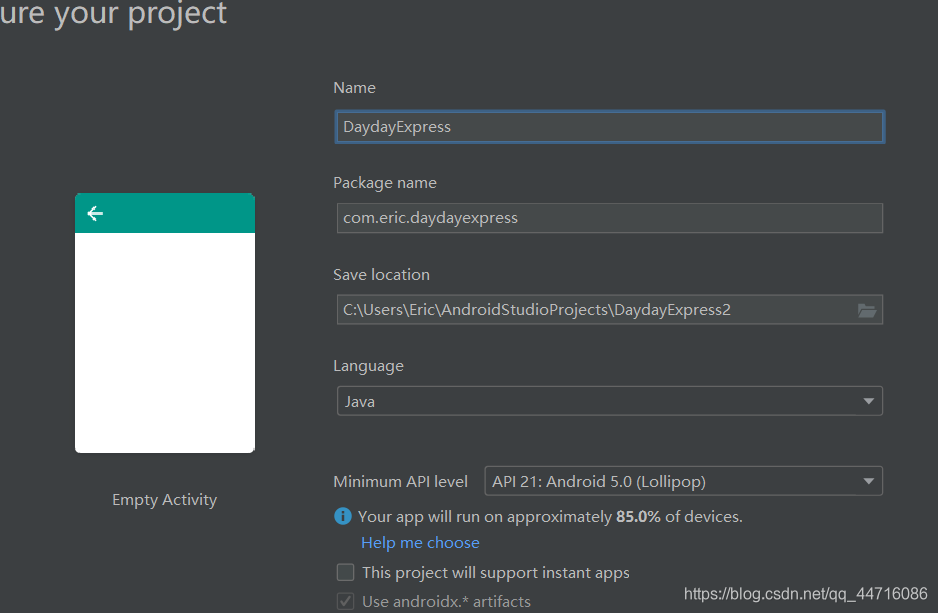
第一步:创建工程
输入项目名字 选择 类型 和 license
在AndroidStudio中创建同名工程
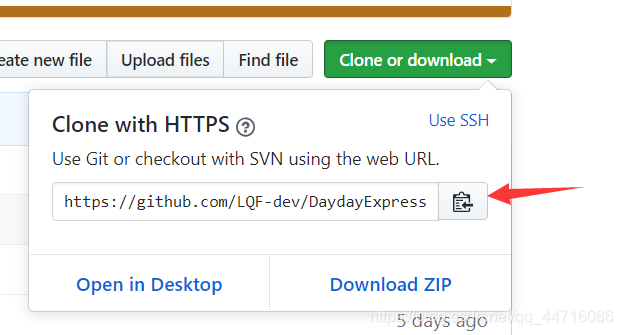
在bit bash 中 进入创建的工程目录 输入:
git clone (在github上你的新创建项目的地址)
例如 git clone https://github.com/LQF-dev/DaydayExpress.git
最后push到 github
 git add .
 git commit -m "你的commit"
 git push origin master
(2)编写布局文件
注意:布局代码有点繁琐,并且本人做的也不够好,若不按照此布局文件,可选择直接跳过,查看代码的实现板块
2.1 MainActivity
在主活动中我们会放置两个 EditText 以及一个按钮 并且会引入ToolBar 来代替原来的ActionBar
- 以下是activity_main的代码
<?xml version="1.0" encoding="utf-8"?>

<androidx.drawerlayout.widget.DrawerLayout
    xmlns:android="http://schemas.android.com/apk/res/android"
    xmlns:app="http://schemas.android.com/apk/res-auto"
    android:id="@+id/drawer_layout"
    android:layout_width="match_parent"
    android:layout_height="match_parent">


<RelativeLayout xmlns:android="http://schemas.android.com/apk/res/android"
    xmlns:app="http://schemas.android.com/apk/res-auto"
    android:orientation="vertical"
    android:layout_width="match_parent"
    android:layout_height="match_parent">

<androidx.appcompat.widget.Toolbar
    android:id="@+id/toolbar"
    android:layout_width="match_parent"
    android:layout_height="?attr/actionBarSize"
    android:background="?attr/colorPrimary"
    android:theme="@style/ThemeOverlay.AppCompat.Dark.ActionBar"
    app:popupTheme="@style/ThemeOverlay.AppCompat.Light"
   /> >


    <EditText

        android:id="@+id/edit_expNu"
        android:layout_width="wrap_content"
        android:layout_height="wrap_content"
        android:layout_centerInParent="true"
        android:hint="请输入快递单号"/>

    <EditText

        android:id="@+id/edit_expCode"
        android:layout_width="wrap_content"
        android:layout_height="wrap_content"
        android:layout_centerInParent="true"
        android:layout_below="@+id/edit_expNu"
        android:hint="请输入快递公司名称"/>

    <Button
        android:id="@+id/submit"
        android:layout_below="@+id/edit_expCode"
        android:layout_centerInParent="true"
        android:layout_width="wrap_content"
        android:layout_height="wrap_content"
        android:text="查询"/>


</RelativeLayout>


    <com.google.android.material.navigation.NavigationView
        android:id="@+id/nav_view"
        android:layout_width="match_parent"
        android:layout_height="match_parent"
        android:layout_gravity="start"
        app:menu="@menu/nav_menu"
        app:headerLayout="@layout/nav_header">


    </com.google.android.material.navigation.NavigationView>


</androidx.drawerlayout.widget.DrawerLayout>
2.2 TraceAcvitity
- 在此活动中存在
toolbar 显示标题栏
RelativeLayout 来容纳图片和运送信息
LinearLayout 容纳辅助信息
RecycleView 来显示快递追踪信息
<?xml version="1.0" encoding="utf-8"?>
<LinearLayout xmlns:android="http://schemas.android.com/apk/res/android"
    xmlns:app="http://schemas.android.com/apk/res-auto"
    xmlns:tools="http://schemas.android.com/tools"
    android:orientation="vertical"
    android:layout_width="match_parent"
    android:layout_height="match_parent"
    >

    <androidx.appcompat.widget.Toolbar
        android:id="@+id/toolbar_trace"
        android:layout_width="match_parent"
        android:layout_height="?attr/actionBarSize"
        android:background="?attr/colorPrimary"
        android:theme="@style/ThemeOverlay.AppCompat.Dark.ActionBar"
        app:popupTheme="@style/ThemeOverlay.AppCompat.Light"
        /> >

    <RelativeLayout

        android:layout_width="match_parent"
        android:layout_height="wrap_content"
        android:layout_marginBottom="20dp"
        android:padding="20dp">

        <ImageView
            android:id="@+id/iv_companyImage"
            android:layout_width="wrap_content"
            android:layout_height="wrap_content"
            android:layout_alignParentLeft="true"
            android:layout_alignParentTop="true"
            android:src="@drawable/ic_express_64" />

        <TextView
            android:id="@+id/text_state"
            android:layout_width="wrap_content"
            android:layout_height="wrap_content"
            android:layout_alignParentTop="true"
            android:layout_marginLeft="44dp"
            android:layout_marginTop="12dp"
            android:layout_toRightOf="@+id/iv_companyImage"
            android:text="正在运送" />

        <TextView
            android:id="@+id/text_showNumber"
            android:layout_width="wrap_content"
            android:layout_height="wrap_content"
            android:layout_below="@+id/text_state"
            android:layout_marginLeft="44dp"

            android:layout_toRightOf="@+id/iv_companyImage"
            android:text="快递单号" />


    </RelativeLayout>


    <LinearLayout
        android:orientation="horizontal"
        android:layout_width="match_parent"
        android:layout_height="wrap_content">

        <TextView
            android:text="快速详情"
            android:layout_gravity="center"
            android:layout_width="0dp"
            android:layout_height="wrap_content"
            android:layout_weight="1"
            android:padding="10dp"/>
        <TextView
            android:id="@+id/tv_time_total"
            android:layout_gravity="center"
            android:text="耗时:"
            android:padding="10dp"
            android:layout_width="0dp"
            android:layout_height="wrap_content"
            android:layout_weight="1"/>

    </LinearLayout>


<androidx.recyclerview.widget.RecyclerView
    android:id="@+id/recycle_view_trace"
    android:layout_width="match_parent"
    android:layout_height="wrap_content">

</androidx.recyclerview.widget.RecyclerView>


</LinearLayout>
2.3 ToolBar 的使用
android项目中默认显示的是ActionBar,故先要在 style.xml 文件中修改项目的主题才能使用Toobar
<resources>

    <!-- Base application theme. -->
    <style name="AppTheme" parent="Theme.AppCompat.Light.NoActionBar">

    </style>

</resources>
以下是 toobar 的简单使用 我仅仅在 Toolbar 中增加了一个 扫一扫 的 item,小伙伴可按照你的需求增加不同的功能

<?xml version="1.0" encoding="utf-8"?>
<menu xmlns:android="http://schemas.android.com/apk/res/android"
    xmlns:app="http://schemas.android.com/apk/res-auto">
    <item
        android:id="@+id/scan"
        android:title="扫一扫"
        app:showAsAction="never"
        />
</menu>
2.4 依赖的引入

(3)项目的代码实现
3.1 代码的整体理解
当前程序的思路非常简单
1. 本地调用查询快递 api,发送查询请求
2. 接受解析得到的 json 数据,利用GSON或者其他的方式,将有效数据提取出来,
3. 最后在主线程(UITHread)将数据显示出来即可
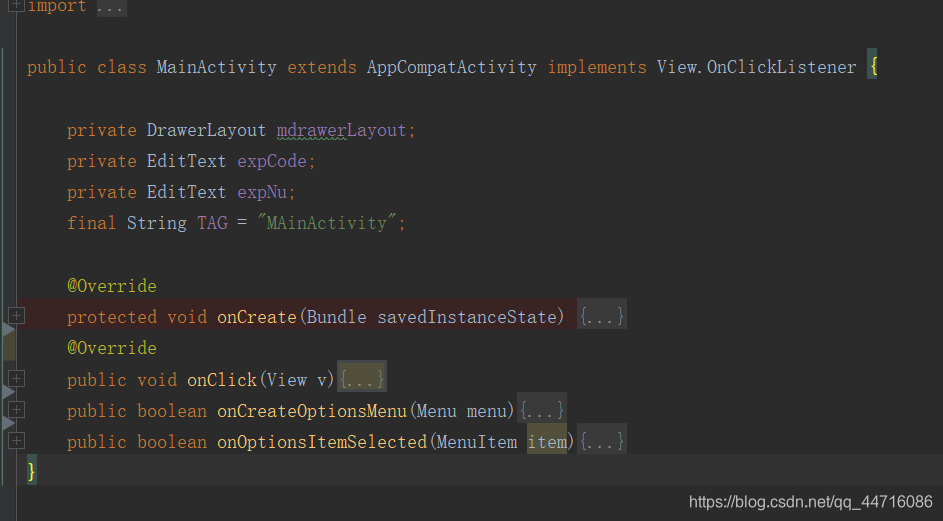
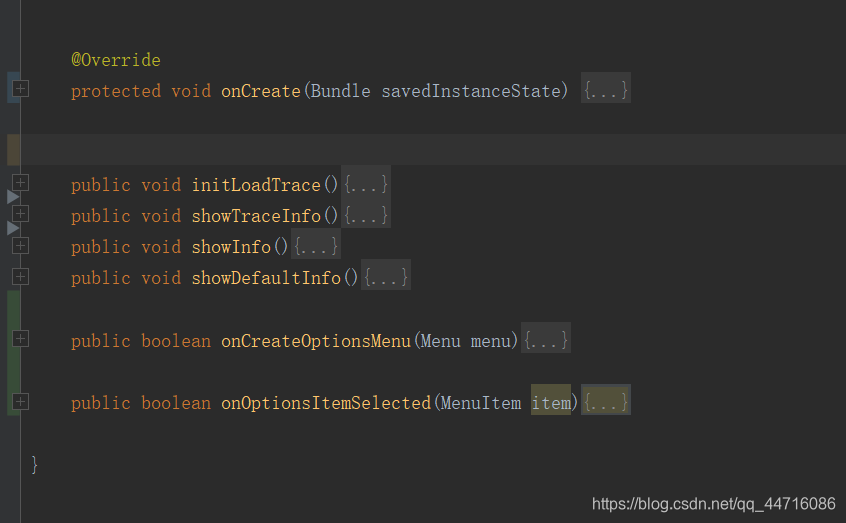
3.2 MainActivity的代码实现
- 整体框架
3.2.1.onCreate
    @Override
    protected void onCreate(Bundle savedInstanceState) {


        super.onCreate(savedInstanceState);
        setContentView(R.layout.activity_main);
        //实例化各种控件
        Button submit = (Button)findViewById(R.id.submit);
        submit.setOnClickListener(this);

        expCode = (EditText)findViewById(R.id.edit_expCode);
        expNu =  (EditText)findViewById(R.id.edit_expNu);

       androidx.appcompat.widget.Toolbar toolbar = (Toolbar) findViewById(R.id.toolbar);
       setSupportActionBar(toolbar);

        mdrawerLayout = (DrawerLayout) findViewById(R.id.drawer_layout) ;

        //展示ActionBar
        ActionBar actionBar = getSupportActionBar();
        if(actionBar != null){


          actionBar.setDisplayHomeAsUpEnabled(true);
          //Todo change icon later
          actionBar.setHomeAsUpIndicator(R.drawable.ic_menu);

        }


    }
3.2.2.按钮的onCLick事件
- 通过SharedPreferences 来储存输入的数据并且传递到 TraceActivity
  @Override
    public void onClick(View v){


        switch (v.getId()){


            case R.id.submit:
                 final String code = expCode.getText().toString();
                 final String num = expNu.getText().toString();
                Log.d(TAG, "code = "+ code);
                Log.d(TAG, "num = " + num);
                 if(!(code.equals("STO") || code.equals("YTO")|| code.equals("ZTO")) ){


                     Toast.makeText(this, "仅支持 申通 圆通 中通", Toast.LENGTH_SHORT).show();
                 }else{


                     Toast.makeText(this, "查询成功", Toast.LENGTH_SHORT).show();
                 }

                // 打开另一个activity
                 SharedPreferences.Editor editor =  getSharedPreferences("data",MODE_PRIVATE).edit();
                editor.putString("code",code);
                editor.putString("number",num);
                editor.apply();
                Intent intent = new Intent(this,TraceActivity.class);
                startActivity(intent);

        }

    }
3.2.3 加载Toolbar 以及 TooBar 的点击事件
- 我仅仅 只加入了 一个扫一扫的菜单
  public boolean onCreateOptionsMenu(Menu menu){


        getMenuInflater().inflate(R.menu.toolbar,menu);
        return true;
    }
    public boolean onOptionsItemSelected(MenuItem item){


        switch (item.getItemId()){


            case R.id.scan:
                Toast.makeText(this, "你点击了扫一扫按钮", Toast.LENGTH_SHORT).show();
                break;

            case android.R.id.home:
                Log.d(TAG, "onOptionsItemSelected: open_drawer");
                mdrawerLayout.openDrawer(GravityCompat.START);
                break;
                default:
                    break;
        }
        return true;

    }
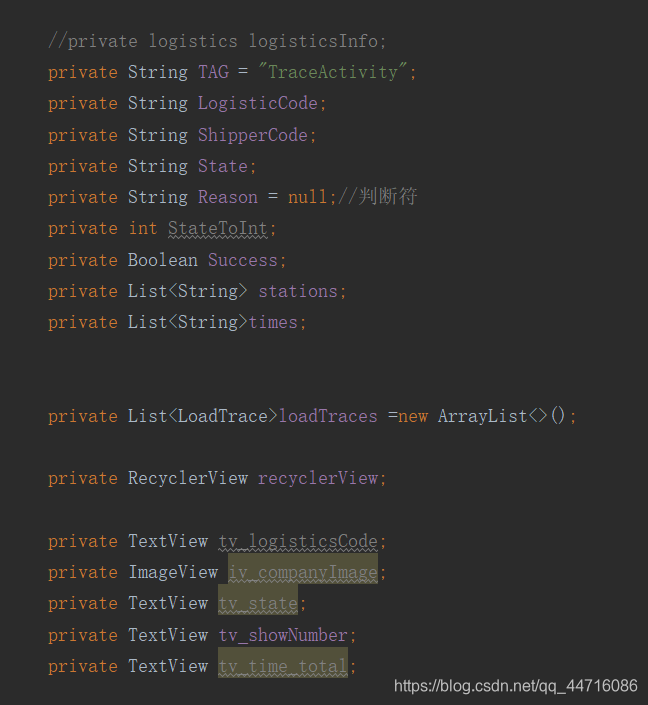
3.3 TraceActivity的代码实现
- 整体框架
3.3.1 有哪些免费的快递api?怎样使用api?
可以使用快递100 快递鸟的api。 这里我使用的是快递鸟的免费版(快递鸟直接注册即可,快递100还需要审核)但是。。。快递鸟免费版本仅仅支持中通 圆通 申通三家的快递查询,具体情况可登录快递鸟的网站查询。
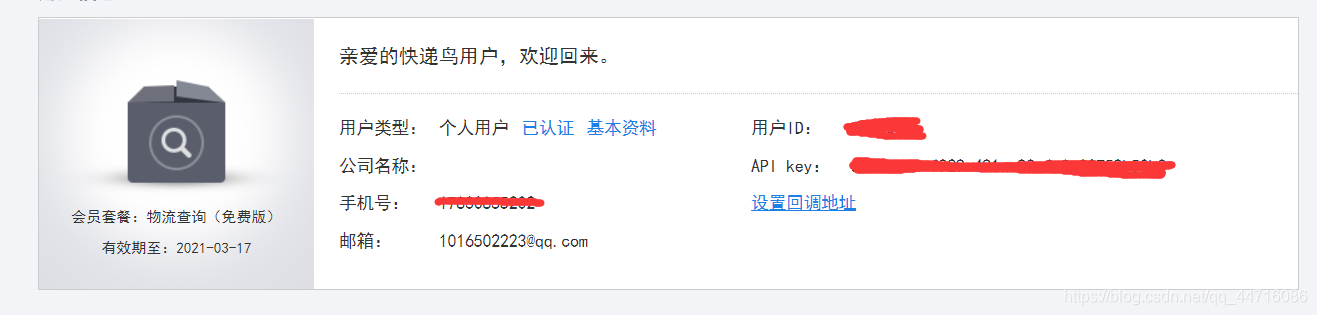 当你得到你的id apikey就可以使用快递鸟的api了,但是如何使用呢?不用着急,我会给您介绍清楚的!
如下图所示,打开快递鸟提供的demo

并将下载好的.java文件复制到你的项目下面 即可 如图:
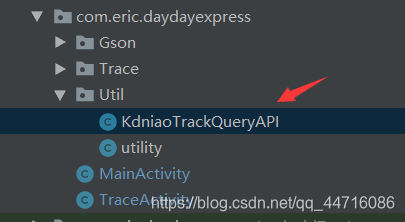
此接口KdniaoTrackQueryAPI 较为复杂,你不需要了解其中的具体实现,只需要知道存在一个getOrderByJson的方法,该方法需要你传进去两个参数(公司编号)(快递单号)即可返回 JSON 数据

3.3.2 Json数据的解析 以及onCreate方法的实现
- 此为得到的 json 数据

由于我仅仅需要解析出来的物流轨迹,这里就不使用GSON 的解析方法了,而是直接转化为JSONObject 直接解析
 new Thread(new Runnable() {


            @Override
           public void run() {


                try {


                    //Log.d(TAG, "run: 进入run");

                    //这里的 respond 就是 待解析的Json数据
                    String respond = new KdniaoTrackQueryAPI().getOrderTracesByJson(code,num);
                   // Log.d(TAG, "respond:  " + respond);

                    JSONObject jsonObject = new JSONObject(respond);
                    JSONArray array = jsonObject.getJSONArray("Traces");
                    for (int i = 0; i < array.length(); i++) {


                        JSONObject object = array.getJSONObject(i);
                        String AcceptStation = object.getString("AcceptStation");
                        stations.add(AcceptStation);
                        String AcceptTime = object.getString("AcceptTime");
                        times.add(AcceptTime);
                       // Log.d(TAG, "AcceptStation:" + stations.get(i));
                       // Log.d(TAG, "AcceptTime : " + times.get(i));
                        //Log.d(TAG, "AcceptTime size: " + times.size());
                    } try {


                        Reason = jsonObject.getString("Reason");
                        Log.d(TAG, "Reason: " + Reason);
                    } catch (Exception e) {


                        e.printStackTrace();
                        //Log.d(TAG, "Reason: 正常查询无Reason 现在Reason:" + Reason);

                    }
                     catch (Exception e) {


                    e.printStackTrace();
                }
数据已经得到,并且已经存在 两个list中,下一步就是更新数据了
3.3.3 在主线程中更新数据
 if(   Reason==null  ){


                runOnUiThread(new Runnable() {


                    @Override
                    public void run() {


                        //查询正确显示
                        showInfo();
                    }
                });
            }
                else {


                    runOnUiThread(new Runnable() {


                        @Override
                        public void run() {


                            //查询不正确显示默认数据
                            showDefaultInfo();
                        }
                    });
                }

           }
       }).start();//runable
showInfo() 以及 showDefaultInfo()的逻辑请看下面
  /**
     * 初始化 list 给recycleView的Adapter提供数据
     */
    public void initLoadTrace(){


        for(int i =0;i < times.size();i++){


            LoadTrace loadTraceItem = new LoadTrace(stations.get(i),times.get(i));
            loadTraces.add(loadTraceItem);

        }

    }

    /**
     * 展示物流轨迹信息
     */
    public void showTraceInfo(){


        initLoadTrace();
        RecyclerView.LayoutManager layoutManager = new LinearLayoutManager(this);
        LoadTraceAdapter adapter = new LoadTraceAdapter(loadTraces);
        recyclerView.setLayoutManager(layoutManager);
        recyclerView.addItemDecoration(new DividerItemDecoration(this,
                DividerItemDecoration.VERTICAL));
        recyclerView.setAdapter(adapter);

    }

    /**
     *展示界面以及物流轨迹信息
     */
    public void showInfo(){


        showTraceInfo();
        tv_showNumber.setText(LogisticCode);

    }

    /**
     * 展示默认信息
     */
    public void showDefaultInfo(){


        tv_showNumber.setText("暂无");
        Toast.makeText(this, "请输入正确信息", Toast.LENGTH_SHORT).show();
    }
-此时整体逻辑基本结束。
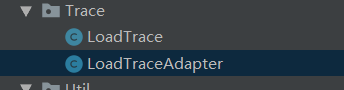
3.3.4 RecycleView 的使用
这一节我就简要跳过,不懂的小伙伴请百度下RecycleView的使用
public class LoadTrace {


    private String traceInfo;
    private String time;

    public LoadTrace(String traceInfo,String time){


        this.traceInfo = traceInfo;
        this.time = time;
    }

    public String getTraceInfo() {


        return traceInfo;
    }

    public String getTime() {


        return time;
    }
}
public class LoadTraceAdapter extends RecyclerView.Adapter<LoadTraceAdapter.ViewHolder> {


    private List<LoadTrace>mLoadTraces;
    static class ViewHolder extends RecyclerView.ViewHolder{


        TextView traceInfo;
        TextView time;
        public ViewHolder(View view){


            super(view);
            traceInfo = (TextView)view.findViewById(R.id.tv_traceInfo);
            time = (TextView)view.findViewById(R.id.tv_time_item);

        }
    }


    public LoadTraceAdapter(List<LoadTrace>loadTraceList){


        mLoadTraces = loadTraceList;
    }

    @Override
    public ViewHolder onCreateViewHolder(ViewGroup parent , int viewType){


        View view = LayoutInflater.from(parent.getContext())
                .inflate(R.layout.loadtrace_item,parent,false);
        ViewHolder holder = new ViewHolder(view);
        return holder;
    }


    //滚动到这里加载
    @Override
    public void onBindViewHolder(ViewHolder holder,int position){


        LoadTrace loadTrace = mLoadTraces.get(position);
        holder.traceInfo.setText(loadTrace.getTraceInfo());
        holder.time.setText(loadTrace.getTime());
    }


    @Override
    public  int  getItemCount(){


        return mLoadTraces.size();
    }

}
(三)将代码push到github上
项目终于完成了! 这时候可以将我们的项目上传到 github 上管理。

尾巴:
谢谢能看到这里的小伙伴,本人也是第一次写这么长的博客,希望你能有所收获,也希望我们能一起努力,学好技术!
要是有小伙伴不知道最终效果是什么,可以在github中download我的代码下面是我的源代码:
https://github.com/LQF-dev/DaydayExpress