想弄个Demo进行JNI练习,由于使用的是之前创建的项目,且创建项目时,并没有包含C++,然后就回顾了Android笔记之使用CMake进行JNI开发(Android Studio)这篇文章。按着这个文章步骤做,以前是可以的,但是在编译时报了configrure Error,最后找到了Android studio 同步工程失败:External Native Build Issues: Error configuring,说是gradle插件版本的问题,按着改了gradle插件版本就解决了问题。
这里重新记录下当前环境和实现步骤,以后好作个对比更新。
环境:
Android Studio 3.1.4
gradle插件是3.2.1 ,可在项目的根目录的build.gradle中查看
buildscript {

    repositories {
        google()
        jcenter()
    }
    dependencies {
        classpath 'com.android.tools.build:gradle:3.2.1'  // gradle插件版本


        // NOTE: Do not place your application dependencies here; they belong
        // in the individual module build.gradle files
    }
}

allprojects {
    repositories {
        google()
        jcenter()
    }
}

task clean(type: Delete) {
    delete rootProject.buildDir
}
添加步骤
1.添加CMakeLists.txt
2.模块配置CMakeLists.txt
3.编写C/CPP文件
4.java调用
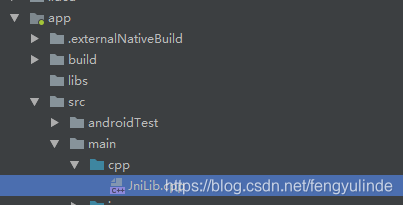
这里假设已经在src/main/cpp下编写好了C++文件JniLib.cpp
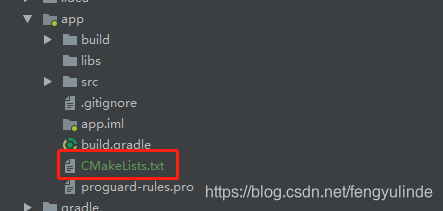
1.在工程模块下新建一个CMakeLists.txt
这里以app模块为例,如下图:
CMakeLists.txt内容如下:
# For more information about using CMake with Android Studio, read the
# documentation: https://d.android.com/studio/projects/add-native-code.html

# Sets the minimum version of CMake required to build the native library.

cmake_minimum_required(VERSION 3.4.1)

# Creates and names a library, sets it as either STATIC
# or SHARED, and provides the relative paths to its source code.
# You can define multiple libraries, and CMake builds them for you.
# Gradle automatically packages shared libraries with your APK.

add_library( # Sets the name of the library.
			#库名,可修改
             JniLib

             # Sets the library as a shared library.
             SHARED

             # Provides a relative path to your source file(s).
             # c++源代码文件路径
             src/main/cpp/JniLib.cpp )

# Searches for a specified prebuilt library and stores the path as a
# variable. Because CMake includes system libraries in the search path by
# default, you only need to specify the name of the public NDK library
# you want to add. CMake verifies that the library exists before
# completing its build.

# 不是必须添加的
find_library( # Sets the name of the path variable.
              log-lib

              # Specifies the name of the NDK library that
              # you want CMake to locate.
              log )

# Specifies libraries CMake should link to your target library. You
# can link multiple libraries, such as libraries you define in this
# build script, prebuilt third-party libraries, or system libraries.

# 不是必须添加的
target_link_libraries( # Specifies the target library.
                       JniLib

                       # Links the target library to the log library
                       # included in the NDK.
                       ${log-lib} )
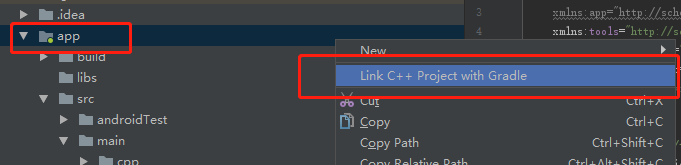
2.配置模块支持jni调用
对项目模块右键,选择Link C++ Project with Gradle
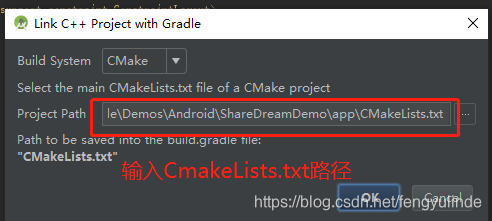
在弹出的提示框中选择刚新建配置的CMakeLists.txt文件:
等待编译完成,会在模块的android节点中生成如下内容
android {
    ...
    externalNativeBuild {
        cmake {
            path 'CMakeLists.txt'
        }
    }
}
注意: gradle插件3.2.0以下,添加添加了externalNativeBuild节点,编译时会报configure error。
4.编写C/CPP文件
JniLIb.cpp
#include <jni.h>
#include <string>

extern "C" JNIEXPORT jstring // 指定方法的返回类型,不设置的话会报错
JNICALL
Java_com_sharedream_demo_activity_JNIDemoActivity_getMessage(
      JNIEnv *env,
      jobject /* this */) {


  std::string hello = "Hello from C++";
  return env->NewStringUTF(hello.c_str());
}
注意: 每个JNI方法,都需要 extern “C” JNIEXPORT <JNI类型> ,JNIEXPORT <JNI类型> 用于控制函数的返回类型,否则会报错
5.java调用
public class JNIDemoActivity extends BaseActivity {


    @BindView(R.id.tv_jni_message)
    TextView tvJNIMessage;

    static {


        // 1.导入对应的so库
        System.loadLibrary("JniLib");
    }

    @Override
    protected void onCreate(Bundle savedInstanceState) {


        super.onCreate(savedInstanceState);
        // 3.调用
        String message = getMessage();
        Logger.d("message = " + message);
        tvJNIMessage.setText(message);
    }

    @Override
    protected int getLayoutId() {


        return R.layout.activity_jni_demo;
    }

    // 2.声明本地方法
    public static native String getMessage();
}