Gateway若想跟 Sentinel Starter 配合使用,需要加上 spring-cloud-alibaba-sentinel-gateway 依赖,同时需要添加 spring-cloud-starter-gateway 依赖来让 spring-cloud-alibaba-sentinel-gateway 模块里的 Spring Cloud Gateway 自动化配置类生效:
添加如下三个依赖:
<dependency>
<groupId>org.springframework.cloud</groupId>
<artifactId>spring-cloud-starter-gateway</artifactId>
</dependency>
<dependency>
<groupId>com.alibaba.cloud</groupId>
<artifactId>spring-cloud-starter-alibaba-sentinel</artifactId>
</dependency>
<dependency>
<groupId>com.alibaba.cloud</groupId>
<artifactId>spring-cloud-alibaba-sentinel-gateway</artifactId>
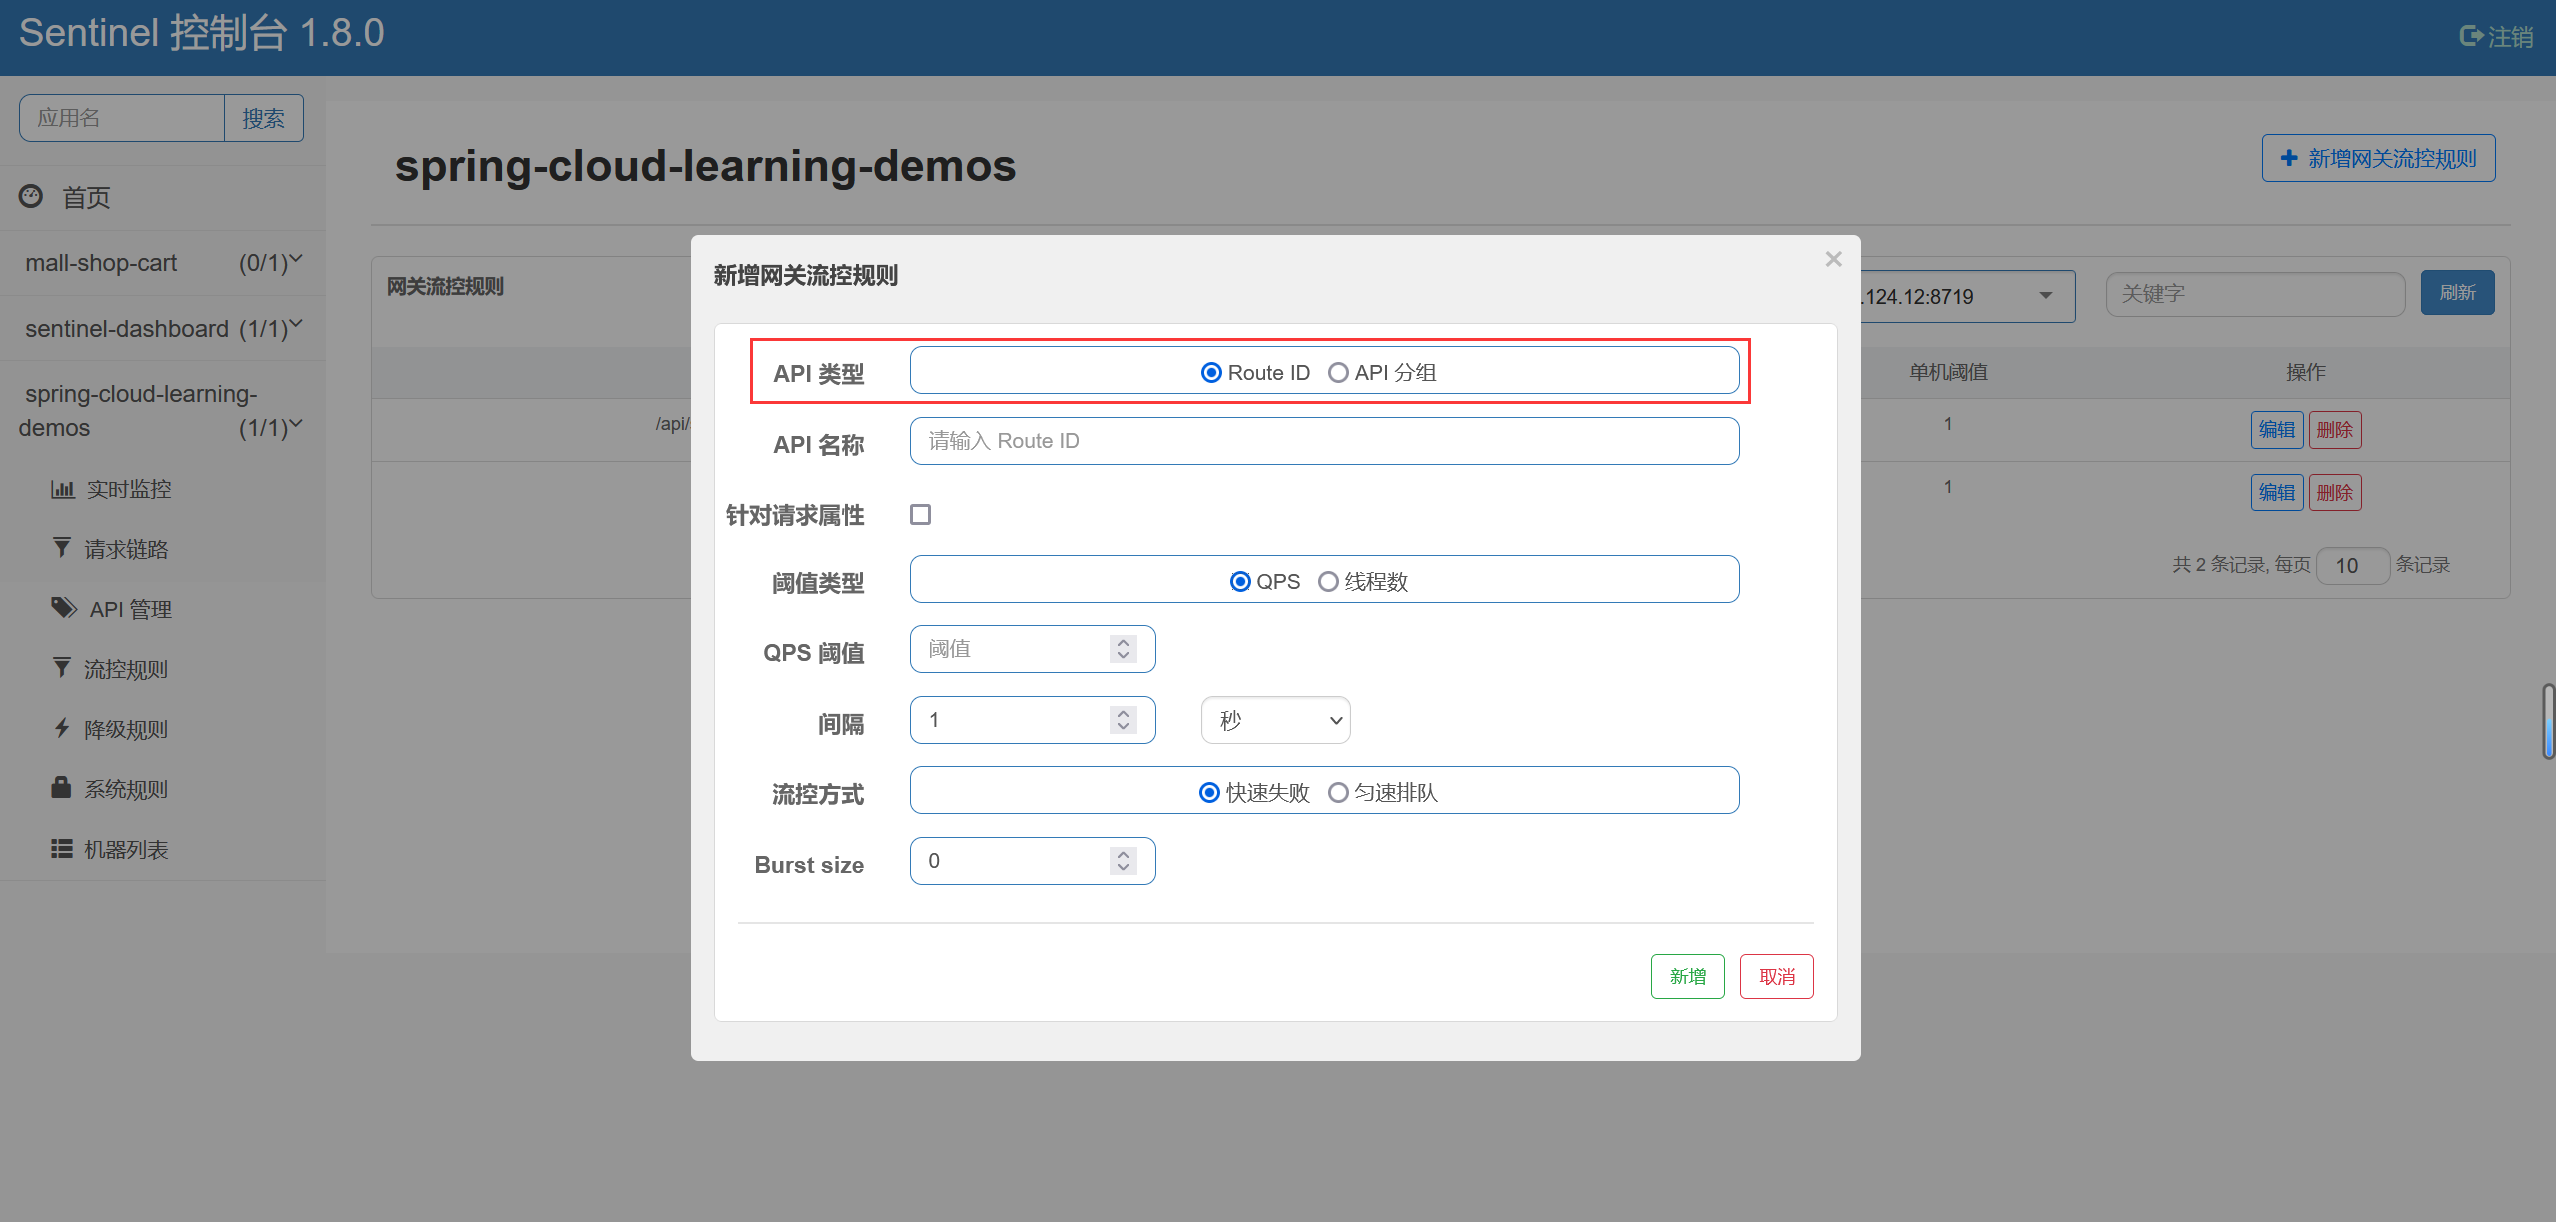
</dependency>由于sentinel starter依赖默认情况下就会为当前服务的所有的HTTP服务提供限流埋点,所以只要项目引入了sentinel starter 依赖,那么当前项目中的所有可以通过HTTP方式访问到的资源都将被sentinel保护起来。但在 Gateway网关和Sentinel的整合中, Sentinel 网关流控默认的粒度是 route 维度以及自定义 API 分组维度,默认不支持 URL 粒度;所以在Sentinel网关的项目中需要禁用 URL 粒度 的配置
配置项为:spring.cloud.sentinel.filter.enabled=false
Sentinel 流控配置持久化
首先添加sentinel持久化依赖,这里选择 nacos作为持久化源
<!-- sentinel数据持久化 -->
<dependency>
    <groupId>com.alibaba.csp</groupId>
    <artifactId>sentinel-datasource-nacos</artifactId>
</dependency>
注意版本要和nacos的client版本一致,不然可能连接不上nacos
源码如下:
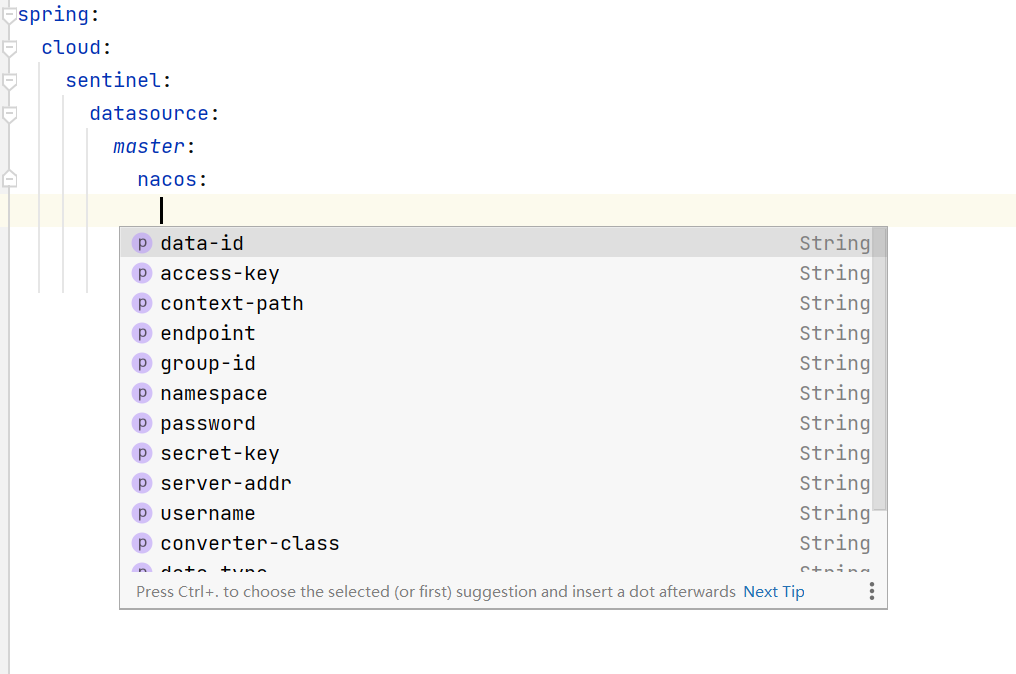
Sentinel 的数据源配置项是一个Map,由于Key键是String类型,所以数据源的名称是可以随便取的,例如我上面的master,但值就决定了你将采用那种数据源,一共有6中持久化的方式可以选择。

配置示范:
spring:
  application:
    name: gateway-sentinel
  cloud:
    gateway:
      discovery:
        locator:
          enabled: true
      routes:
        - id: blog-service
          uri: lb://blog-service
          predicates:
            - Path=/api/service/**
          filters:
            - StripPrefix=1

    sentinel:
      # 网关项目禁用 URL 粒度保护
      filter:
        enabled: false
      # 默认情况下 Sentinel 会在客户端首次调用的时候进行初始化,开始向控制台发送心跳包
      # 配置 sentinel.eager=true 时,取消Sentinel控制台懒加载功能
      eager: true
      transport:
        port: 8719
        dashboard: 192.168.56.10:8858
      datasource:
        # 数据源名称,可以随便取
        master:
          # 数据源类型
          nacos:
            server-addr: 192.168.56.10:8848
            username: nacos
            password: nacos
            namespace: 06d75982-b107-4468-a275-1288c8198fc4
            group-id: gateway
            # 限流配置文件名称
            data-id: sentinel.json
            # nacos中持久化存储限流配置的文件类型
            data-type: json
            # 如果是网关,则必须选择 gw 开头的限流规则,不然无效
            rule-type: gw-flow

# Actuator Web 访问端口
management:
  server:
    port: 8081
  endpoints:
    web:
      exposure:
        include: "*"
  endpoint:
    health:
      show-details: always

server:
  port: 9999
以上配置完成之后在nacos 中添加相关配置:
