2.11 pack grid place 放置位置
pack
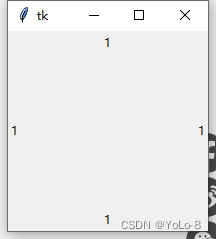
首先我们先看看我们常用的pack(), 他会按照上下左右的方式排列.
tk.Label(window, text='1').pack(side='top')#上
tk.Label(window, text='1').pack(side='bottom')#下
tk.Label(window, text='1').pack(side='left')#左
tk.Label(window, text='1').pack(side='right')#右
grid
接下里我们在看看grid(), grid 是方格, 所以所有的内容会被放在这些规律的方格中
for i in range(4):
    for j in range(3):
        tk.Label(window, text=1).grid(row=i, column=j, padx=10, pady=10)
以上的代码就是创建一个四行三列的表格,其实grid就是用表格的形式定位的。这里的参数 row为行,colum为列,padx就是单元格左右间距,pady就是单元格上下间距。

place
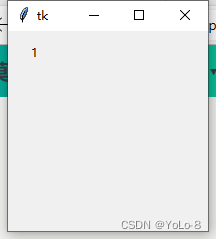
再接下来就是place(), 这个比较容易理解,就是给精确的坐标来定位,如此处给的(20,10),就是将这个部件放在坐标为(x,y)的这个位置 后面的参数anchor=nw就是前面所讲的锚定点是西北角。
tk.Label(window, text=1).place(x=20, y=10, anchor='nw')
代码实现
import tkinter as tk

window = tk.Tk()
window.geometry('200x200')

#canvas = tk.Canvas(window, height=150, width=500)
#canvas.grid(row=1, column=1)
#image_file = tk.PhotoImage(file='welcome.gif')
#image = canvas.create_image(0, 0, anchor='nw', image=image_file)

#tk.Label(window, text='1').pack(side='top')
#tk.Label(window, text='1').pack(side='bottom')
#tk.Label(window, text='1').pack(side='left')
#tk.Label(window, text='1').pack(side='right')

#for i in range(4):
    #for j in range(3):
        #tk.Label(window, text=1).grid(row=i, column=j, padx=10, pady=10)

tk.Label(window, text=1).place(x=20, y=10, anchor='nw')

window.mainloop()