蓝桥杯单片机
(〇)注意事项
- 运行程序时注意调整J13为IO模式 / MM模式
- 运行程序时注意调整J5为BTN独立按键 / KBD矩阵键盘
- Keil创建工程文件选择AT89C52
- Keil编译完后要勾选Creat HEX File
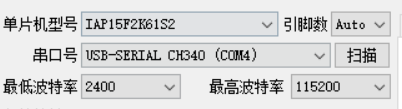
- STC-ISP要选择相应的单片机型号和串口号
- 串口助手中注意波特率调整 与文本、HEX模式的切换
- 注意区别unsigned char 与 unsigned int 类型
- DS18B20中onewire.c中调用的所有延时函数的参数都要扩大10倍
(一)LED闪烁
01 LED全部同时闪烁
#include <reg52.h>

//74HC138译码器定义管脚
sbit HC138_A = P2^5;
sbit HC138_B = P2^6;
sbit HC138_C = P2^7;

void Delay(unsigned int t)  //延时函数
{


	while(t--);
	while(t--);
}


void LEDRunning()  //LED闪烁函数
{


	HC138_C = 1;  //CBA=100即38译码器Y4输出低电平(有效)
	HC138_B = 0;
	HC138_A = 0;

	P0 = 0x00;  //全亮,根据原理图:低电平有效
	Delay(60000);
	Delay(60000);

	P0 = 0xff;  //全灭
	Delay(60000);
	Delay(60000);
}

void main()  //主函数
{


	while(1)
	{


		LEDRunning();
	}
}
02 LED闪烁三次后依次亮灭
#include <reg52.h>

//74HC138译码器定义管脚
sbit HC138_A = P2^5;
sbit HC138_B = P2^6;
sbit HC138_C = P2^7;

//延时函数
void Delay(unsigned int t)
{


	while(t--);
	while(t--);
}


void LEDRunning()
{


	unsigned char i;
	HC138_C = 1;
	HC138_B = 0;
	HC138_A = 0;

	for(i=0;i<3;i++)
	{


		P0 = 0x00;
		Delay(60000);
		Delay(60000);
		P0 = 0xff;
		Delay(60000);
		Delay(60000);
	}

	for(i=1;i<=8;i++) //i从1开始,使第一次也亮
	{


		P0 = 0xff << i;  //全1,左移补0
		Delay(60000);
		Delay(60000);
	}

	for(i=1;i<=8;i++)
	{


		P0 = ~(0xff << i);  //相当于全0,左移补1
		Delay(60000);
		Delay(60000);
	}
}

void main()
{


	while(1)
	{


		LEDRunning();
	}
}
*03 补充关闭外设的代码
void InitSystem()  //关闭外设(蜂鸣器与继电器)
{


	HC138_C = 1;  //Y5输出,连接U9锁存器与达林顿管
	HC138_B = 0;
	HC138_A = 1;

	P0 = 0x00; //达林顿管中为非门,输出1关闭蜂鸣器与继电器
}
04 LED闪烁并控制蜂鸣器与继电器
#include <reg52.h>

//74HC138译码器定义管脚
sbit HC138_A = P2^5;
sbit HC138_B = P2^6;
sbit HC138_C = P2^7;

//延时函数
void Delay(unsigned int t)
{


	while(t--);
	while(t--);
}


void LEDRunning()
{


	unsigned char i;
	HC138_C = 1;  //Y4输出
	HC138_B = 0;
	HC138_A = 0;

	for(i=0;i<3;i++)
	{


		P0 = 0x00;
		Delay(60000);
		Delay(60000);
		P0 = 0xff;
		Delay(60000);
		Delay(60000);
	}
	HC138_C = 1;  //Y5输出
	HC138_B = 0;
	HC138_A = 1;
	P0 = 0x10;  //继电器吸合,其LED亮
	Delay(60000);
	Delay(60000);
	P0 = 0x00;  //继电器关闭,其LED灭


	HC138_C = 1;  //Y4输出,切换到控制8个LED
	HC138_B = 0;
	HC138_A = 0;
	for(i=1;i<=8;i++) //i从1开始,使第一次也亮
	{


		P0 = 0xff << i;  //全1,左移补0
		Delay(60000);
		Delay(60000);
	}

	for(i=1;i<=8;i++)
	{


		P0 = ~(0xff << i);  //相当于全0,左移补1
		Delay(60000);
		Delay(60000);
	}

	HC138_C = 1;  //Y5输出
	HC138_B = 0;
	HC138_A = 1;
	P0 = 0x40;  //蜂鸣器响,其LED亮
	Delay(60000);
	Delay(60000);
	P0 = 0x00;  //蜂鸣器关闭,其LED灭
}

void InitSystem()  //关闭外设(蜂鸣器与继电器)
{


	HC138_C = 1;  //Y5输出,连接U9锁存器与达林顿管
	HC138_B = 0;
	HC138_A = 1;

	P0 = 0x00; //达林顿管中为非门,输出1关闭蜂鸣器与继电器
}

void main()
{


	InitSystem(); //关闭外设
	while(1)
	{


		LEDRunning();
	}
}
04 简化整体程序设计
#include <reg52.h>

void Delay(unsigned int t)
{


	while(t--);
	while(t--);
}

void InitHC138(unsigned char n)  //控制74HC138输出
{


	switch(n)
	{


		case 4:  P2 = P2 & 0x1F | 0x80; break;
		case 5:  P2 = P2 & 0x1F | 0xa0; break;
		case 6:  P2 = P2 & 0x1F | 0xc0; break;
		case 7:  P2 = P2 & 0x1F | 0xe0; break;
	}
}

void LEDRunning()  //控制LED闪烁
{


	unsigned char i;

	InitHC138(4);
	for(i=0;i<3;i++)
	{


		P0 = 0x00;
		Delay(60000);
		Delay(60000);
		P0 = 0xff;
		Delay(60000);
		Delay(60000);
	}

	InitHC138(5);   //控制继电器
	P0 = 0x10;
	Delay(60000);
	Delay(60000);
	P0 = 0x00;


	InitHC138(4);
	for(i=1;i<=8;i++)
	{


		P0 = 0xff << i;
		Delay(60000);
		Delay(60000);
	}

	for(i=1;i<=8;i++)
	{


		P0 = ~(0xff << i);
		Delay(60000);
		Delay(60000);
	}

	InitHC138(5);  //控制蜂鸣器
	P0 = 0x40;
	Delay(60000);
	Delay(60000);
	P0 = 0x00;
}

void InitSystem()  //关闭外设(蜂鸣器与继电器)
{


	InitHC138(5);
	P0 = 0x00;
}

void main()
{


	InitSystem(); //关闭外设
	while(1)
	{


		LEDRunning();
	}
}
(二)数码管显示
01 数码管静态显示
(数码管分别单独显示0 ~ 9,然后同时显示0 ~ F)
#include <reg52.h>

void Delay(unsigned int t)
{


	while(t--);
	while(t--);
}

//建立数组:数码管段码表,即单个数码管上显示的内容
unsigned char SMG_duanma[18]=
	{

    0xc0,0xf9,0xa4,0xb0,0x99,0x92,0x82,0xf8,0x80,0x90,   // 0~9
	0x88,0x80,0xc6,0xc0,0x86,0x8e,   // A~F
	0xbf,0x7f};   // -与.

void InitHC138(unsigned char n)  //选择输出端口连接相应功能的锁存器
{


	switch(n)
	{


		case 4:
		P2 = P2 & 0x1F | 0x80;
		break;
		case 5:
		P2 = P2 & 0x1F | 0xA0;
		break;
		case 6:
		P2 = P2 & 0x1F | 0xC0;
		break;
		case 7:
		P2 = P2 & 0x1F | 0xE0;
		break;
	}
}

void show_SMG(unsigned char dat, unsigned int pos)  //单个数码管显示
{


	InitHC138(7);  //单个数码管显示的内容
	P0 = dat;
	InitHC138(6);  //单个数码管显示的位置
	P0 = 0x01 << pos;
	/*从左边第一个数码管开始,到右边最后一个数码管为止
	由于高位在前,低位在后,代码编写时为左移符号*/
}

void SMG_Static()  //数码管分别单独显示0~9
{


	unsigned char i,j;
	for(i = 0;i < 8; i++)  //控制显示位置
	{


		for(j = 0;j < 10; j++)  //控制显示内容
		{


			show_SMG(SMG_duanma[j],i);
			Delay(60000);
			Delay(60000);
		}
	}

	for(j = 0;j < 16; j++)
	{


		InitHC138(7);  //控制显示内容,段码端,接0有效
		P0 = SMG_duanma[j];
		InitHC138(6);  //控制显示位置,共阳com端,接1有效
		P0 = 0xff;
		Delay(60000);  //容易忘记延时函数!!!
		Delay(60000);
	}
}


void InitSystem()  //初始化,关闭蜂鸣器、继电器、LED
{


	InitHC138(5);
	P0 = 0x00;
	InitHC138(4);
	P0 = 0xff;
}


void main()
{


	InitSystem(); //关闭外设
	while(1)
	{


		SMG_Static();  //数码管显示函数
	}
}
02 数码管动态显示
(前四位为2023,中二位为- -分隔符,后两位为月份递增)
#include <reg52.h>
unsigned char month = 12;  //月份上限
unsigned char SMG_duanma[18]={


	0xc0,0xf9,0xa4,0xb0,0x99,0x92,0x82,0xf8,0x80,0x90, // 0~9
	0x88,0x80,0xc6,0xc0,0x86,0x8e, // A~F
	0xbf,0x7f};  // -与.

void SelectHC573(unsigned char channel)  //74HC138输出端连接的相应信道的HC573
{


	switch(channel)
	{


		case(4):
		P2 = P2 & 0x1f | 0x80;
		break;
		case(5):
		P2 = P2 & 0x1f | 0xa0;
		break;
		case(6):
		P2 = P2 & 0x1f | 0xc0;
		break;
		case(7):
		P2 = P2 & 0x1f | 0xe0;
		break;
	}
}

void SMG_bit(unsigned char dat, unsigned char pos)  //单个数码管的显示内容、显示位置
{


	SelectHC573(7);
	P0 = dat;
	SelectHC573(6);
	P0 = 0x01 << pos;
}

void SMG_Dlelay(unsigned int t)  //单个数码管显示的延时函数
{


	while(t--);
}

void SMG_display()
{


	SMG_bit(SMG_duanma[2],0);
	SMG_Dlelay(500);
	SMG_bit(SMG_duanma[0],1);
	SMG_Dlelay(500);
	SMG_bit(SMG_duanma[2],2);
	SMG_Dlelay(500);
	SMG_bit(SMG_duanma[3],3);
	SMG_Dlelay(500);

	SMG_bit(SMG_duanma[16],4);
	SMG_Dlelay(500);
	SMG_bit(SMG_duanma[16],5);
	SMG_Dlelay(500);

	SMG_bit(SMG_duanma[month/10],6);
	SMG_Dlelay(500);
	SMG_bit(SMG_duanma[month%10],7);
	SMG_Dlelay(500);
}

void Delay(unsigned int t)  //控制月份递增的延时函数
{


	while(t--)
	{


		SMG_display();
	}
}

void InitSystem()  //关闭外设
{


	SelectHC573(5);
	P0 = 0x00;
}

void main()
{


	InitSystem();
	while(1)
	{


		SMG_display();

		month++;
		if(month>12)
		month = 1;
		Delay(100);
	}
}
(三)独立按键
01 独立按键的基本操作
S7 ~ S4 控制 L1 ~ L4亮灭
#include <reg52.h>
sbit S7 = P3^0;   //定义按键引脚
sbit S6 = P3^1;
sbit S5 = P3^2;
sbit S4 = P3^3;

sbit L1 = P0^0;  //定义LED引脚
sbit L2 = P0^1;
sbit L3 = P0^2;
sbit L4 = P0^3;
sbit L5 = P0^4;
sbit L6 = P0^5;
sbit L7 = P0^6;
sbit L8 = P0^7;

void SelectHC573(unsigned char channel)  //选择HC138输出的HC573锁存器
{


	switch(channel)
	{


		case 4:
		P2 = P2 & 0x1f | 0x80;
		break;
		case 5:
		P2 = P2 & 0x1f | 0xa0;
		break;
		case 6:
		P2 = P2 & 0x1f | 0xc0;
		break;
		case 7:
		P2 = P2 & 0x1f | 0xe0;
		break;
	}
}

void KEY_Delay(unsigned char t)  //按键延时
{


	while(t--);
}

void KEY_Alone()
{


	SelectHC573(4);  //选通LED锁存器
	if(S7 == 0)  //判断按键是否按下
	{


		KEY_Delay(100);  //延时去抖动(消抖)
		/*实现按键消抖 一个简单的消抖办法是检测到按键按下,则等待一定时常之后,再次检测是否在按下状态,如果是按下的状态,那么才确定是在按下状态。*/
		if(S7 ==0)  //按键持续按下
		{


			L1 = 0;  //L1亮
			while(S7 ==0);  //如果按键为按下状态,则L1保持亮状态,不执行下面语句
			L1 = 1;  //如果按键松开,即跳出while循环,则L1灭
		}
	}
	if(S6 == 0)
	{


		KEY_Delay(100);
		if(S6 ==0)
		{


			L2 = 0;
			while(S6 ==0);
			L2 = 1;
		}
	}
	if(S5 == 0)
	{


		KEY_Delay(100);
		if(S5 ==0)
		{


			L3 = 0;
			while(S5 ==0);
			L3 = 1;
		}
	}
	if(S4 == 0)
	{


		KEY_Delay(100);
		if(S4 ==0)
		{


			L4 = 0;
			while(S4 ==0);
			L4 = 1;
		}
	}

}

void InitSystem() //关闭外设,LED上电后为全灭状态
{


	SelectHC573(5);
	P0 = 0x00;
	SelectHC573(4);
	P0 = 0xFF;
}

void main()
{


	InitSystem();
	while(1)
	{


		KEY_Alone();
	}
}
02 独立按键的扩展应用
S7、S6为两个状态,相互独立,
S7按下时,S6不能操作;S6按下时,S7不能操作
S7、S6都能够控制S5、S4
当S7、S6都未按下时,S5、S4都不能操作
S7控制S5使L3亮灭;S7控制S4使L4亮灭
S6控制S5使L5亮灭;S6控制S4使L6亮灭
#include <reg52.h>
sbit S7 = P3^0;   //定义按键引脚
sbit S6 = P3^1;
sbit S5 = P3^2;
sbit S4 = P3^3;

sbit L1 = P0^0;  //定义LED引脚
sbit L2 = P0^1;
sbit L3 = P0^2;
sbit L4 = P0^3;
sbit L5 = P0^4;
sbit L6 = P0^5;
sbit L7 = P0^6;
sbit L8 = P0^7;

void SelectHC573(unsigned char channel)  //选择HC138输出的HC573锁存器
{


	switch(channel)
	{


		case 4:
		P2 = P2 & 0x1f | 0x80;
		break;
		case 5:
		P2 = P2 & 0x1f | 0xa0;
		break;
		case 6:
		P2 = P2 & 0x1f | 0xc0;
		break;
		case 7:
		P2 = P2 & 0x1f | 0xe0;
		break;
	}
}

void KEY_Delay(unsigned char t)  //按键延时
{


	while(t--);
}

unsigned char stat = 0;  //定义一个状态变量

void KEY_Alone()
{


	SelectHC573(4);  //选通LED锁存器

	if(S7 == 0)  //判断按键是否按下
	{


		KEY_Delay(100);  //延时去抖动

		if(S7 ==0)  //按键持续按下
		{


			if(stat == 0)  //按键按下后,判断当前状态
			{


				L1 = 0;
				stat = 1;  //占用状态,设置为状态1
			}
			else if(stat == 1)  //按键按下后,判断当前状态
			{


				L1 = 1;
				stat = 0;  //释放状态
			}
			while(S7 ==0);  //循环当前状态,避免跳变
		}
	}

	if(S6 == 0)
	{


		KEY_Delay(100);
		if(S6 ==0)
		{


			if(stat == 0)
			{


				L2 = 0;
				stat = 2;  //占用状态,设置为状态2
			}
			else if(stat == 2)
			{


				L2 = 1;
				stat = 0;  //释放状态
			}
			while(S6 ==0);  //循环当前状态,避免跳变
		}
	}

	if(S5 == 0)
	{


		KEY_Delay(100);
		if(S5 ==0)
		{


			if(stat == 1)  //状态1,受S7控制
			{


				L3 = 0;
				while(S5 == 0);
				L3 =1;
			}
			else if(stat ==2)  //状态2,受S6控制
			{


				L5 = 0;
				while(S5 == 0);
				L5 =1;
			}
		}
	}

	if(S4 == 0)
	{


		KEY_Delay(100);
		if(S4 ==0)
		{


			if(stat == 1)
			{


				L4 = 0;
				while(S4 == 0);
				L4 =1;
			}
			else if(stat ==2)
			{


				L6 = 0;
				while(S4 == 0);
				L6 =1;
			}
		}
	}

}

void InitSystem() //关闭外设,LED上电后为全灭状态
{


	SelectHC573(5);
	P0 = 0x00;
	SelectHC573(4);
	P0 = 0xFF;
}

void main()
{


	InitSystem();
	while(1)
	{


		KEY_Alone();
	}
}
(四)矩阵键盘
01 矩阵键盘的基本应用
矩阵键盘扫描,按键控制数码管第一位显示
#include <reg52.h>
 /*打开头文件后发现没有对C3、C4的引脚P4的定义
需要自己添加,头文件中P3为0xb0,所以可以定一P4为0xc0*/
sfr P4 = 0xc0;

sbit R1 = P3^0;
sbit R2 = P3^1;
sbit R3 = P3^2;
sbit R4 = P3^3;

sbit C1 = P4^4;
sbit C2 = P4^2;
sbit C3 = P3^5;
sbit C4 = P3^4;

unsigned char SMG_duanma[18]={


	0xc0,0xf9,0xa4,0xb0,0x99,0x92,0x82,0xf8,0x80,0x90,
	0x88,0x80,0xc6,0xc0,0x86,0x8e,
	0xbf,0x7f};

void SelectHC573(unsigned char channel)
{


	switch(channel)
	{


		case 4:
		P2 = P2 & 0x1f | 0x80;
		break;
		case 5:
		P2 = P2 & 0x1f | 0xa0;
		break;
		case 6:
		P2 = P2 & 0x1f | 0xc0;
		break;
		case 7:
		P2 = P2 & 0x1f | 0xe0;
		break;
	}
}

void Delay(unsigned char t)
{


	while(t--);
}

void SMG_Display(unsigned char dat)
{


	SelectHC573(6);  //只在第一位显示
	P0 = 0x01;
	SelectHC573(7);
	P0 = dat;
}


unsigned char Key_Num;
void ScanKey_DisplayNum()
{


	//扫描第一行
	R1 = 0;
	R2 = R3 = R4 =1;
	C1 = C2 = C3 = C4 =1;
	if(C1 == 0)
	{


		Delay(100);  //按键延时消抖
		if(C1 == 0)
		{


			while(C1 == 0);
			Key_Num = 0;
			SMG_Display(SMG_duanma[Key_Num]);
		}
	}
	else if(C2 == 0)
	{


		Delay(100);  //按键延时消抖
		if(C2 == 0)
		{


			while(C2 == 0);
			Key_Num = 1;
			SMG_Display(SMG_duanma[Key_Num]);
		}
	}
	else if(C3 == 0)
	{


		Delay(100);  //按键延时消抖
		if(C3 == 0)
		{


			while(C3 == 0);
			Key_Num = 2;
			SMG_Display(SMG_duanma[Key_Num]);
		}
	}
	else if(C4 == 0)
	{


		Delay(100);  //按键延时消抖
		if(C4 == 0)
		{


			while(C4 == 0);
			Key_Num = 3;
			SMG_Display(SMG_duanma[Key_Num]);
		}
	}

	//扫描第二行
	R2 = 0;
	R1 = R3 = R4 =1;
	C1 = C2 = C3 = C4 =1;
	if(C1 == 0)
	{


		Delay(100);  //按键延时消抖
		if(C1 == 0)
		{


			while(C1 == 0);
			Key_Num = 4;
			SMG_Display(SMG_duanma[Key_Num]);
		}
	}
	else if(C2 == 0)
	{


		Delay(100);  //按键延时消抖
		if(C2 == 0)
		{


			while(C2 == 0);
			Key_Num = 5;
			SMG_Display(SMG_duanma[Key_Num]);
		}
	}
	else if(C3 == 0)
	{


		Delay(100);  //按键延时消抖
		if(C3 == 0)
		{


			while(C3 == 0);
			Key_Num = 6;
			SMG_Display(SMG_duanma[Key_Num]);
		}
	}
	else if(C4 == 0)
	{


		Delay(100);  //按键延时消抖
		if(C4 == 0)
		{


			while(C4 == 0);
			Key_Num = 7;
			SMG_Display(SMG_duanma[Key_Num]);
		}
	}

	//扫描第三行
	R3 = 0;
	R1 = R2 = R4 =1;
	C1 = C2 = C3 = C4 =1;
	if(C1 == 0)
	{


		Delay(100);  //按键延时消抖
		if(C1 == 0)
		{


			while(C1 == 0);
			Key_Num = 8;
			SMG_Display(SMG_duanma[Key_Num]);
		}
	}
	else if(C2 == 0)
	{


		Delay(100);  //按键延时消抖
		if(C2 == 0)
		{


			while(C2 == 0);
			Key_Num = 9;
			SMG_Display(SMG_duanma[Key_Num]);
		}
	}
	else if(C3 == 0)
	{


		Delay(100);  //按键延时消抖
		if(C3 == 0)
		{


			while(C3 == 0);
			Key_Num = 10;
			SMG_Display(SMG_duanma[Key_Num]);
		}
	}
	else if(C4 == 0)
	{


		Delay(100);  //按键延时消抖
		if(C4 == 0)
		{


			while(C4 == 0);
			Key_Num = 11;
			SMG_Display(SMG_duanma[Key_Num]);
		}
	}

	//扫描第四行
	R4 = 0;
	R1 = R2 = R3 =1;
	C1 = C2 = C3 = C4 =1;
	if(C1 == 0)
	{


		Delay(100);  //按键延时消抖
		if(C1 == 0)
		{


			while(C1 == 0);
			Key_Num = 12;
			SMG_Display(SMG_duanma[Key_Num]);
		}
	}
	else if(C2 == 0)
	{


		Delay(100);  //按键延时消抖
		if(C2 == 0)
		{


			while(C2 == 0);
			Key_Num = 13;
			SMG_Display(SMG_duanma[Key_Num]);
		}
	}
	else if(C3 == 0)
	{


		Delay(100);  //按键延时消抖
		if(C3 == 0)
		{


			while(C3 == 0);
			Key_Num = 14;
			SMG_Display(SMG_duanma[Key_Num]);
		}
	}
	else if(C4 == 0)
	{


		Delay(100);  //按键延时消抖
		if(C4 == 0)
		{


			while(C4 == 0);
			Key_Num = 15;
			SMG_Display(SMG_duanma[Key_Num]);
		}
	}
}

void InitSystem()
{


	SelectHC573(5);
	P0 = 0x00;
	SelectHC573(4);
	P0 = 0xff;
}

void main()
{


	InitSystem();  //关闭外设
	while(1)
	{


		ScanKey_DisplayNum();  //矩阵键盘扫描,数码管显示相应数字
	}
}
(五)中断系统与外部中断
01 外部中断基本操作
主程序:L1闪烁
中断服务函数:L8亮一段时间
方法1
#include <reg52.h>

sbit L1 = P0^0;
sbit L8 = P0^7;

void SelectHC573(unsigned char channel)
{


	switch(channel)
	{


		case 4:
		P2 = P2 & 0x1f | 0x80;
		break;
		case 5:
		P2 = P2 & 0x1f | 0xa0;
		break;
		case 6:
		P2 = P2 & 0x1f | 0xc0;
		break;
		case 7:
		P2 = P2 & 0x1f | 0xe0;
		break;
	}
}

void Delay(unsigned int t)
{


	while(t--);
	while(t--);
}
void working()
{


	SelectHC573(4);
	L1 = 0;
	Delay(60000);
	L1 = 1;
	Delay(60000);
}

//=============================
void Init_INT0()  //中断函数初始化
{


	IT0 = 1;
	EX0 = 1;
	EA = 1;
}


void Service_INT0() interrupt 0  //中断服务函数
{


	L8 = 0;
	Delay(60000);
	Delay(60000);
	Delay(60000);
	Delay(60000);
	Delay(60000);
	Delay(60000);
	L8 = 1;
}

//================================

void InitSystem()
{


	SelectHC573(5);
	P0 = 0x00;
	SelectHC573(4);
	P0 = 0xff;
}

void main()
{


	InitSystem();
	Init_INT0();
	while(1)
	{


		working();
	}
}
方法2
简化中断服务函数(中断函数要快进快出)
#include <reg52.h>

sbit L1 = P0^0;
sbit L8 = P0^7;

void SelectHC573(unsigned char channel)
{


	switch(channel)
	{


		case 4:
		P2 = P2 & 0x1f | 0x80;
		break;
		case 5:
		P2 = P2 & 0x1f | 0xa0;
		break;
		case 6:
		P2 = P2 & 0x1f | 0xc0;
		break;
		case 7:
		P2 = P2 & 0x1f | 0xe0;
		break;
	}
}

void Delay(unsigned int t)
{


	while(t--);
	while(t--);
}
void working()
{


	SelectHC573(4);
	L1 = 0;
	Delay(60000);
	L1 = 1;
	Delay(60000);
}

//=============================
void Init_INT0()
{


	IT0 = 1;
	EX0 = 1;
	EA = 1;
}

unsigned char stat = 0;
void Service_INT0() interrupt 0
{


	stat = 1;
}

void LEDINT()
{


	if(stat == 1)
	{


		L8 = 0;
		Delay(60000);
		Delay(60000);
		Delay(60000);
		Delay(60000);
		Delay(60000);
		Delay(60000);
		L8 = 1;
		stat = 0;
	}
}

//================================

void InitSystem()
{


	SelectHC573(5);
	P0 = 0x00;
	SelectHC573(4);
	P0 = 0xff;
}

void main()
{


	InitSystem();
	Init_INT0();
	while(1)
	{


		working();
		LEDINT();
	}
}
(六)定时器
01 定时器的基本原理与应用
定时器T0的模式1,实现以下功能
每隔1s,L1闪烁1次,即亮0.5s,灭0.5s
每隔10s,L8闪烁1次,即亮5s,灭5s
#include <reg52.h>
sbit L1 = P0^0;
sbit L8 = P0^7;

void Select_HC573(unsigned char channel)
{


	switch(channel)
	{


		case 4:
		P2 = P2 & 0x1f | 0x80;
		break;
		case 5:
		P2 = P2 & 0x1f | 0xa0;
		break;
		case 6:
		P2 = P2 & 0x1f | 0xc0;
		break;
		case 7:
		P2 = P2 & 0x1f | 0xe0;
		break;
	}
}

//================================
void Init_Time0()
{


	TMOD = 0x01;  //模式1,16位无自动重装
	/* TMOD只能高四位控制T1,此处不需要,所以全部置0
	低四位控制T0,且使用模式1*/

	TH0 = (65535-50000) / 256;  //高8位
	TL0 = (65535-50000) % 256;  //低8位

	ET0 = 1;  //T0的中断允许
	EA = 1;  //总中断

	TR0 =1;  //定时器0运行控制
}

unsigned char count = 0;
unsigned char count1 = 0;
void Service_Time0() interrupt 1
{


	Select_HC573(4);
	TH0 = (65535-50000) / 256;  //模式1无自动重装,中断服务函数需重新赋初始值
  	TL0 = (65535-50000) % 256;
	count++;
	count1++;

	if(count == 10)
	{


		L1 = ~L1;
		count = 0;
	}

	if(count1 == 100)
	{


		L8 = ~L8;
		count1 = 0;
	}

}
//=================================

void Init_System()
{


	Select_HC573(5);
	P0 = 0x00;
	Select_HC573(4);
	P0 = 0xff;
}

void main()
{


	Init_Time0();
	Init_System();
	while(1)
	{


	}
}
02 定时器的进阶综合案例
分、秒、毫秒显示
00-00-00
#include <reg52.h>

sbit S4 = P3^3;
sbit S5 = P3^2;

unsigned char SMG_duanma[12]={


	0xc0,0xf9,0xa4,0xb0,0x99,0x92,0x82,0xf8,0x80,0x90,
	0xbf,0x7f};

unsigned char min;
unsigned char sec;
unsigned char msec;

void Select_HC573(unsigned char channel)
{


	switch(channel)
	{


		case 4:
		P2 = P2 & 0x1f | 0x80;
		break;
		case 5:
		P2 = P2 & 0x1f | 0xa0;
		break;
		case 6:
		P2 = P2 & 0x1f | 0xc0;
		break;
		case 7:
		P2 = P2 & 0x1f | 0xe0;
		break;
	}
}

void SMG_bit(unsigned char pos,unsigned char dat)
{


	Select_HC573(6);
	P0 = 0x01 << pos;
	Select_HC573(7);
	P0 = dat;
}

void SMG_Delay(unsigned int t)
{


	while(t--);
}

void SMG_Display()
{


	SMG_bit(7,SMG_duanma[msec%10]);
	SMG_Delay(500);
	SMG_bit(6,SMG_duanma[msec/10]);
	SMG_Delay(500);

	SMG_bit(5,SMG_duanma[10]);
	SMG_Delay(500);

	SMG_bit(4,SMG_duanma[sec%10]);
	SMG_Delay(500);
	SMG_bit(3,SMG_duanma[sec/10]);
	SMG_Delay(500);

	SMG_bit(2,SMG_duanma[10]);
	SMG_Delay(500);

	SMG_bit(1,SMG_duanma[min%10]);
	SMG_Delay(500);
	SMG_bit(0,SMG_duanma[min/10]);
	SMG_Delay(500);
}

//==========定时器相关函数================
void Init_Time0()
{


	TMOD = 0x01;  //模式1,16位无自动重装

	TH0 = (65535-50000) / 256;  //高8位
	TL0 = (65535-50000) % 256;  //低8位

	ET0 = 1;  //T0的中断允许
	EA = 1;  //总中断

	TR0 =1;  //定时器0运行控制
}

/*可以用烧录软件生成蓝桥杯规定的12MHz下的定时器配置,
再自己添加定时器中断使能和总中断。

void Init_Time0()		//50毫秒@12.000MHz
{
	AUXR &= 0x7F;			//定时器时钟12T模式
	TMOD &= 0xF0;			//设置定时器模式
	TL0 = 0xB0;				//设置定时初始值
	TH0 = 0x3C;				//设置定时初始值
	TF0 = 0;				//清除TF0标志
	TR0 = 1;				//定时器0开始计时

	ET0 = 1;
	EA = 1;
}

*/

void Service_Time0() interrupt 1
{


	TH0 = (65535-50000) / 256;
	TL0 = (65535-50000) % 256;
	msec++;

	if(msec == 20)
	{


		sec++;
		msec = 0;
		if(sec == 60)
		{


			min++;
			sec = 0;
		}
		if(min == 99)
		min = 0;
	}
}
//=================================

void Key_Delay(unsigned int t)
{


	while(t--);
}

void Key_fun()
{


	if(S4 == 0)
	{


		Key_Delay(100);  //延时消抖
		if(S4 == 0)
		{


			TR0 = ~TR0;  //暂停或启动
			while(S4 == 0)  //松手检测,数码管仍动态显示
			{


				SMG_Display();
			}
		}
	}

	if(S5 == 0)
	{


		Key_Delay(100);  //延时消抖
		if(S5 == 0)
		{


			min = sec = msec = 0;  //复位
			while(S5 == 0)
			{


				SMG_Display();
			}
		}
	}
}

void Init_System()
{


	Select_HC573(5);
	P0 = 0x00;
	Select_HC573(4);
	P0 = 0xff;
}

void main()
{


	Init_Time0();
	Init_System();
	while(1)
	{


		SMG_Display();
		Key_fun();
	}
}
(七)脉冲宽度调制(PWM)
01 脉宽调制信号的发生与控制
S7控制L1调节三种亮度,10%、40%、90%
脉宽信号频率为100Hz(即信号周期为10ms=10 000us,将一个周期分为100份,每份100us)
#include <reg52.h>

sbit L1 = P0^0;
sbit S7 = P3^0;

void Select_HC573(unsigned char channel)
{


	switch(channel)
	{


		case 4:
		P2 = P2 & 0x1f | 0x80;
		break;

		case 5:
		P2 = P2 & 0x1f | 0xa0;
		break;

		case 6:
		P2 = P2 & 0x1f | 0xc0;
		break;

		case 7:
		P2 = P2 & 0x1f | 0xe0;
		break;
	}
}

//============定时器相关函数==============
void Init_Time0()
{


	TMOD = 0x00;  //模式0,16位自动重装,中断服务函数中不用再重写了

	TH0 = (65535-100) / 256;
	TL0 = (65535-100) % 256;

	ET0 = 1;
	EA = 1;
	//TR0定时器0控制位放在按键函数中
}

unsigned char count = 0;
unsigned char pwm_duty = 0;
void Service_Time0() interrupt 1
{


	count++;
	if(count == pwm_duty)
	{


		L1 = 1;
	}
	else if(count == 100)
	{


		L1 = 0;
		count = 0;
	}
}
//========================================
void Key_Delay(unsigned char t)
{


	while(t--);
}

unsigned char stat = 0;  //状态变量
void Key_Fun()
{


	Select_HC573(4);
	if(S7 == 0)
	{


		Key_Delay(100);  //延时消抖
		if(S7 == 0)
		{


			switch(stat)
			{


				case 0:
					L1 = 0;
					TR0 = 1;  //开启定时器0运行控制位
					pwm_duty = 10;
					stat = 10;
				break;

				case 10:
					pwm_duty = 40;
					stat = 40;
				break;

				case 40:
					pwm_duty = 90;
					stat = 90;
				break;

				case 90:
					L1 = 1;
					TR0 = 0;  //关闭定时器0运行控制位
					stat = 0;
				break;
			}
		while(S7 == 0); //检测松手
		}
	}
}

void Init_System()
{


	Select_HC573(5);
	P0 = 0x00;
	Select_HC573(4);
	P0 = 0xff;
}

void main()
{


	Init_System();
	Init_Time0();
	while(1)
	{


		Key_Fun();
	}
}
(八)串口通信
01 串口通信基本原理应用
- Send_Byte()函数需要重新上电才能执行
- 串口中断,串口接收完完整的一帧数据自身产生的中断,配置使能该中断后,串口会判断总线上一个字节的时间间隔内有没有再次接收到数据(即if(RI == 1)),如果没有则当前一帧数据接收完成,产生中断。
#include <reg52.h>

sfr AUXR = 0x8e;  //定义辅助寄存器
void Send_Byte(unsigned char dat);
//声明数据发送函数(因数据接收函数在发送函数之前要调用发送函数)

void Select_HC573(unsigned char channel)
{


	switch(channel)
	{


		case 4:
		P2 = P2 & 0x1f | 0x80;
		break;
		case 5:
		P2 = P2 & 0x1f | 0xa0;
		break;
		case 6:
		P2 = P2 & 0x1f | 0xc0;
		break;
		case 7:
		P2 = P2 & 0x1f | 0xe0;
		break;
	}
}

//============中断接收函数===============
void Init_Uart()
{


	TMOD = 0x20;
	TH1 = 0xfd;
	TL1 = 0xfd;
	TR1 = 1;

	SCON = 0x50;
	AUXR = 0x00;

	ES = 1;
	EA = 1;
}

unsigned char urdat;
void Service_Uart() interrupt 4 //数据接收(中断方式)
{


	if(RI == 1)
	{


		RI = 0;  //软件复位
		urdat = SBUF;
		Send_Byte(urdat + 1);
	}
}
//===================================

void Send_Byte(unsigned char dat)  //数据发送(轮询方式)
{


	SBUF = dat;  //SBUF 串口数据缓冲寄存器
	while(TI == 0);  //如果数据已发送则TI为1,跳出此循环
	TI = 0;
}
void Init_System()
{


	Select_HC573(5);
	P0 = 0x00;
	Select_HC573(4);
	P0 = 0xff;
}

void main()
{


	Init_System();
	Init_Uart();
	Send_Byte(0x5a);
	Send_Byte(0xa5);
	while(1);
}
02 串口通信的进阶应用

开关反转
在原理图中LED亮为0,灭为1
但若是题目要求亮为1,灭为0
以ax为例
改变低4位,保留高4位
0 | any = any
1 | any = 1
0 & any = 0
1 & any = any
- 一般由于程序初始化设置,LED上电后为灭状态,即P0 = 0xff(1111 1111)
- P0 | 0x0f ——>
高4位不变,低4位为1(1111 1111)- ~command | 0xf0 ——>command按位取反,再使高4位为1,
低4位不变(1111 xxxx)- P0 = (P0 | 0x0f) & (~command | 0xf0) ——>两式相与(1111 xxxx)
#include <reg52.h>
sfr AUXR = 0x8e;  //定义辅助寄存器

void Select_HC573(unsigned char channel)  //锁存器选择函数
{


	switch(channel)
	{


		case 4: P2 = P2 & 0x1f | 0x80; break;  //控制LED
		case 5: P2 = P2 & 0x1f | 0xa0; break;  //控制蜂鸣器、继电器
		case 6: P2 = P2 & 0x1f | 0xc0; break;  //数码管com共阳公共端
		case 7: P2 = P2 & 0x1f | 0xe0; break;  //数码管段码端
	}
}

//==============串口数据接收中断===================
void Init_Uart()  //中断初始化函数
{


	TMOD = 0x20;  //定时器1
	TH1 = 0xfd;  //设置波特率为9600
	TL1 = 0xfd;  //11.0592M或12M的12分频

	SCON = 0X50;  //串口参数为模式1且允许接收
	AUXR = 0x00;  //bit7=1:定时器1不分频,0则12分频

	TR1 = 1;  //启动定时器1
	ES = 1;  //使能串口中断
	EA = 1;  //打开总中断
}

unsigned char command = 0x00;  //注意赋初值为16进制
void Service_Uart() interrupt 4  //中断服务函数
{


	if(RI == 1)  //收到一个完整字节
	{


		command = SBUF;  //将SBUF缓冲器中数据赋值给command
		RI = 0;  //人工清零
	}
}
//=================================================

void SendByte(unsigned char dat)  //发送数据函数
{


	SBUF = dat;  //将数据放入SBUF缓冲器
	while(TI == 0);  //如果成功发送数据,则TI为1跳出此循环
	TI = 0;  //人工清零
}

void  SendString(unsigned char *str)  //发送字符串函数
{


	while(*str != '\0')  //判断指针是否指向字符串结束符
	{


		SendByte(*str++);  //先执行SendByte(*str),赋值完成后,指针++移向下一位
	}
}

void Working()
{


	Select_HC573(4);  //控制LED
	if(command != 0x00)
	{


		switch(command & 0xf0)  //高4位不变,低4位清零
		{


			case 0xa0:
				P0 = (P0 | 0x0f) & (~command | 0xf0);
				command = 0x00;  //避免重复执行working函数
			break;

			case 0xb0:
				P0 = (P0 | 0xf0) & ((~command << 4)| 0x0f);
				command = 0x00;
			break;

			case 0xc0:
				SendString("The System is Working Normally...");
				command = 0x00;
			break;
		}
	}
}

void Init_System()  //程序初始化
{


	Select_HC573(5);
	P0 = 0x00;
	Select_HC573(4);
	P0 = 0xff;
}

void main()
{


	Init_Uart();
	Init_System();
	SendString("Welcome to the System...\r\n");
	while(1)
	{


		Working();
	}
}
(九)IO / 存储扩展
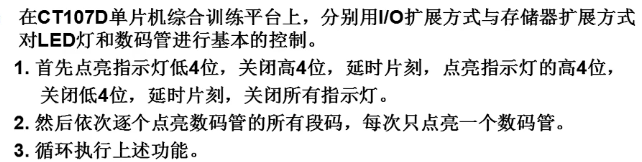
IO扩展(J13接2~3脚 IO模式)
#include <reg52.h>

void Select_HC573(unsigned char channel)
{


	switch(channel)
	{


		case 4: P2 = P2 & 0x1f | 0x80; break;
		case 5: P2 = P2 & 0x1f | 0xa0; break;
		case 6: P2 = P2 & 0x1f | 0xc0; break;
		case 7: P2 = P2 & 0x1f | 0xe0; break;
	}
}

void Delay(unsigned int t)
{


	while(t--);
	while(t--);
}

void LED_Display()
{


	Select_HC573(4);
	P0 = 0x0f;
	Delay(60000);
	Delay(60000);
	P0 = 0xf0;
	Delay(60000);
	Delay(60000);
	P0 = 0xff;
	Delay(60000);
	Delay(60000);
}


void SMG_Display()
{


	unsigned char i;
	for(i = 0;i < 8; i++)
	{


		Select_HC573(6);
		P0 = 0x01 << i;
		Select_HC573(7);
		P0 = 0x00;
		Delay(60000);
		Delay(60000);
	}
	P0 = 0xff;
	Delay(60000);
	Delay(60000);
}

void Init_System()
{


	Select_HC573(5);
	P0 = 0x00;
	Select_HC573(4);
	P0 = 0xff;
}

void main()
{


	Init_System();
	while(1)
	{


		LED_Display();
		SMG_Display();
	}
}
存储扩展(J13接1~2脚 MM模式)
#include <absacc.h>

void Delay(unsigned int t)
{


	while(t--);
	while(t--);
}

void LED_Display()
{


	XBYTE[0x8000] = 0x0f;
	Delay(60000);
	Delay(60000);
	XBYTE[0x8000] = 0xf0;
	Delay(60000);
	Delay(60000);
	XBYTE[0x8000] = 0xff;
	Delay(60000);
	Delay(60000);
}


void SMG_Display()
{


	unsigned char i;
	for(i = 0;i < 8; i++)
	{


		XBYTE[0xc000] = 0x01 << i;
		XBYTE[0xe000] = 0x00;
		Delay(60000);
		Delay(60000);
	}
	XBYTE[0xe000] = 0xff;
	Delay(60000);
	Delay(60000);
}

void Init_System()
{


	XBYTE[0xa000] = 0x00;
	XBYTE[0x8000] = 0xff;
}

void main()
{


	Init_System();
	while(1)
	{


		LED_Display();
		SMG_Display();
	}
}