第五篇利用vue实现了登录页面,用go语言开发了服务端并最后在nginx上进行了部署。本篇将axios封装,登录逻辑优化,404页面实现。
目录
4.1webpack.config.js和vue.config.js的区别
4.2 npm run dev 与 npm run build
1.前端
1.1代码结构
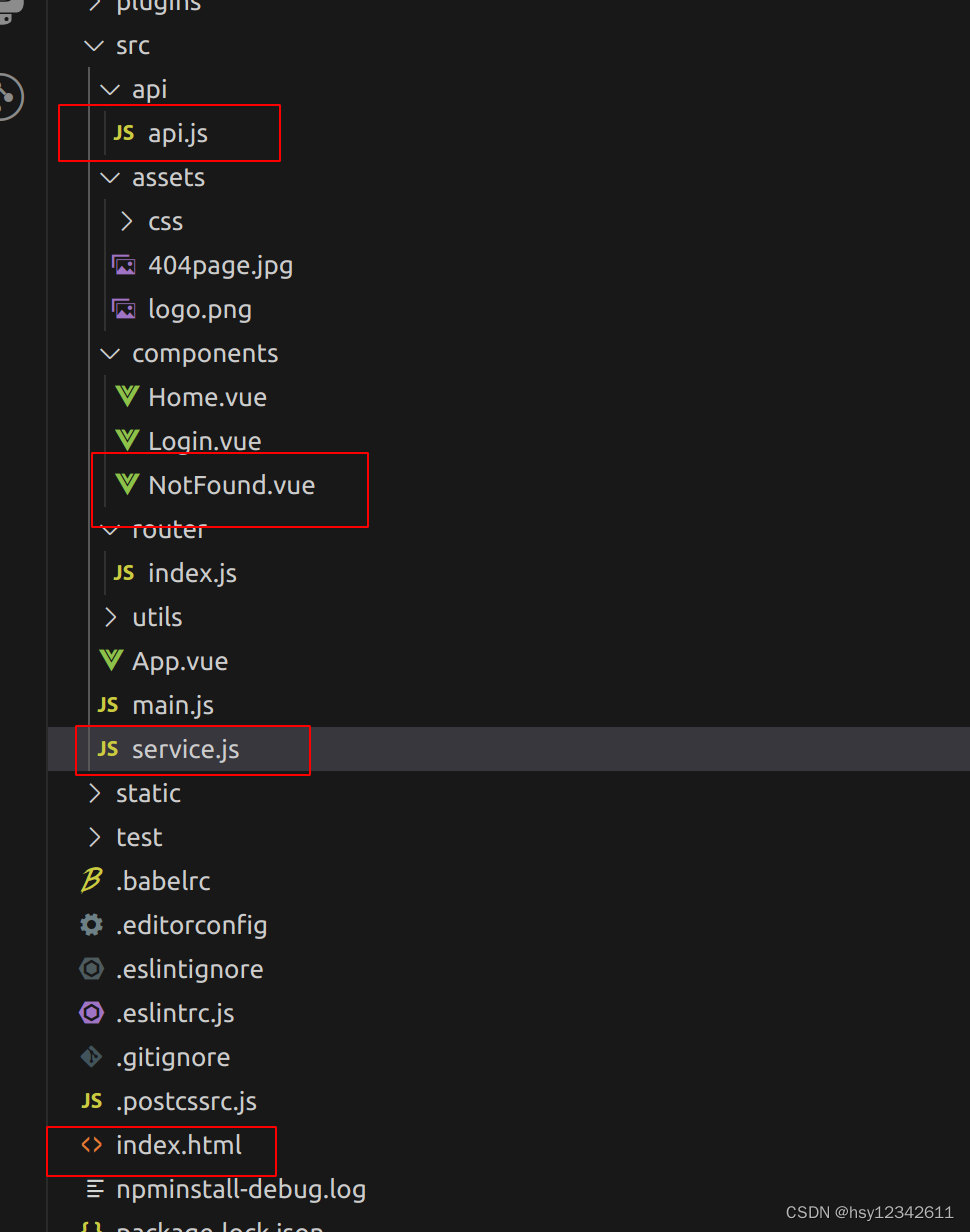
1.2源码
src/service.js
import axios from "axios";
import { getToken } from "@/utils/dealtoken.js"
import { Promise } from 'core-js'
import { Message } from "element-ui";

// axios二次封装

const service = axios.create({
    // baseURL还可以使用代理
    baseURL: 'http://127.0.0.1:8181',
    timeout: 3000
})

// 请求拦截器
service.interceptors.request.use((config) => {
    //对请求做一些额外处理
    config.headers['token'] = getToken('token')
    config.headers['username'] = getToken('username')
    return config
}, (error) => {
    return Promise.reject(error)
})


// 响应拦截器
service.interceptors.response.use((response) => {
    //对响应做一些处理
    let {status, msg} = response.data
    if (status != 200) {
        Message({message: msg || 'error', type: 'warning'})
    }
    console.log(response, status, msg)
    return response
}, (error) => {
    return Promise.reject(error)
})


export default service
src/main.js
import Vue from 'vue'
import App from './App'
import 'font-awesome/css/font-awesome.min.css'
//import axios from 'axios'
import router from './router'
import service from './service'

// 挂载到原型就可以全局使用
//Vue.prototype.axios = axios
Vue.prototype.service = service
//Vue.config.productionTip = false

import ElementUI from 'element-ui'
import 'element-ui/lib/theme-chalk/index.css'
Vue.use(ElementUI)


new Vue({
  router,
  render: h => h(App)
}).$mount('#myapp')
router/index.js
import Vue from 'vue'
import Home from '@/components/Home'
import VueRouter from 'vue-router'

Vue.use(VueRouter)

const routes = [
  { path: '/', redirect: '/login', component: () => import('@/components/Login') },
  { path: '/login', name: 'Login', component: () => import('@/components/Login') },
  { path: '/home', component: Home },
  { path: '*', name: 'NotFound',  component: () => import('@/components/NotFound') }
]


export default new VueRouter({
  mode: 'history',
  routes: routes
})
src/api/api.js
//业务服务调用接口封装

import service from '../service.js'

export function login(data) {
    return service({
        method: 'post',
        url: '/login',
        data
    })
}
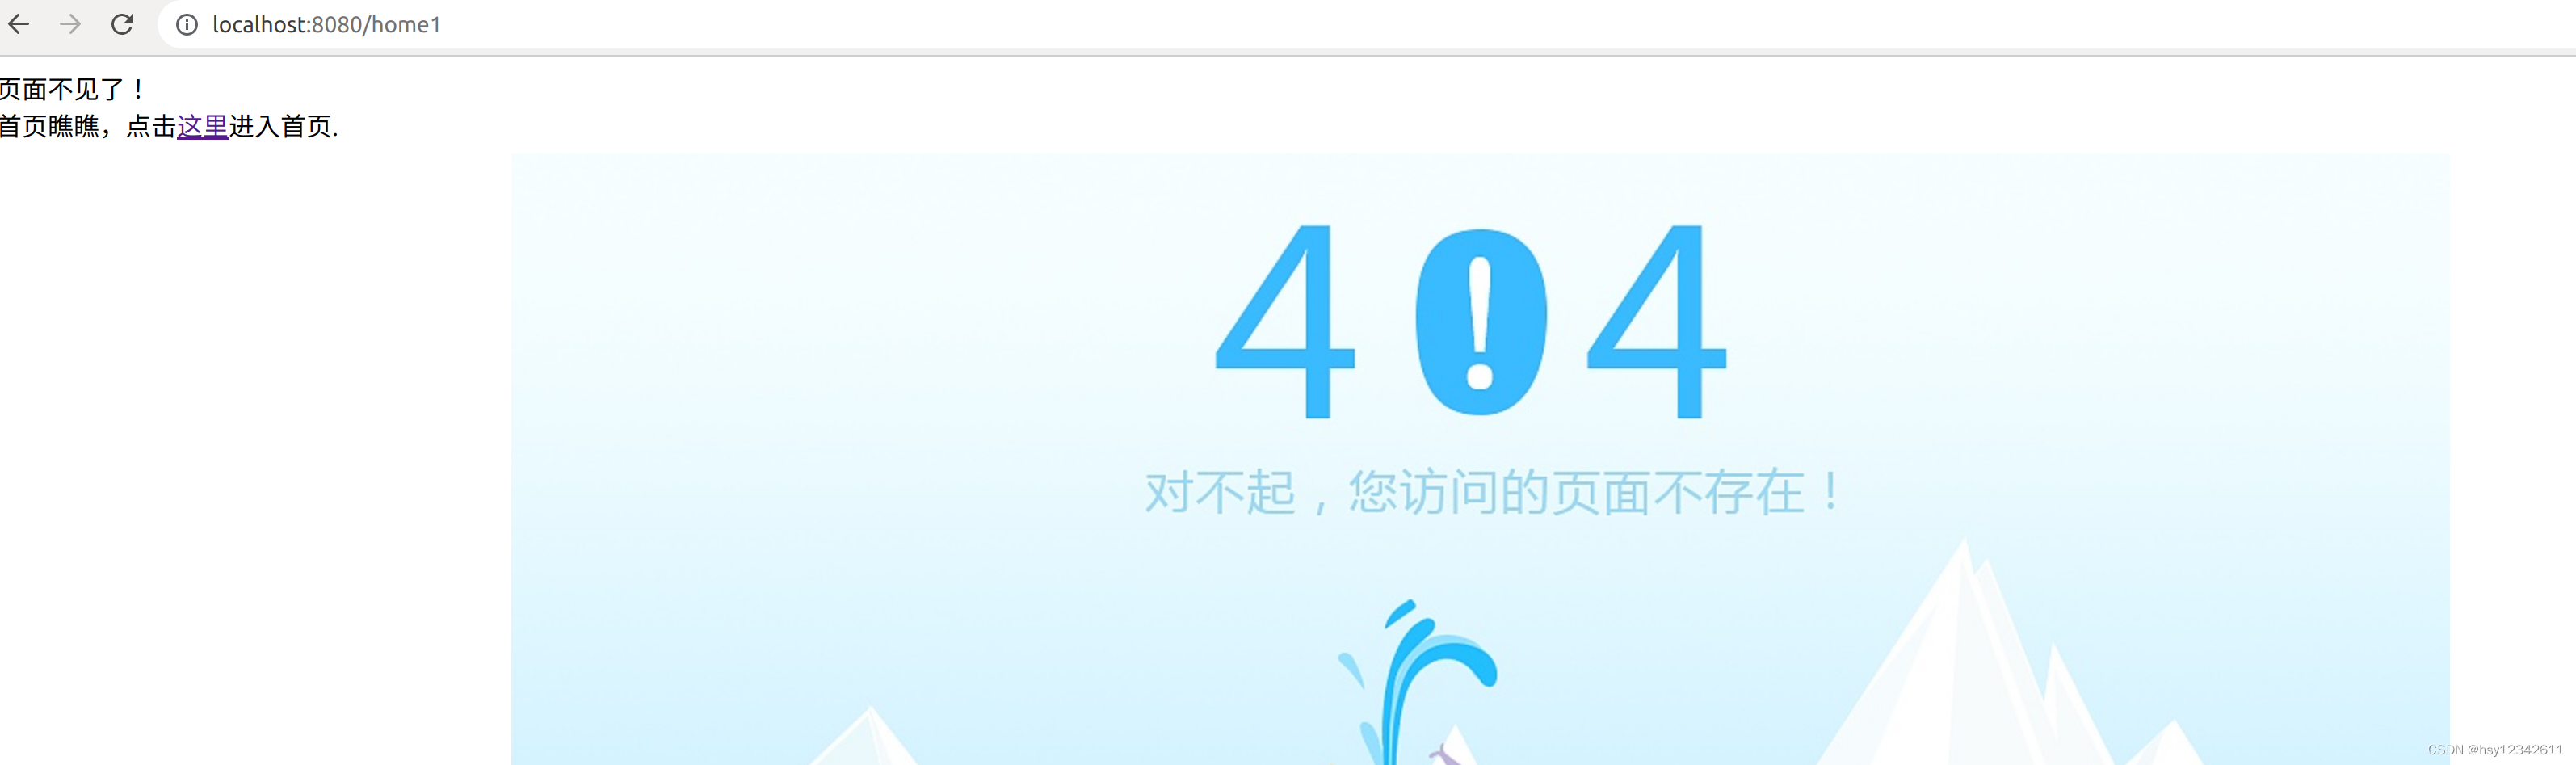
src/components/NotFound.vue
<template>
<div class="notfound">
<div class="big">页面不见了!</div>
<div>首页瞧瞧,点击<router-link to="/">这里</router-link>进入首页.</div>
</div>
</template>
<script>
export default {
data() {
return {};
},
};
</script>
<style lang='scss'>
.notfound {
width: 100%;
height: 100%;
position: absolute;
background: #409EFF;
background: url('../assets/404page.jpg') center no-repeat;
}
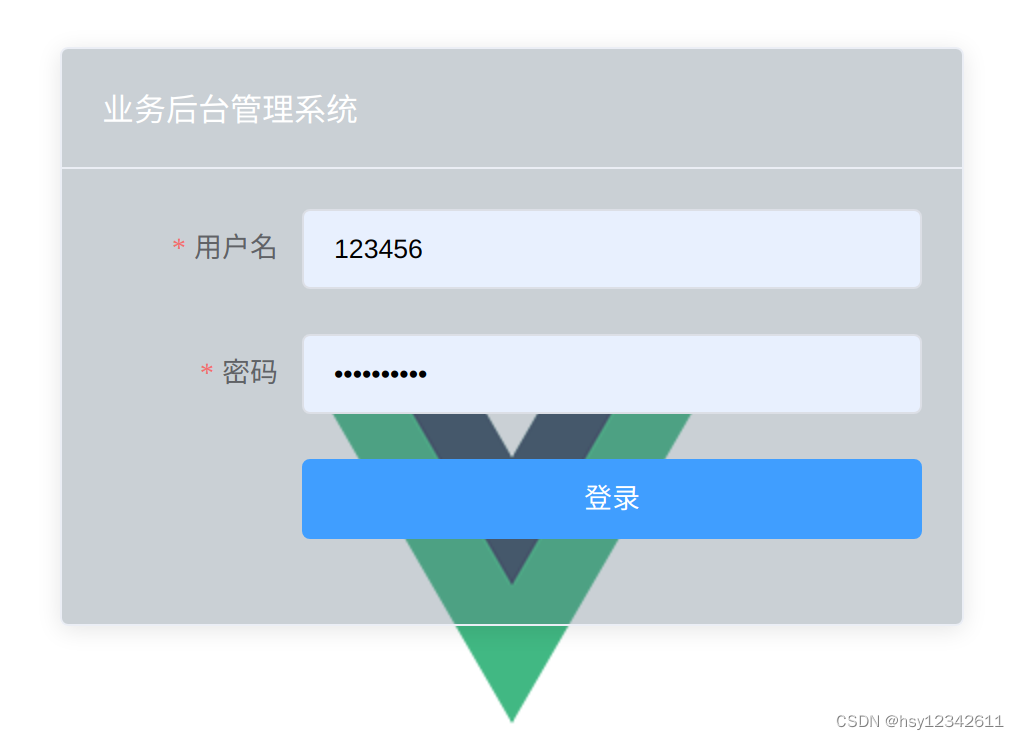
</style>src/components/Login.vue
<template>
  <div class="login">
    <el-card class="box-card">
        <div slot="header" class="clearfix">
            <span>业务后台管理系统</span>
        </div>

        <el-form label-width="100px" :model="form" ref="form" :rules='rules'>
            <el-form-item label="用户名" prop='username'>
                <el-input v-model="form.username"></el-input>
            </el-form-item>
            <el-form-item label="密码" prop='password'>
                <el-input type='password' v-model="form.password"></el-input>
            </el-form-item>
            <el-form-item>
                <el-button type='primary' @click="login('form')">登录</el-button>
            </el-form-item>
        </el-form>
    </el-card>
  </div>
</template>

/*
原生AJAX和Axios在使用上存在一定的区别。Axios可以支持多种方式,包括浏览器环境、node环境,而AJAX则只能在浏览器环境中使用。
Axios还支持多种请求方式,包括GET、POST、PUT、DELETE等;而AJAX只能支持GET和POST方式发送请求。此外,Axios还可以拦截请求和响应。
*/

<script>

//登录验证的封装
import {login} from '@/api/api.js'
import {nameRule, passRule} from '../utils/validate.js'
import {setToken} from '@/utils/dealtoken.js'

export default {
  data () {
    return {
        form: {
            username: "",
            password: ""
        },
        rules: {
            username: [{validator: nameRule, required: true, trigger: "blur"}],
            password: [{validator: passRule, required: true, trigger: "blur"}]
        }
    }
  },
  methods: {
    login(form) {
        this.$refs[form].validate((valid) => {
            if (valid) {
                console.log(this.form)

                login(this.form).then(res => {
                    if (res.data.status === 200) {
                        setToken('token', res.data.token)
                        setToken('username', res.data.Name)
                        this.$message({message: res.data.msg, type: 'success'})
                        this.$router.push('/home')
                    }
                })
            } else {
                console.error(this.form)
            }
        })
    }
  }
}
</script>

<style lang='scss'>
    .login {
        width: 100%;
        height: 100%;
        position: absolute;
        //background: #409EFF;
        background: url('../assets/logo.png') center no-repeat;
        .el-card {
            background: #65768557;
        }
        .box-card {
            width: 450px;
            margin: 200px auto;
            color: #fff;
            .el-form .el-form-item_label {
                color: #fff;
            }
            .el-card_header {
                font-size: 34px;
            }
            .el-button {
                width: 100%;
            }
        }
    }
</style>
2.服务端
2.1源码
server.go
package main

import (
	"main/controller"
	"net/http"

	"github.com/gin-contrib/cors"
	"github.com/gin-gonic/gin"
)

/*
// 错误: server.go:4:2: package main/controller is not in GOROOT (/home/tiger/go/go/src/main/controller)
go mod init main

//错误: server.go:7:2: no required module provides package github.com/gin-gonic/gin; to add it:
go get github.com/gin-gonic/gin

//处理跨域框架
go get github.com/gin-contrib/cors
*/

/*
当客户端(尤其是基于 Web 的客户端)想要访问 API 时,服务器会决定允许哪些客户端发送请求。这是通过使用称为 CORS 来完成的,它代表跨源资源共享。
跨域资源共享 (CORS) 是一种机制,允许从提供第一个资源的域之外的另一个域请求网页上的受限资源。
*/

func CrosHandler() gin.HandlerFunc {
	return func(context *gin.Context) {
		context.Writer.Header().Set("Access-Control-Allow-Origin", "*")
		context.Header("Access-Control-Allow-Origin", "*") // 设置允许访问所有域
		context.Header("Access-Control-Allow-Methods", "POST,GET,OPTIONS,PUT,DELETE,UPDATE")
		context.Header("Access-Control-Allow-Headers", "Authorization, Content-Length, X-CSRF-Token, Token,session,X_Requested_With,Accept, Origin, Host, Connection, Accept-Encoding, Accept-Language,DNT, X-CustomHeader, Keep-Alive, User-Agent, X-Requested-With, If-Modified-Since, Cache-Control, Content-Type, Pragma,token,openid,opentoken")
		context.Header("Access-Control-Expose-Headers", "Content-Length, Access-Control-Allow-Origin, Access-Control-Allow-Headers,Cache-Control,Content-Language,Content-Type,Expires,Last-Modified,Pragma,FooBar")
		context.Header("Access-Control-Max-Age", "172800")
		context.Header("Access-Control-Allow-Credentials", "true")
		context.Set("content-type", "application/json") //设置返回格式是json
		//处理请求
		context.Next()
	}
}

// http://127.0.0.1:8181/ping
// http://127.0.0.1:8181/index
func main() {
	r := gin.Default()

	// 设置全局跨域访问
	//r.Use(CrosHandler())

	//cors处理跨域
	corsConfig := cors.DefaultConfig()
	corsConfig.AllowCredentials = true
	corsConfig.AllowHeaders = []string{"content-type", "Origin", "token", "username"}
	corsConfig.AllowOrigins = []string{"http://localhost:8080"}

	r.Use(cors.New(corsConfig))
	//r.Use(cors.Default())

	// 返回一个json数据
	r.GET("/ping", func(c *gin.Context) {
		c.JSON(200, gin.H{
			"message": "pong",
			"num":     888,
		})
	})

	// 返回一个html页面
	r.LoadHTMLGlob("templates/*")
	r.GET("/index", func(c *gin.Context) {
		c.HTML(http.StatusOK, "index.html", nil)
	})

	r.POST("/login", controller.LoginPost)
	r.POST("/formlogin", controller.FormLoginPost)
	r.POST("/upload", controller.UploadFile)

	//r.Run()  // <===> r.Run(":8080")  监听并在 0.0.0.0:8080 上启动服务
	r.Run(":8181")
}
controller/login.go
package controller

import (
	"encoding/json"
	"fmt"
	"io/ioutil"
	"net/http"
	"path/filepath"

	"github.com/gin-gonic/gin"
)

// post  http://127.0.0.1:8181/login
// axios.post 和 post json处理
func LoginPost(ctx *gin.Context) {
	version := ctx.DefaultQuery("version", "V1.0.0.1")
	//前端使用axios直接传递form时,axios会默认使用json,必须使用下面方式获取json数据,解析后再使用
	data, _ := ioutil.ReadAll(ctx.Request.Body)
	type UserInfo struct {
		Username string
		Password string
	}
	var u UserInfo
	err := json.Unmarshal(data, &u)
	if err != nil {
		fmt.Println(err)
	}
	username := u.Username
	password := u.Password

	fmt.Println("login info:: ", version, username, password)

	if username == "123456" && password == "1234abcdE@" {
		ctx.JSON(http.StatusOK, gin.H{
			"status":   200,
			"Name":     username,
			"Password": password,
			"msg":      "登录成功",
			"token":    "abcd1234ABCD",
		})
	} else {
		ctx.JSON(http.StatusOK, gin.H{
			"status":   -1,
			"Name":     username,
			"Password": password,
			"msg":      "用户名或密码错误",
		})
	}
}

// http://127.0.0.1:8181/formlogin
// form表单提交处理 application/x-www-form-urlencoded 或者 application/form-data
func FormLoginPost(ctx *gin.Context) {
	username := ctx.PostForm("username")
	password := ctx.PostForm("password")

	fmt.Println("FormLoginPost :: ", username, password)

	if username == "123456" && password == "1234abcdE@" {
		ctx.JSON(http.StatusOK, gin.H{
			"status":   200,
			"Name":     username,
			"Password": password,
			"msg":      "登录成功",
			"token":    "abcd1234ABCD",
		})
	} else {
		ctx.JSON(http.StatusOK, gin.H{
			"status":   -1,
			"Name":     username,
			"Password": password,
			"msg":      "用户名或密码错误",
		})
	}
}

// form表单提交文件上传处理 multipart/form-data
func UploadFile(ctx *gin.Context) {
	file, _ := ctx.FormFile("uploadfile")
	fmt.Println(file.Filename)
	file_path := "upload/" + filepath.Base(file.Filename)
	fmt.Println(file_path)
	ctx.SaveUploadedFile(file, file_path)
	ctx.String(http.StatusOK, "上传成功")
}
3.运行效果

4.注意事项
4.1webpack.config.js和vue.config.js的区别
webpack.config.js是webpack的配置文件,所有使用webpack作为打包工具的项目都是可以创建这个文件使用的,Vue /react项目都可以。
vue.config.js是Vue项目的配置文件,通过这个文件配置Vue项目中常用的功能,简化了配置工作,也可以直接写一些关于webpack的配置,当然如果需要更加专业的配置,这两个文件在Vue的项目中也是可以共存的。
用 vue-cli-service serve 启动就会用 vue.config.js;
用 webpack-dev-server 启动就会用 wepback.config.js(默认)。
vue.config.js 是 Vue CLI 3.x 中一个重要的配置文件,用于对项目进行全局的配置。这个文件不存在,需要手动创建,与 package.json 文件同级。通过 vue.config.js 文件的配置,我们可以实现很多高级功能,例如 Webpack 的各项配置、跨域代理、目录别名等等。
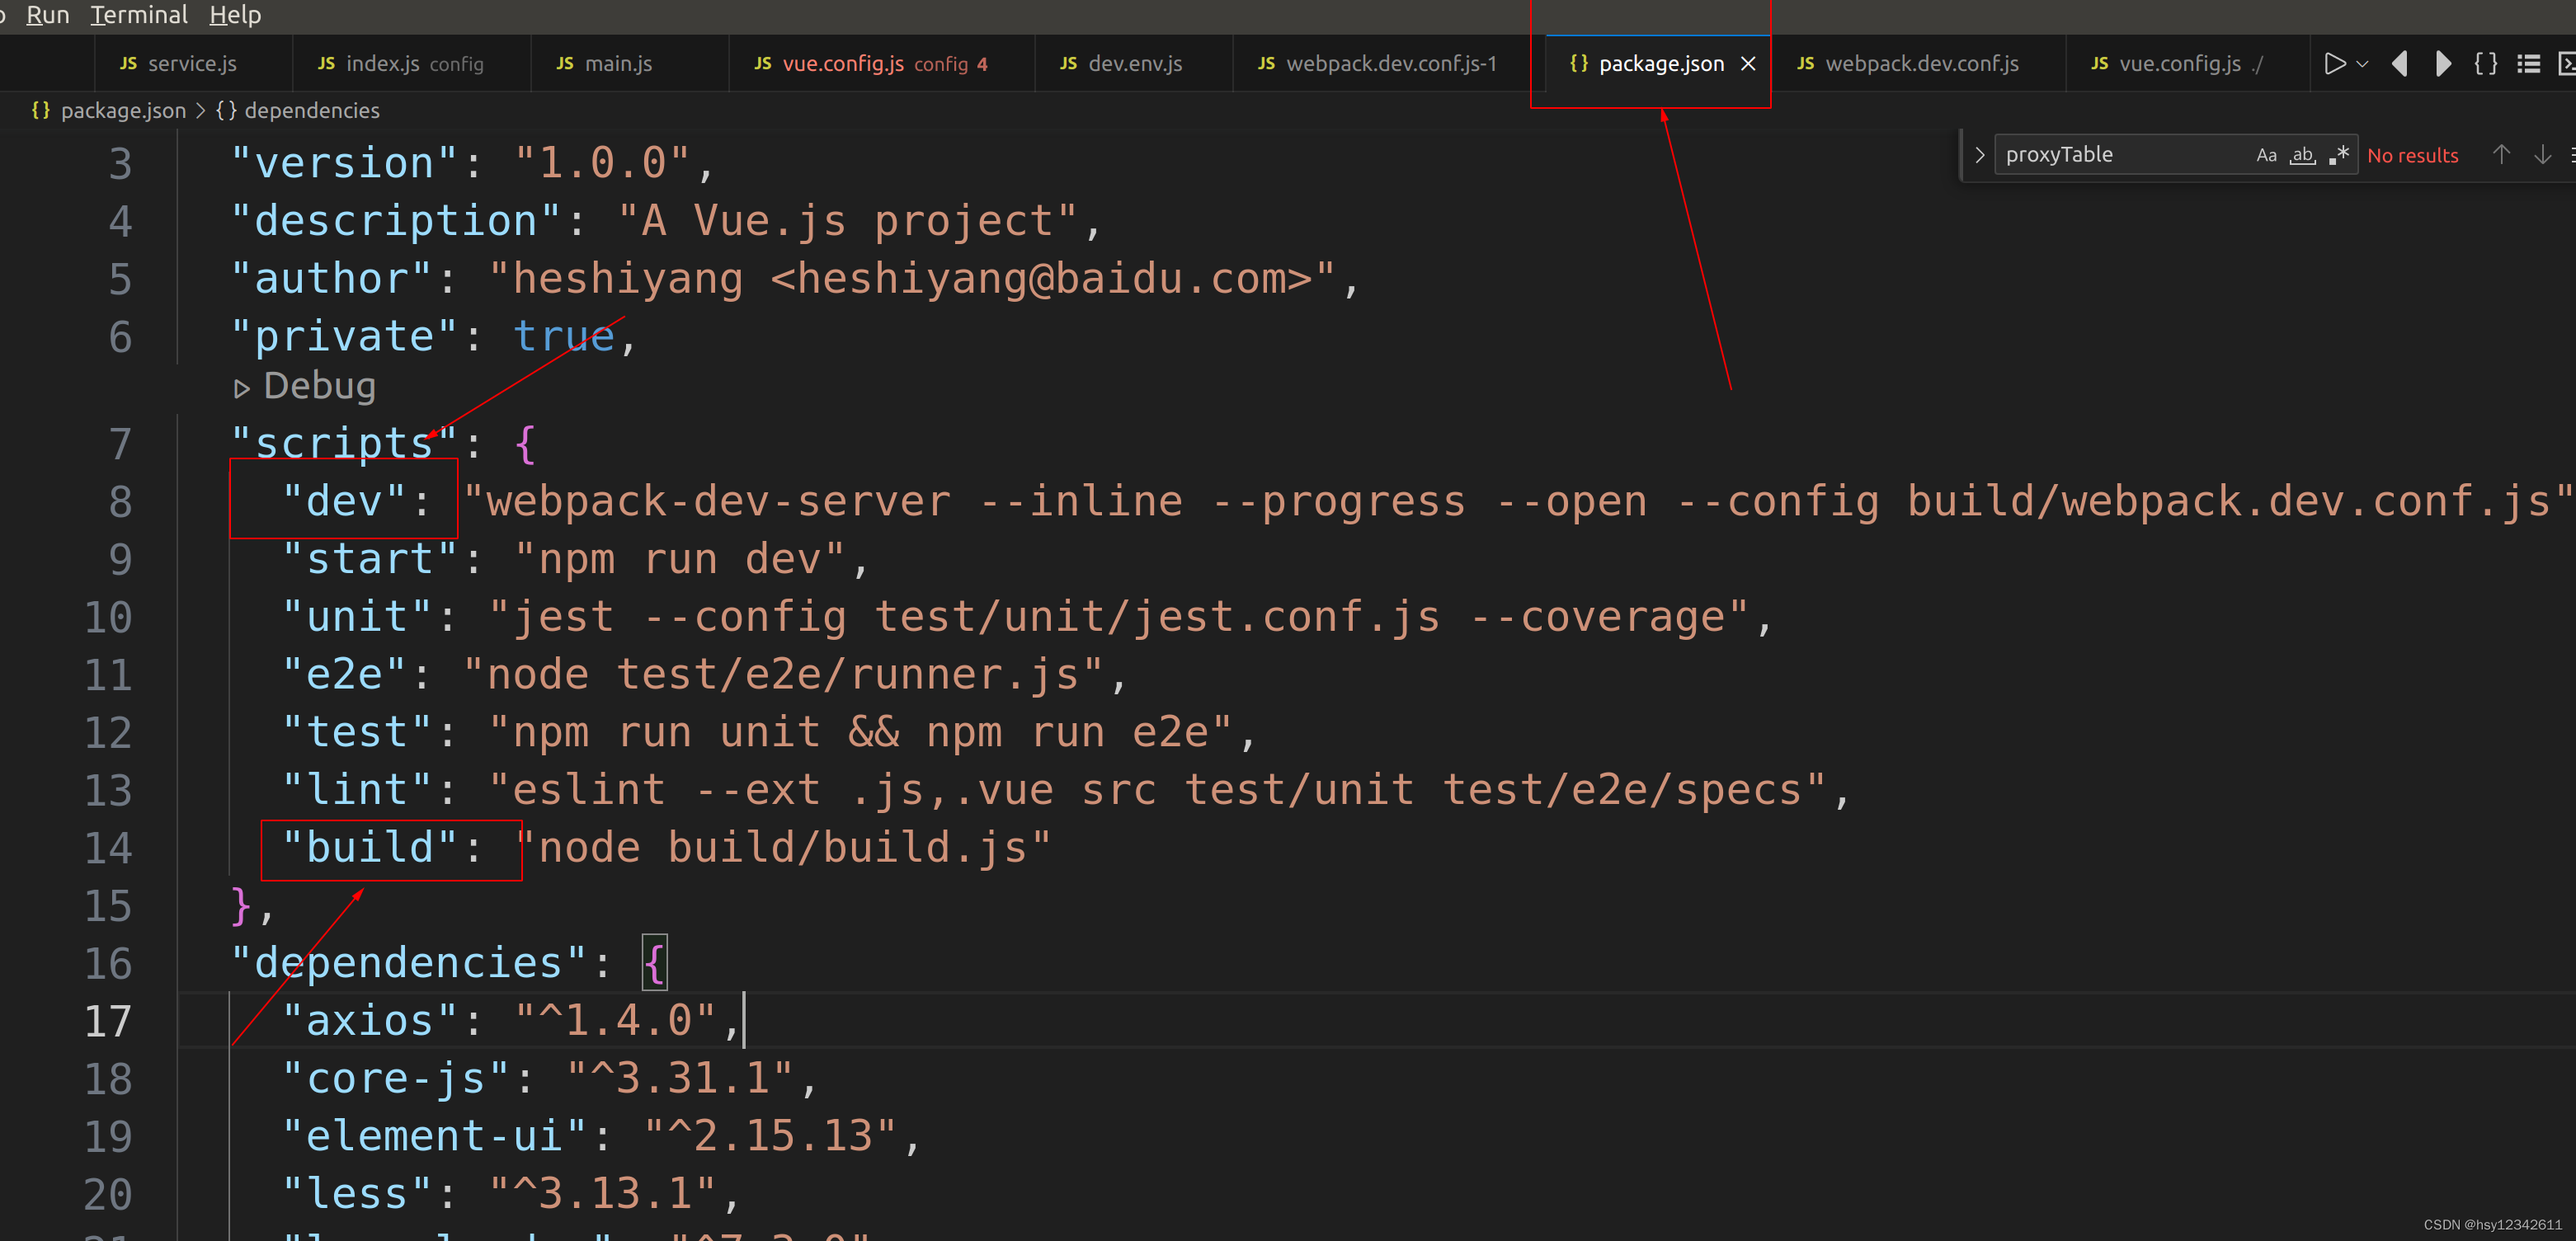
4.2 npm run dev 与 npm run build
当在控制台执行npm run dev 与 npm run build时,其实npm是读取package.json中scripts进行真正的程序执行
4.3ajax、Promise、axios总结
promise是一种异步机制的解决方案。axios是一个基于promise方案封装的网络请求库,它是基于XHR进行二次封装。
axios可以说是XHR的一个子集,而XHR又是ajax的一个子集
axios是ajax,ajax不止axios;axios有的ajax都有,ajax有的axios不一定有。
4.4Go语言处理跨域处理
corsConfig := cors.DefaultConfig()
corsConfig.AllowCredentials = true
corsConfig.AllowHeaders = []string{"content-type", "Origin", "token", "username"}
corsConfig.AllowOrigins = []string{"http://localhost:8080"}

r.Use(cors.New(corsConfig))