文章目录

1. MyBatis 框架介绍
MyBatis 是 Apache软件基金会下的一个开源项目,前身是 iBatis 框架。
2010年这个项目由apache 软件基金会迁移到google code下,改名为 MyBatis 。2013年11月又迁移到了github(GitHub 是一个面向开源及私有 软件项目的托管平台)。
MyBatis 是一款优秀的持久层框架,它支持定制化 SQL、存储过程以及高级映射(多表)。MyBatis 避免了几乎所有的 JDBC 代码和手动设置参数以及获取结果集。它对 jdbc 的操作数据库的过程进行封装,使开发者只需要关注 SQL 本身,而不需要花费精力去处理例如注册驱动、创建 connection、创建 statement、手动设置参数、结果集检索等 jdbc 繁杂的过程代码。MyBatis 可以使用简单的 XML 或注解来配置和映射原生类型、接口和 Java 的 POJO(Plain Old Java Objects,普通老式 Java 对象)为数据库中的记录。
1.1 MyBatis优点
- 简单易学:MyBatis 本身就很小且简单。没有任何第三方依赖,最简单安装只要两个jar文件+配置几个SQL映射文件即可。
- 使用灵活:MyBatis 不会对应用程序或者数据库的现有设计强加任何影响。SQL语句写在XML里,便于统一管理和优化。
- 解除SQL与程序代码的耦合:通过提供DAO层,将业务逻辑和数据访问逻辑分离,使系统的设计更清晰,更易维护,更易进行单元测试。SQL语句和代码的分离,提高了可维护性。
1.2 MyBatis 不足
- 编写SQL语句时工作量很大,尤其是字段多、关联表多时,更是如此。
- SQL语句依赖于数据库,导致数据库移植性差,不能更换数据库。
- 框架还是比较简陋,功能尚有缺失。
2. MyBatis 框架整体架构
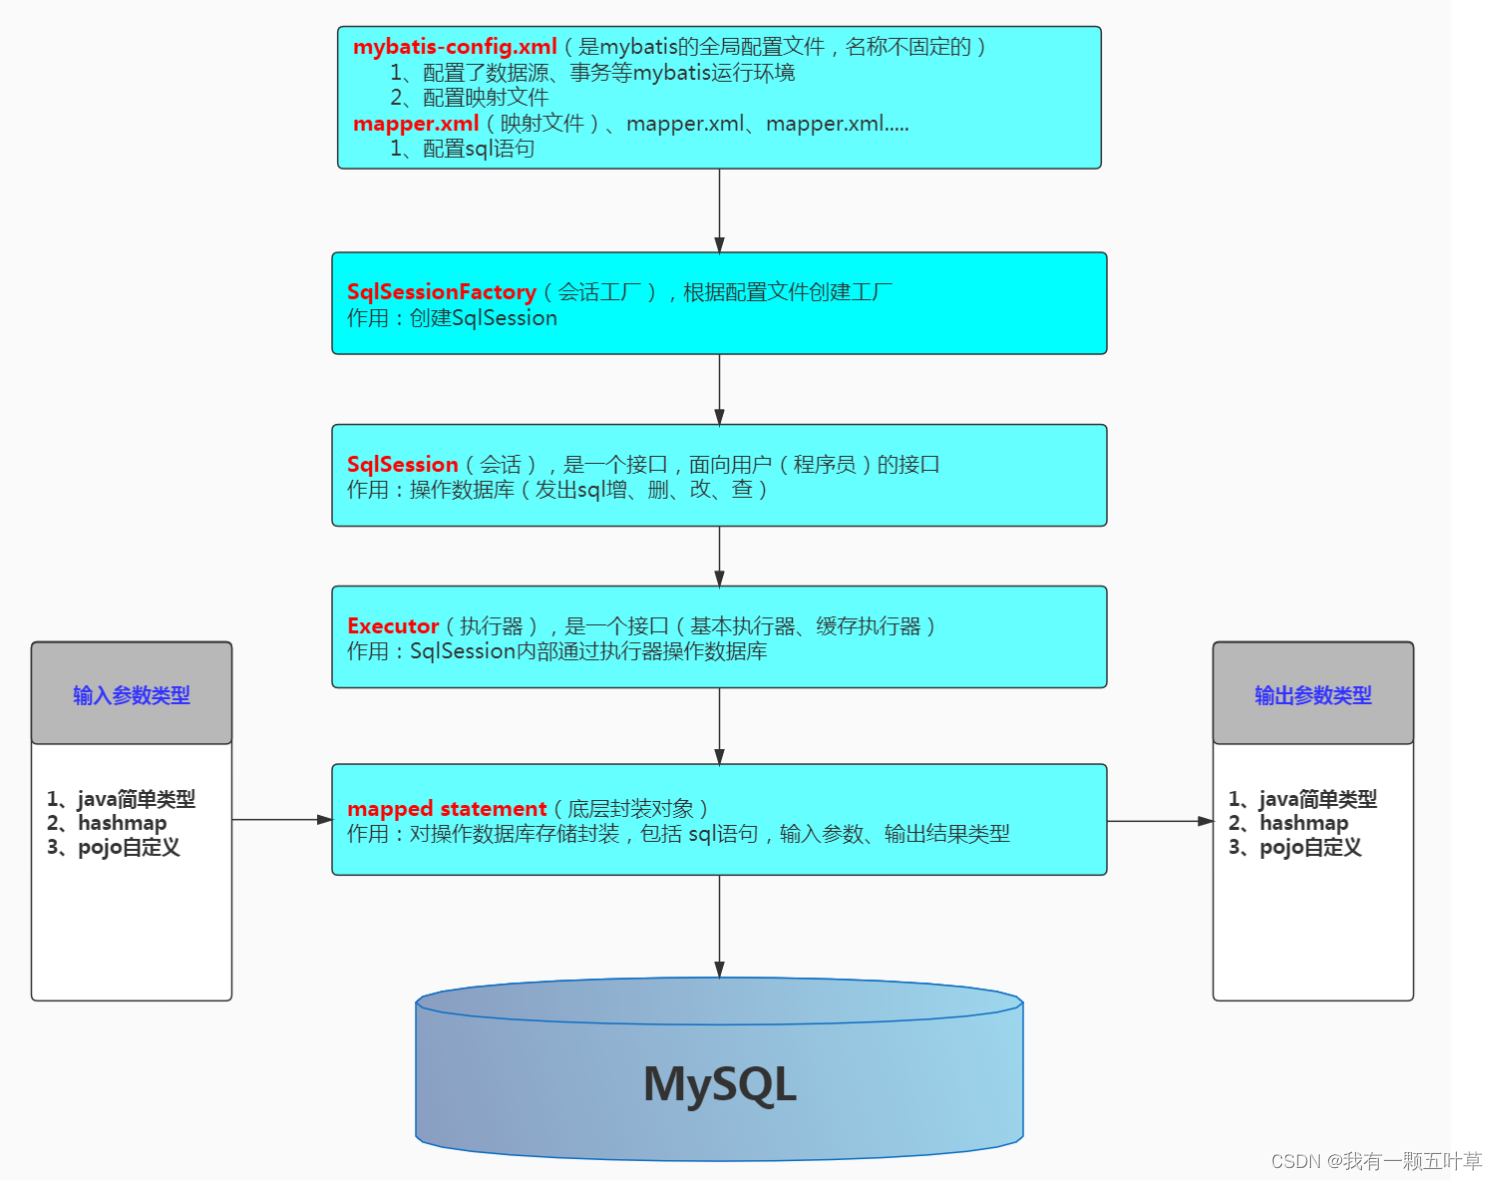
1、配置文件
全局配置文件(核心配置文件):mybatis-config.xml,作用:配置数据源(配置数据库连接信息),引入映射文件
映射文件:XxMapper.xml,作用:配置sql语句、参数、结果集封装类型等
2、SqlSessionFactory
作用:获取SqlSession
通过 new SqlSessionFactoryBuilder().build(inputStream)来构建,inputStream:读取配置文件的IO流
3、SqlSession
作用:执行CRUD操作
4、Executor
执行器,SqlSession通过调用它来完成具体的CRUD
5、Mapped Statement
在映射文件里面配置,包含3部分内容:
具体的sql,sql执行所需的参数类型,sql执行结果的封装类型
参数类型和结果集封装类型包括3种:
HashMap,基本数据类型,pojo
3. MyBatis 的 ORM 介绍
Object Relational Mapping 对象关系映射:是一种程序设计技术,用于实现面向对象编程语言里不同类型系统的数据之间的转换。从效果上说,它其实是创建了一个可在编程语言里使用的“虚拟对象数据库”。如今已有很多免费和付费的ORM产品,而有些程序员更倾向于创建自己的ORM工具。
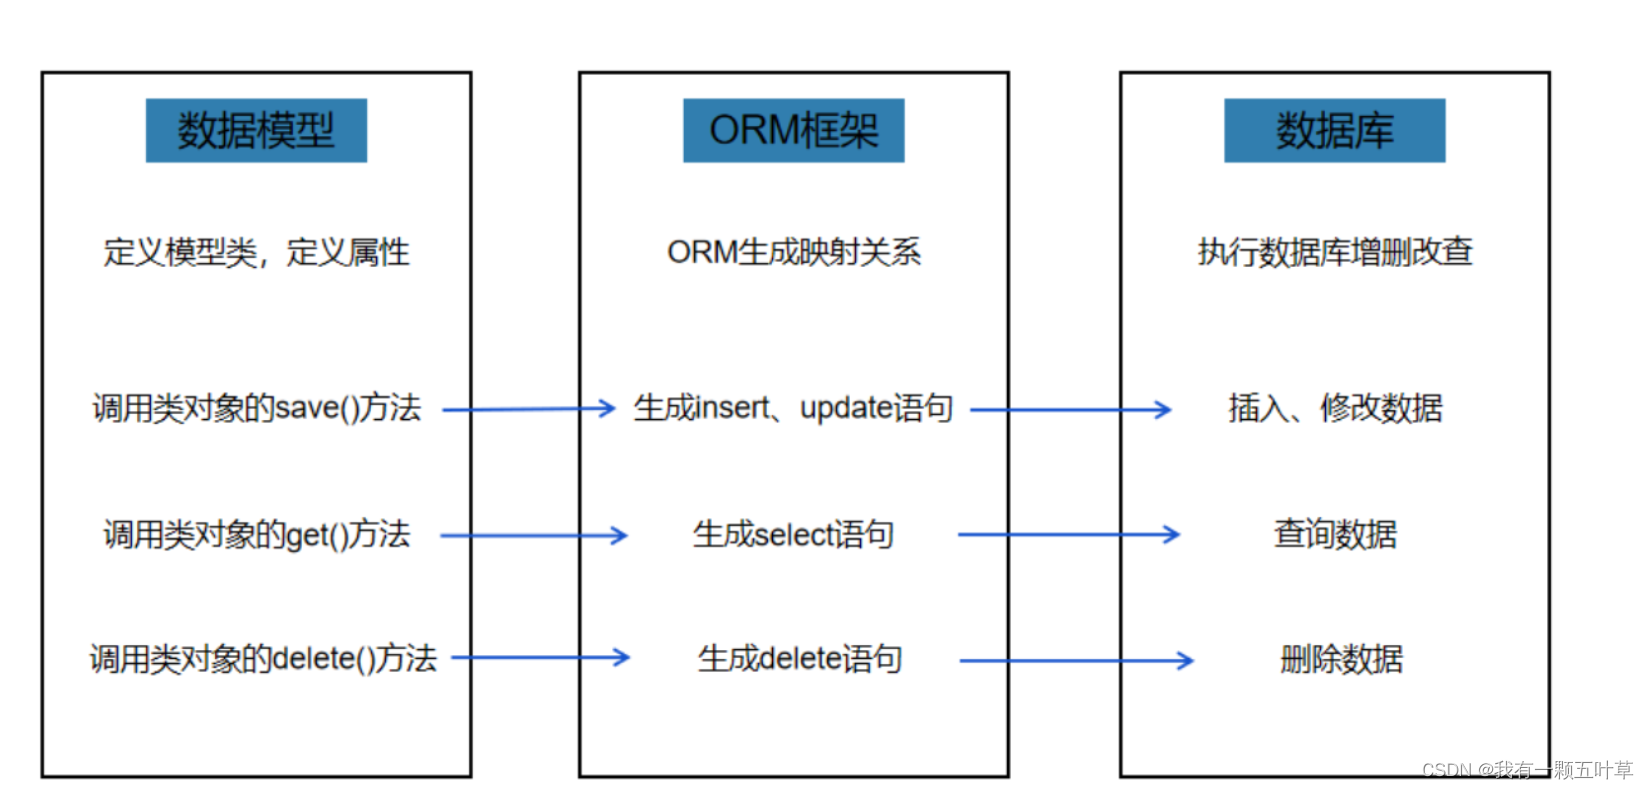
MyBatis的两种映射方式:
1. 通过XML映射
2. 通过注解
4. MyBatis 框架入门开发
4.1 入门案例的搭建
4.1.1 准备SQL数据
create table user (
  id int primary key auto_increment,
  username varchar(20) not null,
  birthday date,
  sex char(1) default '男',
  address varchar(50)
);

insert into user values (null, '刘亦菲','1988-10-24','女','湖北武汉');
insert into user values (null, '胡歌','1988-11-12','男','上海');
insert into user values (null, '李现','1991-10-30','男','湖北武汉');
insert into user values (null, '宋祖儿','1999-03-22','女','北京');
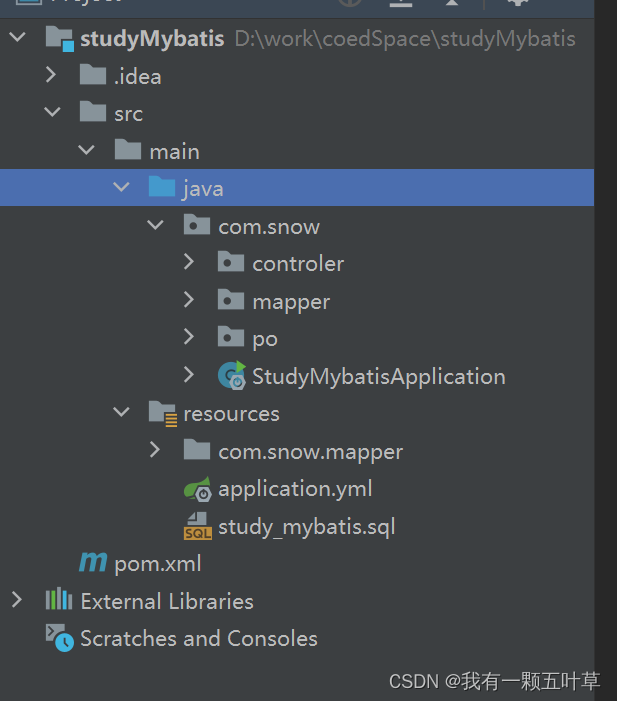
4.1.2 新建 SpringBoot 项目
结构如下:
4.1.3 pom文件:
<?xml version="1.0" encoding="UTF-8"?>
<project xmlns="http://maven.apache.org/POM/4.0.0"
         xmlns:xsi="http://www.w3.org/2001/XMLSchema-instance"
         xsi:schemaLocation="http://maven.apache.org/POM/4.0.0
         http://maven.apache.org/xsd/maven-4.0.0.xsd">
    <modelVersion>4.0.0</modelVersion>


    <parent>
        <groupId>org.springframework.boot</groupId>
        <artifactId>spring-boot-starter-parent</artifactId>
        <version>2.3.6.RELEASE</version>
    </parent>

    <groupId>com.snow</groupId>
    <artifactId>studyMybatis</artifactId>
    <version>1.0-SNAPSHOT</version>

    <properties>
        <maven.compiler.source>8</maven.compiler.source>
        <maven.compiler.target>8</maven.compiler.target>
    </properties>


    <dependencies>

        <dependency>
            <groupId>org.springframework.boot</groupId>
            <artifactId>spring-boot-starter-web</artifactId>
        </dependency>

        <dependency>
            <groupId>org.mybatis.spring.boot</groupId>
            <artifactId>mybatis-spring-boot-starter</artifactId>
            <version>2.1.4</version>
        </dependency>

        <dependency>
            <groupId>mysql</groupId>
            <artifactId>mysql-connector-java</artifactId>
            <scope>runtime</scope>
        </dependency>

    </dependencies>

</project>
4.1.4 配置文件
在resource下面的application.yml文件里写配置:
spring:
  datasource:
    username: root
    password: root
    url: jdbc:mysql://192.168.0.108:3306/study_mybatis?serverTimezone=UTC&useUnicode=true&characterEncoding=utf-8
    driver-class-name: com.mysql.cj.jdbc.Driver


# mybatis 配置
mybatis:
  # 配置实体类所在的包
  type-aliases-package: com.snow.po
  # 配置 xml 文件所在的包
  mapper-locations: classpath:com/snow/mapper/*.xml
  configuration:
    # 开启驼峰命名
    map-underscore-to-camel-case: true

logging:
  level:
    com.snow.mapper: debug
实体类:
import java.io.Serializable;
import java.time.LocalDate;

public class User implements Serializable {


    //  id int primary key auto_increment,
    private Integer id;

    //  username varchar(20) not null,
    private String username;

    //  birthday date,
    private LocalDate birthday;

    //  sex char(1) default '男',
    private String sex;

    //  address varchar(50)
    private String address;

    public User() {


    }

    public User(Integer id, String username, LocalDate birthday, String sex, String address) {


        this.id = id;
        this.username = username;
        this.birthday = birthday;
        this.sex = sex;
        this.address = address;
    }
	 //SET GET 略
}
4.1.5 mapper 和 mapper.xml
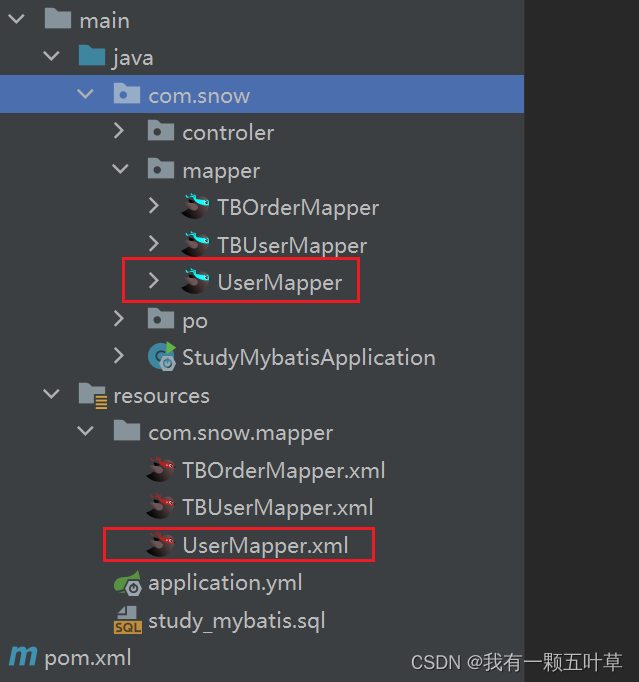
mapper类
import com.snow.po.User;
import org.apache.ibatis.annotations.*;

import java.util.List;

@Mapper
public interface UserMapper {


    List<User> getList();
}
mapper.xml文件
<?xml version="1.0" encoding="UTF-8" ?>
<!DOCTYPE mapper
        PUBLIC "-//mybatis.org//DTD Mapper 3.0//EN"
        "http://mybatis.org/dtd/mybatis-3-mapper.dtd">
<mapper namespace="com.snow.mapper.UserMapper">
    <select id="getList" resultType="User">
        select * from user ORDER BY id DESC
    </select>
</mapper>
4.1.6 构建Controller
@RestController
@RequestMapping("/user")
public class UserController {


    @Autowired
    private UserMapper userMapper;

	@GetMapping("/getList")
    public List<User> getList(){


        return userMapper.getList();
    }
}
4.2 测试
完成如上编写后 启动项目 进行测试
输入 http://localhost:8080/user/getList
如下即是获取到了表里的数据
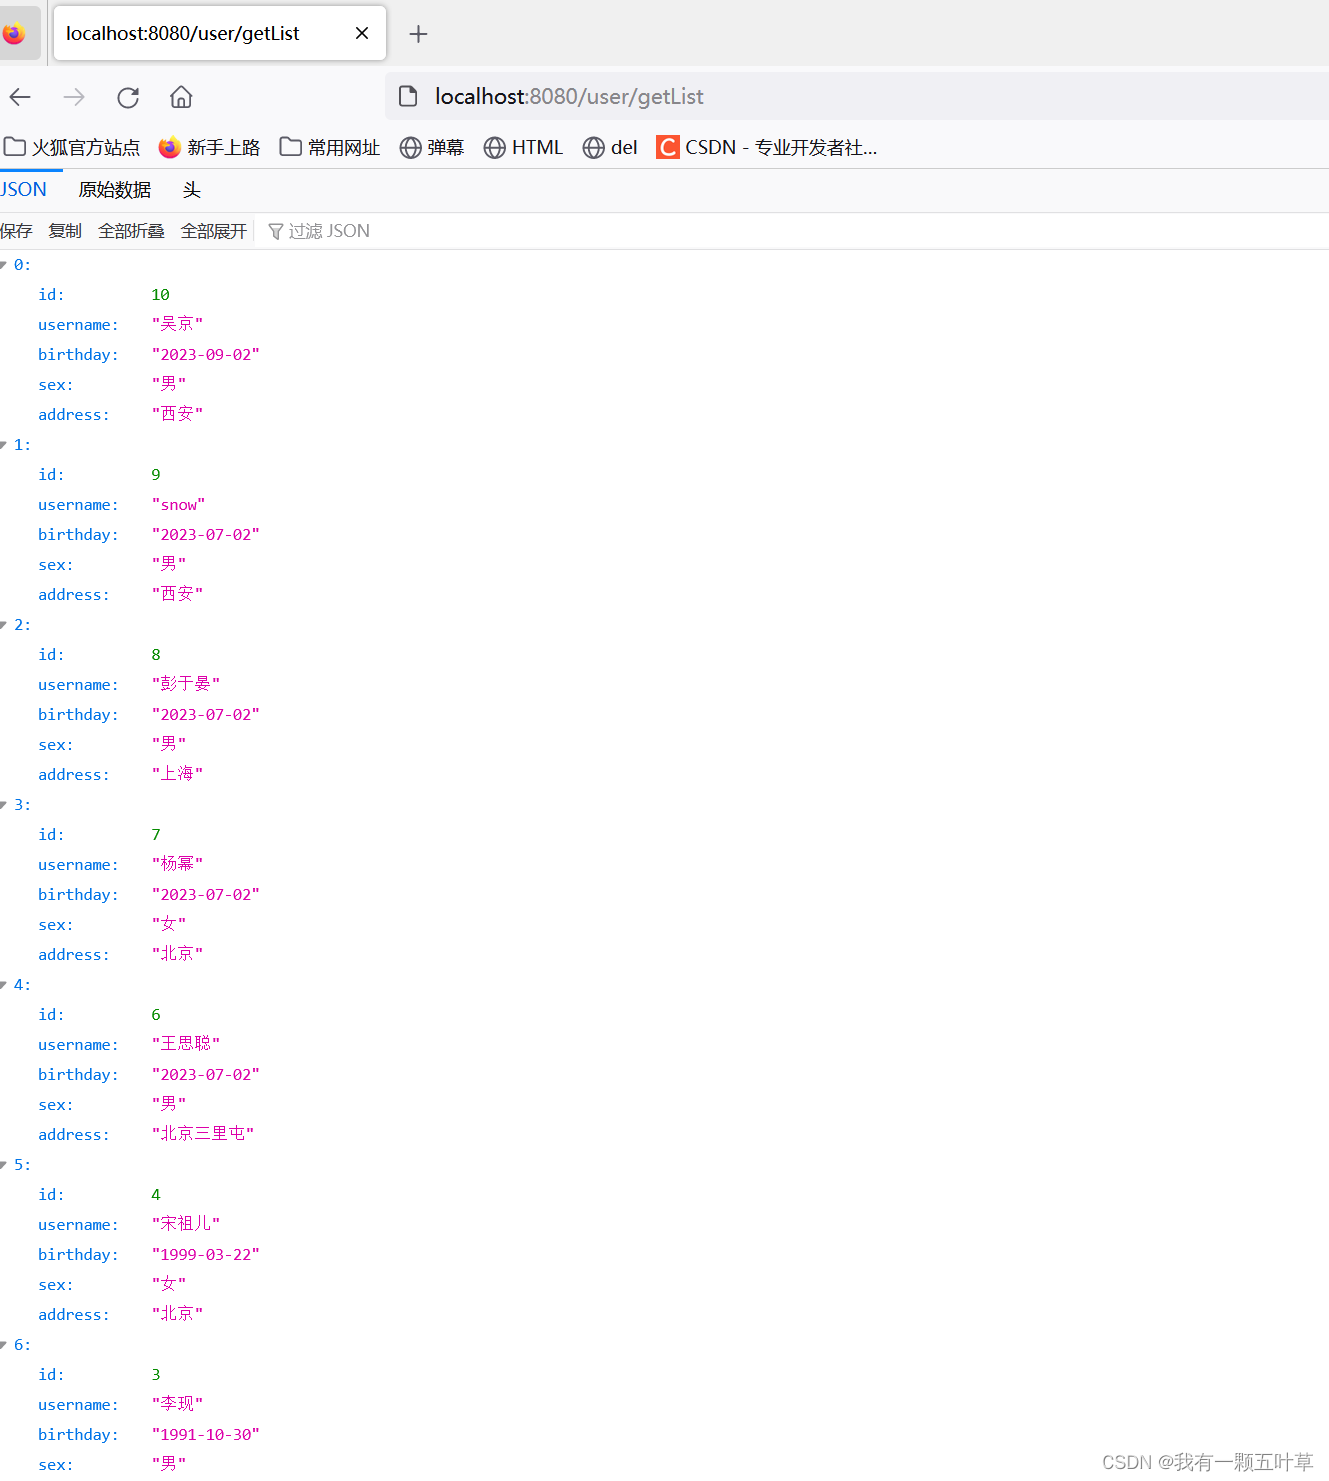
一个简单的入门案例就完成了 ,是不是比 JDBC 方便了许多呢。
5. 总结
MyBatis是一个流行的Java持久化框架,用于简化与关系数据库的交互。以下是我对MyBatis入门的总结:
-
引入依赖:首先,在项目中引入MyBatis的相关依赖。可以使用Maven或Gradle等构建工具进行配置。
-
配置数据源:在MyBatis的配置文件中,配置与数据库的连接信息,包括数据库的URL、用户名和密码等。
-
定义映射文件:MyBatis使用映射文件将Java对象与数据库表进行映射。在映射文件中,定义SQL语句和参数的映射关系。
-
编写实体类:创建与数据库表对应的实体类,并使用注解或XML配置与字段的映射关系。
-
编写DAO接口:定义持久化操作的接口,接口中声明需要执行的数据库操作。
-
配置DAO映射:在MyBatis的配置文件中,配置DAO接口的映射关系,将接口与映射文件进行绑定。
-
获取SqlSession:通过SqlSessionFactory获取SqlSession对象,SqlSession是MyBatis的核心类,用于执行SQL语句。
-
执行数据库操作:通过SqlSession对象调用DAO接口中的方法,执行数据库操作,如插入、查询、更新和删除等。
-
释放资源:在操作完成后,关闭SqlSession。
MyBatis通过简单的配置和编写少量代码,使得Java程序与数据库的交互变得容易和灵活。入门MyBatis需要理解上述基本步骤,学习并掌握MyBatis的核心概念和使用方式。希望这个总结对你有帮助!
