我们回忆下上一篇文章的内容,属性注入的关键节点是PropertySourcesPlaceholderConfigurer的BeanFactory后置处理器org.springframework.context.support.PropertySourcesPlaceholderConfigurer#postProcessBeanFactory,只有在执行这个方法前设置到Environment的数据源,才能被应用到springboot启动中所有属性注入的阶段,这样才能优雅的将自己的代码加入扩展点中,否则还得自己手动处理@value注解,手动绑定@ConfigurationProperties等
一 自定义数据源
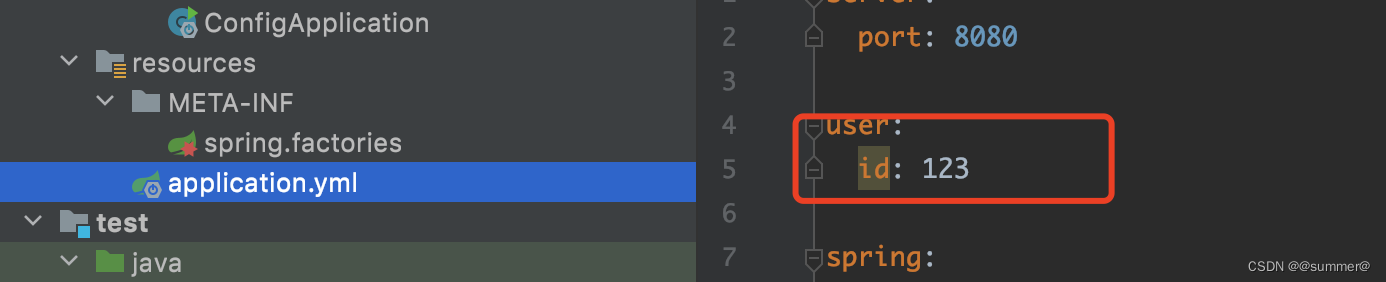
上一篇文章说过任何地方都能加入数据源,但是我们通常需要在application.yml中读取一些属性来确定怎么获取数据源,比如获取数据源的地址、账号、密码什么的,那就需要我们在加载application.yml后再进行我们数据源的加载,下面我就介绍几个常用的场景
1 自定义EnvironmentPostProcessor接口
application.yml就是用的这个接口实现加载的,他是在ConfigDataEnvironmentPostProcessor#postProcessEnvironment中加载的,而这个方法的调用是EnvironmentPostProcessorApplicationListener在springboot启动时创建完Environment对象后收到的ApplicationEnvironmentPreparedEvent消息后,执行中spring.factories中定义的所有EnvironmentPostProcessor的接口,可以看到一些Environment中默认的数据源(random等)也用的这个接口来实现

所以我们也可以自定一EnvironmentPostProcessor接口来加入到springboot的启动流程中
EnvironmentPostProcessorApplicationListener在执行EnvironmentPostProcessor接口时是先进行排序根据order的顺序来依次执行,如果我们想在application.yml后执行,那么只需要比ConfigDataEnvironmentPostProcessor后执行即可,ConfigDataEnvironmentPostProcessor的order是Ordered.HIGHEST_PRECEDENCE + 10(这个+10就是springboot框架作为一个可扩展框架留给我们的扩展点,我们可以在+9或者+11来确定在他的前还是后执行我们的代码)


那我们只需要继承Ordered或用@Order注解将order设置为Ordered.HIGHEST_PRECEDENCE + 11即可,不能用PriorityOrdered,因为PriorityOrdered的类会优先于order类执行
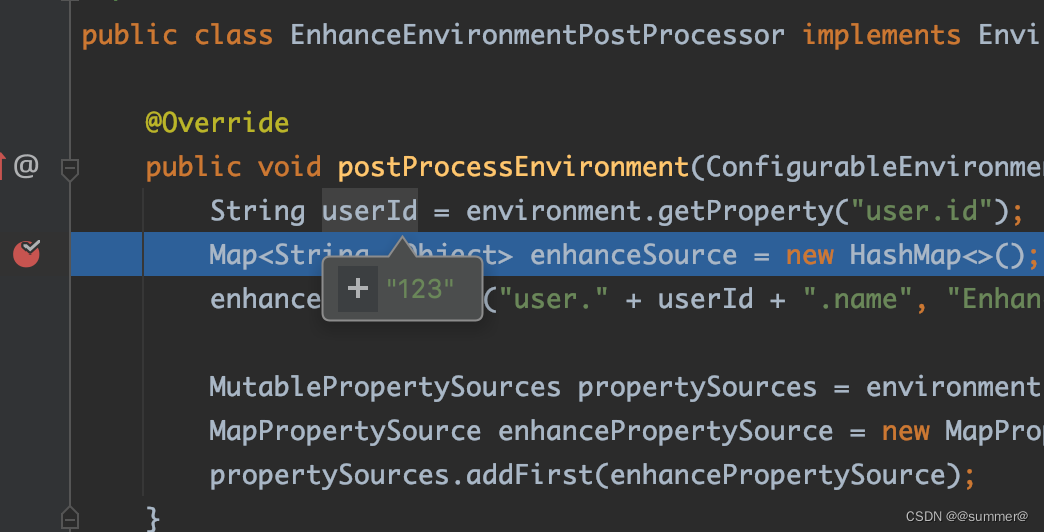
public class EnhanceEnvironmentPostProcessor implements EnvironmentPostProcessor, Ordered {
@Override
public void postProcessEnvironment(ConfigurableEnvironment environment, SpringApplication application) {
String userId = environment.getProperty("user.id");
Map<String, Object> enhanceSource = new HashMap<>();
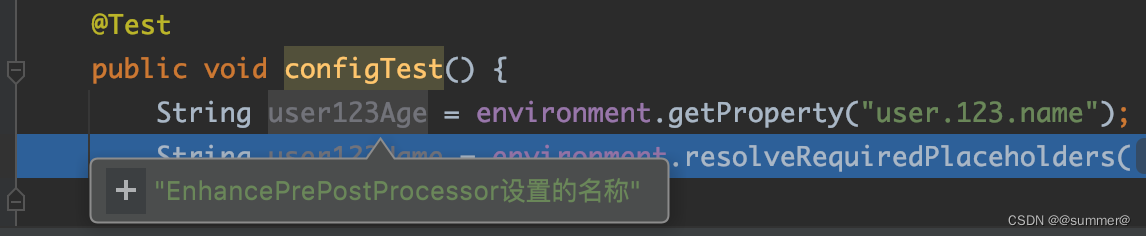
enhanceSource.put("user." + userId + ".name", "EnhanceEnvironmentPostProcessor设置的名称");
MutablePropertySources propertySources = environment.getPropertySources();
MapPropertySource enhancePropertySource = new MapPropertySource("enhance", enhanceSource);
propertySources.addFirst(enhancePropertySource);
}
@Override
public int getOrder() {
return Ordered.HIGHEST_PRECEDENCE + 11;
}
}


2 自定义ApplicationContextInitializer接口
springboot在SpringApplication构造器时会从spring.factories中获取所有EnvironmentPostProcessor的接口保存起来,并且在prepareContext阶段的applyInitializers()方法中以此去执行(也是根据order排好序的),因为这个阶段是在EnvironmentPostProcessor阶段后执行的,所以也可以获取到application.yml的属性
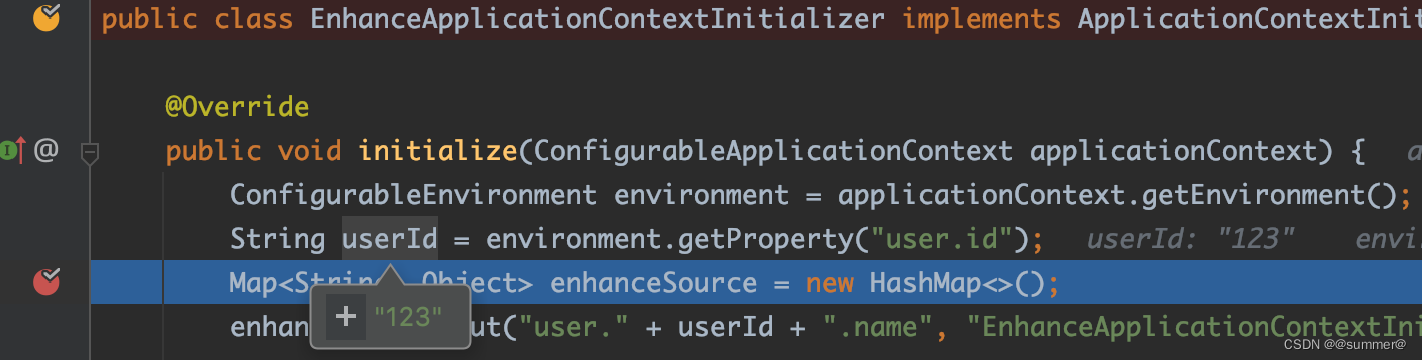
public class EnhanceApplicationContextInitializer implements ApplicationContextInitializer<ConfigurableApplicationContext> {

    @Override
    public void initialize(ConfigurableApplicationContext applicationContext) {
        ConfigurableEnvironment environment = applicationContext.getEnvironment();
        String userId = environment.getProperty("user.id");
        Map<String, Object> enhanceSource = new HashMap<>();
        enhanceSource.put("user." + userId + ".name", "EnhanceApplicationContextInitializer设置的名称");

        MutablePropertySources propertySources = environment.getPropertySources();
        MapPropertySource enhancePropertySource = new MapPropertySource("enhance", enhanceSource);
        propertySources.addFirst(enhancePropertySource);
    }
}

3 自定义BeanFactoryPostProcessor
BeanFactoryPostProcessor就是更靠后的一个阶段了,这种方式注入的时候不仅能获取到application.yml中的属性,还可以获取到分布式配置中心的属性。因为springboot第一次用到配置也就是Environment对象,是在PropertySourcesPlaceholderConfigurer中解析BeanDefinition的propertyValues(上一篇讲过),那么分布式也要在这之前配置进去,如
- disconf就是自定义了一个PropertyPlaceholderConfigurer并在初始化这个bean的时候加载的配置
- nacos则是用NacosConfigApplicationContextInitializer使用上述自定义ApplicationContextInitializer接口的方式加载的
而PropertySourcesPlaceholderConfigurer也是一个BeanFactoryPostProcessor,那我们只要在他之前加载即可,它使用了父类的PriorityOrdered设置的order

那我们只要比他优先一点就可以了,也继承PriorityOrdered,设置order为Ordered.LOWEST_PRECEDENCE-1


二 自定义属性解析
我们还是针对那四种获取属性的方式来执行自定义解析,BeanDefinition、@Value、@ConfigurationProperties、environment.getProperty。但environment.getProperty是在我们代码中调用的,我们完全可以自由控制对结果再执行自定义的解析方法,所以这个就没必要在讨论了,我们主要对另外三种springboot自动注入的属性(用户无感知)来做解析,比如我要写一个自定义解密的方法decode()
1 BeanDefinition
之前已经说过BeanDefinition是在org.springframework.beans.factory.config.PlaceholderConfigurerSupport#doProcessProperties中解析bean属性的
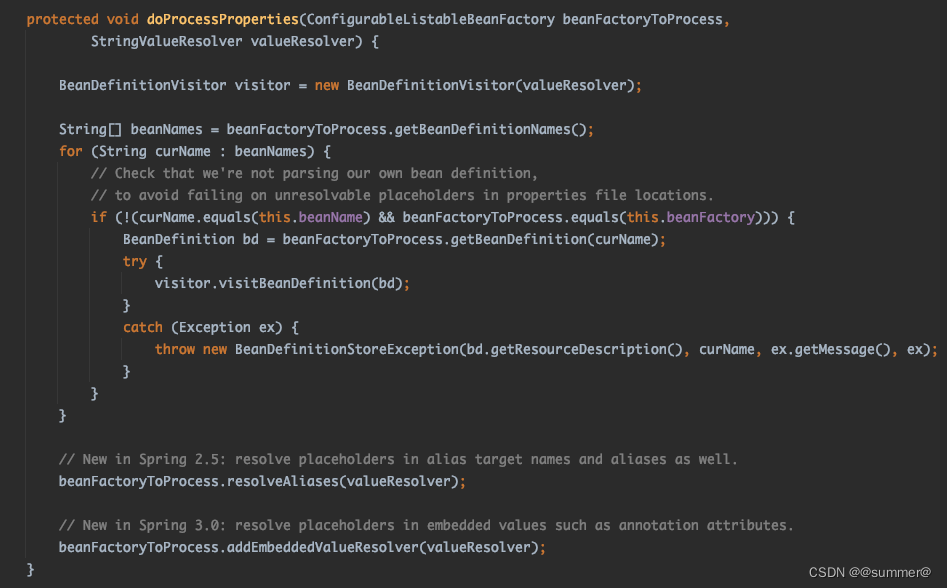

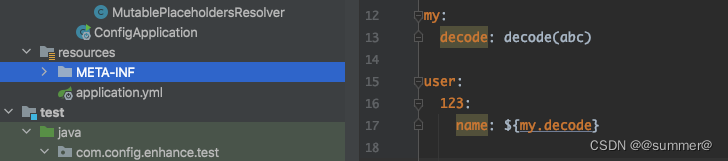
可以看到他是用的valueResolver来进行解析的,而springboot并没有在这留扩展点,所以我们需要,自己写一个StringValueResolver,并用这个解析器重新解析下BeanDefinition,而且我们要在PropertySourcesPlaceholderConfigurer之后执行,这样我们就能对springboot解析后的属性再进行一次解析,比如${user.123.name},springboot先会解析为decode(abc),然后我们这个再会将decode(abc)解析为123
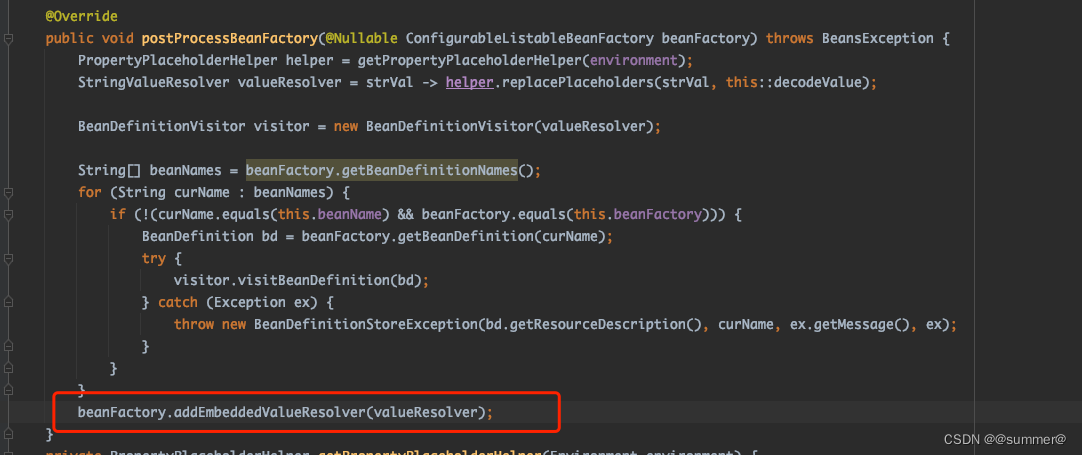
   @Override
    public void postProcessBeanFactory(@Nullable ConfigurableListableBeanFactory beanFactory) throws BeansException {
        PropertyPlaceholderHelper helper = getPropertyPlaceholderHelper(environment);
        StringValueResolver valueResolver = strVal -> helper.replacePlaceholders(strVal, this::decodeValue);

        BeanDefinitionVisitor visitor = new BeanDefinitionVisitor(valueResolver);

        String[] beanNames = beanFactory.getBeanDefinitionNames();
        for (String curName : beanNames) {
            if (!(curName.equals(this.beanName) && beanFactory.equals(this.beanFactory))) {
                BeanDefinition bd = beanFactory.getBeanDefinition(curName);
                try {
                    visitor.visitBeanDefinition(bd);
                } catch (Exception ex) {
                    throw new BeanDefinitionStoreException(bd.getResourceDescription(), curName, ex.getMessage(), ex);
                }
            }
        }
    }
    private PropertyPlaceholderHelper getPropertyPlaceholderHelper(Environment environment) {
        Boolean ignore = environment.getProperty("enhance.ignore.unresolvable", Boolean.class);
        return new PropertyPlaceholderHelper("decode(", ")",
                PlaceholderConfigurerSupport.DEFAULT_VALUE_SEPARATOR, Optional.ofNullable(ignore).filter(Boolean.TRUE::equals).orElse(false));
    }

    public String decodeValue(String strVal) {
        if (strVal != null && strVal.equals("abc")) {
            return "123";
        }
        return strVal;
    }
可以看到,我用了PropertyPlaceholderHelper来帮助解析属性,并且设置了前缀"decode("和后缀")",replacePlaceholders方法有两个参数,一个是要解析的值,第二个是PlaceholderResolver对象,当调用replacePlaceholders方法时会先将字符串中所有的decode(xxx)的子串,依次递归先去掉前缀和后缀,然后再调用PlaceholderResolver对象的resolvePlaceholder方法(我们自定义的)进行解析,解析完成后的子串如果还有decode(xxx)的子串会接续递归执行上面的步骤直到没有前缀。springboot默认的${xxx}这种类型的解析也是这里处理的只不过它的PlaceholderResolver对象的resolvePlaceholder方法,是从数据源集合里面调用获取属性对应的值。


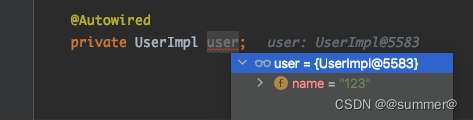
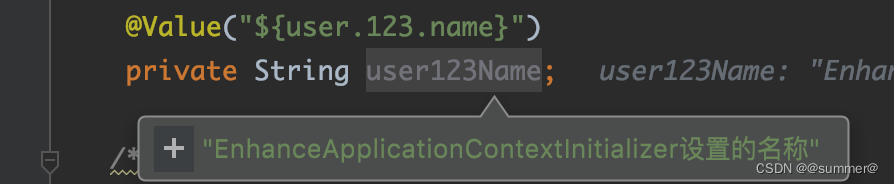
2 @Value
对于@value,之前也说过,他也是在执行PropertySourcesPlaceholderConfigurer时,将StringValueResolver添加到beanFactory中,等后面解析的时候从这里面获取,也就是和上面的BeanDefinition解析用的同一个StringValueResolver。幸运的是springboot对于解析@value留了扩展点(因为beanFactory中保存了StringValueResolver的集合,解析@value的时候是从这个集合中遍历,用每一个解析器来对上一个解析的结果再做解析)
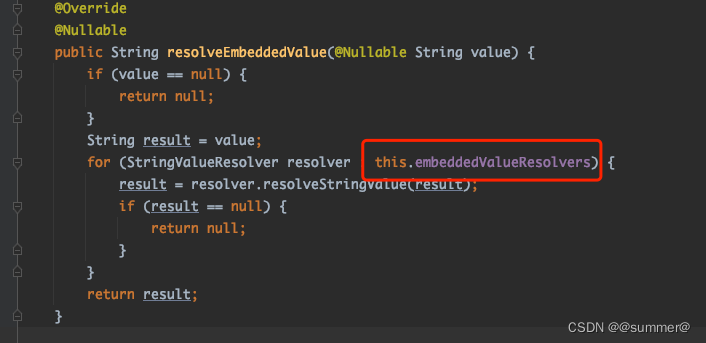
所以只要把我们自定义的那个StringValueResolver也加到beanFactory中即可,即对刚才的代码加上一行beanFactory.addEmbeddedValueResolver(valueResolver);

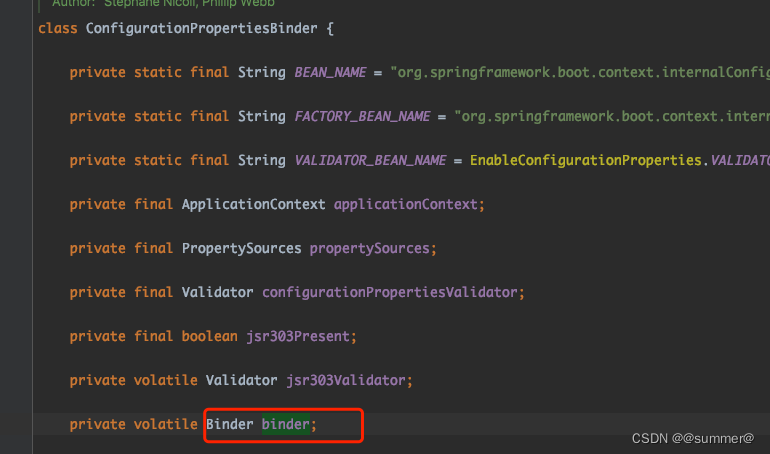
3 @ConfigurationProperties
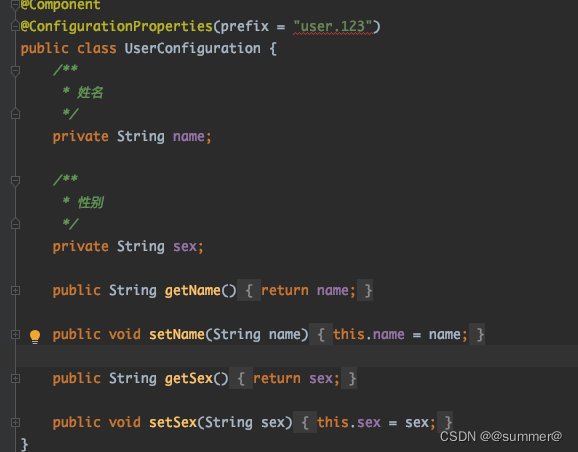
@ConfigurationProperties是由org.springframework.boot.context.properties.ConfigurationPropertiesBindingPostProcessor#postProcessBeforeInitialization来绑定的,之前也说过本质是是用的ConfigurationPropertiesBinder类的binder成员变量,而这个binder也是写死的生成方式,没有给扩展点。所以如果实现@ConfigurationProperties的自定义解析,那我们只能自定义binder,然后用binder来对@ConfigurationProperties的类来进行解析,或者利用反射来手动为ConfigurationPropertiesBinder的binder变量赋值
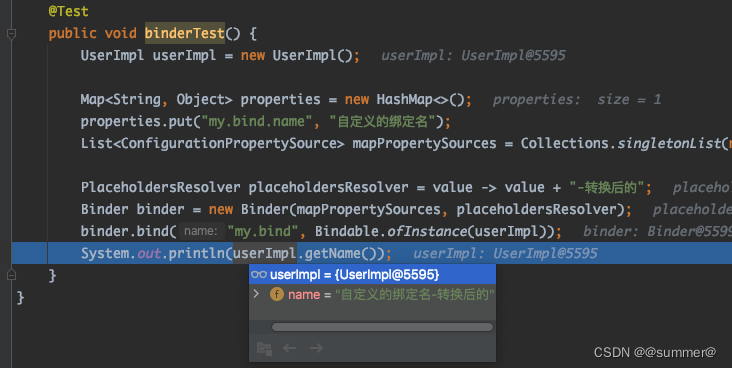
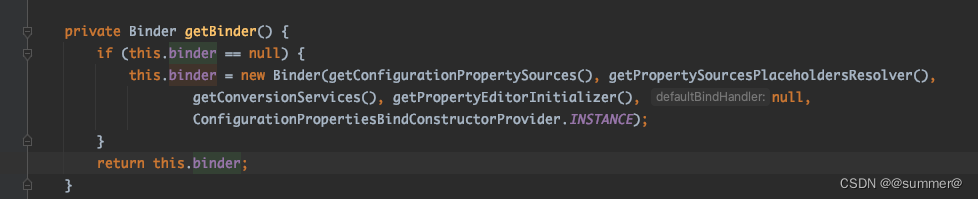 Binder中有数据源和解析方法,调用其bind方法时只要传入属性的前缀(prefix = "user.123")和要绑定的对象,即可对该目标对象进行属性绑定
ConfigurationPropertiesBindingPostProcessor在InitializingBean阶段中,从bean工厂中获取ConfigurationPropertiesBinder对象


并且注册这个bean时会判断是否已经有这个bean了,如果有的话就就不创建了,直接用已有的bean

所以针对这个@ConfigurationProperties的解析有以下几种方案
3.1 手动设置ConfigurationPropertiesBinder#binder(有侵入性,但是进行了一次绑定)
因为ConfigurationPropertiesBinder的作用域是friendly的,所以只能同一个包里能访问,我们只能反射来使用或者自己创建个org.springframework.boot.context.properties包,然后在里面写我们的替换逻辑,ConfigurationPropertiesBinder中的binder是私有的,所以要想设置上,只能用反射了
public class BinderPostProcessor implements BeanFactoryPostProcessor, EnvironmentAware {

    private Environment environment;

    @Override
    public void postProcessBeanFactory(ConfigurableListableBeanFactory beanFactory) throws BeansException {
        String beanName = "org.springframework.boot.context.internalConfigurationPropertiesBinder";
        Object configurationPropertiesBinder = beanFactory.getBean(beanName);
        try {
            //获取configurationPropertiesBinder的 binder 对象
            Field binderField = configurationPropertiesBinder.getClass().getDeclaredField("binder");
            binderField.setAccessible(true);
            Binder binder = (Binder) binderField.get(configurationPropertiesBinder);
            if (binder == null) {
                //如果binder为空,要先获取springboot定义的binder
                Method getBinder = configurationPropertiesBinder.getClass().getDeclaredMethod("getBinder");
                getBinder.setAccessible(true);
                binder = (Binder) getBinder.invoke(configurationPropertiesBinder);
            }
            //获取springboot原生binder的解析方法,解析${xxx}的
            Field placeholdersResolverField = binder.getClass().getDeclaredField("placeholdersResolver");
            placeholdersResolverField.setAccessible(true);
            PlaceholdersResolver springbootResolver = (PlaceholdersResolver) placeholdersResolverField.get(binder);
            //自定义的解析方法,解析decode(xxx)的
            PropertyPlaceholderHelper helper = getPropertyPlaceholderHelper(environment);
            PlaceholdersResolver myResolver = val -> helper.replacePlaceholders(String.valueOf(val), this::decodeValue);
            //将这两个解析方法组合到一起,先执行springboot的解析,对解析的结果在进行自定义的解析
            MutablePlaceholdersResolver mutablePlaceholdersResolver = new MutablePlaceholdersResolver(springbootResolver, myResolver);
            //将新的解析器设置回binder中
            placeholdersResolverField.set(binder, mutablePlaceholdersResolver);
        } catch (NoSuchFieldException | NoSuchMethodException | IllegalAccessException | InvocationTargetException e) {
            e.printStackTrace();
        }
    }

    private PropertyPlaceholderHelper getPropertyPlaceholderHelper(Environment environment) {
        Boolean ignore = environment.getProperty("enhance.ignore.unresolvable", Boolean.class);
        return new PropertyPlaceholderHelper("decode(", ")",
                PlaceholderConfigurerSupport.DEFAULT_VALUE_SEPARATOR, Optional.ofNullable(ignore).filter(Boolean.TRUE::equals).orElse(false));
    }

    public String decodeValue(String strVal) {
        if (strVal != null && strVal.equals("abc")) {
            return "123";
        }
        return strVal;
    }

    @Override
    public void setEnvironment(@Nullable Environment environment) {
        this.environment = environment;
    }
}
public class MutablePlaceholdersResolver implements PlaceholdersResolver {
private final PlaceholdersResolver[] placeholdersResolvers;
public MutablePlaceholdersResolver(PlaceholdersResolver... placeholdersResolvers) {
if (placeholdersResolvers == null) {
throw new IllegalArgumentException("placeholdersResolvers is null");
}
this.placeholdersResolvers = placeholdersResolvers;
}
@Override
public Object resolvePlaceholders(Object value) {
for (PlaceholdersResolver placeholdersResolver : placeholdersResolvers) {
value = placeholdersResolver.resolvePlaceholders(value);
}
return value;
}
}可以看到只是对原有的binder对象里面的placeholdersResolver解析器进行了修改,而且之前的placeholdersResolver也没去掉,是组合到一起使用。里面的那个MutablePlaceholdersResolver是自定义的一个解析器,他的作用是使用多个解析器对一个属性进行解析,我将binder对象原本的解析器和我自定义的decode解析器一同放到MutablePlaceholdersResolver里面,用这个MutablePlaceholdersResolver替换了原本的解析器,解析的时候先通过原本的解析器(解析${xxx})进行解析,然后再用decode解析器对解析结果进行解析。

3.2 自定义BeanPostProcessor(无侵入性,但是进行了两次绑定)
自定义一个BeanPostProcessor对ConfigurationPropertiesBindingPostProcessor已经绑定好的@ConfigurationProperties类进行二次解析,已知ConfigurationPropertiesBindingPostProcessor是实现的PriorityOrdered,如果想在他后面执行就比他优先级低可以,所以干脆就不实现order即可
@Slf4j
@Component
public class EnhanceConfigurationPropertiesBindingPostProcessor implements BeanPostProcessor, EnvironmentAware, InitializingBean {

    private Environment environment;

    private PlaceholdersResolver myResolver;

    @Override
    public void afterPropertiesSet() throws Exception {
        PropertyPlaceholderHelper helper = getPropertyPlaceholderHelper(environment);
        myResolver = val -> helper.replacePlaceholders(String.valueOf(val), this::decodeValue);
    }

    @Override
    public Object postProcessBeforeInitialization(Object bean, String beanName) throws BeansException {
        ConfigurationProperties annotation = AnnotationUtils.findAnnotation(bean.getClass(), ConfigurationProperties.class);
        if (annotation != null) {
            try {
                String beanJson = JSON.toJSONString(bean, SerializerFeature.IgnoreNonFieldGetter);
                JSONObject source = JSON.parseObject(beanJson);

                Map<String, Object> target = new LinkedHashMap<>();
                EnhanceUtils.buildFlattenedMap(target, source, annotation.prefix());
                List<ConfigurationPropertySource> mapPropertySources = Collections.singletonList(new MapConfigurationPropertySource(target));

                Binder binder = new Binder(mapPropertySources, myResolver);
                binder.bind(annotation.prefix(), Bindable.ofInstance(bean));
            } catch (Exception e) {
                log.error("EnhanceConfigurationPropertiesBindingPostProcessor bind fail,beanName:{}", beanName, e);
            }
        }
        return bean;
    }

    private PropertyPlaceholderHelper getPropertyPlaceholderHelper(Environment environment) {
        Boolean ignore = environment.getProperty("enhance.ignore.unresolvable", Boolean.class);
        return new PropertyPlaceholderHelper("decode(", ")",
                PlaceholderConfigurerSupport.DEFAULT_VALUE_SEPARATOR, Optional.ofNullable(ignore).filter(Boolean.TRUE::equals).orElse(false));
    }

    public String decodeValue(String strVal) {
        if (strVal != null && strVal.equals("abc")) {
            return "123";
        }
        return strVal;
    }

    @Override
    public void setEnvironment(Environment environment) {
        this.environment = environment;
    }

}
可以看到这个Binder的sources我用的是这个bean的json转的,这样做的目的是,对这个bean的值再执行自定义的值解析,不重新从数据源里找值了,当然也可以用environment作为sources覆盖之前springboot赋的值,不过如果之前绑定的数据源没在environment里就没法自定义解析了,而且解析的方式还有加上springboot的那个解析方式,不然值是${}这样的属性就没办法解析了,如下修改上面的那个binder
Binder binder = new Binder(ConfigurationPropertySources.get(environment), myResolver);
可以看到${my.decode}并没有得到解析,所以还有修改Binder的第二个参数,也就是解析器要加上springboot的默认解析方式,参考3.1的MutablePlaceholdersResolver
PlaceholdersResolver springbootResolver = new PropertySourcesPlaceholdersResolver(environment);
MutablePlaceholdersResolver mutablePlaceholdersResolver = new MutablePlaceholdersResolver(springbootResolver, myResolver);
Binder binder = new Binder(ConfigurationPropertySources.get(environment), mutablePlaceholdersResolver);
三 简化开发
如果觉得一个个模块的设置比较麻烦,我在下一篇会写出一个框架,可以直接使用框架来自定义相关的数据源和解析