文章目录
0. 前言
上个章节我们学习了RocketMQ的学习环境安装,讲了两种安装方式 1. docker使用官方镜像安装,2.使用源码方式安装。安装教程如下
如果已经安装了RocketMQ 学习环境可以略过此章节《【实践篇(一)】RocketMQ入门之学习环境搭建》
本章节,我们学习Spring Boot 集成Apache RocketMQ。并验证 在SpringBoot应用中展示如何使用Apache RocketMQ的生产者(Producer)进行消息发送。
这段代码实现了以下类型的消息发送:
使用Apache RocketMQ 官方的依赖库 RocketMQTemplate,实现同步、异步等消息。
同步消息:使用
syncSend方法,生产者会等待消息服务器回复确认后才会继续发送下一条消息。异步消息:使用
asyncSend方法,生产者发送消息后不等待服务器回复,直接发送下一条消息。单向消息:使用
sendOneWay方法,生产者只负责发送消息,不等待服务器回复,也不关注发送结果。顺序消息:使用
sendOrderly方法,按照消息的发送顺序进行消费(First-In-First-Out)。延迟消息:使用
sendDelayed方法,消息被发送后,不会立即被消费,等待特定的延迟时间后,才能被消费。批量消息:使用
sendBatch方法,一次发送多条消息,可以有效提高发送的吞吐量。
关于RocketMQ消息的消息模型介绍和使用,我专门写了一篇博客,搭建可以了解
《RocketMQ 消息传递模型》https://blog.csdn.net/wangshuai6707/article/details/132863088
1. Spring Boot 集成Apache RocketMQ详细步骤
1.1.添加依赖
在SpringBoot项目的pom.xml文件中添加RocketMQ的依赖:
<?xml version="1.0" encoding="UTF-8"?>
<project xmlns="http://maven.apache.org/POM/4.0.0" xmlns:xsi="http://www.w3.org/2001/XMLSchema-instance"
	xsi:schemaLocation="http://maven.apache.org/POM/4.0.0 https://maven.apache.org/xsd/maven-4.0.0.xsd">
	<modelVersion>4.0.0</modelVersion>
	<parent>
		<groupId>org.springframework.boot</groupId>
		<artifactId>spring-boot-starter-parent</artifactId>
		<version>2.7.15</version>
		<relativePath/>
	</parent>
	<groupId>com.icepip.project</groupId>
	<artifactId>springboot-icepip-rocketMQ-example</artifactId>
	<version>0.0.1-SNAPSHOT</version>
	<name>springboot-icepip-rocketMQ-example</name>
	<description>Spring boot 集成rocketMQ 示例</description>
	<properties>
		<java.version>8</java.version>
	</properties>
	<dependencies>
		<dependency>
			<groupId>org.springframework.boot</groupId>
			<artifactId>spring-boot-starter-web</artifactId>
		</dependency>
		<dependency>
			<groupId>org.apache.rocketmq</groupId>
			<artifactId>rocketmq-spring-boot-starter</artifactId>
			<version>2.0.4</version>
		</dependency>

		<dependency>
			<groupId>org.projectlombok</groupId>
			<artifactId>lombok</artifactId>
			<optional>true</optional>
		</dependency>
		<dependency>
			<groupId>org.springframework.boot</groupId>
			<artifactId>spring-boot-starter-test</artifactId>
			<scope>test</scope>
		</dependency>
		<dependency>
			<groupId>org.springframework.boot</groupId>
			<artifactId>spring-boot-starter-actuator</artifactId>
		</dependency>

		<dependency>
			<groupId>org.springframework.boot</groupId>
			<artifactId>spring-boot-starter-thymeleaf</artifactId>
		</dependency>

	</dependencies>

	<build>
		<plugins>
			<plugin>
				<groupId>org.springframework.boot</groupId>
				<artifactId>spring-boot-maven-plugin</artifactId>
				<configuration>
					<excludes>
						<exclude>
							<groupId>org.projectlombok</groupId>
							<artifactId>lombok</artifactId>
						</exclude>
					</excludes>
				</configuration>
			</plugin>
		</plugins>
	</build>

</project>
1.2.配置RocketMQ
在application.properties文件中配置RocketMQ的相关信息:
rocketmq.name-server=你的RocketMQ服务IP:9876
rocketmq.producer.group=my-producer
# 刚开始未配置 导致超时报错
rocketmq.producer.sendMessageTimeout=10000
1.3.创建消息生产者(Producer)
package com.icepip.project.mqtt.controller;
import org.apache.rocketmq.client.producer.SendCallback;
import org.apache.rocketmq.client.producer.SendResult;
import org.apache.rocketmq.spring.core.RocketMQTemplate;
import org.springframework.beans.factory.annotation.Autowired;
import org.springframework.messaging.support.MessageBuilder;
import org.springframework.web.bind.annotation.GetMapping;
import org.springframework.web.bind.annotation.RequestMapping;
import org.springframework.web.bind.annotation.RestController;
import java.util.ArrayList;
import java.util.List;
/**
* SpringBoot集成Apache RocketMQ详解
* @author 冰点
* @version 1.0.0
* @date 2023/9/9 17:02
*/
@RestController
@RequestMapping("/producer")
public class ProducerController {
@Autowired
private RocketMQTemplate rocketMQTemplate;
/**
* 同步发送消息到指定主题
* @param message
* @return
*/
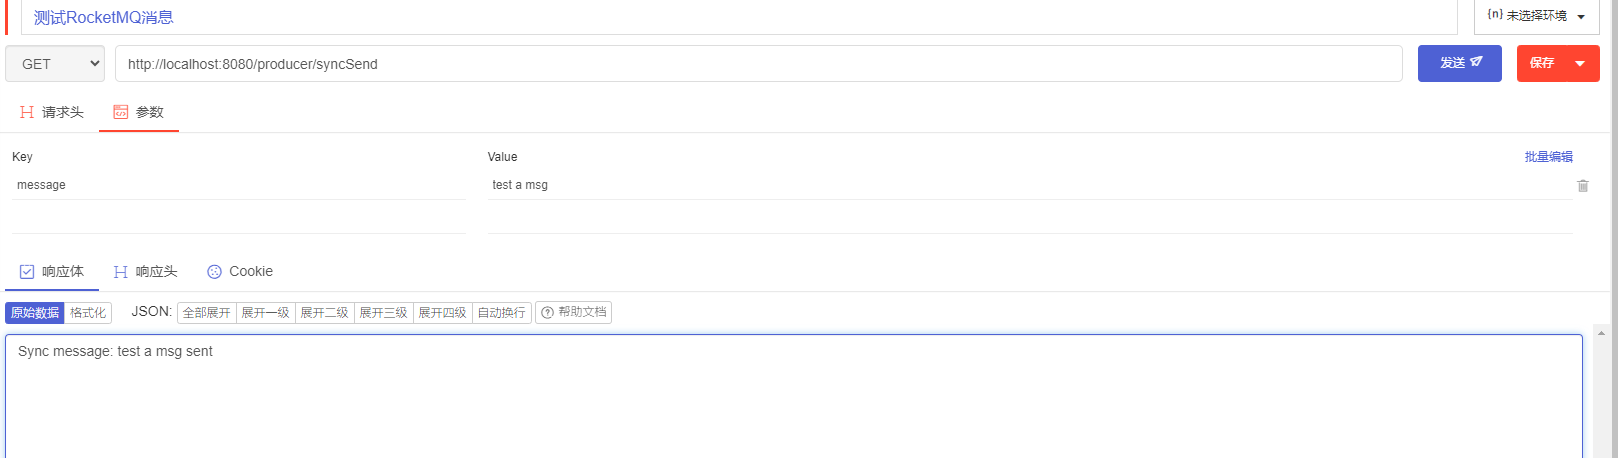
@GetMapping("/syncSend")
public String syncSend(String message) {
// 同步发送消息到指定主题
rocketMQTemplate.syncSend("test-topic", message);
return "Sync message: " + message + " sent";
}
/**
* 异步发送消息到指定主题
* @param message
* @return
*/
@GetMapping("/asyncSend")
public String asyncSend(String message) {
// 异步发送消息到指定主题
rocketMQTemplate.asyncSend("test-topic", MessageBuilder.withPayload(message).build(), new SendCallback() {
@Override
public void onSuccess(SendResult sendResult) {
System.out.println("Async message sent successfully, result: " + sendResult);
}
@Override
public void onException(Throwable throwable) {
System.err.println("Failed to send async message: " + throwable.getMessage());
}
}, 3000, 3); // 3000 ms timeout, delay level 3
return "Async message: " + message + " sent";
}
/**
* 发送单向消息到指定主题,无需等待Broker的确认
* @param message
* @return
*/
@GetMapping("/sendOneWay")
public String sendOneWay(String message) {
// 发送单向消息到指定主题,无需等待Broker的确认
rocketMQTemplate.sendOneWay("test-topic", message);
return "OneWay message: " + message + " sent";
}
// 发送顺序消息
@GetMapping("/sendOrderly")
public String sendOrderly(String message) {
// 发送顺序消息到指定主题
rocketMQTemplate.syncSendOrderly("test-topic", message, "order");
return "Orderly message: " + message + " sent";
}
// 发送延迟消息
@GetMapping("/sendDelayed")
public String sendDelayed(String message) {
// 发送延迟消息到指定主题,延迟级别为3
rocketMQTemplate.syncSend("test-topic", MessageBuilder.withPayload(message).build(), 1000, 3);
return "Delayed message: " + message + " sent";
}
// 发送批量消息
@GetMapping("/sendBatch")
public String sendBatch() {
List<String> messages = new ArrayList<>();
messages.add("message1");
messages.add("message2");
// 批量发送消息到指定主题
rocketMQTemplate.syncSend("test-topic", messages);
return "Batch messages sent";
}
}
1.4.创建消息消费者(Consumer)
package com.icepip.project.mqtt.handler;
import org.apache.rocketmq.spring.annotation.RocketMQMessageListener;
import org.apache.rocketmq.spring.core.RocketMQListener;
import org.springframework.stereotype.Service;
/**
* 定义一个消费者,监听test-topic主题的消息
* @author 冰点
* @version 1.0.0
* @date 2023/9/9 16:29
*/
@Service
@RocketMQMessageListener(topic = "test-topic", consumerGroup = "my-consumer_test-topic")
public class MyConsumer implements RocketMQListener<String>{
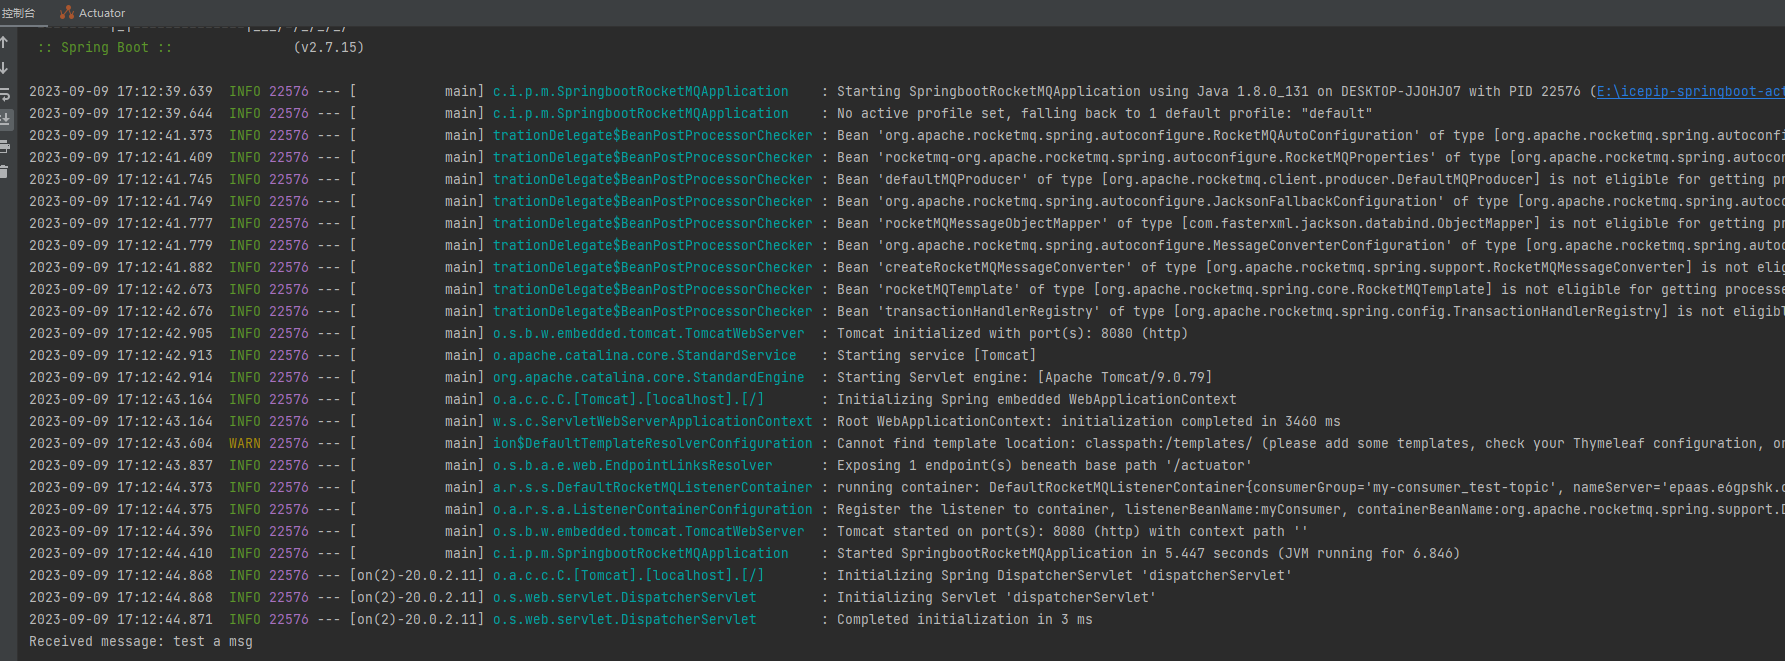
// 当收到消息时,该方法将被调用
@Override
public void onMessage(String message) {
System.out.println("Received message: "+ message);
}
}
2. 测试验证
3. 常见报错
- See http://rocketmq.apache.org/docs/faq/ for further details.; nested exception is org.apache.rocketmq.client.exception.MQClientException: Send [3] times, still failed, cost [6386]ms, Topic: test-topic, BrokersSent: [698f11314447, 698f11314447, 698f11314447]
See http://rocketmq.apache.org/docs/faq/ for further details.] with root cause
org.apache.rocketmq.remoting.exception.RemotingConnectException: connect to <172.17.0.8:10911> failed
解决办法,修改Broker的IP为宿主机IP
进容器修改配置文件,修改完启动服务 。启动之前先kill 掉容器里原来的Broker。
nohup sh mqbroker -c /home/rocketmq/rocketmq-4.9.2/broker.conf &

4. 参考文档
5. 源码地址
我的github https://github.com/wangshuai67/icepip-springboot-action-examples