前言
本文接上篇文章哟。
一、简单学习元素定位
在日常的工作中,我见过很多在浏览器中直接在浏览器中右键Copy Xpath复制元素的同学。这样获得的元素表达式放在 webdriver 中去运行往往是不够稳定的,像前端的一些微小改动,都会引起元素无法定位的NoSuchElementException报错。
所以在实际工作和学习中我们应该加强自己的元素定位能力,尽可能的采用xpath和CSS selector 这种相对稳定的定位语法。由于CSS selector的语法生硬难懂,对新手很不友好,而且相比xpath缺少一些定位语法。所以我们选择xpath进行我们的元素定位语法。
1.1xpath
1.1.1语法规则
xpath是一门在 XML 文档中查找信息的语言。

1.1.2定位工具
- chropath优点:这是一个Chrome浏览器的测试定位插件,类似于firepath,本人试用了一下整体感觉非常好。对小白的友好度很好。缺点:安装这个插件需要FQ。
- Katalon录制工具录制出来的脚本里面也会有定位元素的信息
- 自己写——本人推荐这种优点:本人推荐的方式,因为当熟练到一定程度的时候,写出来的会更直观简洁,并且在运行自动化测试中出现问题时,能快速定位。缺点:需要一定xpath和CSS selector语法积累,不太容易上手。
二、管理页面元素
本篇文章选择的测试地址是百度首页,所以对应的元素也是百度首页的。
项目框架设计中有一个目录page_element就是专门来存放定位元素的文件的。
通过对各种配置文件的对比,我在这里选择的是YAML文件格式。其易读,交互性好。
我们在page_element中新建一个search.yaml文件。
搜索框: "id==kw"
候选: "css==.bdsug-overflow"
搜索候选: "css==#form div li"
搜索按钮: "id==su"
元素定位文件创建好了,下来我们需要读取这个文件。
在common目录中创建readelement.py文件。
#!/usr/bin/env python3
# -*- coding:utf-8 -*-
import os
import yaml
from config.conf import cm


class Element(object):
    """获取元素"""

    def __init__(self, name):
        self.file_name = '%s.yaml' % name
        self.element_path = os.path.join(cm.ELEMENT_PATH, self.file_name)
        if not os.path.exists(self.element_path):
            raise FileNotFoundError("%s 文件不存在!" % self.element_path)
        with open(self.element_path, encoding='utf-8') as f:
            self.data = yaml.safe_load(f)

    def __getitem__(self, item):
        """获取属性"""
        data = self.data.get(item)
        if data:
            name, value = data.split('==')
            return name, value
        raise ArithmeticError("{}中不存在关键字:{}".format(self.file_name, item))


if __name__ == '__main__':
    search = Element('search')
    print(search['搜索框'])
通过特殊方法__getitem__实现调用任意属性,读取yaml中的值。
这样我们就实现了定位元素的存储和调用。
但是还有一个问题,我们怎么样才能确保我们写的每一项元素不出错,人为的错误是不可避免的,但是我们可以通过代码来运行对文件的审查。当前也不能所有问题都能发现。
所以我们编写一个文件,在script脚本文件目录中创建inspect.py文件,对所有的元素yaml文件进行审查。
#!/usr/bin/env python3
# -*- coding:utf-8 -*-
import os
import yaml
from config.conf import cm
from utils.times import running_time


@running_time
def inspect_element():
    """检查所有的元素是否正确
    只能做一个简单的检查
    """
    for files in os.listdir(cm.ELEMENT_PATH):
        _path = os.path.join(cm.ELEMENT_PATH, files)
        with open(_path, encoding='utf-8') as f:
            data = yaml.safe_load(f)
        for k in data.values():
            try:
                pattern, value = k.split('==')
            except ValueError:
                raise Exception("元素表达式中没有`==`")
            if pattern not in cm.LOCATE_MODE:
                raise Exception('%s中元素【%s】没有指定类型' % (_path, k))
            elif pattern == 'xpath':
                assert '//' in value,\
                    '%s中元素【%s】xpath类型与值不配' % (_path, k)
            elif pattern == 'css':
                assert '//' not in value, \
                    '%s中元素【%s]css类型与值不配' % (_path, k)
            else:
                assert value, '%s中元素【%s】类型与值不匹配' % (_path, k)


if __name__ == '__main__':
    inspect_element()
执行该文件:
校验元素done!用时0.002秒!可以看到,很短的时间内,我们就对所填写的YAML文件进行了审查。
现在我们基本所需要的组件已经大致完成了。
接下来我们将进行最重要的一环,封装selenium。
三、封装Selenium基类
在工厂模式种我们是这样写的:
#!/usr/bin/env python3
# -*- coding:utf-8 -*-
import time
from selenium import webdriver


driver = webdriver.Chrome()
driver.get('https://www.baidu.com')
driver.find_element_by_xpath("//input[@id='kw']").send_keys('selenium')
driver.find_element_by_xpath("//input[@id='su']").click()
time.sleep(5)
driver.quit()
很直白,简单,又明了。
创建driver对象,打开百度网页,搜索selenium,点击搜索,然后停留5秒,查看结果,最后关闭浏览器。
那我们为什么要封装selenium的方法呢。首先我们上述这种较为原始的方法,基本不适用于平时做UI自动化测试的,因为在UI界面实际运行情况远远比较复杂,可能因为网络原因,或者控件原因,我们元素还没有显示出来,就进行点击或者输入。所以我们需要封装selenium方法,通过内置的显式等待或一定的条件语句,才能构建一个稳定的方法。而且把selenium方法封装起来,有利于平时的代码维护。
我们在page目录创建webpage.py文件。
#!/usr/bin/env python3
# -*- coding:utf-8 -*-
"""
selenium基类
本文件存放了selenium基类的封装方法
"""
from selenium.webdriver.support import expected_conditions as EC
from selenium.webdriver.support.ui import WebDriverWait
from selenium.common.exceptions import TimeoutException

from config.conf import cm
from utils.times import sleep
from utils.logger import log


class WebPage(object):
    """selenium基类"""

    def __init__(self, driver):
        # self.driver = webdriver.Chrome()
        self.driver = driver
        self.timeout = 20
        self.wait = WebDriverWait(self.driver, self.timeout)

    def get_url(self, url):
        """打开网址并验证"""
        self.driver.maximize_window()
        self.driver.set_page_load_timeout(60)
        try:
            self.driver.get(url)
            self.driver.implicitly_wait(10)
            log.info("打开网页:%s" % url)
        except TimeoutException:
            raise TimeoutException("打开%s超时请检查网络或网址服务器" % url)

    @staticmethod
    def element_locator(func, locator):
        """元素定位器"""
        name, value = locator
        return func(cm.LOCATE_MODE[name], value)

    def find_element(self, locator):
        """寻找单个元素"""
        return WebPage.element_locator(lambda *args: self.wait.until(
            EC.presence_of_element_located(args)), locator)

    def find_elements(self, locator):
        """查找多个相同的元素"""
        return WebPage.element_locator(lambda *args: self.wait.until(
            EC.presence_of_all_elements_located(args)), locator)

    def elements_num(self, locator):
        """获取相同元素的个数"""
        number = len(self.find_elements(locator))
        log.info("相同元素:{}".format((locator, number)))
        return number

    def input_text(self, locator, txt):
        """输入(输入前先清空)"""
        sleep(0.5)
        ele = self.find_element(locator)
        ele.clear()
        ele.send_keys(txt)
        log.info("输入文本:{}".format(txt))

    def is_click(self, locator):
        """点击"""
        self.find_element(locator).click()
        sleep()
        log.info("点击元素:{}".format(locator))

    def element_text(self, locator):
        """获取当前的text"""
        _text = self.find_element(locator).text
        log.info("获取文本:{}".format(_text))
        return _text

    @property
    def get_source(self):
        """获取页面源代码"""
        return self.driver.page_source

    def refresh(self):
        """刷新页面F5"""
        self.driver.refresh()
        self.driver.implicitly_wait(30)
在文件中我们对主要用了显式等待对selenium的click,send_keys等方法,做了二次封装。提高了运行的成功率。
好了我们完成了POM模型的一半左右的内容。接下来我们们进入页面对象。
四、创建页面对象
在page_object目录下创建一个searchpage.py文件。
#!/usr/bin/env python3
# -*- coding:utf-8 -*-
from page.webpage import WebPage, sleep
from common.readelement import Element

search = Element('search')


class SearchPage(WebPage):
    """搜索类"""

    def input_search(self, content):
        """输入搜索"""
        self.input_text(search['搜索框'], txt=content)
        sleep()

    @property
    def imagine(self):
        """搜索联想"""
        return [x.text for x in self.find_elements(search['候选'])]

    def click_search(self):
        """点击搜索"""
        self.is_click(search['搜索按钮'])
在该文件中我们对,输入搜索关键词,点击搜索,搜索联想,进行了封装。
并配置了注释。
在平时中我们应该养成写注释的习惯,因为过一段时间后,没有注释,代码读起来很费劲。
好了我们的页面对象此时业已完成了。下面我们开始编写测试用例。在开始测试用了之前我们先熟悉一下pytest测试框架。
五、简单了解Pytest
打开pytest框架的官网。
# content of test_sample.py
def inc(x):
    return x + 1


def test_answer():
    assert inc(3) == 5
官方教程我认为写的并不适合入门阅读,而且没有汉化版。需要教程的话各位可以自己去找找。
5.1pytest.ini
pytest项目中的配置文件,可以对pytest执行过程中操作做全局控制。
在项目根目录新建pytest.ini文件。
[pytest]
addopts = --html=report.html --self-contained-html
addopts 指定执行时的其他参数说明:--html=report/report.html --self-contained-html 生成pytest-html带样式的报告-s 输出我们用例中的调式信息-q 安静的进行测试-v 可以输出用例更加详细的执行信息,比如用例所在的文件及用例名称等
六、编写测试用例
我们将使用pytest编写测试用例。
在TestCase目录中创建test_search.py文件。
#!/usr/bin/env python3
# -*- coding:utf-8 -*-
import re
import pytest
from utils.logger import log
from common.readconfig import ini
from page_object.searchpage import SearchPage


class TestSearch:
    @pytest.fixture(scope='function', autouse=True)
    def open_baidu(self, drivers):
        """打开百度"""
        search = SearchPage(drivers)
        search.get_url(ini.url)

    def test_001(self, drivers):
        """搜索"""
        search = SearchPage(drivers)
        search.input_search("selenium")
        search.click_search()
        result = re.search(r'selenium', search.get_source)
        log.info(result)
        assert result

    def test_002(self, drivers):
        """测试搜索候选"""
        search = SearchPage(drivers)
        search.input_search("selenium")
        log.info(list(search.imagine))
        assert all(["selenium" in i for i in search.imagine])


if __name__ == '__main__':
    pytest.main(['TestCase/test_search.py'])
我们测试用了就编写好了。
- pytest.fixture 这个实现了和unittest的setup,teardown一样的前置启动,后置清理的装饰器。
- 第一个测试用例:
- 我们实现了在百度selenium关键字,并点击搜索按钮,并在搜索结果中,用正则查找结果页源代码,返回数量大于10我们就认为通过。
- 第二个测试用例:
- 我们实现了,搜索selenium,然后断言搜索候选中的所有结果有没有selenium关键字。
最后我们的在下面写一个执行启动的语句。
这时候我们应该进入执行了,但是还有一个问题,我们还没有把driver传递。
七、conftest.py
我们在项目根目录下新建一个conftest.py文件。
#!/usr/bin/env python3
# -*- coding:utf-8 -*-
import pytest
from py.xml import html
from selenium import webdriver


driver = None


@pytest.fixture(scope='session', autouse=True)
def drivers(request):
    global driver
    if driver is None:
        driver = webdriver.Chrome()
        driver.maximize_window()

    def fn():
        driver.quit()

    request.addfinalizer(fn)
    return driver


@pytest.hookimpl(hookwrapper=True)
def pytest_runtest_makereport(item):
    """
    当测试失败的时候,自动截图,展示到html报告中
    :param item:
    """
    pytest_html = item.config.pluginmanager.getplugin('html')
    outcome = yield
    report = outcome.get_result()
    report.description = str(item.function.__doc__)
    extra = getattr(report, 'extra', [])

    if report.when == 'call' or report.when == "setup":
        xfail = hasattr(report, 'wasxfail')
        if (report.skipped and xfail) or (report.failed and not xfail):
            file_name = report.nodeid.replace("::", "_") + ".png"
            screen_img = _capture_screenshot()
            if file_name:
                html = '<div><img src="data:image/png;base64,%s" alt="screenshot" style="width:1024px;height:768px;" ' \
                       'onclick="window.open(this.src)" align="right"/></div>' % screen_img
                extra.append(pytest_html.extras.html(html))
        report.extra = extra


def pytest_html_results_table_header(cells):
    cells.insert(1, html.th('用例名称'))
    cells.insert(2, html.th('Test_nodeid'))
    cells.pop(2)


def pytest_html_results_table_row(report, cells):
    cells.insert(1, html.td(report.description))
    cells.insert(2, html.td(report.nodeid))
    cells.pop(2)


def pytest_html_results_table_html(report, data):
    if report.passed:
        del data[:]
        data.append(html.div('通过的用例未捕获日志输出.', class_='empty log'))


def _capture_screenshot():
    '''
    截图保存为base64
    :return:
    '''
    return driver.get_screenshot_as_base64()
conftest.py测试框架pytest的胶水文件,里面用到了fixture的方法,封装并传递出了driver。
八、执行用例
以上我们已经编写完成了整个框架和测试用例。
我们进入到当前项目的主目录执行命令:
pytest命令行输出:
Test session starts (platform: win32, Python 3.7.7, pytest 5.3.2, pytest-sugar 0.9.2)
cachedir: .pytest_cache
metadata: {'Python': '3.7.7', 'Platform': 'Windows-10-10.0.18362-SP0', 'Packages': {'pytest': '5.3.2', 'py': '1.8.0', 'pluggy': '0.13.1'}, 'Plugins': {'forked': '1.1.3', 'html': '2.0.1', 'metadata': '1.8.0', 'ordering': '0.6', 'rerunfailures': '8.0', 'sugar': '0.9.2', 'xdist': '1.31.0'}, 'JAVA_HOME': 'D:\\Program Files\\Java\\jdk1.8.0_131'}
rootdir: C:\Users\hoou\PycharmProjects\web-demotest, inifile: pytest.ini
plugins: forked-1.1.3, html-2.0.1, metadata-1.8.0, ordering-0.6, rerunfailures-8.0, sugar-0.9.2, xdist-1.31.0
collecting ...
DevTools listening on ws://127.0.0.1:10351/devtools/browser/78bef34d-b94c-4087-b724-34fb6b2ef6d1

 TestCase\test_search.py::TestSearch.test_001 ✓                                                                                              50% █████

 TestCase\test_search.py::TestSearch.test_002 ✓                                                                                             100% ██████████
------------------------------- generated html file: file://C:\Users\hoou\PycharmProjects\web-demotest\report\report.html --------------------------------

Results (12.90s):
       2 passed
可以看到两条用例已经执行成功了。
项目的report目录中生成了一个report.html文件。
这就是生成的测试报告文件。
九、发送邮件
当项目执行完成之后,需要发送到自己或者其他人邮箱里查看结果。
我们编写发送邮件的模块。
在utils目录中新建send_mail.py文件
#!/usr/bin/env python3
# -*- coding:utf-8 -*-
import zmail
from config.conf import cm


def send_report():
    """发送报告"""
    with open(cm.REPORT_FILE, encoding='utf-8') as f:
        content_html = f.read()
    try:
        mail = {
            'from': '[email protected]',
            'subject': '最新的测试报告邮件',
            'content_html': content_html,
            'attachments': [cm.REPORT_FILE, ]
        }
        server = zmail.server(*cm.EMAIL_INFO.values())
        server.send_mail(cm.ADDRESSEE, mail)
        print("测试邮件发送成功!")
    except Exception as e:
        print("Error: 无法发送邮件,{}!", format(e))


if __name__ == "__main__":
    '''请先在config/conf.py文件设置QQ邮箱的账号和密码'''
    send_report()
执行该文件:
测试邮件发送成功!可以看到测试报告邮件已经发送成功了。打开邮箱。
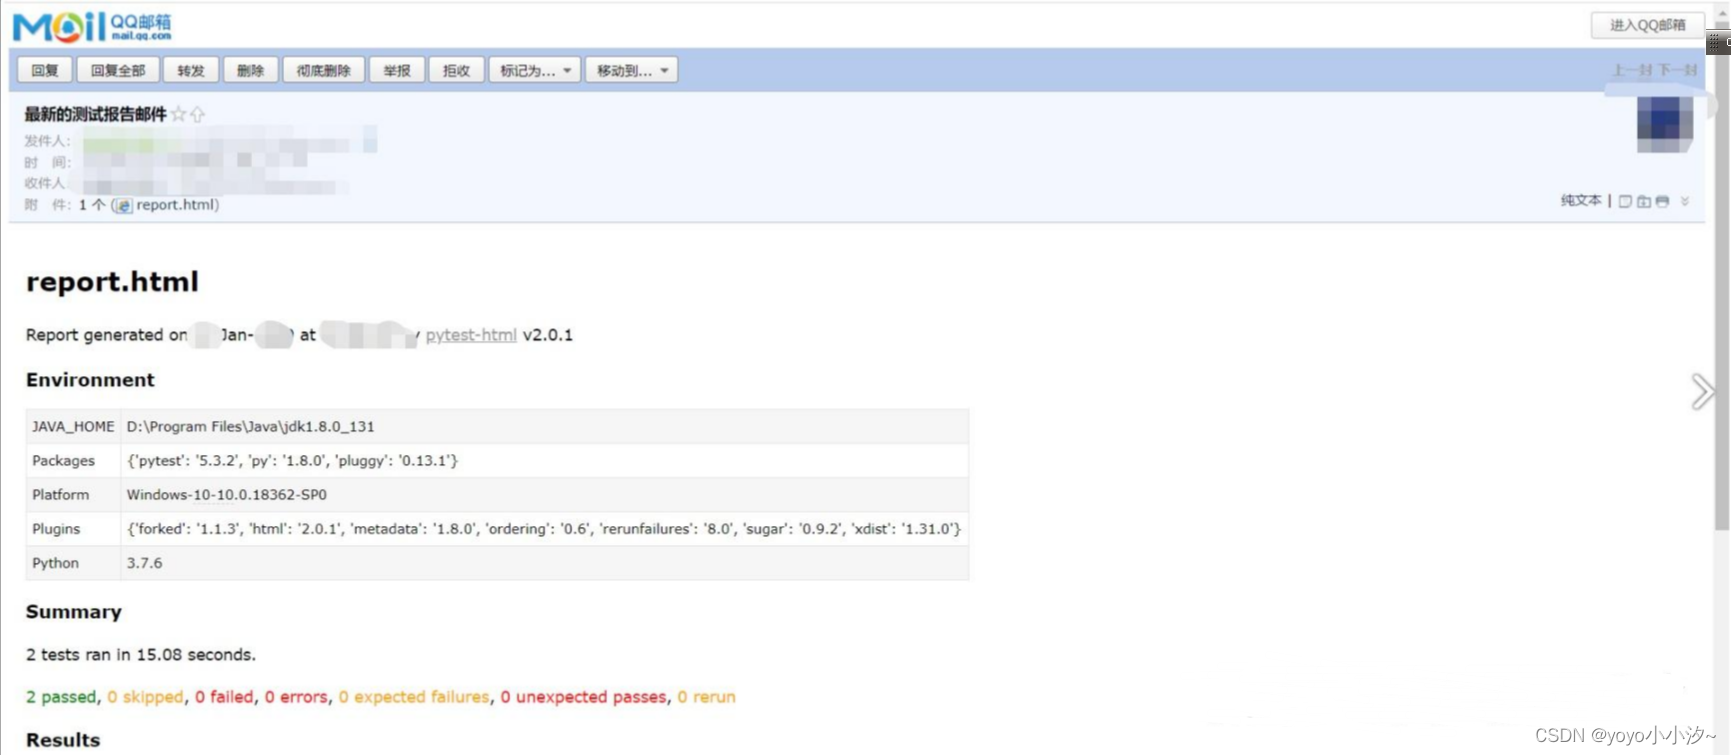

成功收到了邮件。
这个demo项目就算是整体完工了;是不是很有心得,在发送邮件的那一刻很有成就感。
总结
通过这篇文章,想必你已经对pytest+selenium框架有了一个整体的认知了,在自动化测试的道路上又上了一层台阶。喜欢的话可以点赞收藏评论加关注哟,关注我每天给你不同的惊喜。
最后:下面是配套学习资料,对于做【软件测试】的朋友来说应该是最全面最完整的备战仓库,这个仓库也陪伴我走过了最艰难的路程,希望也能帮助到你!

软件测试面试小程序
被百万人刷爆的软件测试题库!!!谁用谁知道!!!全网最全面试刷题小程序,手机就可以刷题,地铁上公交上,卷起来!
涵盖以下这些面试题板块:
1、软件测试基础理论 ,2、web,app,接口功能测试 ,3、网络 ,4、数据库 ,5、linux
6、web,app,接口自动化 ,7、性能测试 ,8、编程基础,9、hr面试题 ,10、开放性测试题,11、安全测试,12、计算机基础