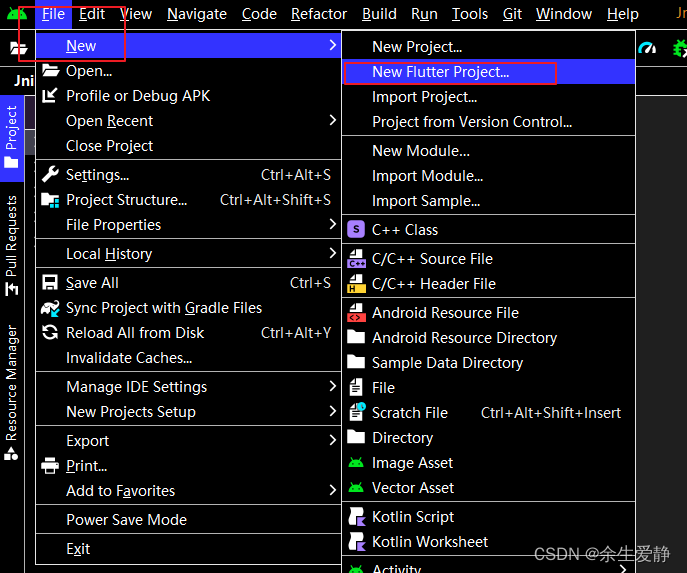
一、创建Flutter项目
1.1 file->New–>New Flutter Project
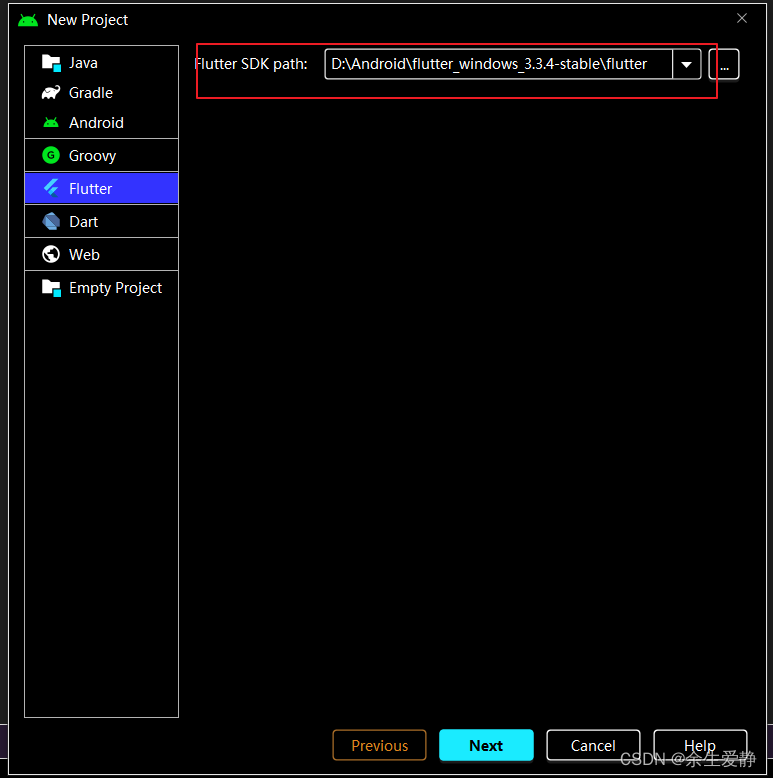
1.2 配置Flutter SDK Path
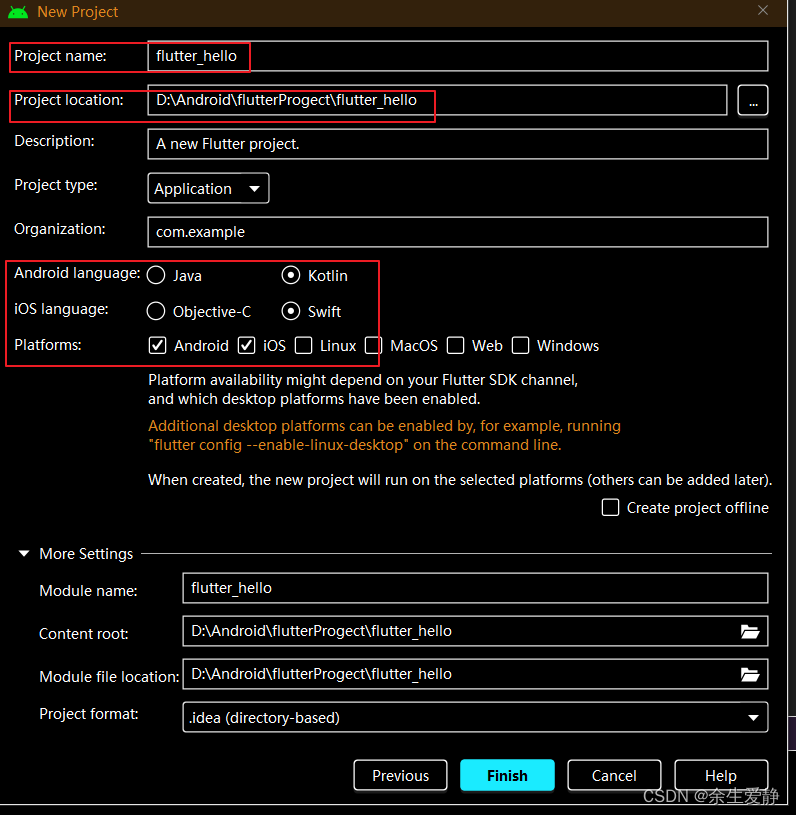
1.3 填写项目相关信息
二、android studio打开项目面板详解
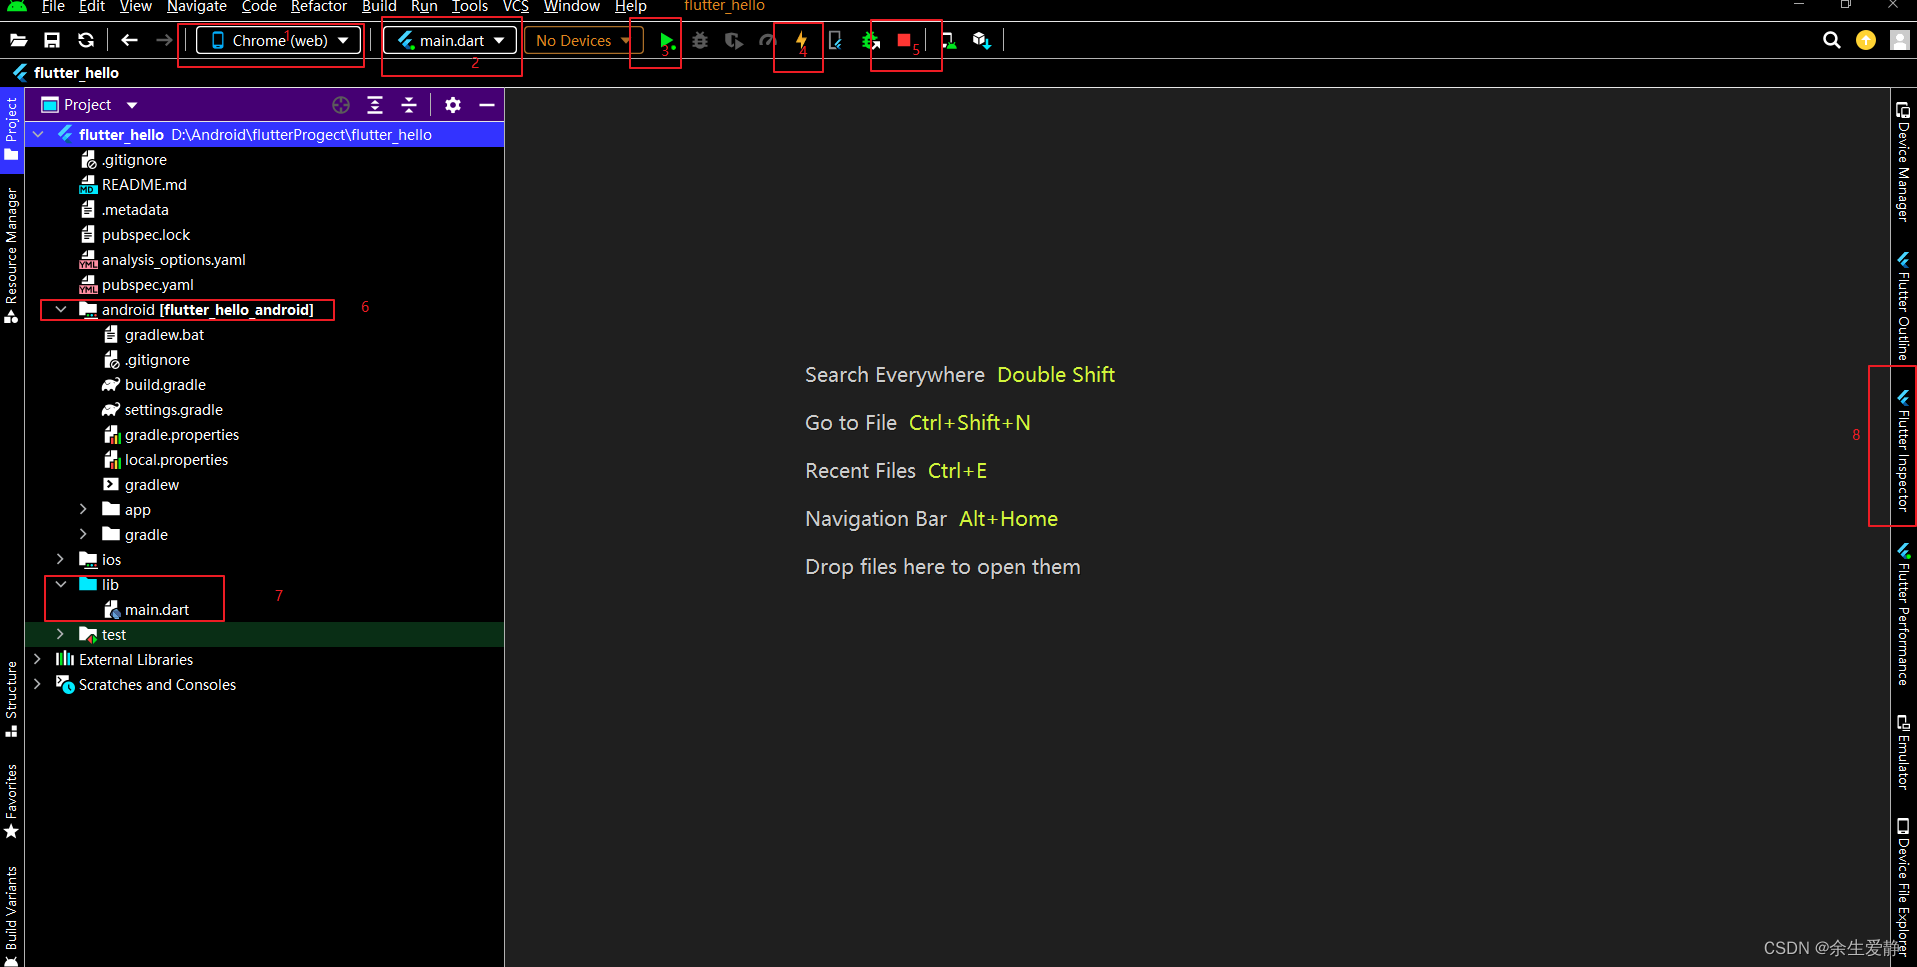
2-1 编译运行模块控制区(1、2、3、4、5)
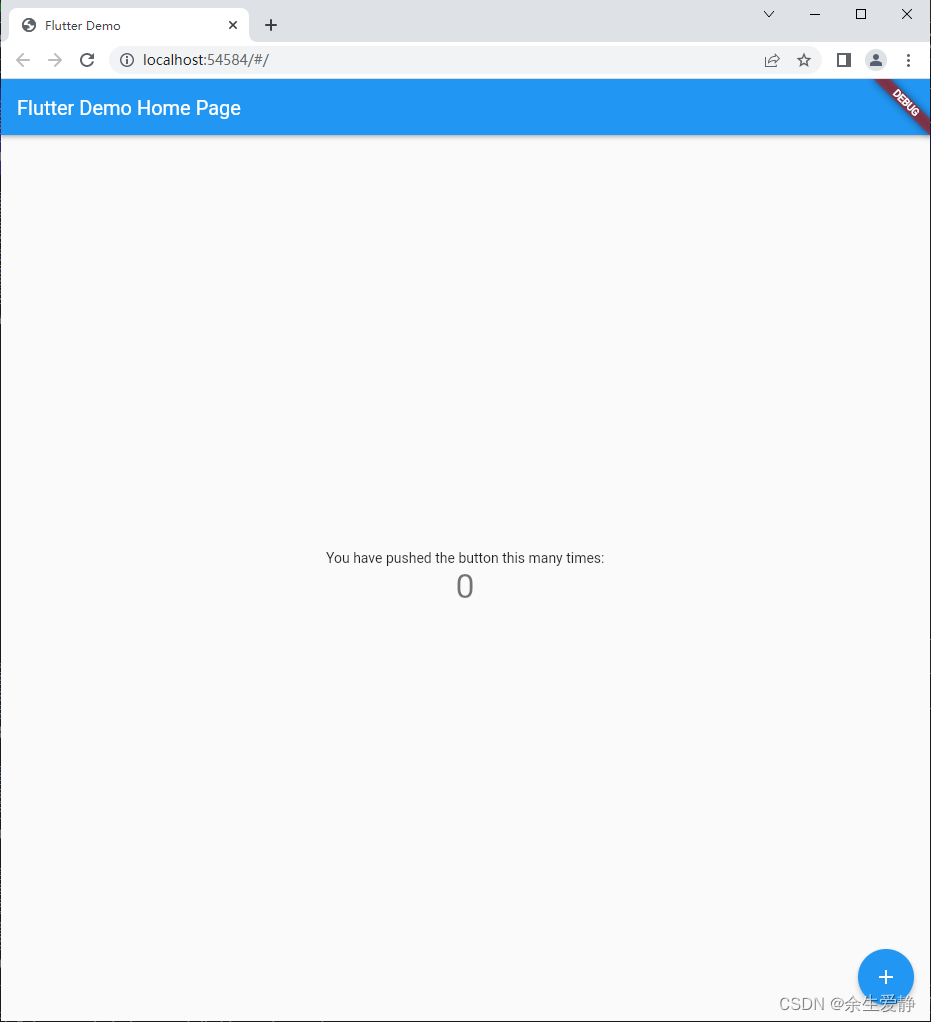
1:运行平台,由于本人没有连接移动设备,选择了chrome浏览器运行

2:运行的源码模块
3:启动运行按钮
4:热更新按钮
5:暂停按钮
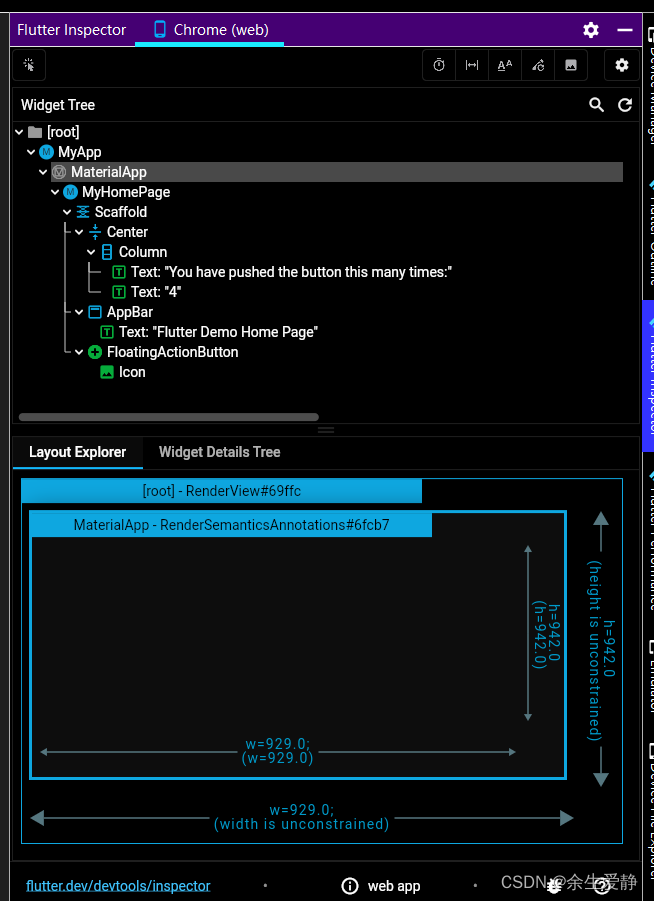
2-2 布局树查看
Flutter widget inspector 是一个强大的工具,用于可视化和查看 widget 树。
Flutter 框架层使用 widgets 作为 核心构建模块来处理从控件(例如文本、按钮和切换等)到布局(例如居中、填充、行和列等)的所有内容。
Flutter inspector 不仅可以帮助你可视化查看 Flutter widget 树,还有其他的作用:了解现有布局
诊断布局问题
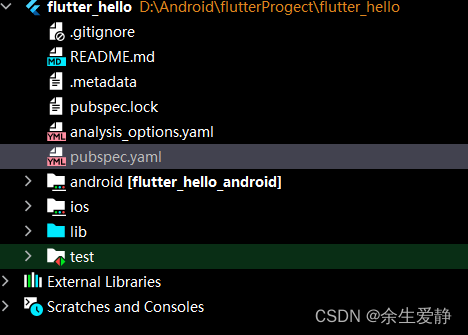
2-3 Flutter项目结构
|--flutter_hello -项目名称
   |--pubspec.yaml  -管理第三方库以及资源的配置文件
   |--android       -android原生工程
   |--ios           -IOS原生工程
   |--lib           -flutter源文件目录
      |--main.dart  -flutter入口文件
2-3-1 pubspec.yaml
pubspec.yaml 是 Flutter 项目的配置文件,类似于 Android 中的 Gradle 配置文件,下面我们就看看 pubspec.yaml 中各个属性的配置。
name: flutter_hello
description: A new Flutter project.

# The following line prevents the package from being accidentally published to
# pub.dev using `flutter pub publish`. This is preferred for private packages.
publish_to: 'none' # Remove this line if you wish to publish to pub.dev

# The following defines the version and build number for your application.
# A version number is three numbers separated by dots, like 1.2.43
# followed by an optional build number separated by a +.
# Both the version and the builder number may be overridden in flutter
# build by specifying --build-name and --build-number, respectively.
# In Android, build-name is used as versionName while build-number used as versionCode.
# Read more about Android versioning at https://developer.android.com/studio/publish/versioning
# In iOS, build-name is used as CFBundleShortVersionString while build-number is used as CFBundleVersion.
# Read more about iOS versioning at
# https://developer.apple.com/library/archive/documentation/General/Reference/InfoPlistKeyReference/Articles/CoreFoundationKeys.html
# In Windows, build-name is used as the major, minor, and patch parts
# of the product and file versions while build-number is used as the build suffix.
version: 1.0.0+1

environment:
  sdk: '>=2.18.2 <3.0.0'

# Dependencies specify other packages that your package needs in order to work.
# To automatically upgrade your package dependencies to the latest versions
# consider running `flutter pub upgrade --major-versions`. Alternatively,
# dependencies can be manually updated by changing the version numbers below to
# the latest version available on pub.dev. To see which dependencies have newer
# versions available, run `flutter pub outdated`.
dependencies:
  flutter:
    sdk: flutter


  # The following adds the Cupertino Icons font to your application.
  # Use with the CupertinoIcons class for iOS style icons.
  cupertino_icons: ^1.0.2

dev_dependencies:
  flutter_test:
    sdk: flutter

  # The "flutter_lints" package below contains a set of recommended lints to
  # encourage good coding practices. The lint set provided by the package is
  # activated in the `analysis_options.yaml` file located at the root of your
  # package. See that file for information about deactivating specific lint
  # rules and activating additional ones.
  flutter_lints: ^2.0.0

# For information on the generic Dart part of this file, see the
# following page: https://dart.dev/tools/pub/pubspec

# The following section is specific to Flutter packages.
flutter:

  # The following line ensures that the Material Icons font is
  # included with your application, so that you can use the icons in
  # the material Icons class.
  uses-material-design: true

  # To add assets to your application, add an assets section, like this:
  # assets:
  #   - images/a_dot_burr.jpeg
  #   - images/a_dot_ham.jpeg

  # An image asset can refer to one or more resolution-specific "variants", see
  # https://flutter.dev/assets-and-images/#resolution-aware

  # For details regarding adding assets from package dependencies, see
  # https://flutter.dev/assets-and-images/#from-packages

  # To add custom fonts to your application, add a fonts section here,
  # in this "flutter" section. Each entry in this list should have a
  # "family" key with the font family name, and a "fonts" key with a
  # list giving the asset and other descriptors for the font. For
  # example:
  # fonts:
  #   - family: Schyler
  #     fonts:
  #       - asset: fonts/Schyler-Regular.ttf
  #       - asset: fonts/Schyler-Italic.ttf
  #         style: italic
  #   - family: Trajan Pro
  #     fonts:
  #       - asset: fonts/TrajanPro.ttf
  #       - asset: fonts/TrajanPro_Bold.ttf
  #         weight: 700
  #
  # For details regarding fonts from package dependencies,
  # see https://flutter.dev/custom-fonts/#from-packages
项目中默认配置,去掉注释部分,剩下如下:

name: flutter_hello
description: A new Flutter project.
publish_to: 'none' # Remove this line if you wish to publish to pub.dev
version: 1.0.0+1

environment:
  sdk: '>=2.18.2 <3.0.0'
dependencies:
  flutter:
    sdk: flutter
  cupertino_icons: ^1.0.2

dev_dependencies:
  flutter_test:
    sdk: flutter
  flutter_lints: ^2.0.0

flutter:
  uses-material-design: true
name
此属性表示包名(package name),此属性是非常重要的,引入其他文件时需要使用此包名:
description
description 属性是一个可选配置属性,是对当前项目的介绍。内容其实就是我们创建项目时候声明的
publish_to
这一行可以防止软件包被pub publish发布到pub.dev上,对于私有软件包这行是必需的配置;如果想要把当前软件包发布到pub.dev也可以删除此行
version
此属性应用程序的版本和内部版本号,格式为 x.x.x+x。
version number: + 前面部分,由 2 个小点隔开,
build number:+后面的部分
在 Android 中 version number 对应 versionName,build number 对应 versionCode,在 android/build.gradle 下有相关配置:
environment
Environment 属性下添加 Flutter 和 Dart 版本控制。
environment:
  sdk: '>=2.18.2 <3.0.0'
上面的版本规定此应用或库只能在高于或等于2.18.2,低于3.0.0的Dart SDK版本上运行。
我们也可以手动添加 Flutter 版本:
environment:
  sdk: ">=2.18.2 <3.0.0"
  flutter: "3.3.4"
dependencies
包含应用程序所依赖的包,会编译到项目中
1、依赖 pub.dev 上的第三方库
依赖 pub.dev 上的第三方库是最常用的一种方式
dependencies:
  transmogrify: ^1.4.0
2、依赖自己的仓库
可以使用hosted来指定仓库的路径,版本约束是可选的,但建议使用。如果没有给出版本约束,则假定为 any。
environment:
  sdk: >=2.15.0 < 3.0.0

dependencies:
  transmogrify:
    hosted: https://some-package-server.com
    version: ^1.4.0
如果你的包有 2.15 之前的语言版本,你必须使用更详细的托管格
environment:
  sdk: >=2.14.0 < 3.0.0

dependencies:
  transmogrify:
    hosted:
      name: transmogrify
      url: https://some-package-server.com
    version: ^1.4.0
3、依赖Git仓库
dependencies:
  kittens:
    git: https://github.com/munificent/kittens.git
如果您想依赖特定的提交、分支或标签,请在描述中添加 ref 键
dependencies:
  kittens:
    git:
      url: https://github.com/munificent/kittens.git
      ref: some-branch
4、依赖本地库
dependencies:
  transmogrify:
    path: /Users/me/transmogrify
dev_dependencies
dev_dependencies 仅仅是运行期间的包
flutter
flutter相关的配置,assets资源、fonts字体
1、图片资源的配置
1-1、在该配置文件的同级建立images目录
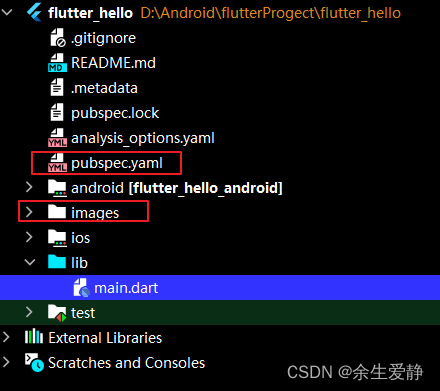
1-2、在pubspec.yaml中配置
 assets:
     - images/flutter.jpg
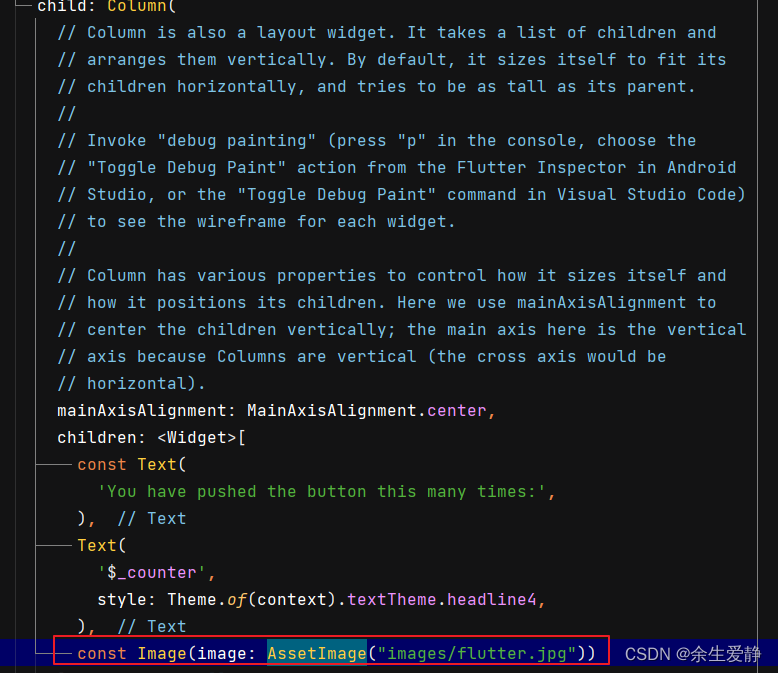
1-3、使用AssetImage方式引入资源
AssetImage("images/flutter.jpg")
2、多分辨率图片的配置
2-1、图片资源
通用图片资源
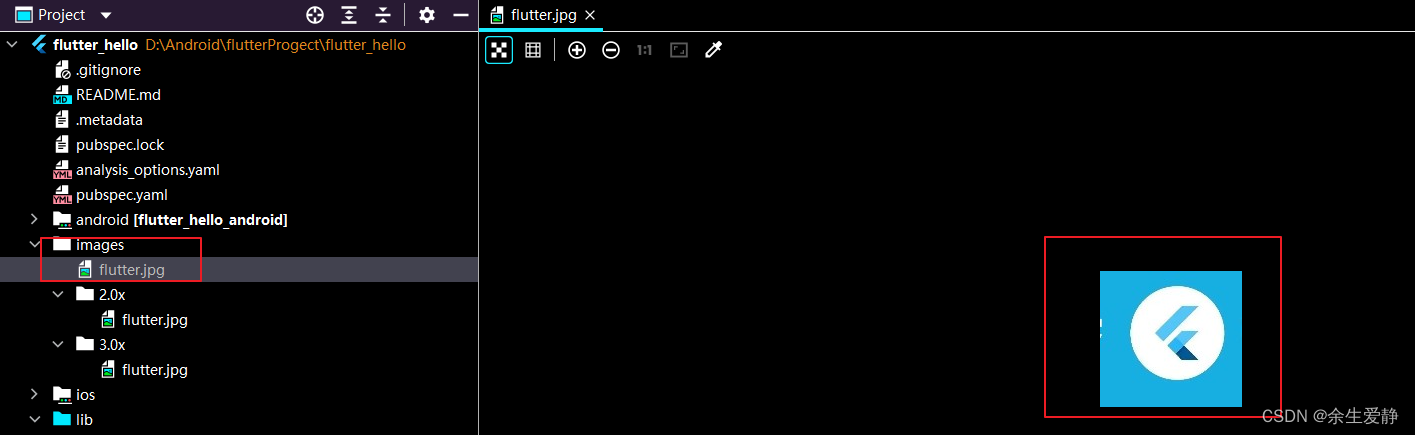
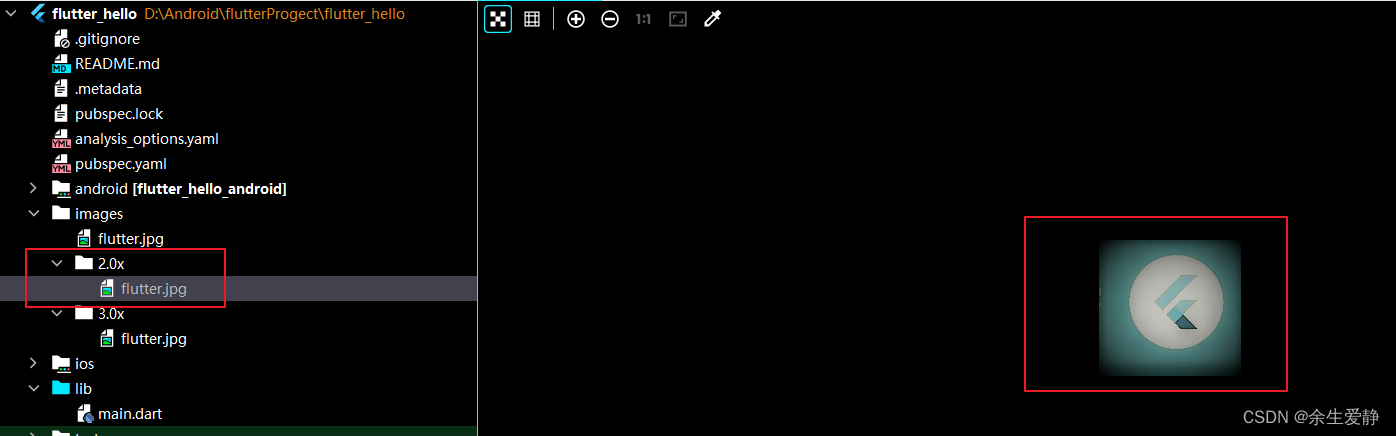
2.0x屏幕密度的图片
3.0x屏幕密度的图片
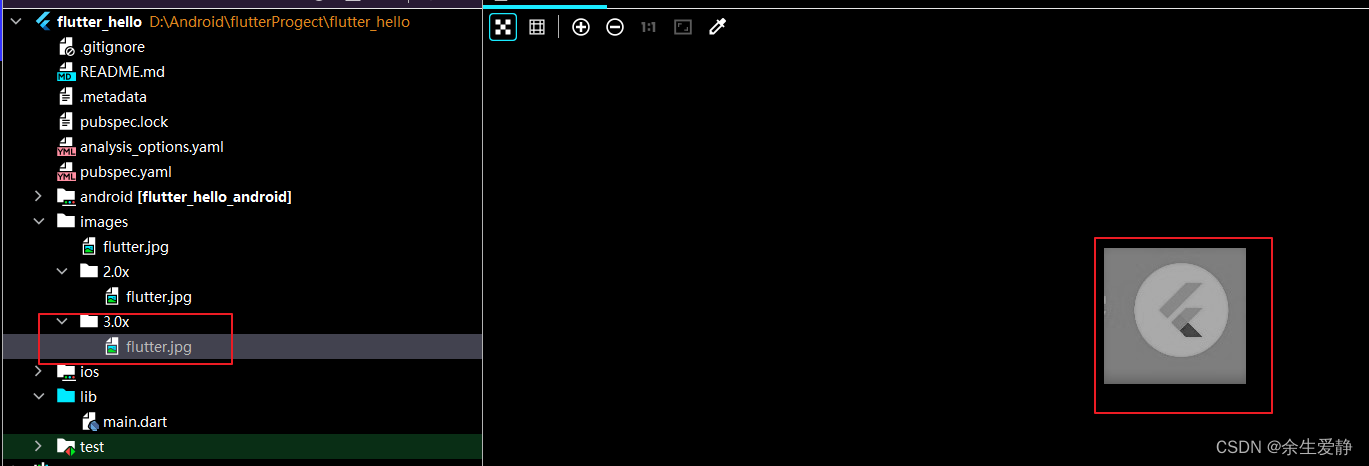
2-2、图片资源的配置
  assets:
     - images/flutter.jpg
     - images/2.0x/flutter.jpg
     - images/3.0x/flutter.jpg
2-3、图片资源的应用
const Image(image: AssetImage("images/flutter.jpg"))
2-4、不同分辨率设备显示的图片资源
2-4-1、VIVO X20A手机:屏幕分辨率 1080x2160 屏幕密度:480
使用adb shell wm size查看设备分辨
adb shell wm size

使用adb shell wm density查看设备屏幕密度
adb shell wm density

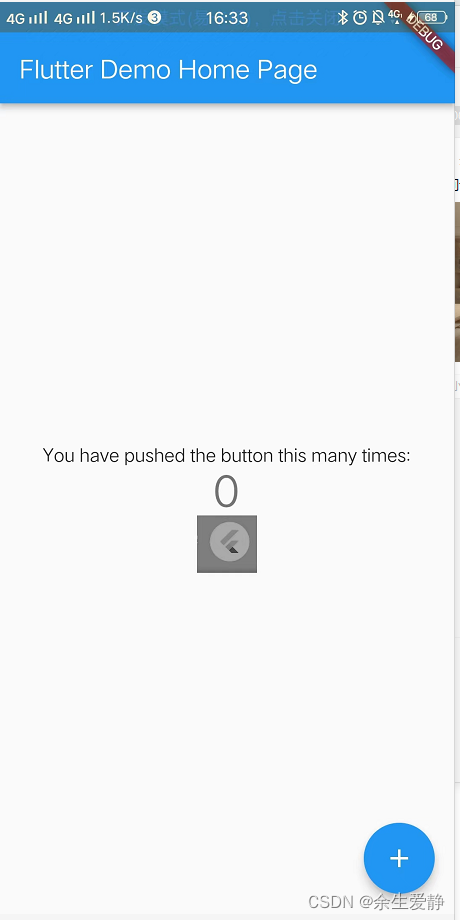
PS:可以看到该设备加载的是3.0x下的图片
2-4-2、android7.0的设备:屏幕分辨率 1366x768 屏幕密度:160

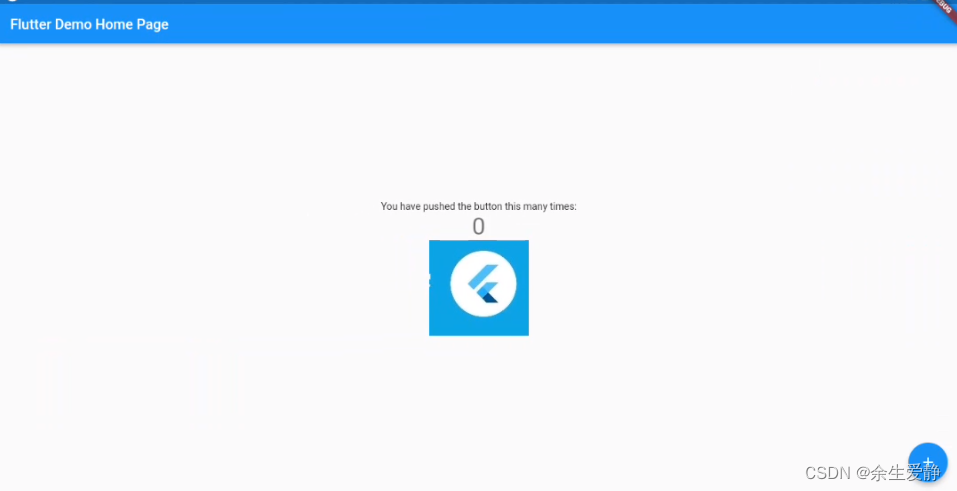
PS:可以看到该设备加载的是通用密度下的图片
屏幕密度
屏幕密度不知道如何定义,其实屏幕密度就是像素密度的另外一种表示,是以160dpi=1.0为基准的。手机出厂之后屏幕密度,包括X,Y轴方向的像素密度都是固定值。
android将实际的屏幕密度进行划分(low,medium,high,and extra high,extra extra high)
一般情况下的普通屏幕:ldpi是120dpi,mdpi是160dpi,hdpi是240dpi,xhdpi是320dpi ,xxhdpi 是480dpi。
android以像素密度160dpi为基准对屏幕进行划分,当像素密度为160dpi时屏幕密度为1.0,像素密度为120dpi时屏幕密度为0.75,像素密度为320dpi时屏幕密度为2.0.
| 名称 | 密度 | 倍数 |
|---|---|---|
| ldpi | 120dpi | 0.75x |
| mdpi | 160dpi | 1x |
| hdpi | 240dpi | 1.5x |
| xhdpi | 320dpi | 2.0x |
| xxhdpi | 480dpi | 3.0x |
| xxxhdpi | 640dpi | 4.0x |
3、字体资源配置
3-1、
目前flutter支持的字体库
- .ttf
- .ttc
- .otf
不支持的字体库: - .woff
- woff2
3-2、下载字体库(google的字体库https://fonts.google.com/),并复制到项目中
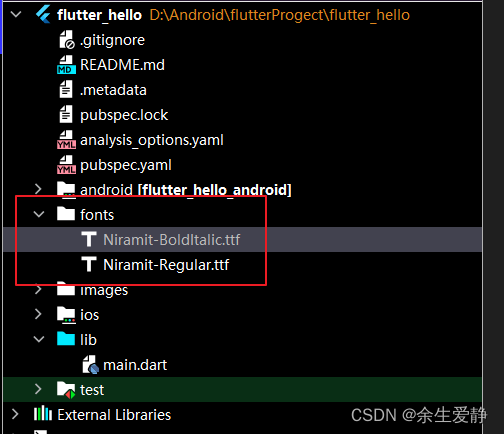
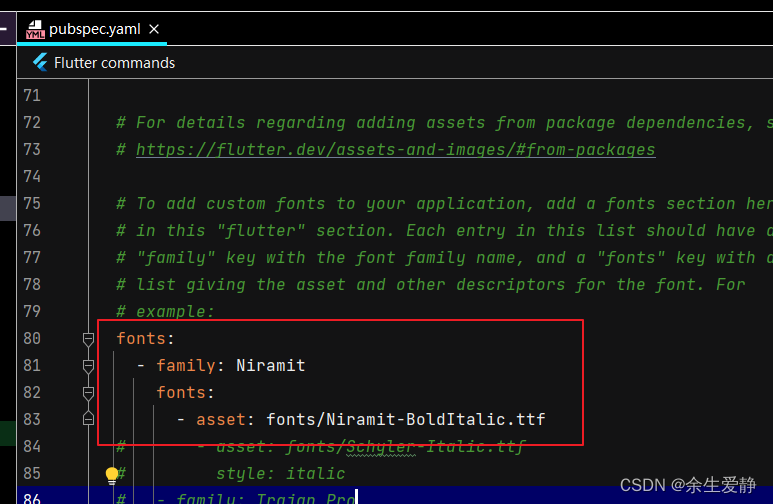
3-3、pubspec.yaml里面配置
 fonts:
   - family: Niramit
     fonts:
       - asset: fonts/Niramit-BoldItalic.ttf
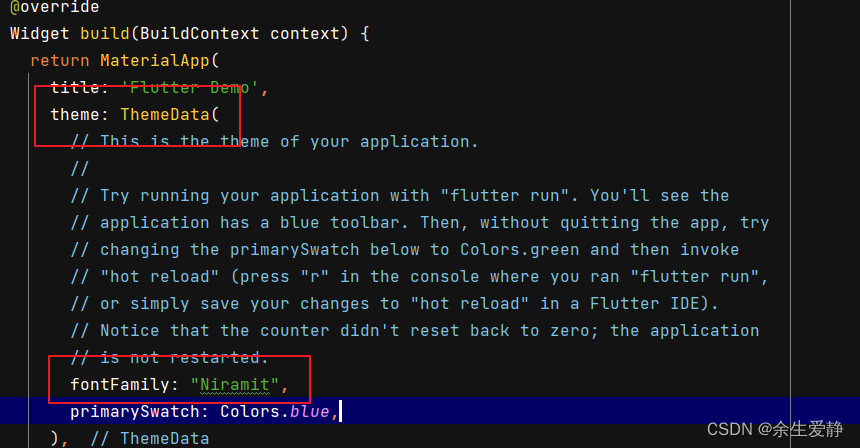
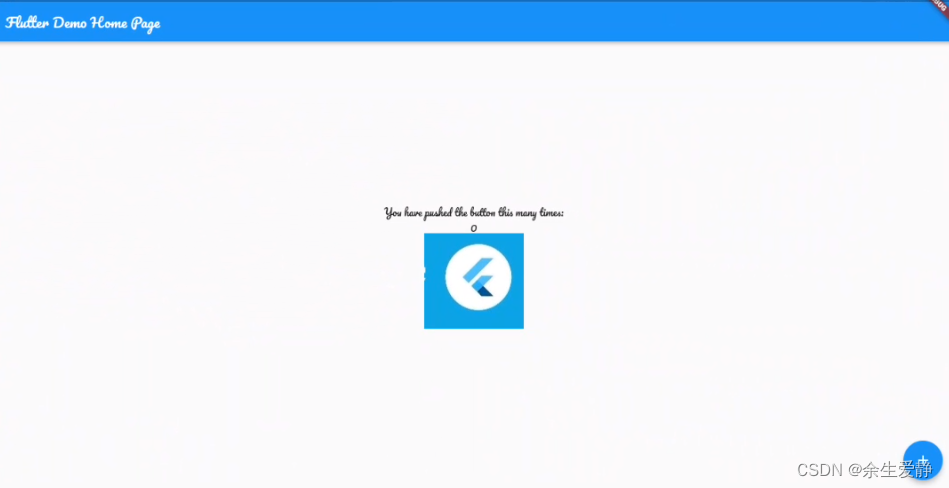
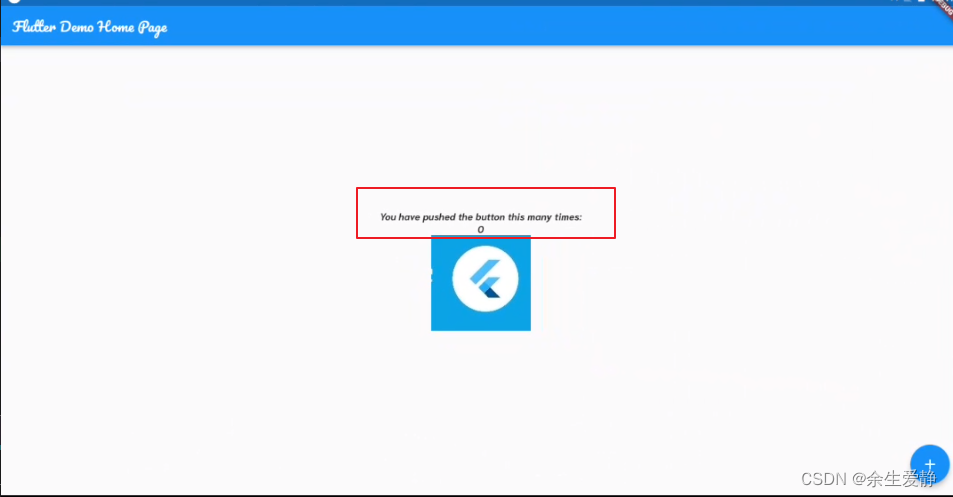
3-4、全局使用
在MaterialApp里面them的fontFamily属性设置
fontFamily: "Niramit",
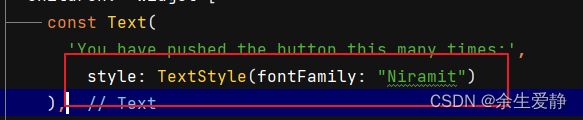
局部控件设置字体:
pubspec.yaml里面配置
- family: Pacifico
      fonts:
        - asset: fonts/Pacifico-Regular.ttf
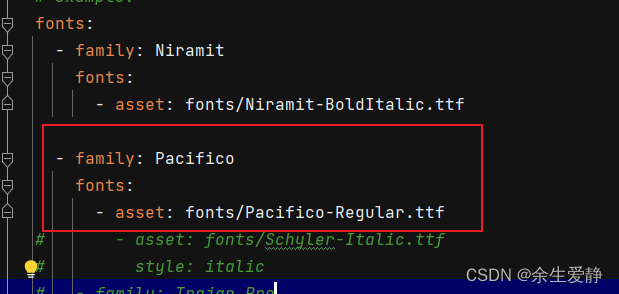
style: TextStyle(fontFamily: "Niramit")
2-3-2 android原生工程
|--android
   |--build.gradle             -项目构建的gradle文件
   |--settings.gradle          -包含整个工程的所有 Module 的声明
   |--gradle.properties        -属性是全局的,可以在各个模块的build.gradle里面直接引用
   |--local.properties         -常用来声明sdk、ndk的路径
   |--app                      -app模块
      |--build.gradle          -app模块的gradle文件
      |--CMakeLists.txt        -app模块下cpp文件编译配置
      |--lib                   -app模块依赖的第三方jar包
      |--src                   -app模块源码
         |--main
            |--AndroidMenifest.xml   -app模块的menifest文件
            |--assets                -本地文件
            |--cpp                   -c或者cpp源码
            |--fonts                 -字体库文件
            |--java                  -源码
            |--jniLibs               -第三方so库文件
            |--res                   -布局、图片、字符、自定义属性、尺寸、颜色值等资源文件
2-3-2-1 android/build.gradle
buildscript {


    ext.kotlin_version = '1.6.10'  //声明kotlin版本
    repositories {

                     //声明依赖的仓库
        google()
        mavenCentral()
    }

    dependencies {

                    //声明gradle依赖的版本
        classpath 'com.android.tools.build:gradle:7.1.2'
        classpath "org.jetbrains.kotlin:kotlin-gradle-plugin:$kotlin_version"
    }
}

allprojects {

                       //所有模块依赖的仓库
    repositories {


        google()
        mavenCentral()
    }
}

rootProject.buildDir = '../build'
subprojects {


    project.buildDir = "${rootProject.buildDir}/${project.name}"
}
subprojects {


    project.evaluationDependsOn(':app')
}

task clean(type: Delete) {


    delete rootProject.buildDir      //删除根目录下的buildDir文件夹任务
}
buildscript和allprojects中都有repositories和dependencies,两者的区别就是buildscript中的配置主要是为gradle本身服务的,gradle插件需要依赖的一些库什么的都在这里配置,allprojects则是为项目中的所有module配置的共同模块。
2-3-2-2 settings.gradle
include ':app'

def localPropertiesFile = new File(rootProject.projectDir, "local.properties")
def properties = new Properties()

assert localPropertiesFile.exists()
localPropertiesFile.withReader("UTF-8") { reader -> properties.load(reader) }

def flutterSdkPath = properties.getProperty("flutter.sdk")
assert flutterSdkPath != null, "flutter.sdk not set in local.properties"
apply from: "$flutterSdkPath/packages/flutter_tools/gradle/app_plugin_loader.gradle"
1、使用include来声明项目包含的模块。
2-3-2-3 gradle.properties
org.gradle.jvmargs=-Xmx1536M
android.useAndroidX=true
android.enableJetifier=true
1、org.gradle.jvmargs=-Xmx1536M
jvm堆内存大小
1-1、堆大小设置(XX类型参数)
初始化堆内存:-XX:InitialHeapSize=1024m(-Xms1024m -简写)
最大堆内存:-XX:MaxHeapSize=1024m (-Xmx1024m -简写)
1-2、-Xss:线程的堆栈大小:-Xss 默认是 512k~1024k 等价于 -XX:ThreadStackSize=512k 。该值等于零表示使用的是默认值。一般情况下无需设置
1-3、-Xmn:设置年轻代大小。整个堆大小=年轻代大小 + 年老代大小 + 持久代大小。持久代一般固定大小为64m,所以增大年轻代后,将会减小年老代大小。此值对系统性能影响较大,Sun官方推荐配置为整个堆的3/8。
1-4、元空间-XX:MetaspaceSize :初始化的Metaspace大小,控制元空间发生GC的阈值。GC后,动态增加或降低MetaspaceSize。在默认情况下,这个值大小根据不同的平台在12M到20M浮动。
-XX:MaxMetaspaceSize:限制Metaspace增长的上限,防止因为某些情况导致Metaspace无限的使用本地内存,影响到其他程序
1-5、-XX:NewRatio新生代(Eden + 2*S)与老年代(不包括永久区)的比值 例如-XX:NewRatio=4 表示新生代:老年代 = 1:4 即老年代占整个对的4/5;默认值=2
1-6、-XX:SurvivorRatio:2个Survivor区和Eden区的比值 例如:-XX:SurvivorRatio=8 表示 两个Survivor区:Eden区=2:8 ,每个Survivor占 1/10 ;JVM默认=8
2、android.useAndroidX=true
表示“Android插件会启用对应的AndroidX库,而非Support库”;未设置时默认为false;
3、android.enableJetifier=true
表示Android插件会通过重写其二进制文件来自动迁移现有的第三方库(aar包或者jar包等依赖库),以迁移使用AndroidX依赖项;未设置时默认为false;
gradle.properties常用功能配置
org.gradle.jvmargs=-Xmx5120m -XX:MaxPermSize=1280m -Dfile.encoding=UTF-8
#(JVM堆内存大小,要是想运行的快一些,就改大点,整个8192m啥的)

org.gradle.daemon=true
#通过开启守护进程,下一次构建的时候,将会连接这个守护进程进行构建,
#而不是重新 fork 一个 gradle构建进程

org.gradle.configureondemand=true
#按需加载

org.gradle.parallel=true
#并行编译

org.gradle.caching=true
#开启 gradle 缓存

android.enableBuildCache=true
#开启依赖缓存,这个设置可以让Android Studio 会把依赖的 jar 或 arr 缓存到本地,并且把模块名称设置为 hash 值。每次编译生成的缓存在 $HOME/.android/build-cache

android.useAndroidX=true
# 标识当前 module 启用 Androidx ,当把android项目自动迁移到androidX,
AS会自动在这个文件加上这句

android.enableJetifier=true
# 表示将项目中使用的第三方库也迁移到 Androidx

android.injected.testOnly=false
#解决真机无法安装测试包的报错,因为国内一些安卓手机制作商定制的
#Android 系统不允许安装含带这个属性的测试包。哪怕你使用 -t 参数通过 adb 安装也是不行的,这个很常见

android.useNewApkCreator=false
#声明使用旧的打包器解决 Android Studio 升级 3.6 之后,
#报错 Entry name 'AndroidManifest.xml' collided,
#因此禁用新版本打包工具,使用旧的打包工具

kotlin.incremental=true
kotlin.incremental.java=true
kotlin.incremental.js=true
#kotlin 增量编译

kotlin.caching.enabled=true
#kotlin 编译缓存

kotlin.parallel.tasks.in.project=true
#kotlin 并行编译

kotlin.code.style=official
# Kotlin code style for this project: "official" or "obsolete"


# 优化kapt
# 并行运行kapt1.2.60版本以上支持
kapt.use.worker.api=true
# 增量编译 kapt1.3.30版本以上支持
kapt.incremental.apt=true
# kapt avoiding 如果用kapt依赖的内容没有变化,会完全重用编译内容,省掉#`app:kaptGenerateStubsDebugKotlin`的时间
kapt.include.compile.classpath=false
2-3-2-4 local.propertices
sdk.dir=D\:\\Android\\AndroidStudio\\SDK
flutter.sdk=D\:\\Android\\flutter_windows_3.3.4-stable\\flutter
flutter.buildMode=debug
flutter.versionName=1.0.0
flutter.versionCode=1
声明了sdk和flutter sdk的路径
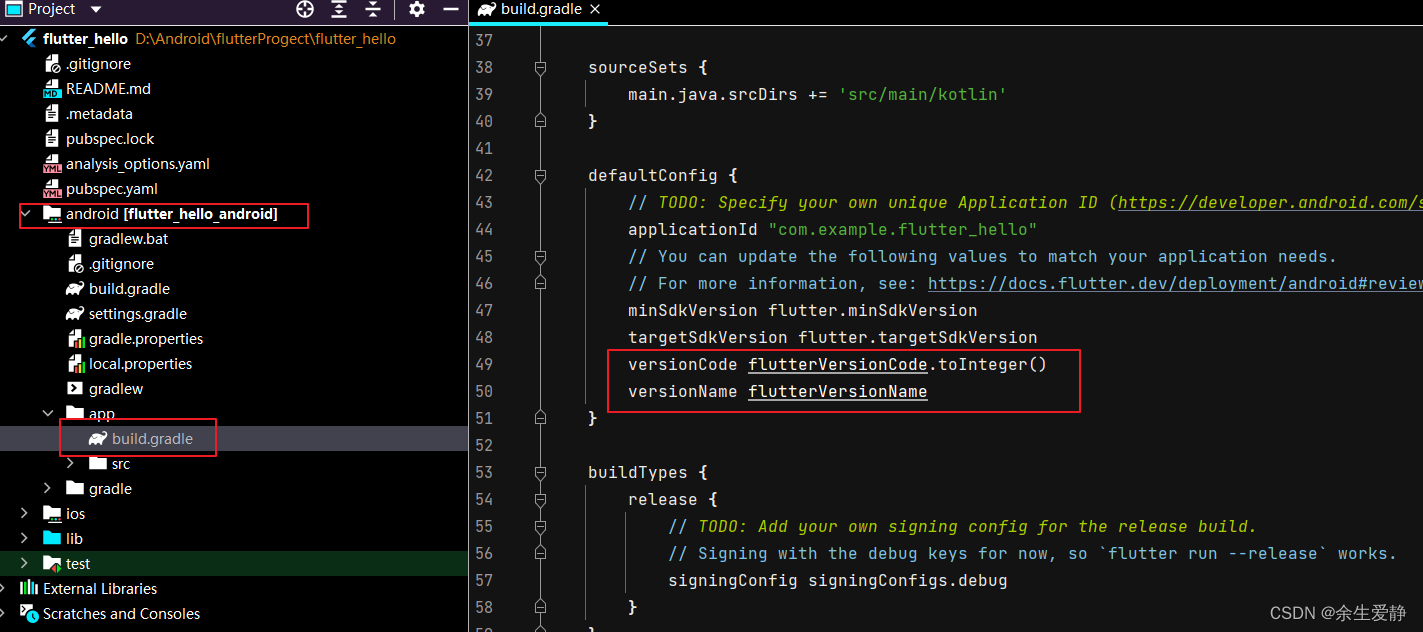
2-3-2-5 app/build.gradle
def localProperties = new Properties()
def localPropertiesFile = rootProject.file('local.properties')
if (localPropertiesFile.exists()) {


    localPropertiesFile.withReader('UTF-8') {

     reader ->
        localProperties.load(reader)
    }
}

def flutterRoot = localProperties.getProperty('flutter.sdk')

def flutterVersionCode = localProperties.getProperty('flutter.versionCode')
if (flutterVersionCode == null) {


    flutterVersionCode = '1'
}

def flutterVersionName = localProperties.getProperty('flutter.versionName')
if (flutterVersionName == null) {


    flutterVersionName = '1.0'
}

apply plugin: 'com.android.application'
apply plugin: 'kotlin-android'
apply from: "$flutterRoot/packages/flutter_tools/gradle/flutter.gradle"

android {


    compileSdkVersion flutter.compileSdkVersion
    ndkVersion flutter.ndkVersion

    compileOptions {


        sourceCompatibility JavaVersion.VERSION_1_8
        targetCompatibility JavaVersion.VERSION_1_8
    }

    kotlinOptions {


        jvmTarget = '1.8'
    }

    sourceSets {


        main.java.srcDirs += 'src/main/kotlin'
    }

    defaultConfig {


        // TODO: Specify your own unique Application ID (https://developer.android.com/studio/build/application-id.html).
        applicationId "com.example.flutter_hello"
        // You can update the following values to match your application needs.
        // For more information, see: https://docs.flutter.dev/deployment/android#reviewing-the-build-configuration.
        minSdkVersion flutter.minSdkVersion
        targetSdkVersion flutter.targetSdkVersion
        versionCode flutterVersionCode.toInteger()
        versionName flutterVersionName
    }

    buildTypes {


        release {


            // TODO: Add your own signing config for the release build.
            // Signing with the debug keys for now, so `flutter run --release` works.
            signingConfig signingConfigs.debug
        }
    }
}

flutter {


    source '../..'
}

dependencies {


    implementation "org.jetbrains.kotlin:kotlin-stdlib-jdk7:$kotlin_version"
}
flutter版本信息从local.propertices读取脚本
def localProperties = new Properties()
def localPropertiesFile = rootProject.file('local.properties')
if (localPropertiesFile.exists()) {


    localPropertiesFile.withReader('UTF-8') {

     reader ->
        localProperties.load(reader)
    }
}

def flutterRoot = localProperties.getProperty('flutter.sdk')

def flutterVersionCode = localProperties.getProperty('flutter.versionCode')
if (flutterVersionCode == null) {


    flutterVersionCode = '1'
}

def flutterVersionName = localProperties.getProperty('flutter.versionName')
if (flutterVersionName == null) {


    flutterVersionName = '1.0'
}
gradle插件依赖
apply plugin: 'com.android.application'
apply plugin: 'kotlin-android'
apply from: "$flutterRoot/packages/flutter_tools/gradle/flutter.gradle"
android编译打包配置
android {


    compileSdkVersion flutter.compileSdkVersion    //sdk版本
    ndkVersion flutter.ndkVersion                  //ndk版本

    compileOptions {

                                  //Java 编译版本
        sourceCompatibility JavaVersion.VERSION_1_8
        targetCompatibility JavaVersion.VERSION_1_8
    }

    kotlinOptions {

                                  //kotlin编译版本
        jvmTarget = '1.8'
    }

    sourceSets {

                                    //显式的指定特定的文件和目录,我们利用这个特性来完成代码和资源的灵活配置
        main.java.srcDirs += 'src/main/kotlin'  //显示指定项目java源码路径
    }

    defaultConfig {


        // TODO: Specify your own unique Application ID (https://developer.android.com/studio/build/application-id.html).
        applicationId "com.example.flutter_hello"     //应用唯一标识ID,必须保持唯一
        // You can update the following values to match your application needs.
        // For more information, see: https://docs.flutter.dev/deployment/android#reviewing-the-build-configuration.
        minSdkVersion flutter.minSdkVersion    //应用支持的最小sdk版本
        targetSdkVersion flutter.targetSdkVersion  //应用当前sdk版本
        versionCode flutterVersionCode.toInteger() //应用版本号
        versionName flutterVersionName             //应用版本名称
        multiDexEnabled true                       //支持分包
    }

    signingConfigs {

    //签名配置
        release {

      //正式包的签名配置
            storeFile file("platform.jks")
            storePassword "platform123"
            keyAlias "platform"
            keyPassword "platform123"
        }

        debug {

    //测试包的签名配置
            storeFile file("platform.jks") //签名文件
            storePassword "platform123"   //保存密码
            keyAlias "platform"           //别名
            keyPassword "platform123"     //密码
        }

    }
    buildTypes {

    //应用打包编译
        release {

      //应用正式包的编译配置
            // TODO: Add your own signing config for the release build.
            // Signing with the debug keys for now, so `flutter run --release` works.
            signingConfig signingConfigs.release //使用上面配置的正式环境的签名文件
        }
    }
}
模块依赖配置管理
dependencies {


    implementation "org.jetbrains.kotlin:kotlin-stdlib-jdk7:$kotlin_version"
}
2-3-2-6 AndroidMenifest.xml
该xml文件配置了应用程序组件(activity,service,provider,receiver)、应用程序的包名、应用程序需要的权限。
<manifest xmlns:android="http://schemas.android.com/apk/res/android"
    package="com.example.flutter_hello">     //程序包名
   <application
        android:label="flutter_hello"  //程序名称
        android:name="${applicationName}"
        android:icon="@mipmap/ic_launcher"> //程序Icon
        <activity   //Activity组件注册
            android:name=".MainActivity"
            android:exported="true"
            android:launchMode="singleTop"
            android:theme="@style/LaunchTheme"
            android:configChanges="orientation|keyboardHidden|keyboard|screenSize|smallestScreenSize|locale|layoutDirection|fontScale|screenLayout|density|uiMode"
            android:hardwareAccelerated="true"
            android:windowSoftInputMode="adjustResize">
            <!-- Specifies an Android theme to apply to this Activity as soon as
                 the Android process has started. This theme is visible to the user
                 while the Flutter UI initializes. After that, this theme continues
                 to determine the Window background behind the Flutter UI. -->
            <meta-data
              android:name="io.flutter.embedding.android.NormalTheme"
              android:resource="@style/NormalTheme"
              />
            <intent-filter>
                <action android:name="android.intent.action.MAIN"/>
                <category android:name="android.intent.category.LAUNCHER"/>
            </intent-filter>
        </activity>
        <!-- Don't delete the meta-data below.
             This is used by the Flutter tool to generate GeneratedPluginRegistrant.java -->
        <meta-data
            android:name="flutterEmbedding"
            android:value="2" />
    </application>
</manifest>
2-3-3 IOS原生工程
2-3-4 lib flutter工程
|--lib
   |--main.dart                     -flutter入口文件
import 'package:flutter/material.dart';
void main() {
runApp(const MyApp());
}
class MyApp extends StatelessWidget {
const MyApp({
super.key});
Widget build(BuildContext context) {
return MaterialApp(
title: 'Flutter Demo',
theme: ThemeData(
fontFamily: "Pacifico",
primarySwatch: Colors.blue,
),
home: const MyHomePage(title: 'Flutter Demo Home Page'),
);
}
}
class MyHomePage extends StatefulWidget {
const MyHomePage({
super.key, required this.title});
final String title;
State<MyHomePage> createState() => _MyHomePageState();
}
class _MyHomePageState extends State<MyHomePage> {
int _counter = 0;
void _incrementCounter() {
setState(() {
_counter++;
});
}
Widget build(BuildContext context) {
return Scaffold(
appBar: AppBar(
title: Text(widget.title),
),
body: Center(
child: Column(
mainAxisAlignment: MainAxisAlignment.center,
children: <Widget>[
const Text(
'You have pushed the button this many times:',
style: TextStyle(fontFamily: "Niramit")
),
Text(
'$_counter',
style: const TextStyle(fontFamily: "Niramit")
),
const Image(image: AssetImage("images/flutter.jpg"))
],
),
),
floatingActionButton: FloatingActionButton(
onPressed: _incrementCounter,
tooltip: 'Increment',
child: const Icon(Icons.add),
),
);
}
}
runApp
void runApp(Widget app) {


  WidgetsFlutterBinding.ensureInitialized()
    ..scheduleAttachRootWidget(app)
    ..scheduleWarmUpFrame();
}
将app绑定到根组件上
MyApp
class MyApp extends StatelessWidget {
const MyApp({
super.key});
Widget build(BuildContext context) {
return MaterialApp(
title: 'Flutter Demo',
theme: ThemeData(
fontFamily: "Pacifico",
primarySwatch: Colors.blue,
),
home: const MyHomePage(title: 'Flutter Demo Home Page'),
);
}
}
MyApp继承自StatelessWidget,StatelessWidget是无状态组件的基类,作为页面的根组件,一般不需要全局的刷新UI,所以通常使用无状态的组件,来提升UI构建性能,MyApp最后构建的组件是MaterialApp。MaterialApp是支持android材料设计效果的组件,在IOS上通常会使用CupertinoApp,CupertinoApp是支持了IOS设计风格的组件;还有WidgetsApp,WidgetsApp是普通效果的组件。
MaterialApp支持的相关属性:
const MaterialApp({


    super.key,
    this.navigatorKey,//导航键
    this.scaffoldMessengerKey,//脚手架键
    this.home,//主页
    Map<String, WidgetBuilder> this.routes = const <String, WidgetBuilder>{

    },//应用程序顶级路由表
    this.initialRoute,//如果构建了导航器,则会显示第一个路由的名称
    this.onGenerateRoute,//路由管理拦截器
    this.onGenerateInitialRoutes,//生成初始化路由
    this.onUnknownRoute,//当onGenerateRoute无法生成路由时调用
    List<NavigatorObserver> this.navigatorObservers = const <NavigatorObserver>[],//创建导航器的观察者列表
    this.builder,//在导航器上面插入小部件
    this.title = '',//程序切换时显示的标题
    this.onGenerateTitle,//程序切换时生成标题字符串
    this.color,//颜色
    this.theme,//页面主题
    this.darkTheme,//深色主题
    this.highContrastTheme,//系统请求“高对比度”使用的主题
    this.highContrastDarkTheme,//系统请求“高对比度”暗黑模式下使用的主题颜色
    this.themeMode = ThemeMode.system,//使用哪种模式的主题(默认跟随系统)
    this.locale,//初始区域设置
    this.localizationsDelegates,//本地化代理
    this.localeListResolutionCallback,//失败或未提供设备的语言环境
    this.localeResolutionCallback,//负责计算语言环境
    this.supportedLocales = const <Locale>[Locale('en', 'US')],//本地化地区列表
    this.debugShowMaterialGrid = false,
    this.showPerformanceOverlay = false,
    this.checkerboardRasterCacheImages = false,//打开栅格缓存图像的棋盘格。
    this.checkerboardOffscreenLayers = false,//打开渲染到屏幕外位图的层的棋盘格
    this.showSemanticsDebugger = false,
    this.debugShowCheckedModeBanner = true,
    this.shortcuts,
    this.actions,
    this.restorationScopeId,
    this.scrollBehavior,//可滚动小部件的行为方式
    this.useInheritedMediaQuery = false,//
  })
MyHomePage
class MyHomePage extends StatefulWidget {
const MyHomePage({
super.key, required this.title});
final String title;
State<MyHomePage> createState() => _MyHomePageState();
}
class _MyHomePageState extends State<MyHomePage> {
int _counter = 0;
void _incrementCounter() {
setState(() {
_counter++;
});
}
Widget build(BuildContext context) {
return Scaffold(
appBar: AppBar(
title: Text(widget.title),
),
body: Center(
child: Column(
mainAxisAlignment: MainAxisAlignment.center,
children: <Widget>[
const Text(
'You have pushed the button this many times:',
style: TextStyle(fontFamily: "Niramit")
),
Text(
'$_counter',
style: const TextStyle(fontFamily: "Niramit")
),
const Image(image: AssetImage("images/flutter.jpg"))
],
),
),
floatingActionButton: FloatingActionButton(
onPressed: _incrementCounter,
tooltip: 'Increment',
child: const Icon(Icons.add),
),
);
}
}
因为demo功能是点击‘+’号,会做数字增加的效果,UI是要变化的,所以MyHomePage继承了StatefulWidget,通过调用setState方法,来重新build控件。
Scaffold
class _MyHomePageState extends State<MyHomePage> {
int _counter = 0;
void _incrementCounter() {
setState(() {
_counter++;
});
}
Widget build(BuildContext context) {
return Scaffold(
appBar: AppBar(
title: Text(widget.title),
),
body: Center(
child: Column(
mainAxisAlignment: MainAxisAlignment.center,
children: <Widget>[
const Text(
'You have pushed the button this many times:',
style: TextStyle(fontFamily: "Niramit")
),
Text(
'$_counter',
style: const TextStyle(fontFamily: "Niramit")
),
const Image(image: AssetImage("images/flutter.jpg"))
],
),
),
floatingActionButton: FloatingActionButton(
onPressed: _incrementCounter,
tooltip: 'Increment',
child: const Icon(Icons.add),
),
);
}
}
其实MyHomePage的整体页面构建出来的顶级页面是Scaffold。何为Scaffold?下面内容源于源码截取
/// Implements the basic Material Design visual layout structure.实现了基本的 Material Design 视觉布局结构。
///
/// This class provides APIs for showing drawers and bottom sheets. 此类提供用于显示抽屉和底页的 API。

/// The Scaffold is designed to be a top level container for
/// a [MaterialApp]. This means that adding a Scaffold
/// to each route on a Material app will provide the app with
/// Material's basic visual layout structure.

///Scaffold是作为MaterialApp的顶级容器而设计的。这就意味着为每一个Material app的页面添加一个Scaffold组件后,
///就会为应用提供了Material Design 视觉布局结构
PS:其实就是一句话:MaterialApp和Scaffold必须搭配使用。
Scaffold支持的属性
const Scaffold({


    super.key,
    this.appBar,//页面上方导航条
    this.body,//页面主体
    this.floatingActionButton,//悬浮按钮
    this.floatingActionButtonLocation,//悬浮按钮位置
    this.floatingActionButtonAnimator,//悬浮按钮动画
    this.persistentFooterButtons,//显示在底部导航条上方的一组按钮
    this.persistentFooterAlignment = AlignmentDirectional.centerEnd,
    this.drawer,//左侧抽屉菜单
    this.onDrawerChanged,//抽屉菜单改变的回调监听
    this.endDrawer,//右侧抽屉菜单
    this.onEndDrawerChanged,//右侧抽屉菜单改变回调监听
    this.bottomNavigationBar,//底部导航条
    this.bottomSheet,//个持久停留在body下方,底部控件上方的控件
    this.backgroundColor,//背景色
    this.resizeToAvoidBottomInset,
    this.primary = true,//是否在屏幕顶部显示Appbar, 默认为 true,Appbar 是否向上延伸到状态栏,如电池电量,时间那一栏
    this.drawerDragStartBehavior = DragStartBehavior.start,//控制 drawer 的一些特性
    this.extendBody = false,//body 是否延伸到底部控件
    this.extendBodyBehindAppBar = false,//默认 false,为 true 时,body 会置顶到 appbar 后,如appbar 为半透明色,可以有毛玻璃效果
    this.drawerScrimColor,//侧滑栏拉出来时,用来遮盖主页面的颜色
    this.drawerEdgeDragWidth,//侧滑栏拉出来的宽度
    this.drawerEnableOpenDragGesture = true,//左侧侧滑栏是否可以滑动
    this.endDrawerEnableOpenDragGesture = true,//右侧侧滑栏是否可以滑动
    this.restorationId,
  })