说明:
1.Hadoop版本:3.1.3
2.阅读工具:IDEA 2023.1.2
3.源码获取:Index of /dist/hadoop/core/hadoop-3.1.3 (apache.org)
4.工程导入:下载源码之后得到hadoop-3.1.3-src.tar.gz压缩包,在当前目录打开PowerShell,使用tar -zxvf指令解压即可,然后使用IDEA打开hadoop-3.1.3-src文件夹,要注意配置好Maven或Gradle仓库,否则jar包导入会比较慢
5.参考课程:尚硅谷大数据Hadoop教程,hadoop3.x搭建到集群调优,百万播放_哔哩哔哩_bilibili
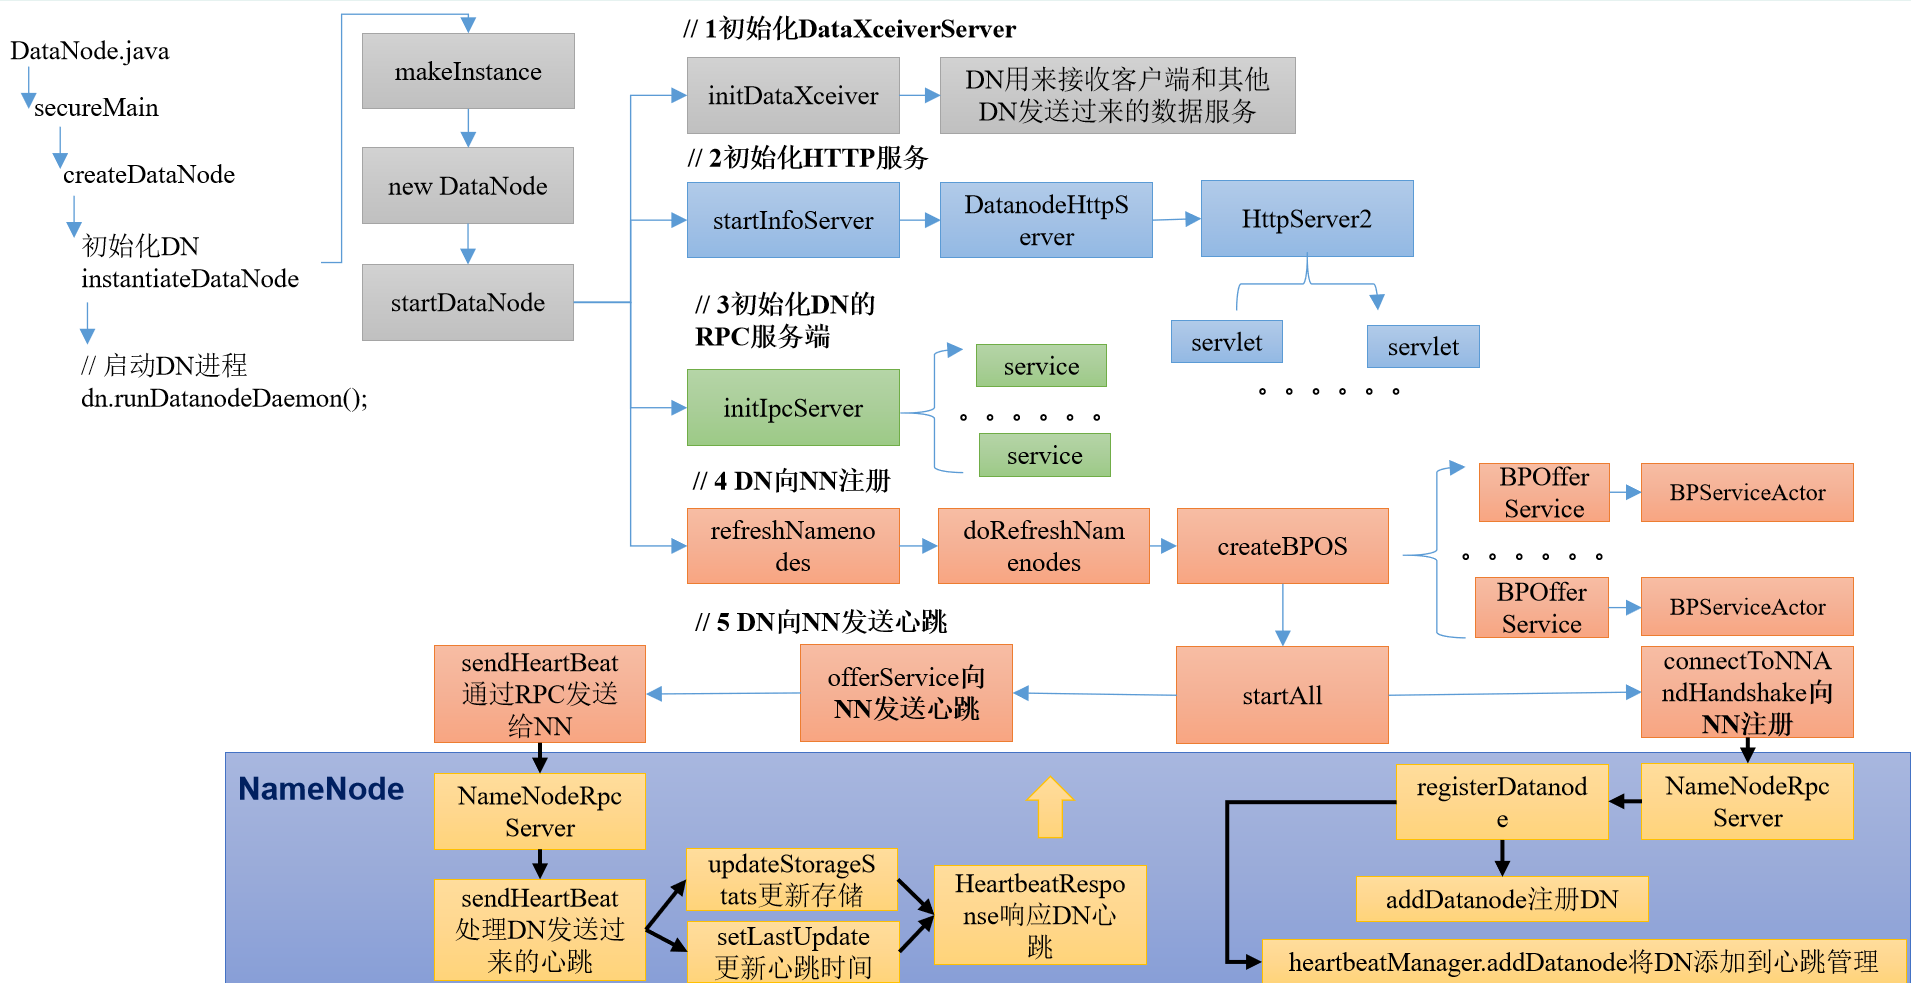
ctrl + n 全局查找datanode,进入DataNode.java
官方对其介绍如下:
/**********************************************************
 * DataNode is a class (and program) that stores a set of
 * blocks for a DFS deployment.  A single deployment can
 * have one or many DataNodes.  Each DataNode communicates
 * regularly with a single NameNode.  It also communicates
 * with client code and other DataNodes from time to time.
 *
 * DataNodes store a series of named blocks.  The DataNode
 * allows client code to read these blocks, or to write new
 * block data.  The DataNode may also, in response to instructions
 * from its NameNode, delete blocks or copy blocks to/from other
 * DataNodes.
 *
 * The DataNode maintains just one critical table:
 *   block-> stream of bytes (of BLOCK_SIZE or less)
 *
 * This info is stored on a local disk.  The DataNode
 * reports the table's contents to the NameNode upon startup
 * and every so often afterwards.
 *
 * DataNodes spend their lives in an endless loop of asking
 * the NameNode for something to do.  A NameNode cannot connect
 * to a DataNode directly; a NameNode simply returns values from
 * functions invoked by a DataNode.
 *
 * DataNodes maintain an open server socket so that client code
 * or other DataNodes can read/write data.  The host/port for
 * this server is reported to the NameNode, which then sends that
 * information to clients or other DataNodes that might be interested.
 *
 **********************************************************/
找到main方法

进入secureMain方法:
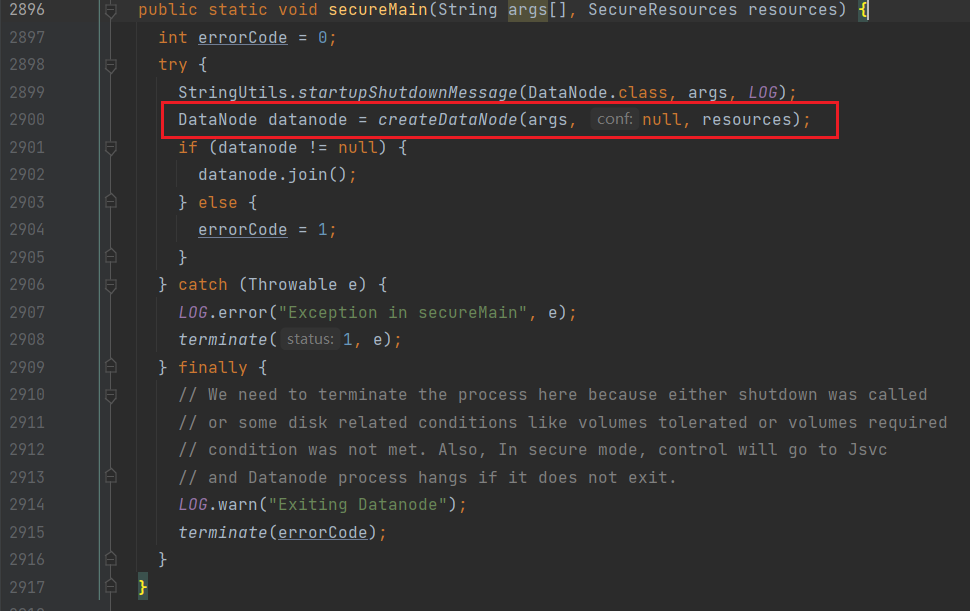
进入createDataNode方法:
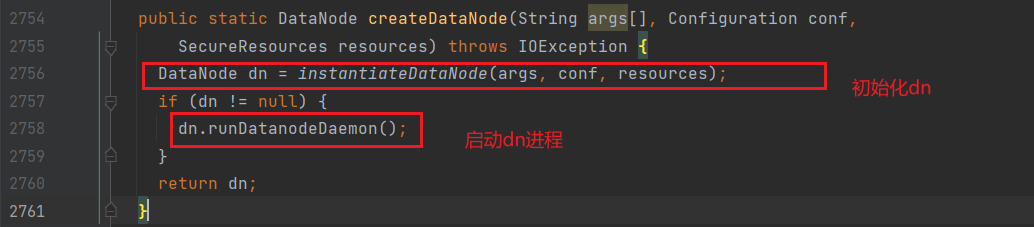
- 进入
instantiateDataNode方法(初始化DN):
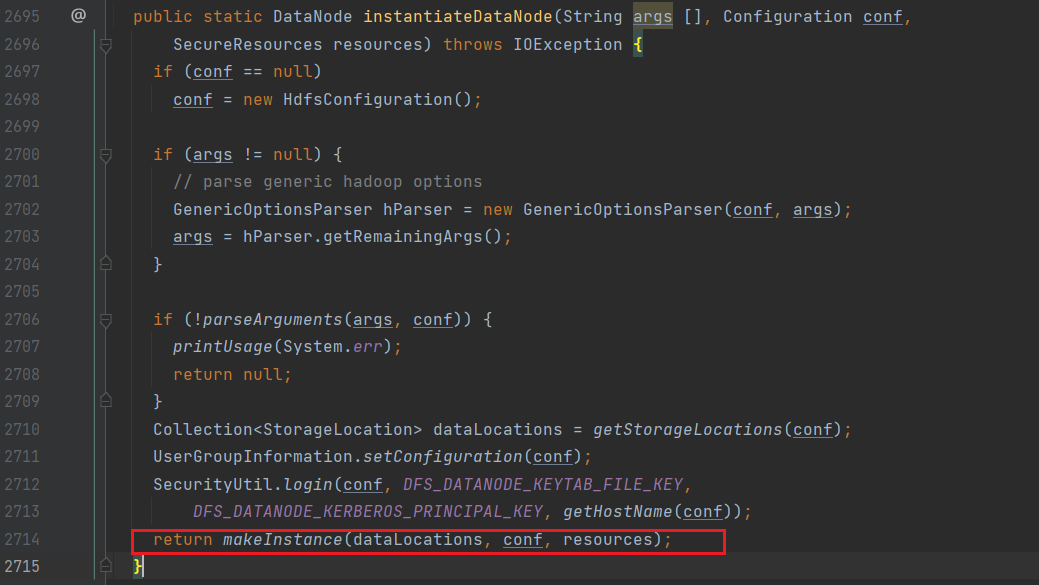
进入makeInstance方法(实例化对象):
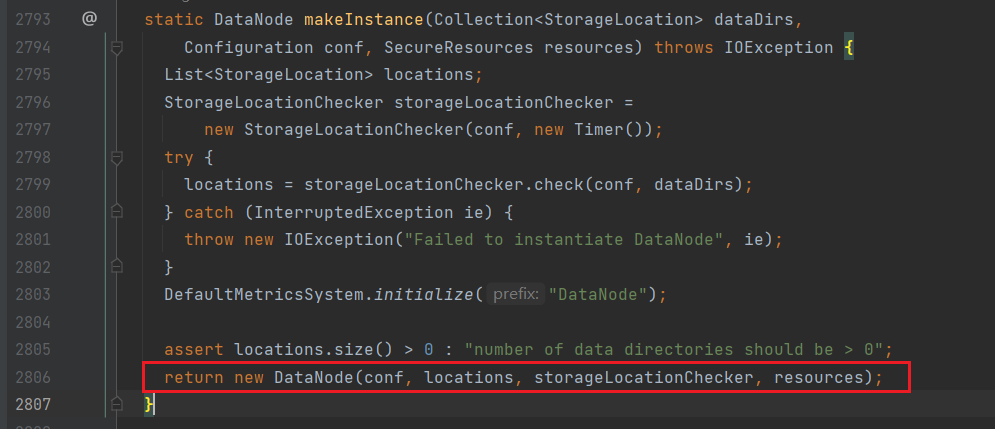
进入DataNode类:
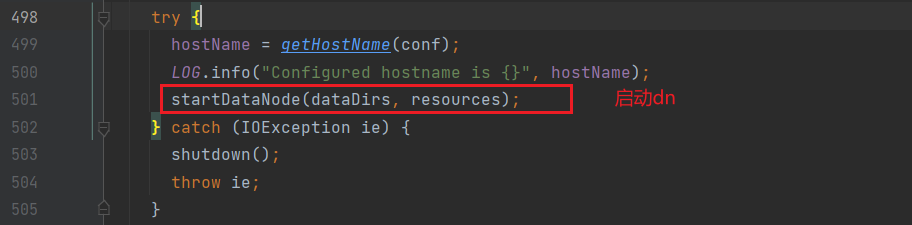
进入startDataNode方法,之后进行DN启动的一系列操作;
1.初始化DataXceiverServer(initDataXceiver)
在startDataNode方法中:
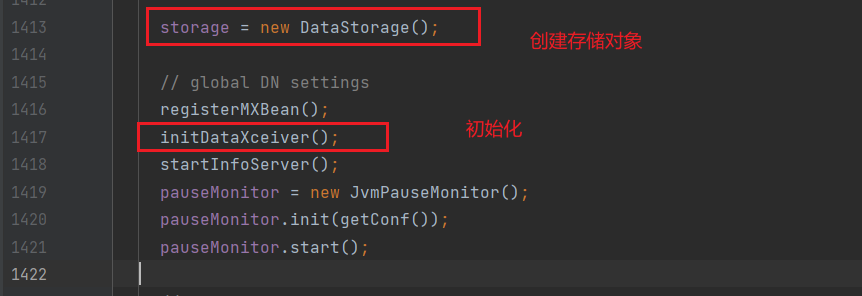
进入initDataXceiver方法:

dataXceiverServer是一个服务(线程),DN利用该服务来接收客户端和其他DN发送过来的数据服务
2.初始化HTTP服务(startInfoServer)
在startDataNode方法中:
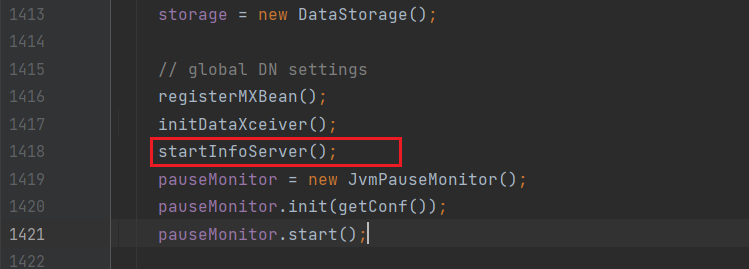
进入startInfoServer方法,实例化了一个httpserver
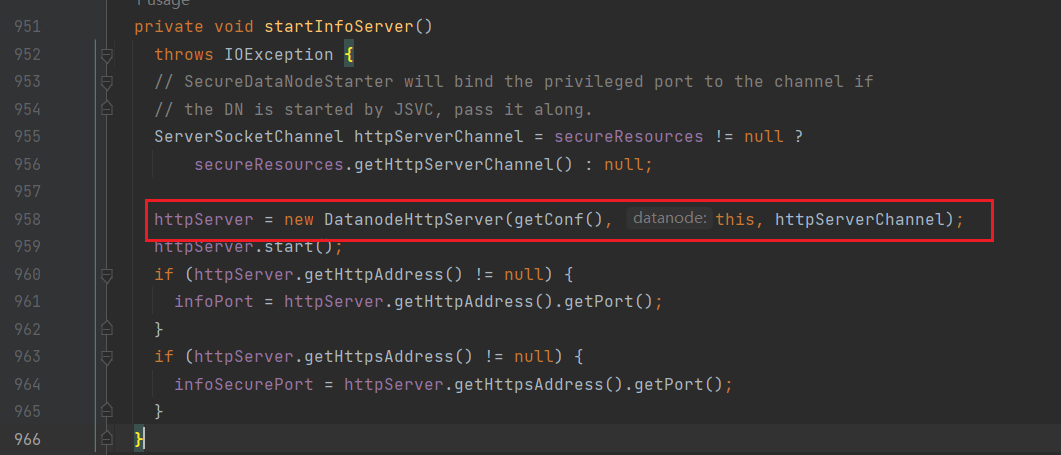
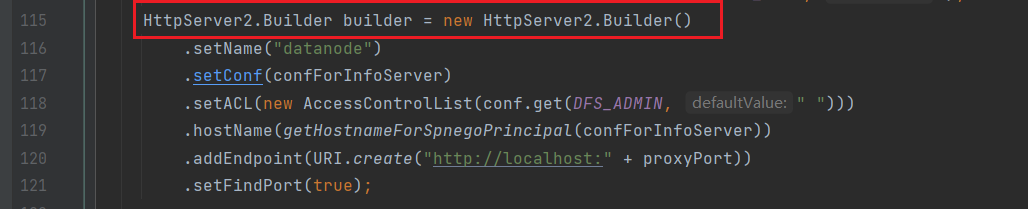
进入DatanodeHttpServer类:(DatanodeHttpServer.java)
也是通过builder构建了一个HTTP server
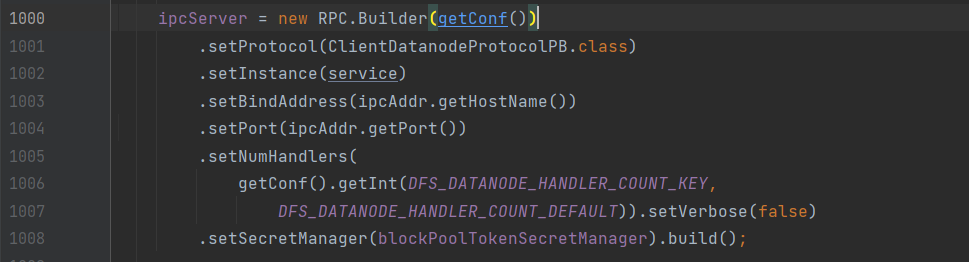
3.初始化RPC服务器(initIpcServer)
在startDataNode方法中:
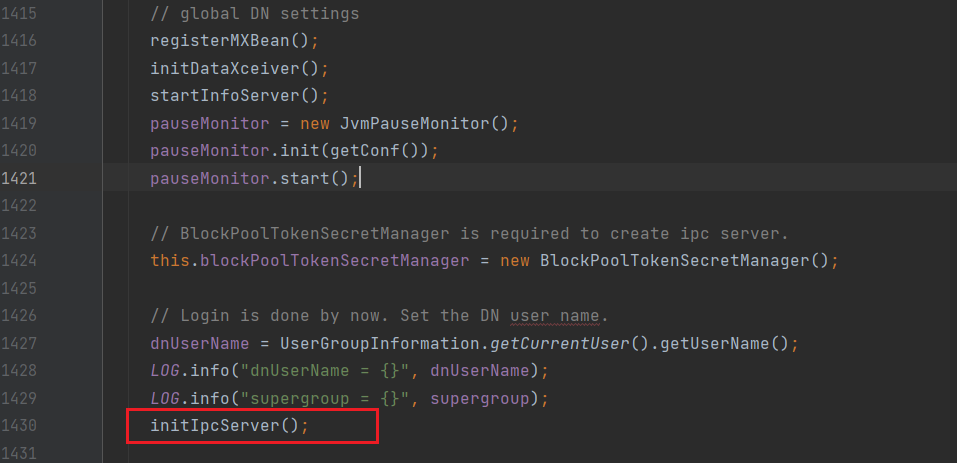
进入initIpcServer,构建RPC服务器
4.向NameNode注册(refreshNamenodes)
在startDataNode方法中:

进入refreshNamenodes(BlockPoolManager.java)
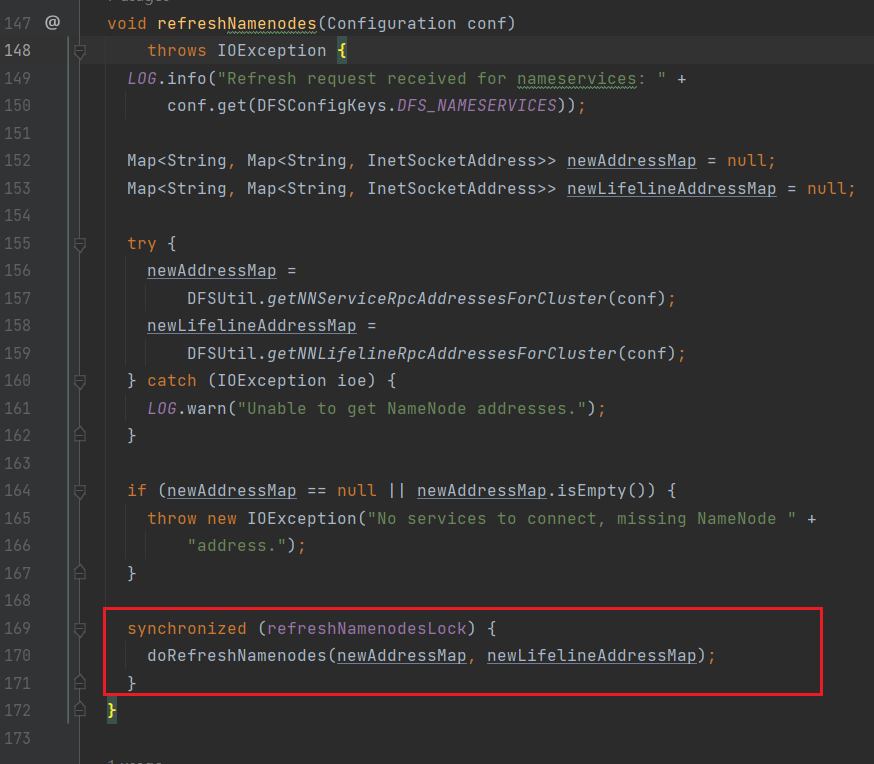
进入doRefreshNamenodes方法:
先是创建BPOS,然后启动所有的BPOS
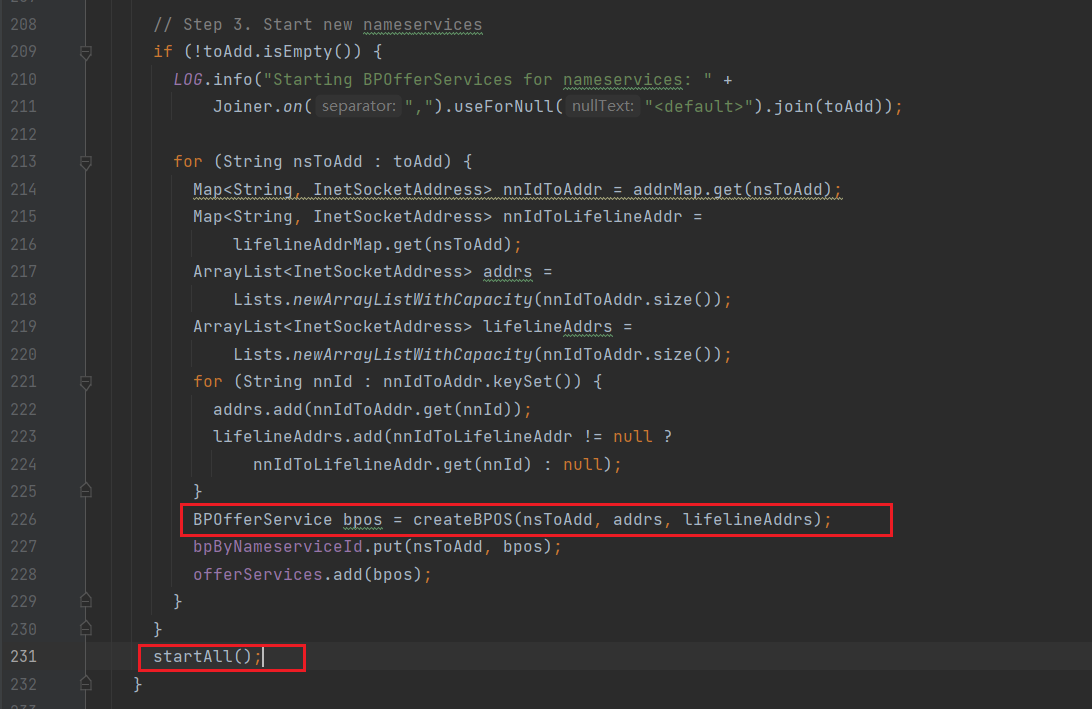
- 接下来进入
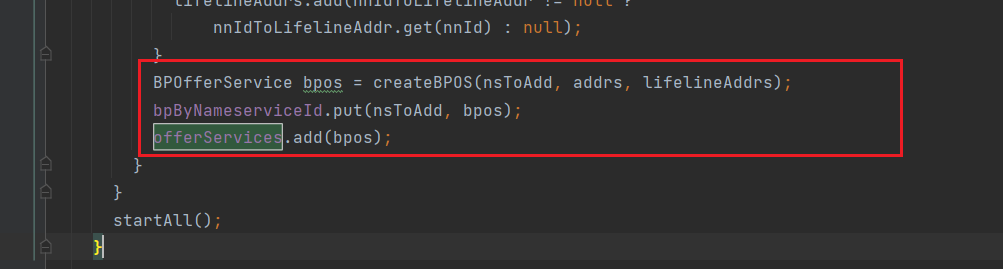
createBPOS方法

可以看到根据NameNode个数创建对应的服务:
有多少个NN就创建多少个对应的服务
- 进入
startAll方法
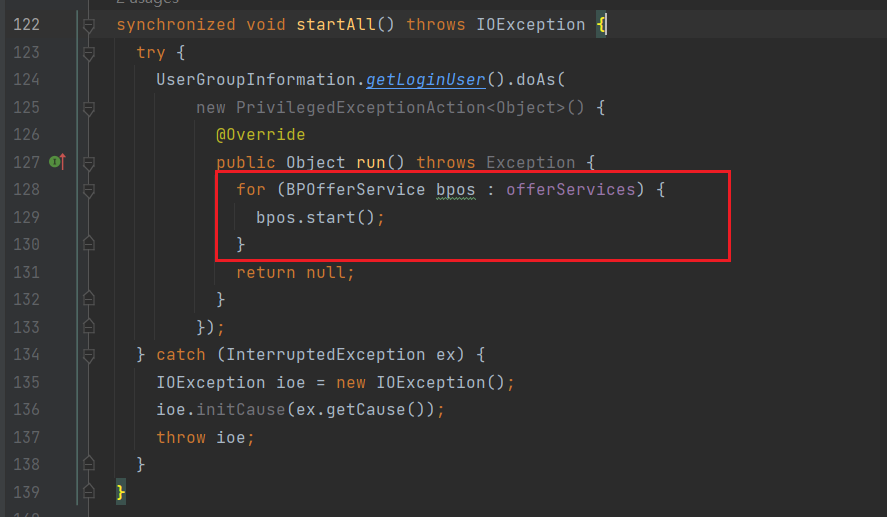
可以看到,遍历了所有的bpos,依次进行启动
这里的offerServices是存储所有通过createBPOS方法创建的bpos的集合:
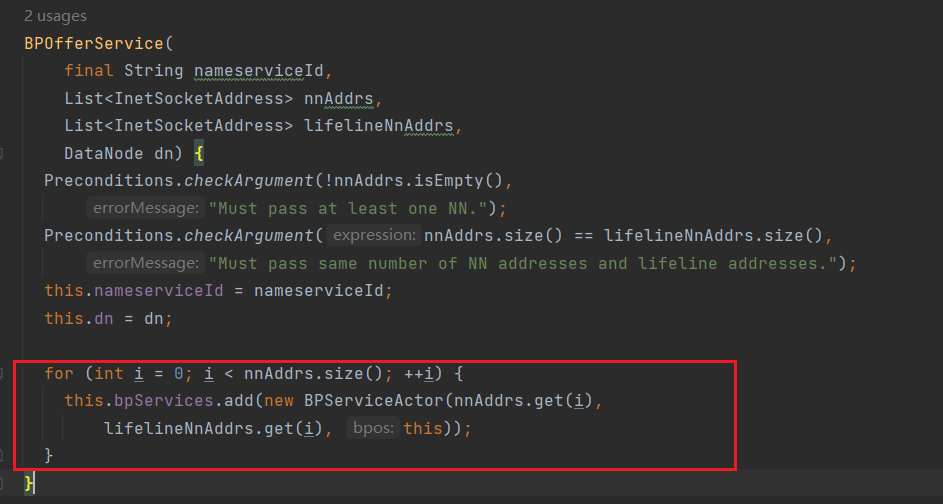
进入bpos.start()方法:

继续进入:
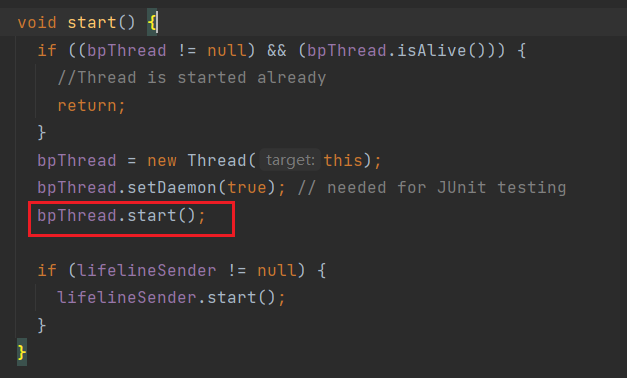
看到bpThread,表示开启一个线程,因此查找其run方法
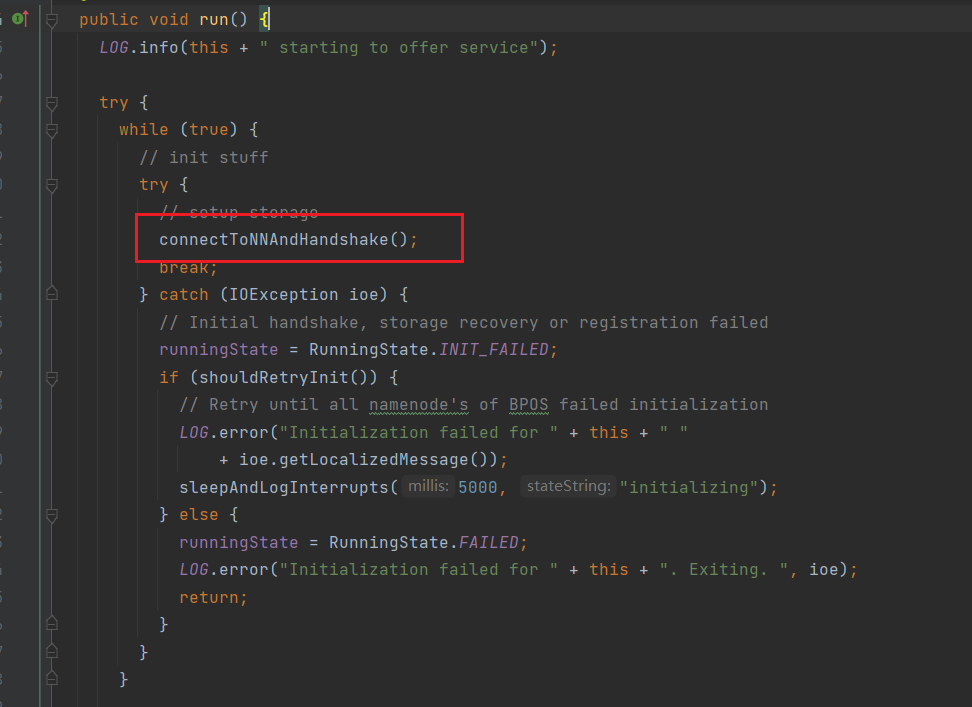
可以看到通过connectToNNAndHandshake方法向NN进行注册:
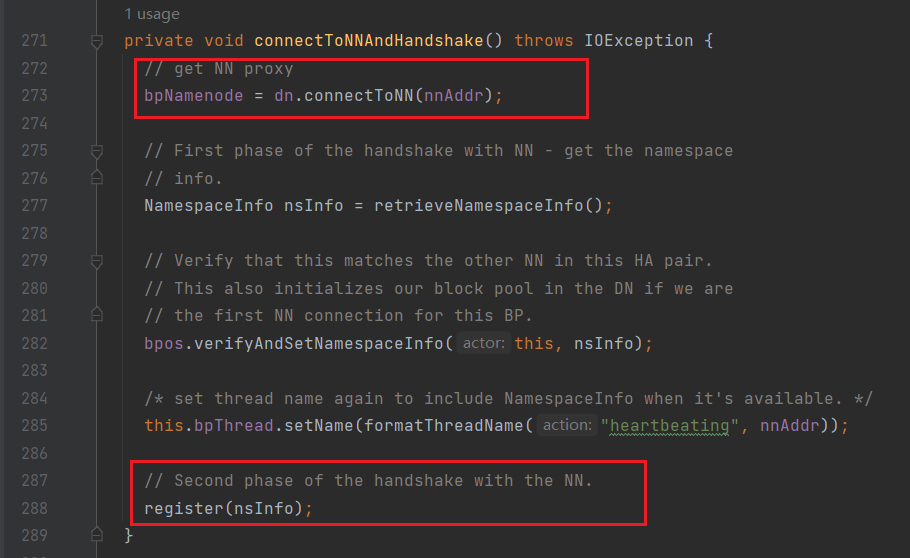
- 通过
connectToNN方法来获取NN的RPC客户端对象,进入该方法:

进入DatanodeProtocolClientSideTranslatorPB:

通过createNamenode方法来创建NN的RPC代理:

- 通过
register方法来向NN进行注册:
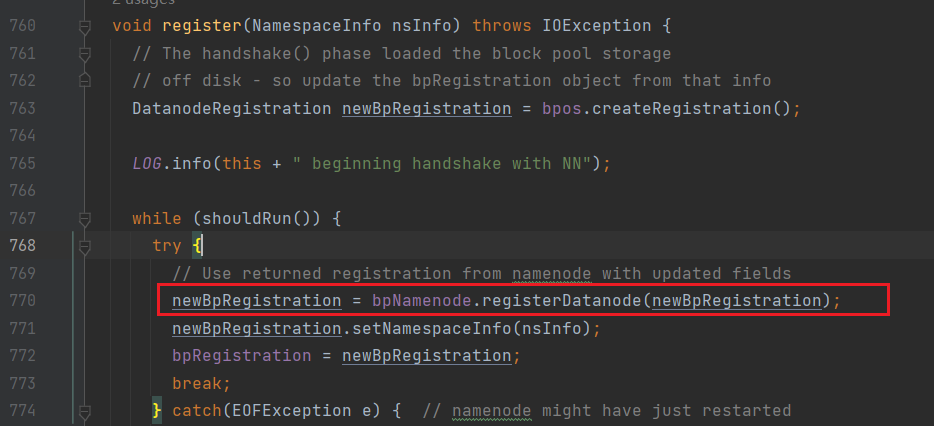
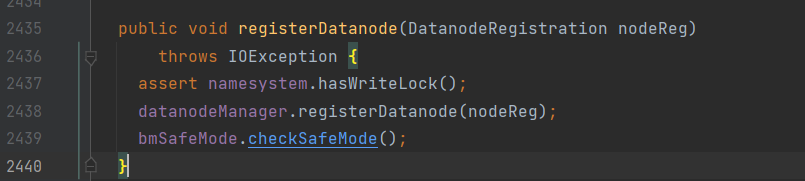
通过bpNamenode.registerDatanode将注册信息发送给NN(bpNamenode即创建的NN RPC proxy)
注意:这里的registerDatanode方法,由DN调用,但执行在NN

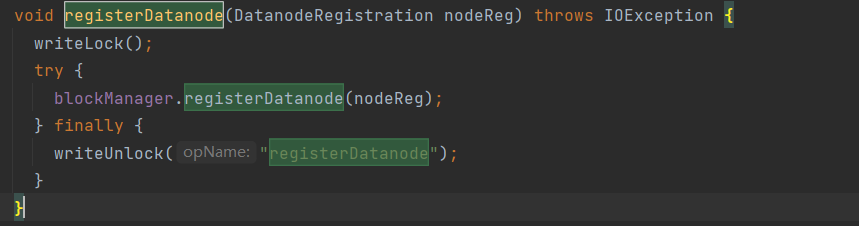
去FSNamesystem中查找:
ctrl+alt+h查看该方法的调用:
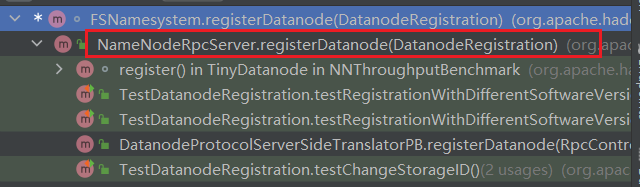
于是到NameNodeRpcServer中去查找:

可以看到,DN的信息向NN注册这一步骤是在该方法中完成的;
接下来回到FSNamesystem中,进入blockManager.registerDatanode方法:
进入datanodeManager.registerDatanode:(DatanodeManager.java)
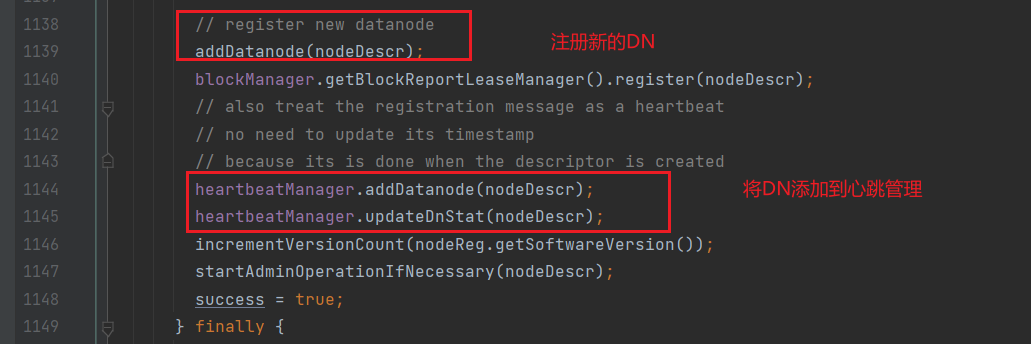
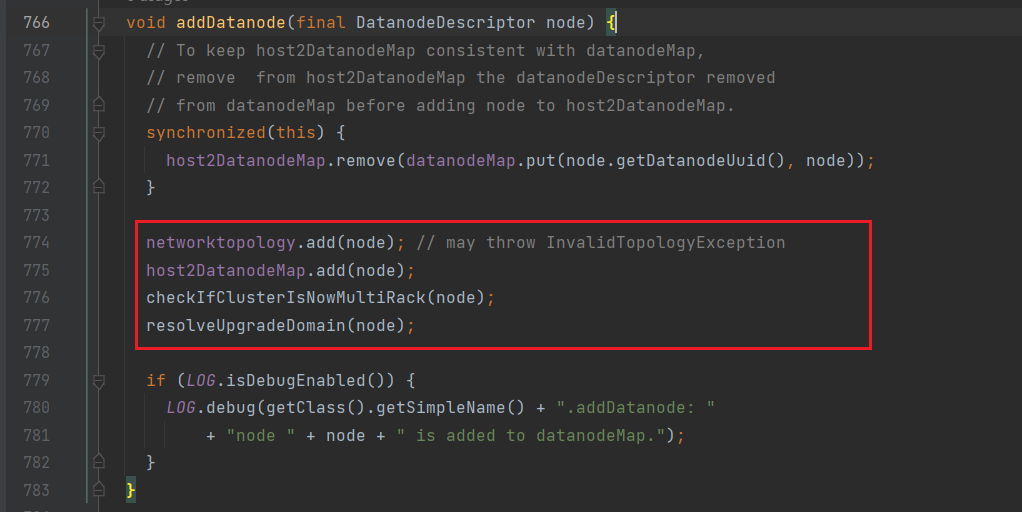
进入addDatanode
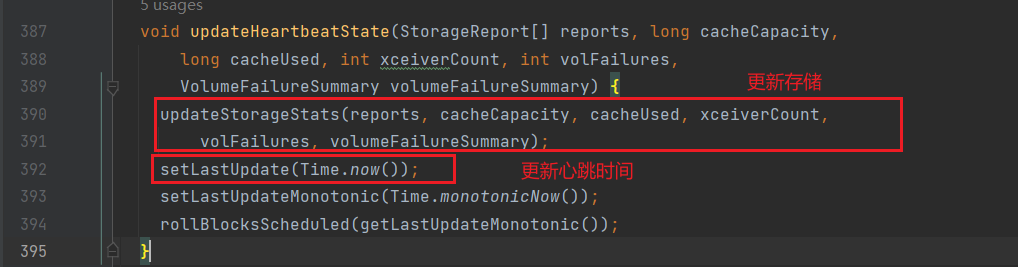
5.向NameNode发送心跳
回到startAll方法,再向前进入到BPServiceActor.java中的run方法
找到其中的offerService方法
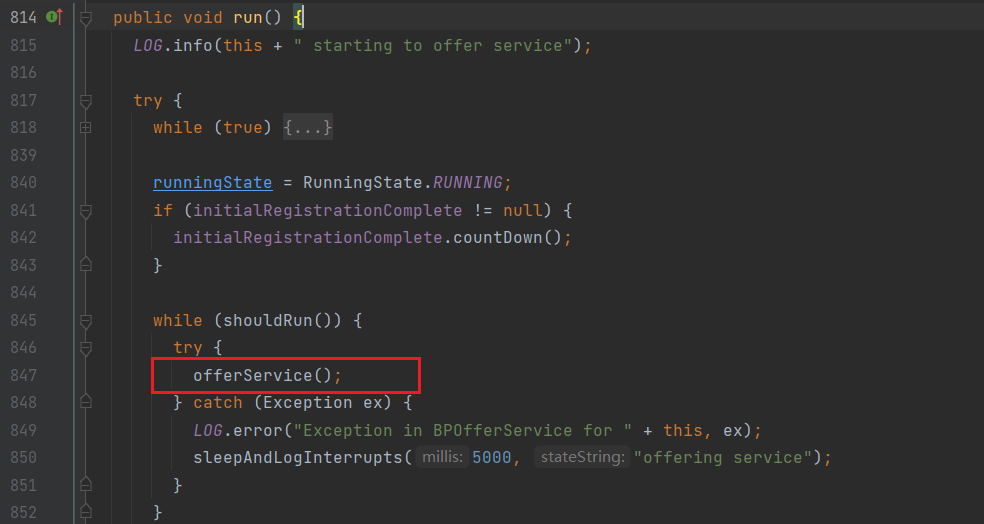
进入offerService方法:
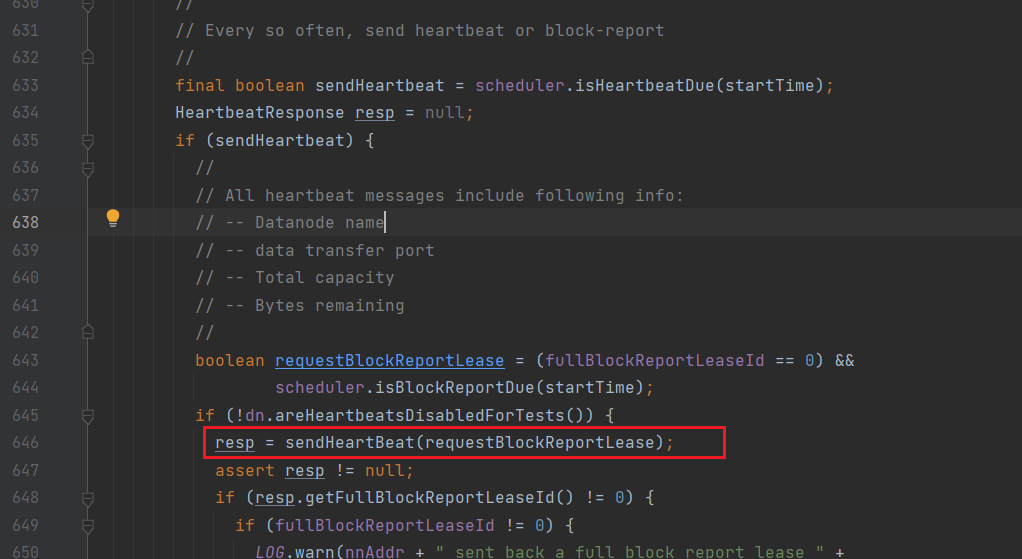
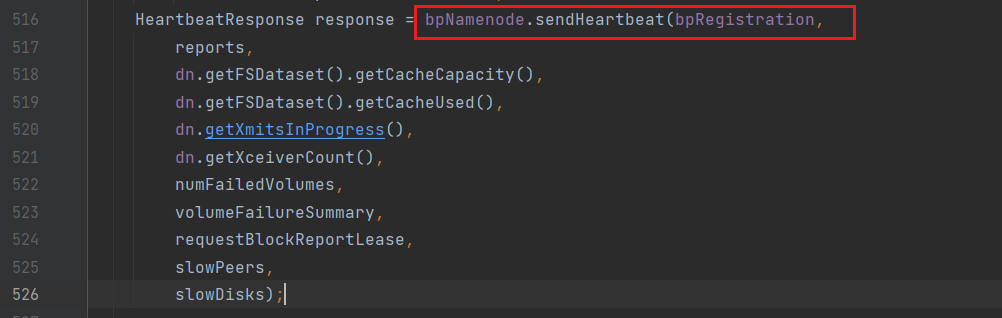
进入sendHeartBeat方法:
这里的bpNamenode是在connectToNNAndHandshake方法中获取到的NN的代理
因此该方法实际上是通过NN的RPC客户端将心跳信息发送给NN
因此该方法实际的实现是在NN中,因此在NameNodeRpcServer.java中搜索sendHeartbeat:
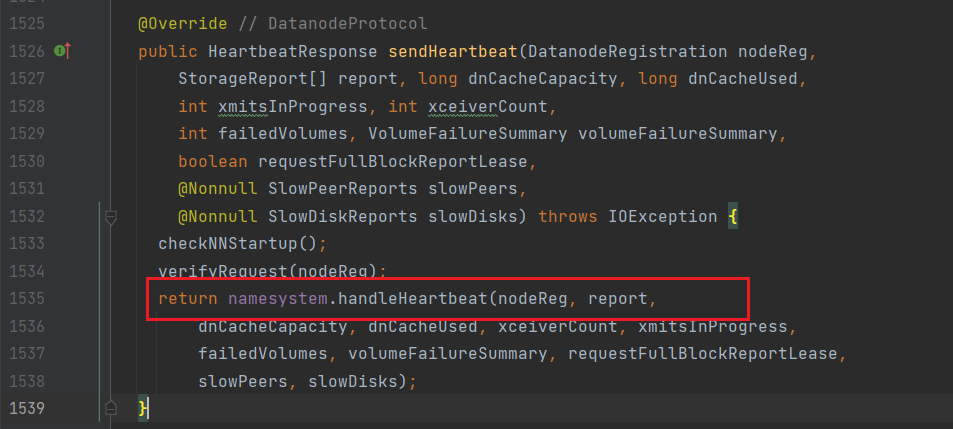
通过handleHeartbeat来处理DN的心跳信息,进入该方法:
处理DN发送过来的心跳并作出相应;
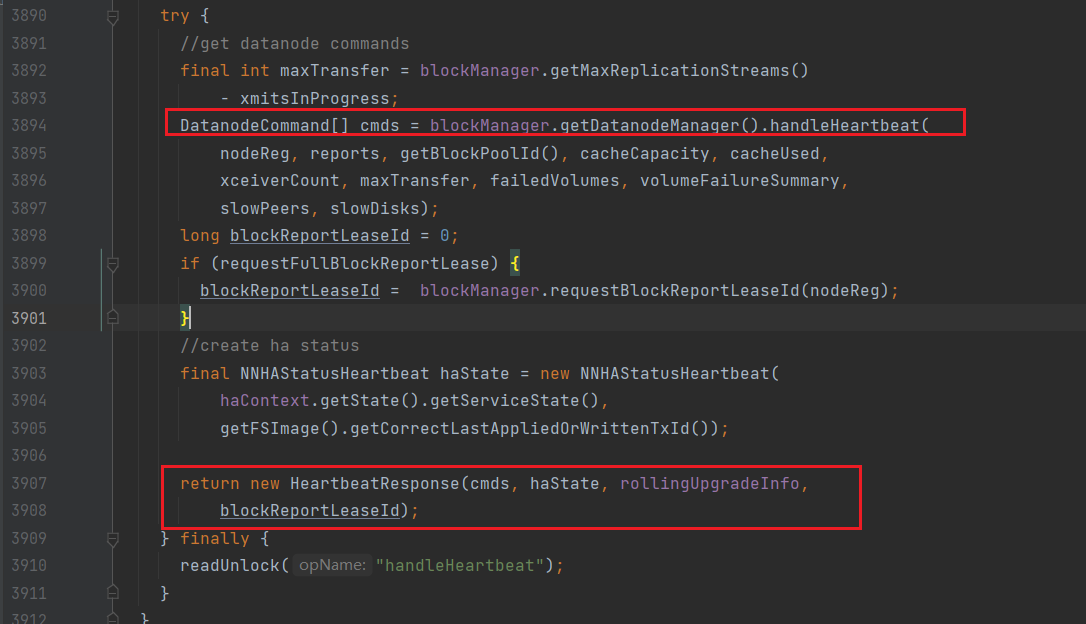
继续进入handleHeartbeat方法:(DatanodeManager.java)

通过updateHeartbeat方法来更新心跳信息,进入该方法:(HeartbeatManager.java)
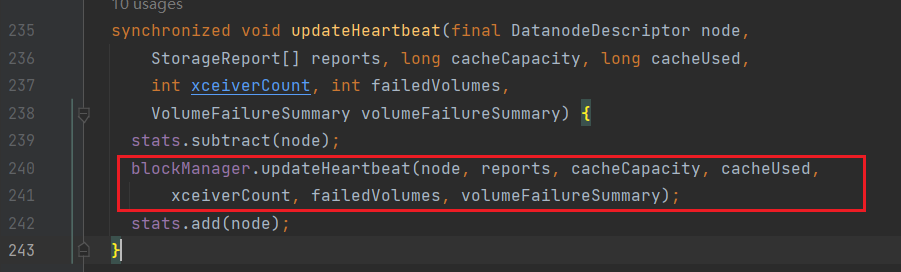
再次进入:(BlockManager.java)
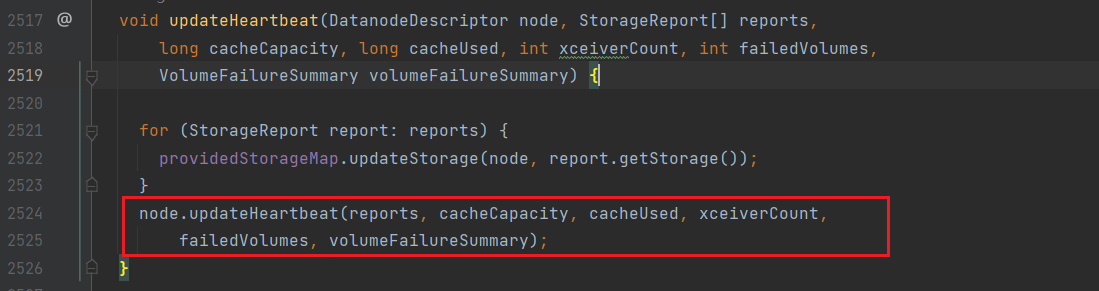
继续进入:(DatanodeDescriptor.java)
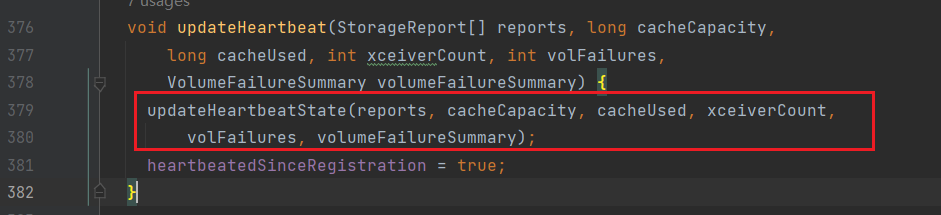
进入updateHeartbeatState方法: