 目录
目录
一、准备工作
创建项目,引入依赖,把之前写的前端页面页拷贝过去
要引入的依赖有: servlet ,mysql,jackson

引入依赖完成之后,再创建目录,然后将 web.xml 的内容复制粘贴上去
<!DOCTYPE web-app PUBLIC
        "-//Sun Microsystems, Inc.//DTD Web Application 2.3//EN"
        "http://java.sun.com/dtd/web-app_2_3.dtd" >
<web-app>
        <display-name>Archetype Created Web Application</display-name>
</web-app>
然后再将之前写的前端代码复制粘贴到 webapp 目录下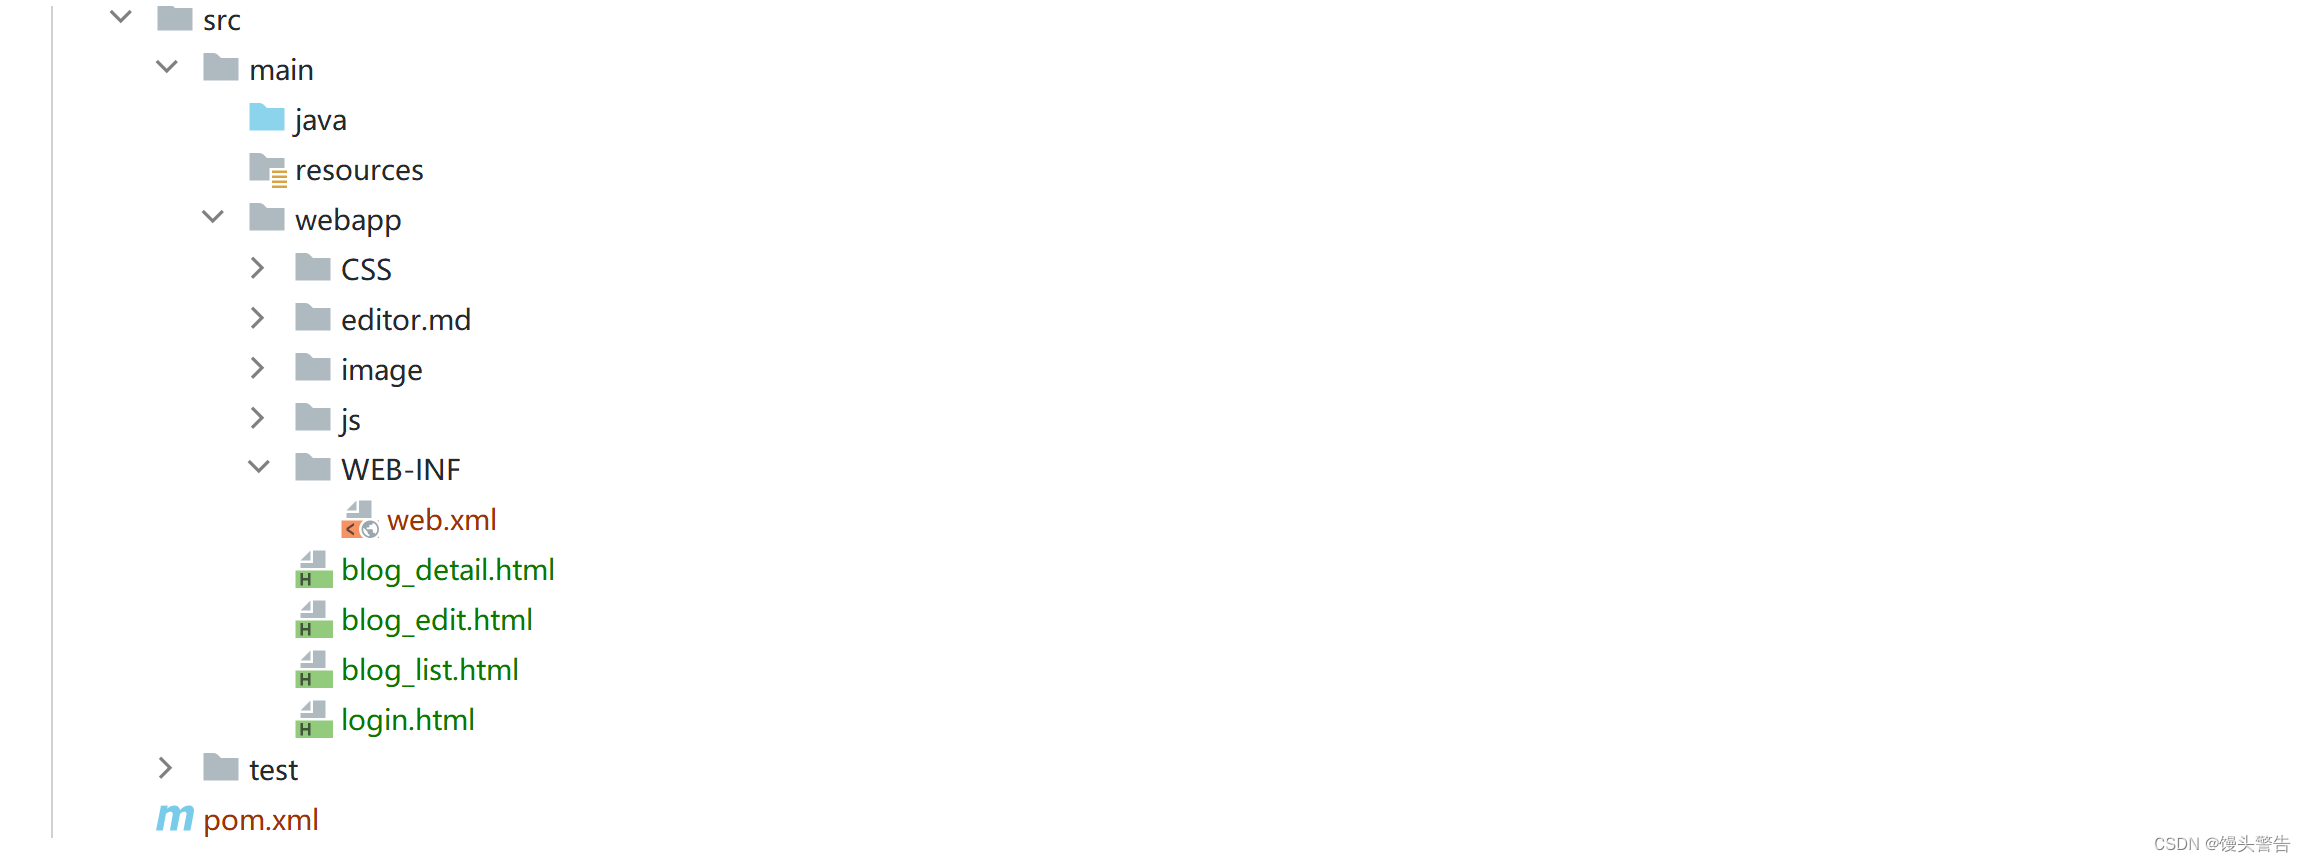
此时,准备工作就完成了
二、设计数据库
结合之前的需求,在当前的博客系统中,主要涉及到两个实体:博客,用户
我们就可以创建两张表来表示 博客 和 用户
这两个实体之间的关系如何?
一对多的关系,一个用户可以写多个博客,但是一个博客只能属于一个用户

三、编写数据库代码
1、建表sql
把一些基本的数据库操作先封装好,以备后续使用
在 src 目录下,创建一个 db.sql,在里面写上数据库的建库建表语句
    --这个文件,主要用来写建库建表语句
    --一般在建表的时候,把建表的 sql 保留下来,以备后续部署其它及其的时候就方便了

    create database if not exists blog_system;
    use blog_system;

    --删除旧表,重新创建新表,防止之前的残留数据面对后续的程序有负面影响
    drop table if exists user;
    drop table if exists blog;

    --进行建表
    create table blog(
        blogId int primary key auto_increment,
        title varchar(128),
        content varchar(4096),
        postTime datetime,
        userId int
    };

    create table user(
        userId int primary key auto_increment,
        username varchar(20) unique , --要求用户名和别人不同
        password varchar(20)
    );
2、封装数据库的连接操作
在 java 目录下,创建一个 DBUtil 类
import com.mysql.jdbc.jdbc2.optional.MysqlDataSource;
import javax.sql.DataSource;
import java.sql.Connection;
import java.sql.PreparedStatement;
import java.sql.ResultSet;
import java.sql.SQLException;

//通过这个类,把数据库连接过程封装一下
//此处,把 DBUtil 作为一个工具类,提供 static 方法,供其它方法来调用
public class DBUtil {
    //静态成员是跟随类对象的,类对象在整个进程中,只有唯一一份
    //静态成员相当于也是唯一的实例(单例模式,饿汉模式)
    private static DataSource dataSource = new MysqlDataSource();

    static {
        //使用静态代码块,针对 dataSourse 进行初始化
        ((MysqlDataSource)dataSource).setUrl("jdbc:mysql://127.0.0.1:3306/java?charactorEncoding=utf8&useSSL=false");
        ((MysqlDataSource)dataSource).setUser("root");
        ((MysqlDataSource)dataSource).setPassword("123456");
    }

    //通过这个方法来建立连接
    public static Connection getConnection() throws SQLException {
        return dataSource.getConnection();
    }

    //通过这个方法来断开连接,释放资源
    public static void close(Connection connection, PreparedStatement statement, ResultSet resultSet)  {
        //此处的三个 try catch 分开写更好,避免前面的异常导致后面的代码无法执行
        if (resultSet != null){
            try {
                resultSet.close();
            } catch (SQLException e) {
                throw new RuntimeException(e);
            }
        }
        if (statement != null){
            try {
                statement.close();
            } catch (SQLException e) {
                throw new RuntimeException(e);
            }
        }
        if (connection != null){
            try {
                connection.close();
            } catch (SQLException e) {
                throw new RuntimeException(e);
            }
        }
    }
}
3、创建实体类
实体类,就是和表中的记录对应的类

实体类里要有哪些属性,都是和当前表中的列是密切相关的
于是,我们便要根据之前表中的列,来创建好 blog 和 user 这两个类:

并且,将里面的每个属性,都手动加上 get set 访问器
4、封装数据库的一些增删改查
针对 博客表 ,创建一个 BlogDao
针对 用户表,创建一个 UserDao
它们提供了一些方法,来进行增删改查
(1)BlogDao
里面一共有四个方法:
1、新增博客
2、根据博客 id 来查询指定博客(用于博客详情页)
3、直接查询出数据库中所有的博客列表
4、删除博客
新增博客:
    //1、新增一个博客
    public void add(Blog blog){
        Connection connection = null;
        PreparedStatement statement = null;
        //1、和数据库建立连接
        try {
             connection = DBUtil.getConnection();
            //2、构造 Sql
            String sql = "insert into blog values(null,?,?,?,?)";
             statement = connection.prepareStatement(sql);
             statement.setString(1,blog.getTitle());
             statement.setString(2,blog.getContent());
             statement.setTimestamp(3,blog.getPostTime());
             statement.setInt(4,blog.getUserId());
            //3、执行 sql
            statement.executeUpdate();
        } catch (SQLException e) {
            throw new RuntimeException(e);
        }finally {
            DBUtil.close(connection,statement,null);
        }
    }
根据博客 id 来查询指定博客(用于博客详情页)
    //2、根据博客 id 来查询指定博客(用于博客详情页)
    public Blog selectById(int blogId){
        Connection connection = null;
        PreparedStatement statement = null;
        ResultSet resultSet = null;
        try{
            //1、和数据库建立连接
            connection = DBUtil.getConnection();
            //2、构造 SQL 语句
            String  sql = "select *from blog where blogId = ?";
            statement = connection.prepareStatement(sql);
            statement.setInt(1,blogId);
            //3、执行 sql
            resultSet = statement.executeQuery();
            //4、遍历结果集合,由于此处的 blogId ,在 blog 表中是唯一的(主键)
            //此时的查询结果,要么是没有查到任何数据,要么是只有一条记录
            //所以,此处使用 if 即可,不用使用 while
            if (resultSet.next()){
                Blog blog = new Blog();
                blog.setBlogId(resultSet.getInt("blogId"));
                blog.setTitle(resultSet.getString("title"));
                blog.setContent(resultSet.getString("content"));
                blog.setPostTime(resultSet.getTimestamp("postTime"));
                blog.setUserId(resultSet.getInt("userId"));
                return blog;
            }
        } catch (SQLException e) {
            throw new RuntimeException(e);
        }finally {
            //5、释放必要的资源
            DBUtil.close(connection,statement,resultSet);
        }
        return null;
    }
直接查询出数据库中所有的博客列表
注意:这里面的博客列表页,显示的博客内容,应该只是一个简单的摘要(文章内容的一小部分)
而不是整篇文章,完整的文章应该放到博客详情页显示
所以,我们可以对比较长的正文进行一个裁剪

    //3、直接查询出数据库中所有的博客列表(用于博客列表页)
    public List<Blog> selectAll(){
        List<Blog> blogs = new ArrayList<>();

        Connection connection = null;
        PreparedStatement statement = null;
        ResultSet resultSet = null;
        try{
            //1、和服务器建立连接
            connection = DBUtil.getConnection();
            //2、构造 sql 语句
            String sql = "select *from blog";
            statement = connection.prepareStatement(sql);
            //3、执行 sql
            resultSet =  statement.executeQuery();
            //4、遍历结果集合
            while (resultSet.next())  {
                Blog blog = new Blog();
                blog.setBlogId(resultSet.getInt("blogId"));
                blog.setTitle(resultSet.getString("title"));
                //这里的正文,在博客列表页中,不需要把整个正文显示出来
                String content = resultSet.getString("content");
                if (content.length() >= 100){
                    content = content.substring(0,100) + "...";
                }
                blog.setContent(content);
                blog.setPostTime(resultSet.getTimestamp("postTime"));
                blog.setUserId(resultSet.getInt("userId"));
                blogs.add(blog);
            }
        } catch (SQLException e) {
            throw new RuntimeException(e);
        }finally {
            DBUtil.close(connection,statement,resultSet);
        }
        return  blogs;
    }
删除博客
    //4、删除指定博客
    public void delete(int blogId){
        Connection connection = null;
        PreparedStatement statement = null;
        try{
            //1、和数据库建立连接
            connection = DBUtil.getConnection();
            //2、构造 sql 语句
            String sql = "delete from blog where blogId = ?";
            statement = connection.prepareStatement(sql);
            statement.setInt(1,blogId);
            //3、执行 sql
            statement.executeUpdate();
        } catch (SQLException e) {
            throw new RuntimeException(e);
        }finally {
            //进行关闭
            DBUtil.close(connection,statement,null);
        }
    }
(2)UserDao
这里面一共有两个方法:
1、根据 userId 来查询用户信息
2、根据 username 来查询用户信息(登录的时候)
根据 userId 来查询用户信息
    //1、根据 userId 来查询用户信息
    public User selectById(int userId){
        Connection connection = null;
        PreparedStatement statement = null;
        ResultSet resultSet = null;
        try {
            //1、和数据库建立连接
            connection = DBUtil.getConnection();
            //2、构造 sql
            String sql = "select *from user where userId = ?";
            statement = connection.prepareStatement(sql);
            statement.setInt(1,userId);
            //3、执行 sql
            resultSet = statement.executeQuery();
            //4、遍历结果集合
            if (resultSet.next()){
                User user = new User();
                user.setUserId(resultSet.getInt("userId"));
                user.setUsername(resultSet.getString("username"));
                user.setPassword(resultSet.getString("password"));
                return user;
            }
        } catch (SQLException e) {
            throw new RuntimeException(e);
        }finally {
            DBUtil.close(connection,statement,resultSet);
        }
        return null;
    }
根据 username 来查询用户信息(登录的时候)
    //2、根据 username 来查询用户信息(登录的时候)
    public User selectByUsername(String username){
        Connection connection = null;
        PreparedStatement statement = null;
        ResultSet resultSet = null;
        try {
            //1、和数据库建立连接
            connection = DBUtil.getConnection();
            //2、构造 sql
            String sql = "select *from user where username = ?";
            statement = connection.prepareStatement(sql);
            statement.setString(1,username);
            //3、执行 sql
            resultSet = statement.executeQuery();
            //4、遍历结果集合
            if (resultSet.next()){
                User user = new User();
                user.setUserId(resultSet.getInt("userId"));
                user.setUsername(resultSet.getString("username"));
                user.setPassword(resultSet.getString("password"));
                return user;
            }
        } catch (SQLException e) {
            throw new RuntimeException(e);
        }finally {
            DBUtil.close(connection,statement,resultSet);
        }
        return null;
    }
写到这里,就把数据库的操作封装完毕了
四、围绕博客列表页实现获取博客列表功能
接下来,我们围绕博客列表页,实现获取博客列表的功能

当前,我们的博客列表页上面的数据,都是固定的,显然是不科学的
正确的做法,应该是通过数据库读取数据,显示到页面上
此处,就需要打通前后端交互的操作
让博客列表页,在加载的时候,通过 ajax 给服务器,发一个请求,服务器查数据库,获取到博客列表数据,返回给浏览器,浏览器再根据数据构造页面内容
这样的交互过程,也称为 “前后端分离”
前端只向后端请求数据,而不请求具体的页面,后端也仅仅是返回数据,这样设定的目的就是为了前端和后端更加解耦合
上述是进行实现博客列表页的基本思路
接下来,我们需要:
1、约定前后端交互接口
2、开发后端代码
3、开发前端代码
1、约定前后端交互接口
在 博客列表页,获取博客列表的功能下,前端要发什么请求,后端返回什么响应,都需要进行约定
确定了前后端接口之后,前端和后端再分别按照这个格式进行开发

2、编写后端代码
@WebServlet("/blog")
public class BlogServlet extends HttpServlet {
    private ObjectMapper objectMapper = new ObjectMapper();
    @Override
    protected void doGet(HttpServletRequest req, HttpServletResponse resp) throws ServletException, IOException {
        BlogDao blogDao = new BlogDao();
        List<Blog> blogs =  blogDao.selectAll();
        //需要把 blogs 转成符合要求的 json 格式的字符串
        String respJson = objectMapper.writeValueAsString(blogs);
        resp.setContentType("application/json;charset=utf8");
        resp.getWriter().write(respJson);
    }
}
此时,我们会发现,这里面的类,越写越多了,看起来会显得比较杂乱

这个时候,我们就可以对它们进行一个分类来处理
model :管理数据 / 操作数据的部分
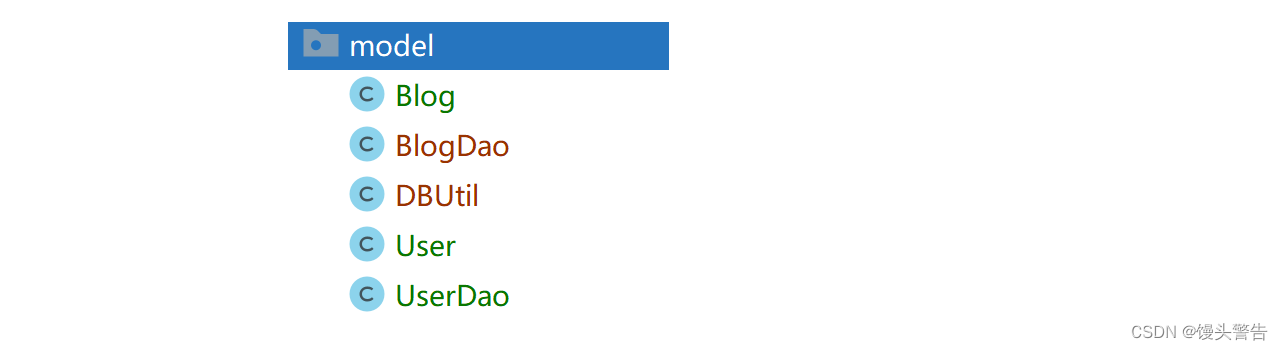
把这个 Servlet 放到 api 中,api 不到一定非得是一个 类 / 方法,也可以是 “网络接口”(处理 HTTP 请求,返回 HTTP 响应)

3、编写前端代码
再博客列表页,加载过程中,触发 ajax 访问服务器中的数据
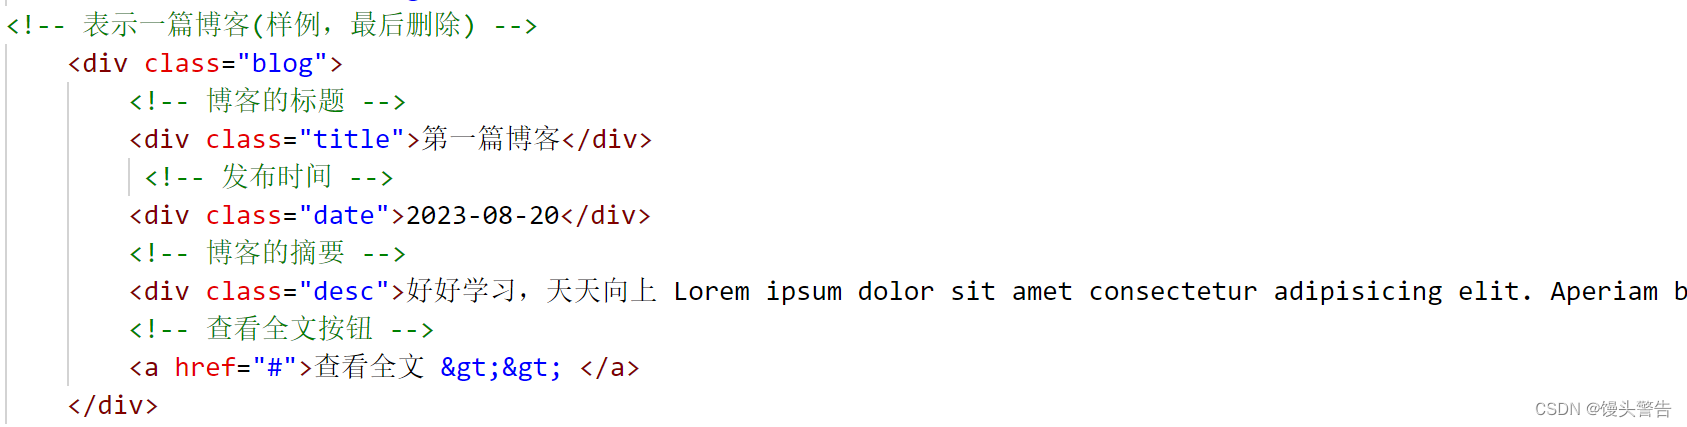
再把拿到的数据,构造到页面中
构造页面内容的时候,我们可以参考之前写好了的 html 代码进行构造
<script src="./js/jquery.mini.js"></script>
<script>
//在页面加载时 ,向服务器发起一个请求,获取博客列表数据
function getBlogs(){
$.ajax({
type:'get',
url:'blog',
success:function(body){
//响应的 body 是一个 json 字符串,此处已经被 jquery 自动解析成 js 对象数组了
//直接 for 循环遍历即可
let containerRight = document.querySelector('.containner');
for(let blog of body){
//构造页面内容,就参考之前写好的 html 代码
//构造整个博客 div
let blogDiv = document.createElement('div');
blogDiv.className = 'blog';
//构造标题
let titleDiv = document.createElement('div');
titleDiv.className = 'title';
titleDiv.innerHTML = blog.title;
blogDiv.appendChild(titleDiv);
//构造发布时间
let dateDiv = document.createElement('div');
datteDiv.className = 'date';
dateDiv.innerHTML = blog.postTime;
blogDiv.appendChild(dateDiv);
//构造博客摘要
let descDiv = document.createElement('div');
descDiv.className = 'desc';
desc.innerHTML = blog.content;
blogDiv.appendChild(descDiv);
//构造查看全文按钮
let a = document.createElement('a');
a.innerHTML = '查看全文 >>';
//期望点击之后,可以跳转到博客详情页,为了让博客详情页知道点了哪个博客,把 blogId 传过去
a.href = 'blog_detail.html?blogId=' + blog.blogId;
blogDiv.appendChild(a);
//把 blogDiv 给加到父元素中
containerRight.appendChild(blogDiv);
}
}
});
}
//要记得调用
getBlogs();
</script>此时,博客列表页功能实现就完成了
此时,我们插入一个测试用例,就会发现两个问题:
1、时间戳:不应该显示时间戳,而是应该显示格式化的时间
需要用到一个格式化时间的类,SimpleDateFormat 来帮我们转化一下就可以了 
2、顺序,新的博客在上面,老的博客在下面

直接在 sql 中加一个 order by 即可
五、博客详情页
接下来,实现博客详情页
点击 “查看全文” 按钮,就可以跳转到博客详情页中
跳转过去后,在博客详情页中发起一个 ajax ,从服务器获取到当前博客的具体内容,再显示出来
1、约定前后端交互接口

注意:由于此处是获取博客详情了,所以此处的 content 是完整的,不用像博客列表页一样进行截断
2、实现后端代码
@WebServlet("/blog")
public class BlogServlet extends HttpServlet {
    private ObjectMapper objectMapper = new ObjectMapper();
    @Override
    protected void doGet(HttpServletRequest req, HttpServletResponse resp) throws ServletException, IOException {
        //尝试获取一下 query string 中的 blogId 字段
        String blogId = req.getParameter("blogId");
        BlogDao blogDao = new BlogDao();
        if (blogId == null){
            //queryString 不存在,该请求是获取博客列表页
            List<Blog> blogs =  blogDao.selectAll();
            //需要把 blogs 转成符合要求的 json 格式的字符串
            String respJson = objectMapper.writeValueAsString(blogs);
            resp.setContentType("application/json;charset=utf8");
            resp.getWriter().write(respJson);
        }else {
            //query string 存在,本次请求是获取指定 id 的博客
            Blog blog = blogDao.selectById(Integer.parseInt(blogId));
            if (blog == null){
                System.out.println("当前 bligId = " + blogId + "对应博客不存在!");
            }
            String respJson = objectMapper.writeValueAsString(blog);
            resp.setContentType("application/json;charset=utf8");
            resp.getWriter().write(respJson);
        }
    }
3、实现前端代码
在 blog_detail.html 中,加入 ajax ,来获取上述数据
![]()
location.search 就是获取当前页面的 query string
这里的 location 不是 http header 中 location ,是 js 代码中的一个全局对象,类似于 document
注意:当前写的 博客内容,是使用 markdown 形式来组织的,比如博客的内容是
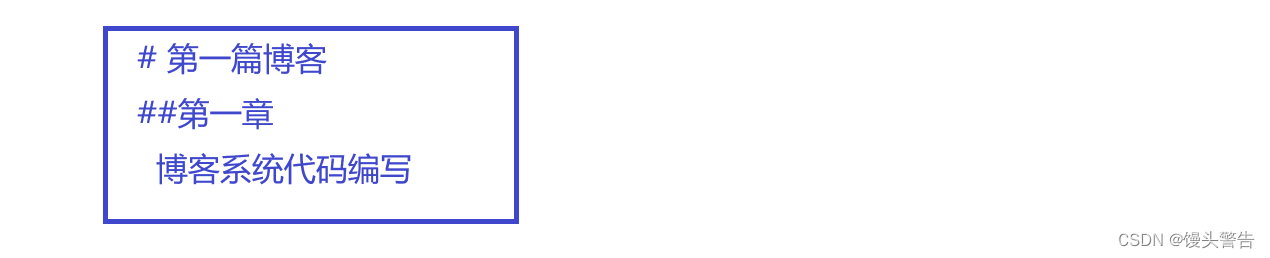
内容中,会带有一些 markdown 的符号,最终显示到网页上,希望用户看到的是渲染之后的结果,也就是把 # 转换成一级标题
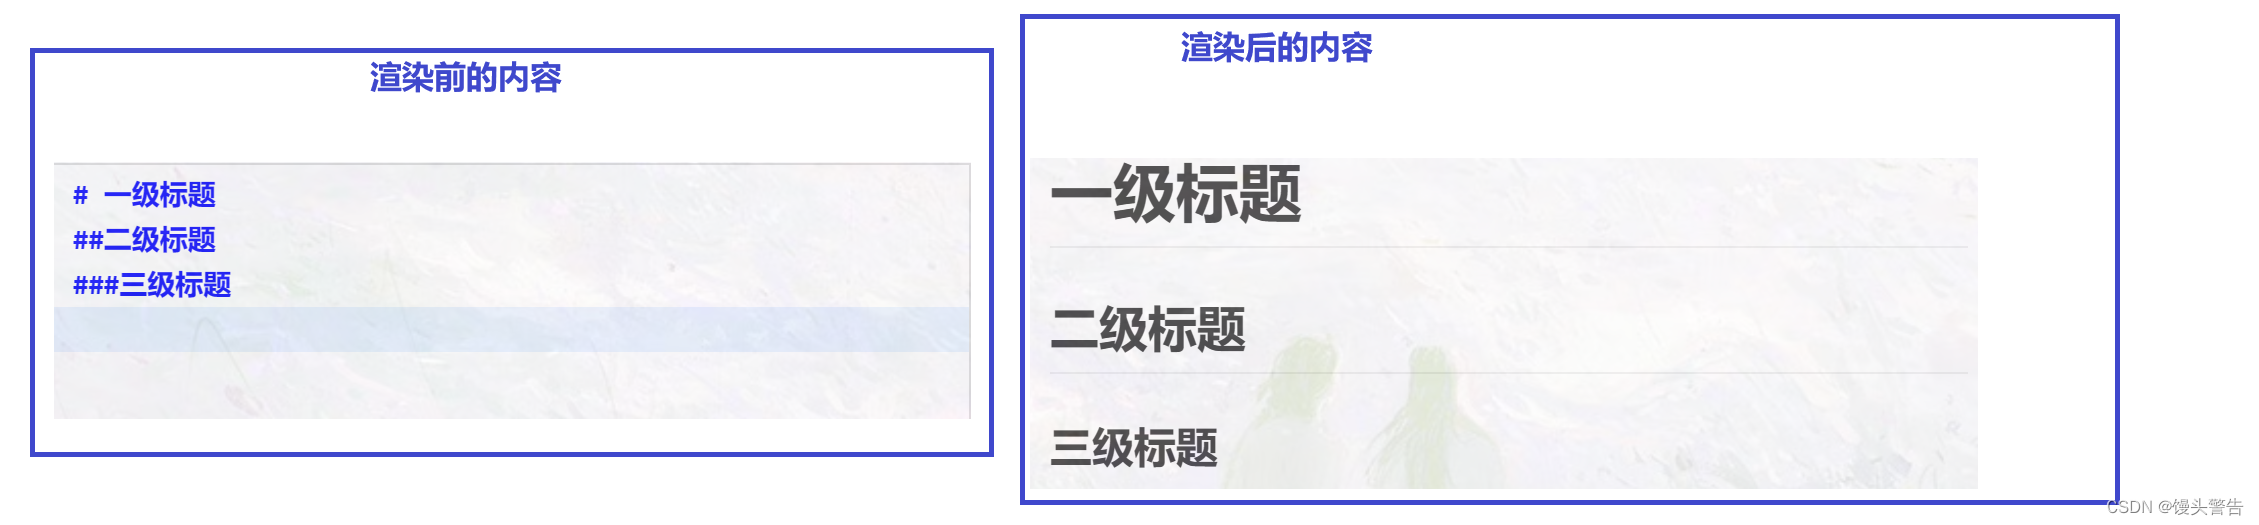
数据库中保存的 content 是渲染前的内容 ,但是最终显示给用户看,我们希望用户看到的是渲染后的内容
这里就需要使用 editor.md 对 markdown 内容进行转换
具体如何转换呢?
editor.md 提供了一个方法: editormd.markdownToHTML ,效果是把 md 字符串,转换成 html 片段,输出到 #content 这个标签内部(使用时要记得引入 editor.md 的依赖)
![]()
代码改完之后,重新启动服务器,发现此时博客详情页的结果,还是之前未修改的状态
这个内容,还是之前写死的内容,但是实际上,代码已经把这个内容给删掉了
这个是因为浏览器自身也有缓存,浏览器从服务器这边获取页面,这个操作是通过网络传输完成的,速度是比较慢的
浏览器就会把页面内容给缓存到本地(客户端电脑的硬盘上),后续再访问同一个页面,就直接读缓存了
这样就带来了一个问题:如果服务器代码改了,客户端命中缓存之后就不一定能及时感知到变化
解决方案:强制刷新, ctrl + f5 ,此时是无视本地缓存的,100%重新访问服务器的

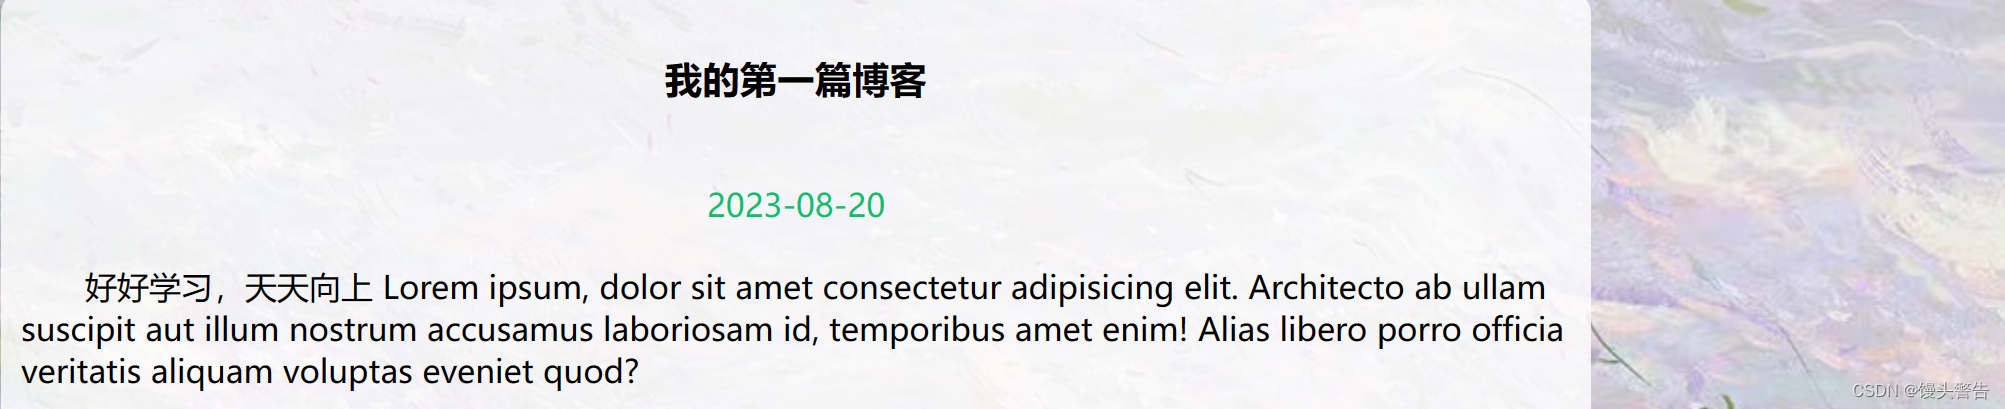
缓存问题解决之后,发现当前页面虽然变化了,但是结果仍然不是很理想,查看报错信息,就会发现是 editormd 的代码写错了,进行修改后再次刷新页面:
![]()

修改完之后,发现正文有了,但是标题没有出来
我们通过抓包来看看服务器返回结果是否符合预期,就可以确定是前端问题还是后端问题

根据响应结果,我们可以判断出后端代码应该没什么问题,响应结果是正确的,接下来检查前端代码
我们会发现,这是由于前端代码中出现了两个 title ,querySelector 默认返回的是第一个 title ,然后导致对标题的修改改错了地方
解决方案:把选择器写的更精确一些即可
![]()
重新启动服务器,再次刷新页面,就可以发现,现在标题就正确出现了

        <!-- 右侧信息 -->
        <div class="containner-right">
            <!-- 博客标题 -->
            <h3 class="title"></h3>
            <!-- 博客发布时间 -->
            <div class="date"></div>
            <!-- 博客正文  为了配合 editormd 进行格式转换,此处一定要改成 id -->
            <div id="content">

            </div>
        </div>
    </div>
    <script src="js/jquery.mini.js"></script>
        <!-- 引入 editor.md 的依赖 -->
        <!-- 要保证这个几个 js 的加载,在 jquery 之后,因为 edit.md 依赖了 jquery -->
        <script src="js/jquery.min.js"></script>
        <script src="editor.md/lib/marked.min.js"></script>
        <script src="editor.md/lib/prettify.min.js"></script>
        <script src="editor.md/editormd.js"></script>
    <script>
        $.ajax({
            type:'get',
            url:'blog' + location.search,
            success:function(body){
                //处理响应结果,此处的 body 就是表示一个博客的 js 对象
                //1、更新标题
                let titleDiv = document.querySelector('.containner-right .title');
                titleDiv.innerHTML = body.title;
                //2、更新日期
                let dateDiv = document.querySelector('.date');
                dateDiv.innerHTML = body.postTime;
                //3、更新博客正文
                //此处,不应该直接把博客正文填充到这个标签里
                editormd.markdownToHTML('content',{markdown: body.content});

            }
        });
    </script>
六、实现登录页

在此处输入用户名和密码,点击登录,就会触发一个 HTTP 请求
服务器验证用户名和密码,然后就可以根据结果判断是否登录成功,如果登录成功,就跳转到博客列表页
当前,只是一个单纯的输入框,还不能提交请求,所以我们需要把它改成 form 表单
1、约定前后端交互接口

2、修改前端代码
把页面里加上 form 表单,使点击登录操作能够触发请求
1、加上 form 标签,把 input 都包裹进去
2、input 加上 name 属性
3、把按钮改成 input submit 类型
        <!-- 垂直水平居中的对话框 -->
        <div class="login-dialog">
            <form action="login" method="post">
                <h3>登录</h3>
                <div class="row">
                    <span>用户名</span>
                    <input type="text" id = "username" placeholder="手机号 / 邮箱" name="username">
                </div>
                <div class="row">
                    <span>密码</span>
                    <input type="password" id = "password" name="password">
                </div>
                <div class="row">
                    <input type="submit" id = "submit" value="登录"></button>
                </div>
            </form>
        </div>
3、修改后端代码
此处需要加个 Servlet 来处理登录请求
@WebServlet("/login")
public class LoginServlet extends HttpServlet {
    @Override
    protected void doPost(HttpServletRequest req, HttpServletResponse resp) throws ServletException, IOException {
        //设置请求的编码,告诉 servlet 按照什么格式来理解请求
        req.setCharacterEncoding("utf8");
        //设置响应的编码,告诉 servlet 按照什么格式来构造请求
        //resp.setCharacterEncoding("utf8");
        resp.setContentType("text/html;charset=utf8");
        //1、读取参数中的用户名和密码
        //注意!!如果用户名密码包含中文,此处的读取可能会乱码,所以设置一下 utf8
        String username = req.getParameter("username");
        String password = req.getParameter("password");
        if (username == null || "".equals(username) || password == null || "".equals(password)){
            //登录失败
            String html = "<h3> 登陆失败! 缺少 username 或者 password 字段! </h3>";
            resp.getWriter().write(html);
            return;
        }
        //2、读数据库,看看用户名是否存在并且密码是否匹配
        UserDao userDao = new UserDao();
        User user = userDao.selectByUsername(username);
        if (user ==null){
            //用户不存在
            String html = "<h3> 登陆失败! 用户名 或 密码 错误!! </h3>";
            resp.getWriter().write(html);
            return;
        }
        if (!password.equals(user.getPassword())){
            //密码不对
            String html = "<h3> 登陆失败! 用户名 或 密码 错误!! </h3>";
            resp.getWriter().write(html);
            return;
        }
        //3、如果用户名和密码验证通过,登录成功,接下来创建会话,使用该会话来保存用户信息
        HttpSession session = req.getSession(true);
        session.setAttribute("user",user);
        //4、进行重定向,跳转到博客列表页
        resp.sendRedirect("blog_list.html");
    }
}
七、页面强制登录
当用户访问 博客列表页/详情页/编辑页,要求用户必须使已经登录的状态
如果用户还未登录,就强制跳转到登录页面
本质就是要求,想要使用系统,就得先登录
实现思路:
在页面加载的时候,专门发起一个新的 ajax (一个页面里可以发起N个 ajax)
以博客列表页为例:
先发一个请求获取到博客列表,再发送一个 ajax 获取用户的登录状态,如果用户已经登录了,就没事,如果未登录,则页面跳转到登录页
1、约定前后端交互接口
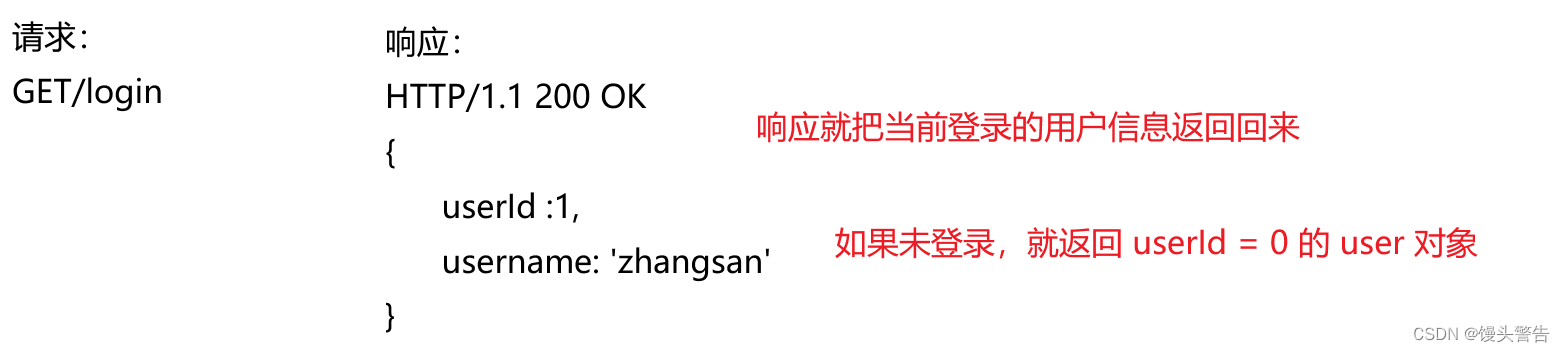
2、编写后端代码
    @Override
    protected void doGet(HttpServletRequest req, HttpServletResponse resp) throws ServletException, IOException {
        resp.setContentType("application/json;charset=utf8");
        //使用这个方法来获取到用户的登录状态
        //如果用户未登录,这里的会话就拿不到
        HttpSession session = req.getSession(false);
        if (session == null){
            //未登录,返回一个空的 user 对象
            User user = new User();
            String respJson = objectMapper.writeValueAsString(user);
            resp.getWriter().write(respJson);
            return;
        }
        User user = (User) session.getAttribute("user");
        if (user == null){
            user = new User();
            String respJson = objectMapper.writeValueAsString(user);
            resp.getWriter().write(respJson);
            return;
        }
        //确实成功去除了 user 对象,直接返回即可
        String respJson = objectMapper.writeValueAsString(user);
        resp.getWriter().write(respJson);
    }
3、实现前端代码
                function checkLogin(){
                    $.ajax({
                        type:'get',
                        url:'login',
                        success:function(body){
                            if(body.userId && body.userId > 0){
                                //登录成功
                                console.log("当前用户已经登录")
                            }else{
                                //当前未登录
                                //强制跳转到登录页
                                location.assign('login.html');
                            }
                        }
                    });
                }

                checkLogin();
八、显示用户信息

这个用户信息,目前是已经被写死了的,我们希望能够让它动态生成一个用户信息
1、如果是博客列表页,此处显示登录用户的信息
2、如果是博客详情页,此时现实的是该文章的作者
1、约定前后端交互接口

博客列表页代码调整:![]()
对于博客详情页的代码,我们重新写一个 servlet
什么时候需要新写一个 servlet?
主要看到当前请求的路径,是新的还是已经有了的
2、编写后端代码
@WebServlet("/author")
public class authorServlet extends HttpServlet {
    ObjectMapper objectMapper = new ObjectMapper();
    @Override
    protected void doGet(HttpServletRequest req, HttpServletResponse resp) throws ServletException, IOException {
        String blogId = req.getParameter("blogId");
        if (blogId == null){
            resp.setContentType("text/html;charset=utf8");
            resp.getWriter().write("参数非法,缺少 blogId ");
            return;
        }
        //根据 blogId 查询 Blog 对象
        BlogDao blogDao = new BlogDao();
        Blog blog = blogDao.selectById(Integer.parseInt(blogId));
        if (blog == null){
            //博客不存在
            resp.setContentType("text/html;charset=utf8");
            resp.getWriter().write("没有找到指定博客:blogId = " + blogId);
            return;
        }
        //根据 blog 中的 userId 找到对应的用户信息
        UserDao userDao = new UserDao();
        User author = userDao.selectById(blog.getUserId());
        String respJson = objectMapper.writeValueAsString(author);
        resp.setContentType("application/json;charset=utf8");
        resp.getWriter().write(respJson);
    }
}
3、编写前端代码
        function getAuthor(){
            $.ajax({
                type:'get',
                url:'author' + location.search,
                success: function(body){
                    //把 username 给设置到页面上
                    let h3 = document.querySelector('.containner-left .card h3');
                    h3.innerHTML = body.username;
                }
            });
        }

        getAuthor();
九、退出登录状态
这里的注销指的是退出登录状态,不是指删除账户
判定登录状态:
1、看是否能查到 http session 对象
2、看 session 对象里有没有 user 对象
实现退出登录,要么是把 http session 给干掉,要么把 user 给干掉,二者选其一即可
如果有会话,但是没有 user 对象,也视为未登录
如果想要干掉 http session 会比较麻烦,所以我们选择干掉 user 对象
1、约定前后端接口

2、编写后端代码
@WebServlet("/logout")
public class logoutServlet extends HttpServlet {
    @Override
    protected void doGet(HttpServletRequest req, HttpServletResponse resp) throws ServletException, IOException {
        HttpSession httpSession = req.getSession(false);
        if (httpSession == null){
            //未登录状态
            resp.setContentType("text/html;charset=utf8");
            resp.getWriter().write("当前未登录!");
            return;
        }
        httpSession.removeAttribute("user");
        resp.sendRedirect("login.html");
    }
}
3、编写前端代码

十、发布博客
1、约定前后端交互接口
使用 form 表单,得让页面中多个 form 标签,同时得让 form 里面能够感知到博客的内容


2、编写服务器代码
@Override
protected void doPost(HttpServletRequest req, HttpServletResponse resp) throws ServletException, IOException {
//发布博客
//读取请求,构造出 blog 对象,插入数据库
HttpSession httpSession = req.getSession(false);
if (httpSession == null){
resp.setContentType("text/html;charset=utf8");
resp.getWriter().write("当前未登录,无法发布博客");
return;
}
User user = (User) httpSession.getAttribute("user");
if (user == null){
resp.setContentType("text/html;charset=utf8");
resp.getWriter().write("当前未登录,无法发布博客");
return;
}
//确保登录之后,就可以把作者给拿到了
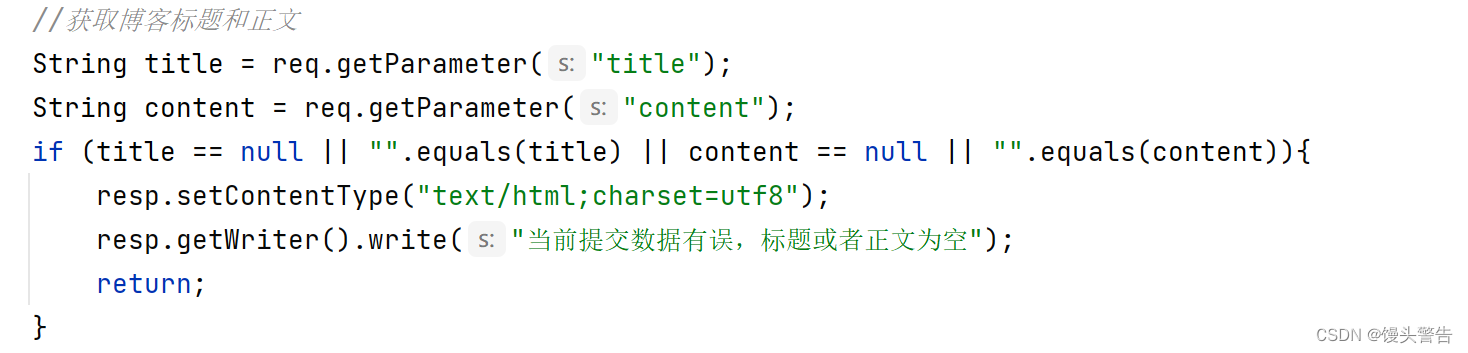
//获取博客标题和正文
String title = req.getParameter("title");
String content = req.getParameter("content");
if (title == null || ".equals(title) || content == null || ".equals(content)){
resp.setContentType("text/html;charset=utf8");
resp.getWriter().write("当前提交数据有误,标题或者正文为空");
return;
}
//构造Blog 对象
Blog blog = new Blog();
blog.setTitle(title);
blog.setContent(content);
blog.setUserId(user.getUserId());
//发布时间
blog.setPostTime(new Timestamp(System.currentTimeMillis()));
//插入数据
BlogDao blogDao = new BlogDao();
blogDao.add(blog);
//跳转到博客列表页
resp.sendRedirect("blog_list.html");
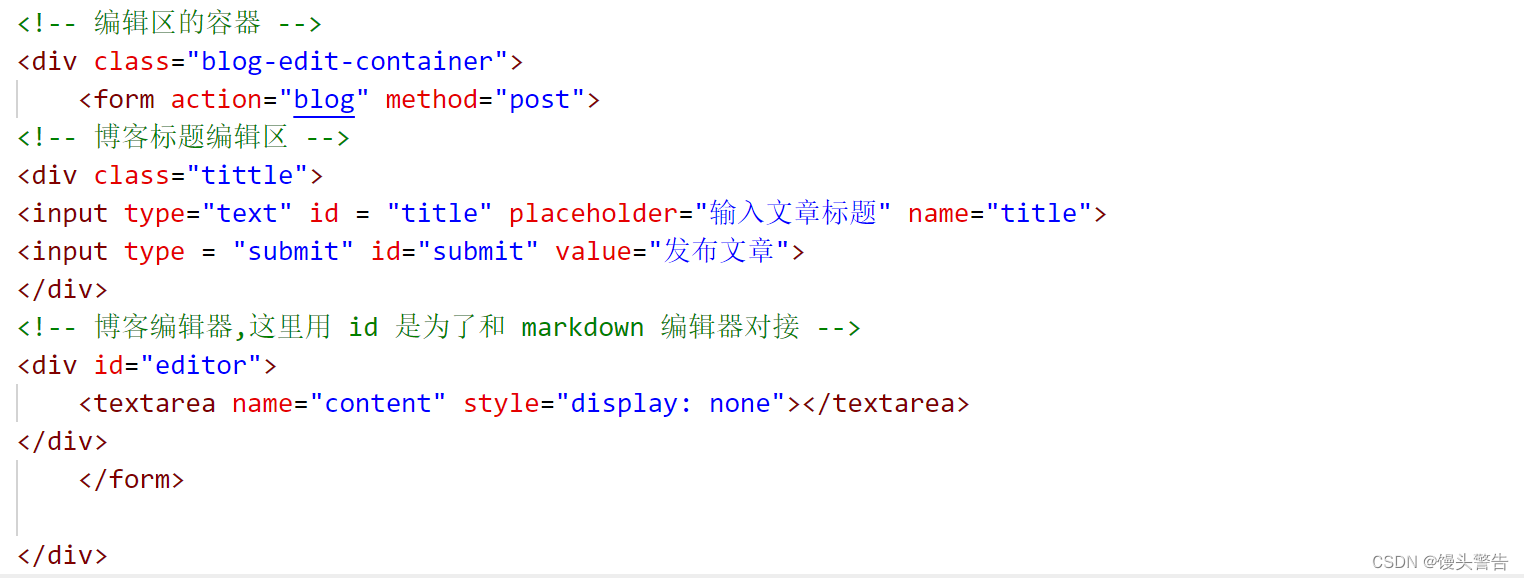
}3、编写客户端代码
对代码进行调整:
1、加上 form 标签
2、给 input 标签加上 name 属性
3、把 button 改成 input 标签,并且 type 为 submit
4、editor.md 文档要求写法:加上 textarea
editor.md对于 form 表单也是支持的,就是可以在 form 里放一个隐藏的 textarea,editor.md 就会自动的把用户输入的 markdown 内容填写到 textarea 里,后续点击 submit就能自动提交
此时,我们再运行代码看一下结果
这时候我们发现了一个问题:代码改完之后,编辑器发生了基因突变
前端代码样式有问题,我们只能通过观察 chorme 开发者工具来找问题
我们可以看到,是当前的 form 出现了问题
具体分析如下: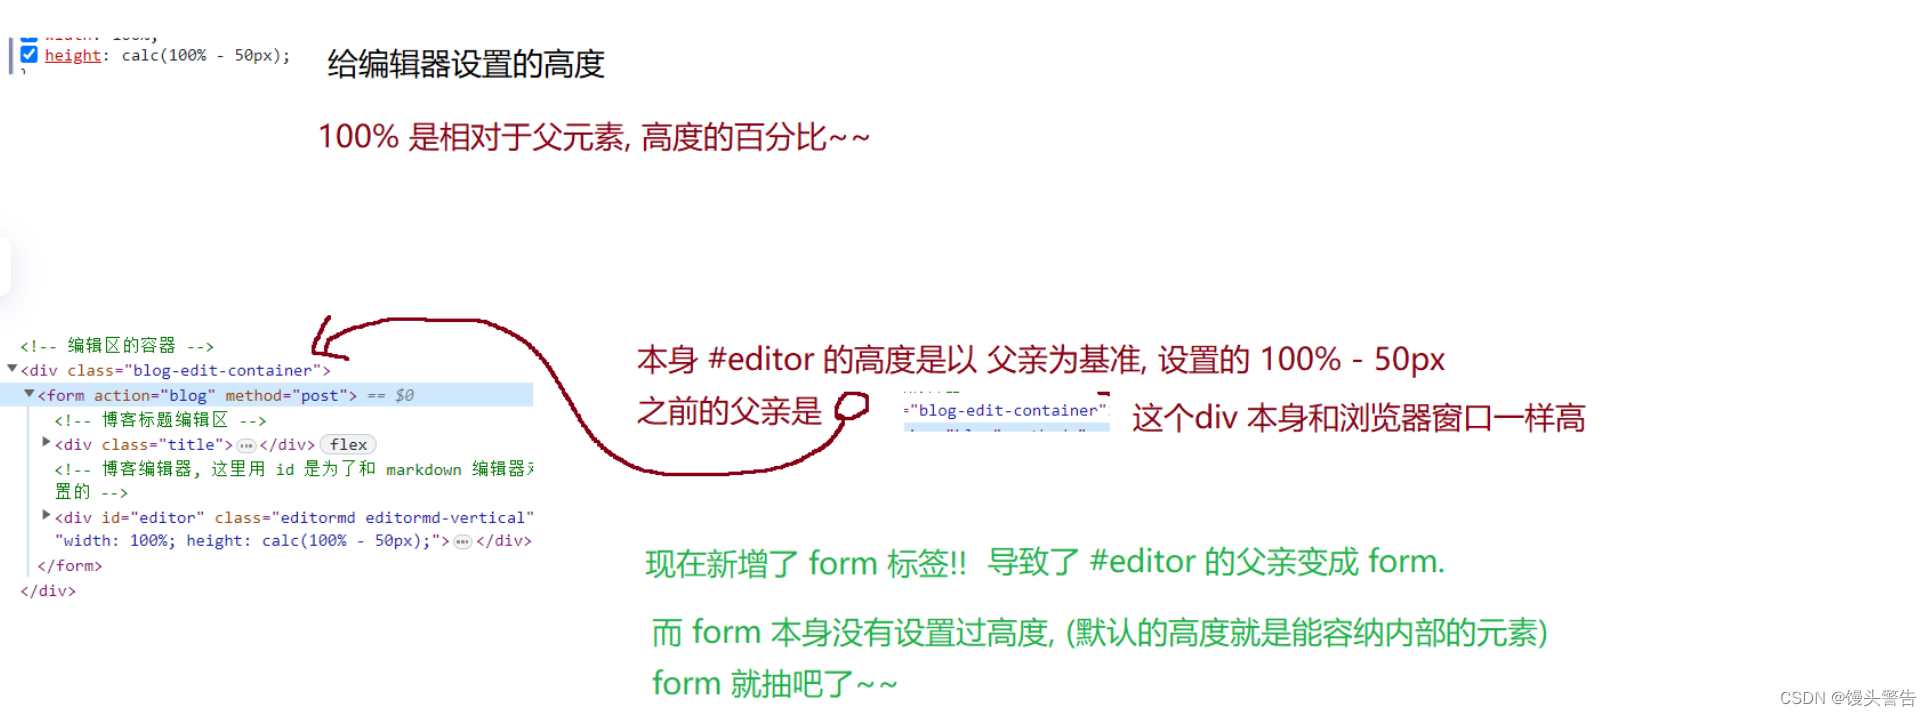
解决方案:给 form 设置高度
![]()
此时,我们就可以正常发布博客了,但是此时却出现了乱码的问题:

乱码有两种情况:
1、提交博客的时候乱码
2、获取博客的时候乱码
我们只需要看一下数据库,就知道是哪种情况;

这时候就可以发现,是提交的时候乱码了
注意:在获取标题和正文的时候,需要指定请求的字符集,也就是告诉 servlet 按照哪种字符集来进行解析请求

此时,再次点击提交,就可以正常的发布博客了
