文章目录
前言
昨天华为mate60提前发售,网上流传,麒麟9000s,“4G改””,“突破列强科技封锁”等字眼流传在各大社交平台,我对着那些mate60相关文章左看右看,上看下看,竟从密密麻麻的文字中看出四个字——“遥遥领先”
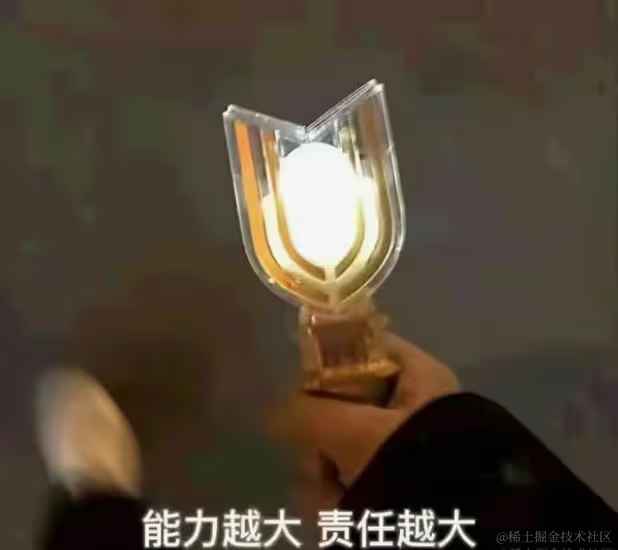
其实起因是在掘金沸点看见这么一个表情包,然后就用HarmonyOS ArkUI 的 Canvas画了一个神光棒(我没有说华为是国产之光啊,叠甲)。不跑偏了,我们今天通过画这个神光棒来熟悉下HarmonyOS ArkUI 的 Canvas
一、Canvas是什么?
Canvas是 ArkUI 提供的画布组件,用于自定义绘制图形。它使用类似于HTML5 Canvas的方式进行绘制,可以实现高效、灵活的自定义UI界面。Canvas可以实现在画布上自由绘制图形,包括线条、矩形、圆形、文本、图片等,并且可以通过控制绘制顺序和渲染顺序来实现图层管理和遮盖效果。
参数:
| 参数名 | 参数类型 | 必填 | 默认值 | 参数描述 |
|---|---|---|---|---|
| context | CanvasRenderingContext2D | 否 | - | 见CanvasRenderingContext2D对象。 |
二、画神光棒
想要画一个神光棒,我们要先将它拆解,看看它由什么组成,然后我们就得到了如下公式:
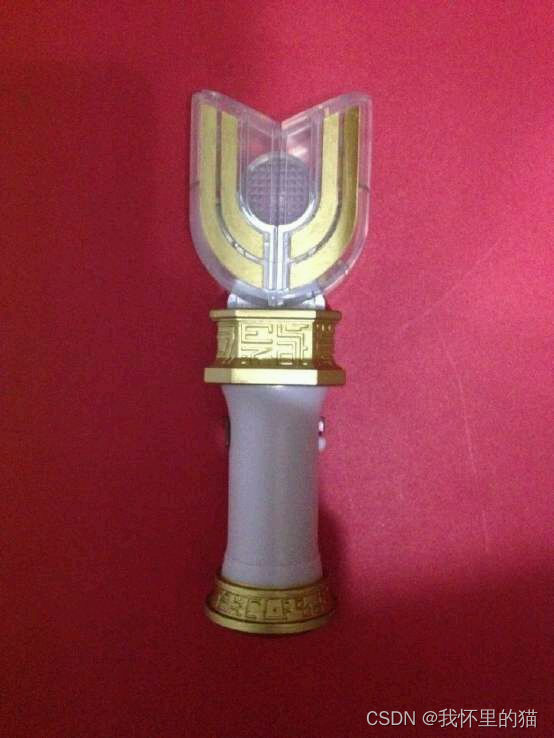
神光棒 = 圆 + 左边的多边形 + 右边的多边形 + 连接部分 + 棒身 + 底座 神光棒 = 圆+左边的多边形+右边的多边形+连接部分+棒身+底座 神光棒=圆+左边的多边形+右边的多边形+连接部分+棒身+底座
得到公式后我们一步一步将其画出来,在开始使用Canvas组件之前,我们需要先初始化CanvasRenderingContext2D:

private settings: RenderingContextSettings = new RenderingContextSettings(true)
 private context: CanvasRenderingContext2D = new CanvasRenderingContext2D(this.settings)
然后用这个context初始化
      Canvas(this.context)
        .width('100%')
        .height('100%')
        .onReady(() => {


          })
接下来的所有绘画工作都将在onReady方法中进行,context自带宽高属性,代表了控件的宽高以方便我们绘制
 		  let width = this.context.width
          let height = this.context.height
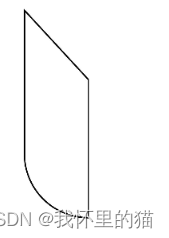
1.绘制神光棒左右侧
代码如下(示例):
		  this.context.lineWidth = 2

		  this.context.beginPath()
          this.context.moveTo(width/2, height/4)
          this.context.lineTo(width/4, height/8)
          this.context.lineTo(width/4, height/3)
          this.context.arcTo(width/4, height/2, width/2, height/2, 90)
          this.context.closePath()
          this.context.stroke()
解释
-
beginPath():beginPath() 是 canvas 的方法之一,它的作用是创建一个新路径,用于绘制图形。新路径创建后,之前绘制的路径和样式将被清空。在开始绘制新的路径之前,我们通常需要调用此方法来创建一个新的路径对象。
-
moveTo():的moveTo方法是用于将画笔移动到指定的坐标点。具体语法如下:
-public void moveTo(float x, float y)其中,x和y分别表示坐标点的横纵坐标。 -
lineTo(): lineTo方法用于在指定坐标处开始绘制一条直线。其语法与moveTo相同
-
arcTo(): arcTo() 是 Canvas API 中的路径绘制方法之一。它用于绘制一段弧线,该弧线的起点和终点是已知的,但是中间的弧度大小和轨迹需要通过控制点来控制。
arcTo() 方法有四个参数,前两个参数是控制点坐标,中间两个参数是终点坐标。它的语法如下:
context.arcTo(x1, y1, x2, y2, radius)
在绘制路径时,我们通常先用 moveTo() 方法来设置路径的起始点,然后用 arcTo() 方法来绘制一段弧线,最后用 lineTo() 或者其它路径绘制方法来补充路径的其它部分。
使用 arcTo() 方法需要注意以下几点:
- 路径的起始点不能和弧线的起点重合;
- 控制点的坐标和终点的坐标必须在同一直线上;
- 控制点和终点的距离必须大于弧线的半径,否则将无法绘制出弧线;
- 如果要绘制出多段弧线,每段弧线的起点和上一段弧线的终点必须重合,否则将会形成断点。
-
closePath():用于将当前笔画的起点和终点连接起来,形成一个封闭路径。当调用 closePath() 后,下一次的绘制操作就会从路径的起点开始,而不是继续上一次路径的终点。路径的起点默认是最后一个 moveTo() 方法所设置的点。如果当前路径没有进行 moveTo() 操作,则起点自动设置为 (0, 0)。在 closePath() 之后,你可以通过 fill() 或 stroke() 方法来填充或描边路径。如果当前路径没有形成封闭路径(即起点和终点未连接),则 closePath() 方法不会产生任何效果。
-
stroke():用于设置描边样式的方法。它可以用于设置图形的描边颜色、宽度和样式。
context.stroke()
stroke() 方法通常在绘制完图形的路径后调用。调用该方法将当前描边样式应用于路径,并在画布上绘制描边路径。
在调用该方法之前,您可以通过以下方法设置描边样式:
- context.strokeStyle :设置描边颜色。可以是一个字符串值,如“red”或“#FF0000”,也可以是 CanvasGradient 或 CanvasPattern 对象。
- context.lineWidth :设置描边线宽度,单位为像素。
- context.lineCap :设置线条的端点样式,可以是 butt(默认)、round 或 square。
- context.lineJoin :设置线条的连接点样式,可以是 miter(默认)、round 或 bevel。
- context.miterLimit :设置斜角的限制比例,只有当 lineJoin 为 miter 时才有效。
效果如下:
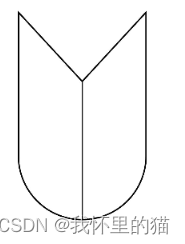
同理,我们只需要变换一下位置坐标,就能将右侧画出来
          this.context.beginPath()
          this.context.moveTo(width/2, height/4)
          this.context.lineTo(width/4*3, height/8)
          this.context.lineTo(width/4*3, height/3)
          this.context.arcTo(width/4*3, height/2, width/2, height/2, 90)
          // this.context.closePath()
          this.context.stroke()
效果入下
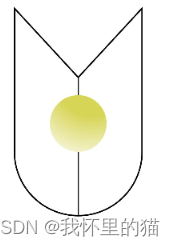
2.中心圆形
代码如下(示例):
 		  this.context.beginPath()
          this.context.arc(width/2, height/3, 40, 0, 360)
          // this.context.stroke()
          var grad = this.context.createRadialGradient(200,200,50, 200,200,200)
          grad.addColorStop(0.0, '#ffd7d556')
          grad.addColorStop(1.0, '#ffcdc555')
          grad.addColorStop(0.5, '#ffffff')
          this.context.fillStyle = grad
          this.context.fill()
解释:
- arc(): arc 方法是用来绘制圆弧的。
该方法的语法如下:
public void arc(float left, float top, float right, float bottom, float startAngle, float sweepAngle, boolean useCenter, Paint paint)
参数说明:
- left:圆弧所在矩形的左边界坐标;
- top:圆弧所在矩形的上边界坐标;
- ight:圆弧所在矩形的右边界坐标;
- bottom:圆弧所在矩形的下边界坐标;
- startAngle:圆弧起始角度,以度数表示;
- sweepAngle:圆弧扫描角度,以度数表示;
- useCenter:是否绘制扇形,默认为 false,表示绘制圆弧;
- paint:绘制圆弧所使用的画笔。
使用 arc 方法可以画出各种圆弧,如扇形、半圆等。同时,通过设置 startAngle 和 sweepAngle 可以绘制出不同的圆弧形状。
- createRadialGradient 用于创建一个放射性渐变的函数,也就是实现在给定的两个圆之间进行颜色渐变的功能。具体来说,该方法接收6个参数:
- centerX: 渐变圆的中心点横坐标。
- centerY: 渐变圆的中心点纵坐标。
- radius: 渐变圆的半径。
- centerX2: 第二个渐变圆的中心点横坐标。
- centerY2: 第二个渐变圆的中心点纵坐标。
- radius2: 第二个渐变圆的半径。
该方法会返回一个渐变对象,可以在canvas上使用该对象进行绘制。
效果如下:
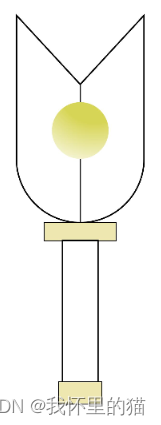
其他部分
熟悉了上面的几个Canvas相关的api,剩下的部分稍微动下脑筋,就可以将中间,棒棒和底座一次搞定 啦,代码如下:
          //神光棒中间
          this.context.beginPath()
          this.context.moveTo(width/2-50, height/2)
          this.context.lineTo(width/2+50, height/2)
          this.context.lineTo(width/2+50, height/2+25)
          this.context.lineTo(width/2-50, height/2+25)
          this.context.closePath()
          this.context.stroke()
          this.context.fillStyle = "#eee7b0"
          this.context.fill()

          //神光棒棒棒
          this.context.beginPath()
          this.context.moveTo(width/2-25, height/2+25)
          this.context.lineTo(width/2-25, height/2+25+200)
          this.context.lineTo(width/2+25, height/2+25+200)
          this.context.lineTo(width/2+25, height/2+25)
          this.context.closePath()
          this.context.stroke()


          //神光棒底座
          this.context.beginPath()
          this.context.moveTo(width/2-30, height/2+25+200)
          this.context.lineTo(width/2+30, height/2+25+200)
          this.context.lineTo(width/2+30, height/2+25+200+30)
          this.context.lineTo(width/2-30, height/2+25+200+30)
          this.context.closePath()
          this.context.stroke()
          this.context.fillStyle = "#eee7b0"
          this.context.fill()
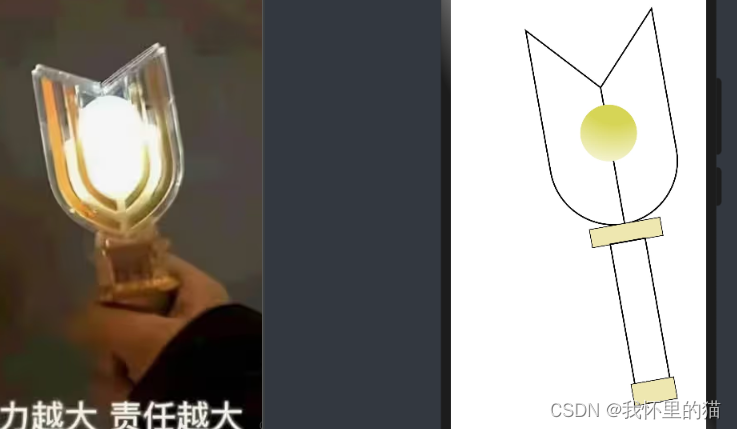
最后再加上一个倾斜,所有人都可以变成光!
this.context.rotate(-10 * Math.PI / 180)
完整代码:
// @ts-nocheck
@Entry
@Preview
@Component
struct Index {


  private settings: RenderingContextSettings = new RenderingContextSettings(true)
  private context: CanvasRenderingContext2D = new CanvasRenderingContext2D(this.settings)

  build() {


    Flex({

     direction: FlexDirection.Column, alignItems: ItemAlign.Center, justifyContent: FlexAlign.Center }) {


      Canvas(this.context)
        .width('100%')
        .height('100%')
        .onReady(() => {


          let width = this.context.width
          let height = this.context.height
          this.context.lineWidth = 2

          this.context.rotate(-10 * Math.PI / 180)


          //神光棒左侧
          this.context.beginPath()
          this.context.moveTo(width/2, height/4)
          this.context.lineTo(width/4, height/8)
          this.context.lineTo(width/4, height/3)
          this.context.arcTo(width/4, height/2, width/2, height/2, 90)
          this.context.closePath()
          this.context.stroke()

          //神光棒右侧
          this.context.beginPath()
          this.context.moveTo(width/2, height/4)
          this.context.lineTo(width/4*3, height/8)
          this.context.lineTo(width/4*3, height/3)
          this.context.arcTo(width/4*3, height/2, width/2, height/2, 90)
          // this.context.closePath()
          this.context.stroke()

          //中心圆形
          this.context.beginPath()
          this.context.arc(width/2, height/3, 40, 0, 360)
          // this.context.stroke()
          var grad = this.context.createRadialGradient(200,200,50, 200,200,200)
          grad.addColorStop(0.0, '#ffd7d556')
          grad.addColorStop(1.0, '#ffcdc555')
          grad.addColorStop(0.5, '#ffffff')
          this.context.fillStyle = grad
          this.context.fill()


          //神光棒中间
          this.context.beginPath()
          this.context.moveTo(width/2-50, height/2)
          this.context.lineTo(width/2+50, height/2)
          this.context.lineTo(width/2+50, height/2+25)
          this.context.lineTo(width/2-50, height/2+25)
          this.context.closePath()
          this.context.stroke()
          this.context.fillStyle = "#eee7b0"
          this.context.fill()

          //神光棒棒棒
          this.context.beginPath()
          this.context.moveTo(width/2-25, height/2+25)
          this.context.lineTo(width/2-25, height/2+25+200)
          this.context.lineTo(width/2+25, height/2+25+200)
          this.context.lineTo(width/2+25, height/2+25)
          this.context.closePath()
          this.context.stroke()


          //神光棒底座
          this.context.beginPath()
          this.context.moveTo(width/2-30, height/2+25+200)
          this.context.lineTo(width/2+30, height/2+25+200)
          this.context.lineTo(width/2+30, height/2+25+200+30)
          this.context.lineTo(width/2-30, height/2+25+200+30)
          this.context.closePath()
          this.context.stroke()
          this.context.fillStyle = "#eee7b0"
          this.context.fill()


        })


    }
    .width('100%')
    .height('100%')
  }

}function centerX<T>(x: any,arg1: number,y: any,arg3: number,z: any,arg5: number,centerX: any,arg7: number,centerY: any,arg9: number) {


throw new Error('Function not implemented.')
}
总结
在编译器的heip->API Reference->画布组件中可以看到Canvans相关的API及介绍,本文参考API文档绘制神光棒,迪迦!