1.准备环境
postgresql官网:https://www.postgresql.org/
1.1.选择安装环境

1.2.选择要安装的版本以及安装平台
安装版本:postgresql14
安装平台:centos7
2.安装
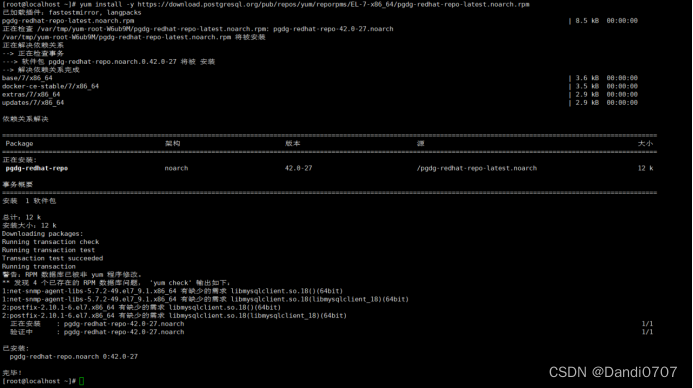
1.安装RPM存储库,执行以下命令:
yum install -y https://download.postgresql.org/pub/repos/yum/reporpms/EL-7-x86_64/pgdg-redhat-repo-latest.noarch.rpm
2.安装PostgreSQL,使用以下命令:
yum install -y postgresql14-server

3.初始化数据库
1.初始化数据库并启用自动启动,使用以下命令:
/usr/pgsql-14/bin/postgresql-14-setup initdb

2.设置成centos7开机启动PostgreSQL服务
systemctl enable postgresql-14
![]()
3.启动PostgreSQL服务
systemctl start postgresql-14
注意:PostgreSQL初始化数据库之后,默认的数据目录是在/var/lib/pgsql,但是该目录在根分区下,一般建议放到独立的数据目录下。
所以这里进行如下操作:
| #停止数据库 systemctl stop postgresql-14 #移动原始数据目录 mv /var/lib/pgsql/ /usr/local/tools/ #创建软连 cd /var/lib/ && ln -s /usr/local/tools/pgsql pgsql #然后启动服务 systemctl start postgresql-14 |
3.1.验证安装是否成功
切换到postgres用户(yum安装时自动生成)
然后直接输入psql回车,输出psql(14.6)就代表安装成功。

4.修改账户密码
| [root@localhost ~]# su - postgres Last login: Thu Dec 22 02:42:20 CST 2022 on pts/1 -bash-4.2$ psql psql (14.6) Type "help" for help. postgres=# ALTER USER postgres WITH PASSWORD 'root1234'; ALTER ROLE |

5.PostgreSQL的简单配置(远程连接)
PostgreSQL14配置文件位置在:/usr/local/tools/pgsql/14/data/postgresql.conf
5.1.修改ip绑定
若要远程连接数据库,则需要修改数据目录下的配置文件。
修改配置文件postgresql.conf:
vim /usr/local/tools/pgsql/14/data/postgresql.conf
| 具体修改:将 #listen_addresses = 'localhost' 前的#号去掉,然后将后面的localhost改为*,然后将 #port = 5432 前的#去掉,最后再将#password_encryption 前面的#号去掉。 |

注解:
listen_addresses = '*' *代表监听所有IP,也可以指定特定的IP列表
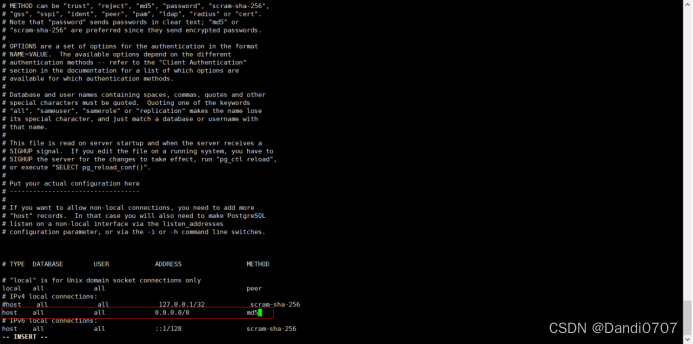
5.2.允许所有ip访问
vi /usr/local/tools/pgsql/14/data/pg_hba.conf
6.检查数据库状态
systemctl restart postgresql-14

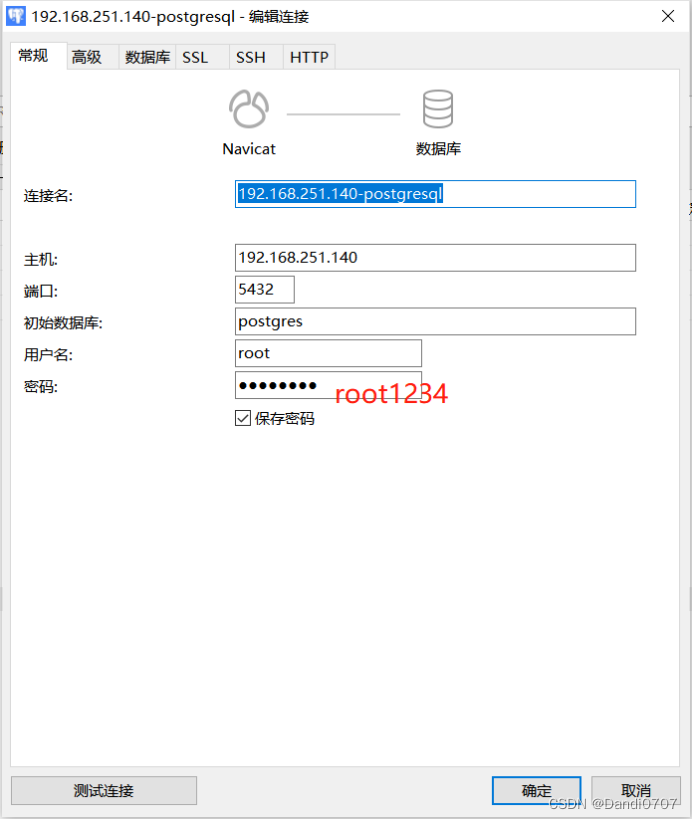
7.测试
7.1.创建用户
| [root@oracledb data]# su - postgres Last login: Thu Dec 22 02:43:30 CST 2022 on pts/1 -bash-4.2$ psql psql (14.6) Type "help" for help. postgres=# CREATE USER root with password 'root1234'; CREATE ROLE |

7.2.远程连接测试