使用官方安装脚本自动安装
安装命令如下:
curl -fsSL https://get.docker.com | bash -s docker --mirror Aliyun
也可以使用国内 daocloud 一键安装命令:
curl -sSL https://get.daocloud.io/docker | sh
Docker离线安装
一、Docker安装
1. 安装包官方地址:https://download.docker.com/linux/static/stable/x86_64/
可以先下载到本地,然后通过ftp工具上传到服务器上,或者在服务器上使用命令下载
wget https://download.docker.com/linux/static/stable/x86_64/docker-18.06.3-ce.tgz
2. 解压
tar -zxvf docker-18.06.3-ce.tgz
3. 将解压出来的docker文件复制到 /usr/bin/ 目录下
cp docker/* /usr/bin/
4. 创建docker.service文件
进入 /etc/systemd/system/ 目录,并创建 docker.service 文件,内容如下,这样可以将docker注册为service服务
[Unit]
Description=Docker Application Container Engine
Documentation=https://docs.docker.com
After=network-online.target firewalld.service
Wants=network-online.target

[Service]
Type=notify
# the default is not to use systemd for cgroups because the delegate issues still
# exists and systemd currently does not support the cgroup feature set required
# for containers run by docker
ExecStart=/usr/bin/dockerd --selinux-enabled=false --insecure-registry=127.0.0.1
ExecReload=/bin/kill -s HUP $MAINPID
# Having non-zero Limit*s causes performance problems due to accounting overhead
# in the kernel. We recommend using cgroups to do container-local accounting.
LimitNOFILE=infinity
LimitNPROC=infinity
LimitCORE=infinity
# Uncomment TasksMax if your systemd version supports it.
# Only systemd 226 and above support this version.
#TasksMax=infinity
TimeoutStartSec=0
# set delegate yes so that systemd does not reset the cgroups of docker containers
Delegate=yes
# kill only the docker process, not all processes in the cgroup
KillMode=process
# restart the docker process if it exits prematurely
Restart=on-failure
StartLimitBurst=3
StartLimitInterval=60s

[Install]
WantedBy=multi-user.target

# 此处的–insecure-registry=127.0.0.1(此处改成你私服ip)设置是针对有搭建了自己私服Harbor时允许docker进行不安全的访问,否则访问将会被拒绝。
5. 启动docker
# 给docker.service文件添加执行权限
chmod +x /etc/systemd/system/docker.service
# 重新加载配置文件(每次有修改docker.service文件时都要重新加载下)
systemctl daemon-reload
# 启动
systemctl start docker
# 设置开机启动
systemctl enable docker.service
# 查看docker服务状态
[root@localhost system]# systemctl status docker
● docker.service - Docker Application Container Engine
Loaded: loaded (/etc/systemd/system/docker.service; enabled; vendor preset: disabled)
Active: active (running) since Tue 2022-06-28 00:54:47 PDT; 10s ago
Docs: https://docs.docker.com
Main PID: 45475 (dockerd)
CGroup: /system.slice/docker.service
├─45475 /usr/bin/dockerd --selinux-enabled=false --insecure-registry=10.1.20.150
└─45487 containerd --config /var/run/docker/containerd/containerd.toml --log-level info
Jun 28 00:54:46 localhost.localdomain dockerd[45475]: time="2022-06-28T00:54:46.158519178-07:00" level=info msg="ccResolverWrapper: sending update to cc: {[{unix:///var/run/docker/containerd..." module=grpc
Jun 28 00:54:46 localhost.localdomain dockerd[45475]: time="2022-06-28T00:54:46.158525449-07:00" level=info msg="ClientConn switching balancer to "pick_first"" module=grpc
Jun 28 00:54:46 localhost.localdomain dockerd[45475]: time="2022-06-28T00:54:46.202943588-07:00" level=info msg="Loading containers: start."
Jun 28 00:54:47 localhost.localdomain dockerd[45475]: time="2022-06-28T00:54:47.021854086-07:00" level=info msg="Default bridge (docker0) is assigned with an IP address 172.17.0.0/16. Daemon...d IP address"
Jun 28 00:54:47 localhost.localdomain dockerd[45475]: time="2022-06-28T00:54:47.126281901-07:00" level=info msg="Firewalld: interface docker0 already part of docker zone, returning"
Jun 28 00:54:47 localhost.localdomain dockerd[45475]: time="2022-06-28T00:54:47.244251569-07:00" level=info msg="Loading containers: done."
Jun 28 00:54:47 localhost.localdomain dockerd[45475]: time="2022-06-28T00:54:47.264592112-07:00" level=info msg="Docker daemon" commit=a89b842 graphdriver(s)=overlay2 version=20.10.17
Jun 28 00:54:47 localhost.localdomain dockerd[45475]: time="2022-06-28T00:54:47.265027319-07:00" level=info msg="Daemon has completed initialization"
Jun 28 00:54:47 localhost.localdomain systemd[1]: Started Docker Application Container Engine.
Jun 28 00:54:47 localhost.localdomain dockerd[45475]: time="2022-06-28T00:54:47.300116789-07:00" level=info msg="API listen on /var/run/docker.sock"
Hint: Some lines were ellipsized, use -l to show in full.
# 如上表示docker已安装成功
6. docker环境检查
docker info
[root@localhost system]# docker info
Running: 0
Paused: 0
Stopped: 0
Images: 0
Server Version: 20.10.17
Storage Driver: overlay2
Backing Filesystem: xfs
Supports d_type: true
Native Overlay Diff: true
userxattr: false
Logging Driver: json-file
Cgroup Driver: cgroupfs
Cgroup Version: 1
Plugins:
Volume: local
Network: bridge host ipvlan macvlan null overlay
Log: awslogs fluentd gcplogs gelf journald json-file local logentries splunk syslog
Swarm: inactive
Runtimes: io.containerd.runc.v2 io.containerd.runtime.v1.linux runc
Default Runtime: runc
Init Binary: docker-init
containerd version: 10c12954828e7c7c9b6e0ea9b0c02b01407d3ae1
runc version: v1.1.2-0-ga916309f
init version: de40ad0
Security Options:
seccomp
Profile: default
Kernel Version: 3.10.0-693.el7.x86_64
Operating System: CentOS Linux 7 (Core)
OSType: linux
Architecture: x86_64
CPUs: 4
Total Memory: 7.624GiB
Name: localhost.localdomain
ID: ZHES:U53P:FOPX:QKRO:4PQE:BIKC:OEQJ:7VUS:NBUQ:U47D:R3QO:JKKX
Docker Root Dir: /var/lib/docker
Debug Mode: false
Registry: https://index.docker.io/v1/
Labels:
Experimental: false
Insecure Registries:
10.1.20.150
127.0.0.0/8
Live Restore Enabled: false
Product License: Community Engine
docker version
[root@localhost system]# docker version
Client:
Version:           20.10.17
API version:       1.41
Go version:        go1.17.11
Git commit:        100c701
Built:             Mon Jun  6 22:56:42 2022
OS/Arch:           linux/amd64
Context:           default
Experimental:      true
Server: Docker Engine - Community
Engine:
Version:          20.10.17
API version:      1.41 (minimum version 1.12)
Go version:       go1.17.11
Git commit:       a89b842
Built:            Mon Jun  6 23:01:45 2022
OS/Arch:          linux/amd64
Experimental:     false
containerd:
Version:          v1.6.6
GitCommit:        10c12954828e7c7c9b6e0ea9b0c02b01407d3ae1
runc:
Version:          1.1.2
GitCommit:        v1.1.2-0-ga916309f
docker-init:
Version:          0.19.0
GitCommit:        de40ad0
二、docker-compose安装
# docker-compose下载并放到/usr/local/bin/下面:
curl -L "https://github.com/docker/compose/releases/download/v2.18.1/docker-compose-$(uname -s)-$(uname -m)" -o /usr/local/bin/docker-compose
# 下载好docker-compose的前提下,拷贝到指定位置
sudo cp docker-compose /usr/local/bin/docker-compose
sudo ln -s /usr/local/bin/docker-compose /usr/bin/docker-compose
sudo chmod +x /usr/local/bin/docker-compose
sudo chmod +x /usr/bin/docker-compose
docker-compose -v
# 最后使用 docker-compose -v 命令测试是否安装成功(如果提示“没有那个文件或目录”可以重启下服务器再试试)
问题
一、centOS7安装docker遇到 [Errno 14] curl#35 - "TCP connection reset by peer问题解决:
安装需要的软件包, yum-util 提供yum-config-manager功能,另外两个是devicemapper驱动依赖的
yum install -y yum-utils device-mapper-persistent-data lvm2
1、更换为阿里源
首先这个问题是因为国内访问不到docker官方镜像的缘故,所以我们要使用 国内的源来访问,之前我也试过163的源,但是一直解决不了,但是后来换了阿里源就成功解决了这个问题,不扯淡了直接出语句:
yum-config-manager --add-repo http://mirrors.aliyun.com/docker-ce/linux/centos/docker-ce.repo
成功的话会有如下提示:
repo saved to /etc/yum.repos.d/docker-ce.repo
2、查看docker仓库中的所有版本 输入指令可以看到docker的版本信息,如下:(如果内核版本低,docker版本高会安装出错)
yum list docker-ce --showduplicates | sort -r
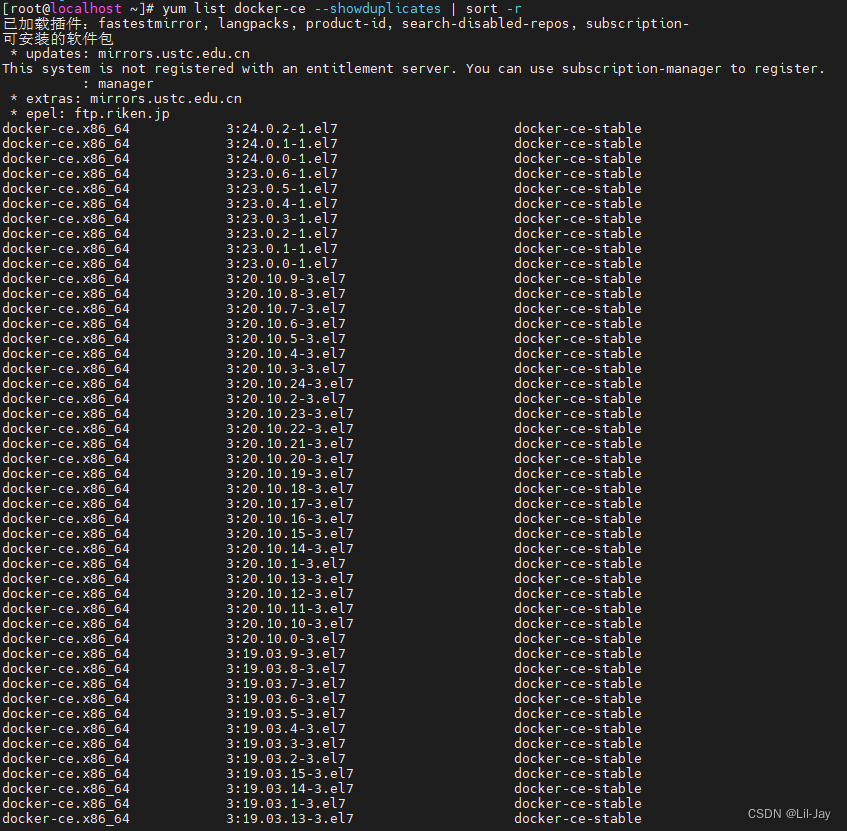
我们可以安装指定版本,使用 sudo yum install <docker的版本>,这里我使用 sudo yum install docker-ce 默认安装最高的版本。例如
sudo yum install docker-ce.x86_64 3:24.0.2-1.el7
3、启动并加入开机启动
sudo systemctl start docker && sudo systemctl enable docker
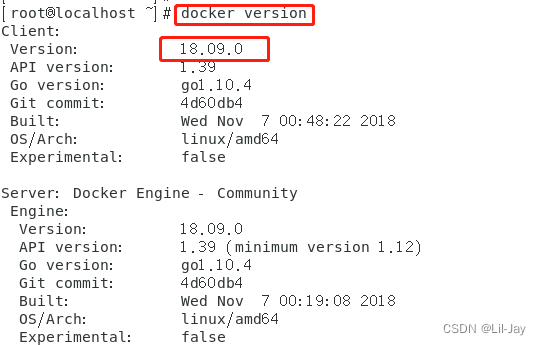
4、检测是否安装docker成功,查看版本信息。出现如下图,恭喜docker安装成功!可以看到Client与Server的信息。
docker version
sudo docker run hello-world
二、因为之前已经安装过旧版本的docker,在安装的时候报错如下:
Transaction check error:
  file /usr/bin/docker from install of docker-ce-17.12.0.ce-1.el7.centos.x86_64 conflicts with file from package docker-common-2:1.12.6-68.gitec8512b.el7.centos.x86_64
  file /usr/bin/docker-containerd from install of docker-ce-17.12.0.ce-1.el7.centos.x86_64 conflicts with file from package docker-common-2:1.12.6-68.gitec8512b.el7.centos.x86_64
  file /usr/bin/docker-containerd-shim from install of docker-ce-17.12.0.ce-1.el7.centos.x86_64 conflicts with file from package docker-common-2:1.12.6-68.gitec8512b.el7.centos.x86_64
  file /usr/bin/dockerd from install of docker-ce-17.12.0.ce-1.el7.centos.x86_64 conflicts with file from package docker-common-2:1.12.6-68.gitec8512b.el7.centos.x86_64
卸载旧版本的包
$ sudo yum erase docker-common-2:1.12.6-68.gitec8512b.el7.centos.x86_64
再次安装docker
$ sudo yum install docker-ce
三、No Presto metadata available for docker-ce-stable
yum install docker-ce -y
四、Delta RPMs disabled because /usr/bin/applydeltarpm not installed.
yum provides '*/applydeltarpm'
yum install deltarpm -y
DOCKER COMPOSE
sudo curl -L "https://github.com/docker/compose/releases/download/1.28.0-rc1/docker-compose-$(uname -s)-$(uname -m)" -o /usr/local/bin/docker-compose
sudo chmod +x /usr/local/bin/docker-compose
sudo ln -s /usr/local/bin/docker-compose /usr/bin/docker-compose
docker-compose --version

docker-compose up / docker-compose up -d 起服务(要有docker-compose.yml)
docker start nginx
docker-compose stop
问题:
dlopen: /lib64/libc.so.6: version `GLIBC_2.28’ not found
错误提示意思是没有GLIBC_2.28版本,升级版本:
1、下载 glibc-2./28.tar.gz (随意一个目录)
wget https://ftp.gnu.org/gnu/glibc/glibc-2.28.tar.gz
2.解压编译等操作(用 root 全权操作,最后两步用时比较久)
[root@hadoop101 opt]# tar -zxvf glibc-2.28.tar.gz
[root@hadoop101 opt]# cd glibc-2.28
[root@hadoop101 glibc-2.28]# mkdir build
[root@hadoop101 glibc-2.28]# cd build
[root@hadoop101 build]# ../configure --prefix=/usr --disable-profile --enable-add-ons --with-headers=/usr/include --with-binutils=/usr/bin
[root@hadoop101 build]# make -j 8
[root@hadoop101 build]# make  install
如果报错:
These critical programs are missing or too old: make bison compiler
查看bison版本:
bison -V
使用 yum 安装bison
yum install -y bison
之后再升级make:
先在 ~/.bash_profile 里加上 PATH=$HOME/local/bin:$PATH
source ~/.bash_profile
ln -s $HOME/local/bin/make $HOME/local/bin/gmake
先下载:
wget https://ftp.gnu.org/gnu/make/make-4.3.tar.gz
tar -zvxf make-4.3.tar.gz
cd make-4.3
./configure --prefix=$HOME/local
make && make install
3.查看安装结果
[root@hadoop101 build]$ strings /lib64/libc.so.6 | grep GLIBC (或用这个命令也可以直接查看当前版本:ldd --version)