Windows下的安装ThinkingData
首先根据他的文档,安装sdk和Logbus,他的原理是sdk写入到log文件,然后通过Logbus2来传送到TD(ThinkingData)服务器。
通过pip获取 Python SDK
pip install ThinkingDataSdk
pip install --upgrade ThinkingDataSdk
安装Logbus
这里省略了
我们来到logbug目录,修改conf下的daemon.json
这里的配置文件可以是这样的
{


    "datasource": [
      {


        "type":"file",
        "file_patterns": ["../assets/logbus/*.*"],
        "app_id": "你的数数id",
        "unit_remove": "day",
        "offset_remove": 7,
        "remove_dirs": true,
        "http_compress": "gzip"
      }
    ],
    "cpu_limit": 2,

    "push_url": "https://后台的push地址.thinkingdata.cn"
}
这里的file_patterns,.表示logbus.exe的目录,我的log放在外面,所以是…,我把服务端的打点目录配置在了服务端脚本目录的logbus下。
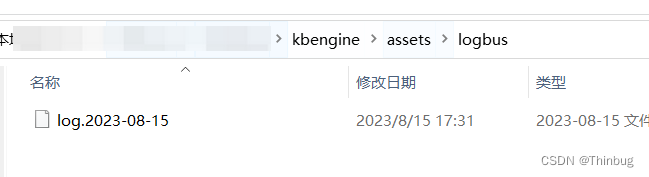
这个文件就是服务端程序生成的打点文件了。
KBEngine配置
根据TD的官方文档,需要
current_directory = os.path.dirname(os.path.abspath(__file__))
LOG_DIRECTORY = current_directory +"/../../logbus"

from tgasdk.sdk import TGAnalytics, LoggingConsumer
te = TGAnalytics(LoggingConsumer(LOG_DIRECTORY))
这里运行后提示很多库找不到,这里我总结了下,有下面一些包
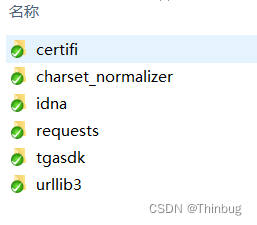
只要把python的包拷贝到kbe\res\scripts\common\Lib下就可以了。
(这些包在我们通过pip安装Logbus2的时候会有安装成功的路径,一般是位于:C:\Users\Administrator\AppData\Local里,其他的包也在这里)
然后我贴一个kbe的脚本
from tgasdk.sdk import TGAnalytics, LoggingConsumer
import os
import datetime
import time
import GameConfigs
import KBEngine
from KBEDebug import *

TIME_WRITE_FILE = 10    #10秒写一次文件

current_directory = os.path.dirname(os.path.abspath(__file__))
LOG_DIRECTORY = current_directory +"/../../logbus"
#DEBUG_MSG("dbg.ThinkingData :: init path :%s" % (LOG_DIRECTORY))

#下一次发送时间
nextsend = int(time.time())+ TIME_WRITE_FILE
#当前有几个发送
sendcount = 0

te = TGAnalytics(LoggingConsumer(LOG_DIRECTORY))


#distinct_id = "S1"
#account_id = "TE1"

properties = {


    #"#time":datetime.datetime.now(),
    # 设置这条event发生的时间,如果不设置的话,则默认是当前时间
    #"#ip":"192.168.1.1",
    # 设置用户的IP,tda会自动根据该IP解析省份、城市
    #"#uuid":uuid.uuid1(),#选填,如果上面enable_uuid开关打开,不需要填
    "Product_Name":"商124",
    "Price":324,
    "OrderId":"1234"
}


#打点事件
def AnalyseEvent(userid,eventName,prop):
    global sendcount
    # 上传事件,包含账号ID与访客ID
    try:
        prop["#time"] = datetime.datetime.now()
        prop["server"] = GameConfigs.SERVER_ID
        #te.track(account_id,eventName,prop)
        # 您也可以只上传访客ID
        # te.track(distinct_id = distinct_id, event_name = "Payment", properties = properties)
        # 或者只上传账号ID
        te.track(account_id = userid, event_name = eventName, properties = prop)

        sendcount = sendcount + 1
        DEBUG_MSG("dbg.ThinkingData :AnalyseEvent  %s" % (eventName))
    except Exception as e:
        #异常处理
        DEBUG_MSG("Error.ThinkingData :: %s" % (e))

def Flush():
    global sendcount,nextsend
    nowtime = int(time.time())
    if sendcount > 0 and nowtime > nextsend:
        te.flush();
        sendcount = 0
        nextsend = int(time.time()) + TIME_WRITE_FILE
        DEBUG_MSG("dbg.ThinkingData Flush .")


#AnalyseEvent("S1","test1",properties)
调用AnalyseEvent就开始打点,调用Flush立即写入log文件。这样如果启动了logbus程序,他就自动上报给TD了。
Centos下
我们下载Linux-amd64版本,然后把刚才windows的json配置文件覆盖,传到服务器。
我们先检测
$ ./logbus env

-bash: ./logbus: Permission denied
chmod -R 777
$ ./logbus env
6:34PM INF app_id [3fexxx] ok
给了权限,运行后提示app_id ok应该ok了,然后我们再运行start。
$ ./logbus start
6:38PM INF Current Version: 2.1.0.8
6:38PM INF app_id [114xx28f11] ok
6:38PM INF [localhost:21666] start daemon success, pid[1391]
成功了,下来就剩下调试了。
记得把logbus需要的库也传到对应的kbe服务端Lib目录下。
然后就可以上传服务端打点代码测试了。
我遇到了找不到zlib,于是重新安装了
yum install zlib-devel
然后把引擎重新make就可以了。