目录
0x01 前言:
抽屉布局(一次只显示一个界面)
需要模块:QStackedLayout
完整代码由三部分组成:封装的主窗口类+封装的抽屉类+程序入口程序
思路:
1、封装窗口类
2、首先有一个抽屉界面
3、然后抽屉界面里面又又多个抽屉(界面)
4、封装多个单独的抽屉类
一、封装的主窗口类
第一步:封装窗口类
class MainWindow(QWidget):
    def __init__(self):
        super().__init__()
        self.create_stack_layout()
        self.init_ui()
第二步:添加抽屉界面
class MainWindow(QWidget):
    def __init__(self):
        super().__init__()
        self.create_stack_layout()
        self.init_ui()

#————————————————————————————————————————————————————————————————
# 下面为新增

    def create_stack_layout(self):
        # 创建堆叠(抽屉)布局
        self.stacked_layout = QStackedLayout()
        w1 = Window1()
        w2 = Window2()

        # 将2个添加到抽屉布局中
        self.stacked_layout.addWidget(w1)
        self.stacked_layout.addWidget(w2)
第三步:添加抽屉界面的相关布局
class MainWindow(QWidget):
def __init__(self):
super().__init__()
self.create_stack_layout()
self.init_ui()
def create_stack_layout(self):
# 创建堆叠(抽屉)布局
self.stacked_layout = QStackedLayout()
w1 = Window1()
w2 = Window2()
# 将2个添加到抽屉布局中
self.stacked_layout.addWidget(w1)
self.stacked_layout.addWidget(w2)
#————————————————————————————————————————————————————————————————
# 下面为新增
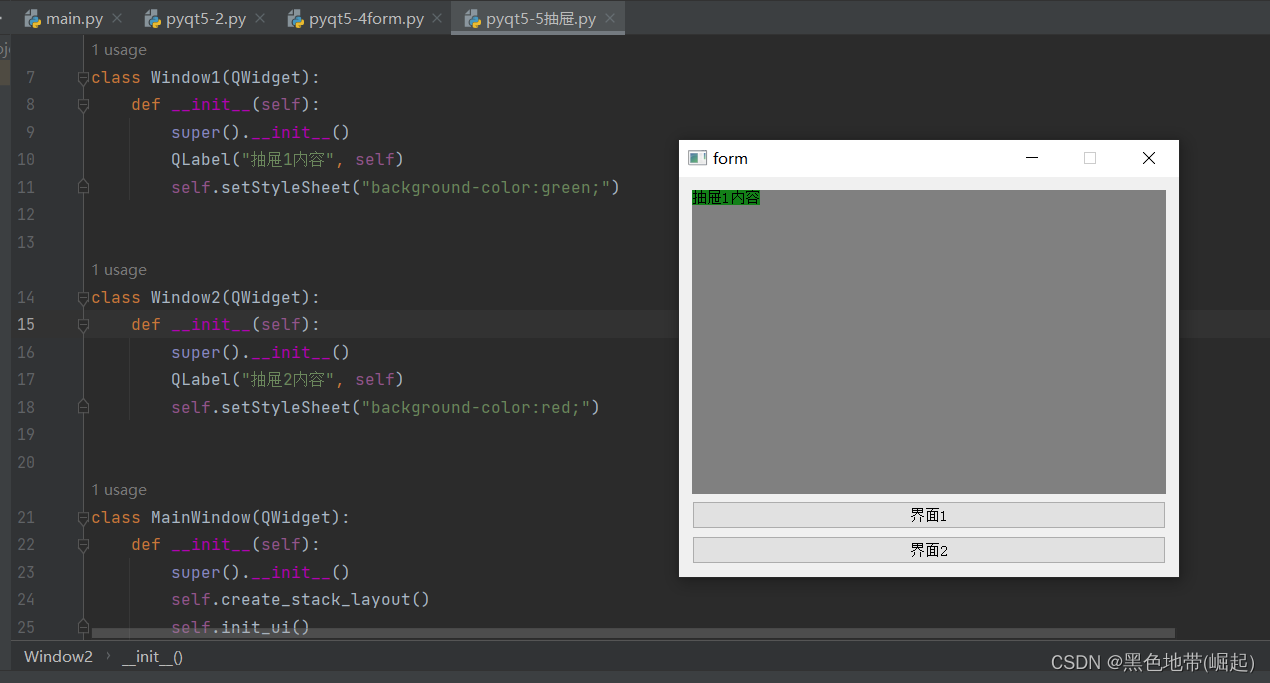
def init_ui(self):
self.setWindowTitle('form')
self.setFixedSize(500,400)
# 先定义最外层的垂直布局(水平布局是QHBoxLayout)
container = QVBoxLayout() # 最外层布局器(命名为容器)
self.setLayout(container) # 设置显示最外层布局器 (布局器的应用)
# 创建要显示的子widget
widget = QWidget()
widget.setLayout(self.stacked_layout)
widget.setStyleSheet("background-color:grey;")
# 创建2个按钮,用来点击进行切换抽屉布局中的weight
btn_press1 = QPushButton("界面1")
btn_press2 = QPushButton("界面2")
# 给按钮添加事件 (点击后调用的函数)
btn_press1.clicked.connect(self.btn_pres1_clicked)
btn_press2.clicked.connect(self.btn_pres2_clicked)
# 将需要显示的控件添加到布局中
container.addWidget(widget)
container.addWidget(btn_press1)
container.addWidget(btn_press2)第四步:每一个抽屉界面的点击触发
先设置布局的索引值
class MainWindow(QWidget):
    def __init__(self):
        super().__init__()
        self.create_stack_layout()
        self.init_ui()

    def create_stack_layout(self):
        self.stacked_layout = QStackedLayout()
        w1 = Window1()
        w2 = Window2()
        self.stacked_layout.addWidget(w1)
        self.stacked_layout.addWidget(w2)

    def init_ui(self):
        self.setWindowTitle('form')
        self.setFixedSize(500, 400)
        container = QVBoxLayout()
        self.setLayout(container)

        widget = QWidget()
        widget.setLayout(self.stacked_layout)
        widget.setStyleSheet("background-color:grey;")

        btn_press1 = QPushButton("界面1")
        btn_press2 = QPushButton("界面2")
        btn_press1.clicked.connect(self.btn_press1_clicked)
        btn_press2.clicked.connect(self.btn_press2_clicked)

        container.addWidget(widget)
        container.addWidget(btn_press1)
        container.addWidget(btn_press2)

#————————————————————————————————————————————————————————————————
# 下面为新增

    def btn_press1(self):
        # 设置抽屉布局当前的索引值(即可切换到指定的weight)
        self.stacked_layout.setCurrentIndex(0)

    def btn_press2(self):
        # 设置抽屉布局当前的索引值(即可切换到指定的weight)
        self.stacked_layout.setCurrentIndex(1)
二、封装的抽屉类
代码:
class Window1(QWidget):
    def __init__(self):
        super().__init__()
        QLabel("抽屉1内容", self)
        self.setStyleSheet("background-color:green;")


class Window2(QWidget):
    def __init__(self):
        super().__init__()
        QLabel("抽屉2内容", self)
        self.setStyleSheet("background-color:red;")
三、程序入口程序
代码:
if __name__ == '__main__':
    app = QApplication(sys.argv)
    w = MainWindow()
    w.show()
    sys.exit(app.exec_())
四、完整代码
代码:
import sys
from PyQt5.QtCore import Qt
from PyQt5.QtGui import QIcon
from PyQt5.QtWidgets import QApplication, QWidget, QPushButton, QLabel, QLineEdit, QDesktopWidget, QHBoxLayout, QVBoxLayout, QGroupBox, QRadioButton, QGridLayout, QFormLayout, QStackedLayout


class Window1(QWidget):
    def __init__(self):
        super().__init__()
        QLabel("抽屉1内容", self)
        self.setStyleSheet("background-color:green;")


class Window2(QWidget):
    def __init__(self):
        super().__init__()
        QLabel("抽屉2内容", self)
        self.setStyleSheet("background-color:red;")


class MainWindow(QWidget):
    def __init__(self):
        super().__init__()
        self.create_stack_layout()
        self.init_ui()

    def create_stack_layout(self):
        self.stacked_layout = QStackedLayout()
        w1 = Window1()
        w2 = Window2()
        self.stacked_layout.addWidget(w1)
        self.stacked_layout.addWidget(w2)

    def init_ui(self):
        self.setWindowTitle('form')
        self.setFixedSize(500, 400)
        container = QVBoxLayout()
        self.setLayout(container)

        widget = QWidget()
        widget.setLayout(self.stacked_layout)
        widget.setStyleSheet("background-color:grey;")

        btn_press1 = QPushButton("界面1")
        btn_press2 = QPushButton("界面2")
        btn_press1.clicked.connect(self.btn_press1_clicked)
        btn_press2.clicked.connect(self.btn_press2_clicked)

        container.addWidget(widget)
        container.addWidget(btn_press1)
        container.addWidget(btn_press2)

    def btn_press1_clicked(self):
        self.stacked_layout.setCurrentIndex(0)

    def btn_press2_clicked(self):
        self.stacked_layout.setCurrentIndex(1)


if __name__ == '__main__':
    app = QApplication(sys.argv)
    w = MainWindow()
    w.show()
    sys.exit(app.exec_())
示例效果:
(界面1)
(界面2)
